Hibernate (O/R Mapping)(从面向关系到面向对象)
不用写面向关系的SQL语句,而是交给hibernate去拼接,体现了面向对象
client-------Student
-------Configuration ---------
-------SessionFactory ------ Hibernate
-------Session ------
--------DB
第一个 Hibernate 示例
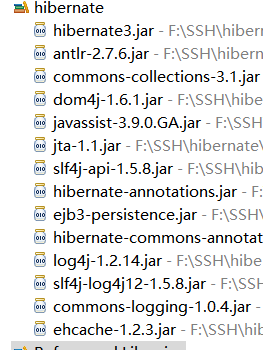
1.加入相应的包
2.在mysql中建立Student对应的数据库和表
3.建立hibernate 配置文件 hibernate.cfg.xml
a)从文档中copy
b)修改对应的数据库连接
c)注释暂时不需要的内容
4.建立Student类
5.建立Student 映射文件 (Student.hbm.xml)
a)参考文档
6.将映射文件加入hibernate.cfg.xml
a)参考文档 <mapping resource="com/bjsxt/hibernate/model/Student.hbm.xml"/>
注:要调用 new Configuration().configure().buildSseesionFactory()
org.hibernate.cfg.Configuration类的作用
读取hibernate 配置文件(hibernate.cfg.xml或hiberante.properties)
1.new Configuration()默认是读取hibernate.properties
2.new Configuration().configure()读取hibernate.cfg.xml配置文件
Annotation 版本的 Helloworld
1.加入相应的包

2.在mysql中建立Teacher对应的数据库和表
3.建立hibernate 配置文件 hibernate.cfg.xml
4.建立Teacher类
5.参考Annotation 文件建立对应的注解
/** @Entity 表示下面的这个Teacher是一个实体类
* @Id 表示主键Id*/
6.在hibernate.cfg.xml中建立映射 <mapping class="com.wjt276.hibernate.model.Teacher"/>
注:1.使用Annotation需要使用AnnotationConfiguration创建Configuration对象
2.<mapping>标签中使用的是class属性,而不是resource属性,并且使用小数点(.)导航,而不是 “ / ”
hibernate.cfg.xml
 1 <?xml version='1.0' encoding='utf-8'?>
 2 <!DOCTYPE hibernate-configuration PUBLIC
 3         "-//Hibernate/Hibernate Configuration DTD 3.0//EN"
 4         "http://hibernate.sourceforge.net/hibernate-configuration-3.0.dtd">
 5
 6 <hibernate-configuration>
 7
 8     <session-factory>
 9
10         <!-- Database connection settings -->
11         <property name="connection.driver_class">com.mysql.jdbc.Driver</property>
12         <property name="connection.url">jdbc:mysql://localhost/hibernate</property>
13         <property name="connection.username">root</property>
14         <property name="connection.password">root</property>
15
16        <!-- JDBC connection pool (use the built-in)
17         <property name="connection.pool_size">1</property>-->
18
19         <!-- SQL dialect -->
20         <property name="dialect">org.hibernate.dialect.MySQLDialect</property>
21
22         <!-- Enable Hibernate's automatic session context management
23         <property name="current_session_context_class">thread</property>-->
24
25         <!-- Disable the second-level cache  -->
26         <property name="cache.provider_class">org.hibernate.cache.NoCacheProvider</property>
27
28         <!-- Echo all executed SQL to stdout -->
29         <property name="show_sql">true</property>
30         <property name="format_sql">true</property>
31
32         <!-- Drop and re-create the database schema on startup -->
33         <property name="hbm2ddl.auto">create</property>
34
35         <mapping resource="com/bjsxt/hibernate/model/Student.hbm.xml"/>
36         <mapping class="com.bjsxt.hibernate.model.Teacher"/>
37     </session-factory>
38
39 </hibernate-configuration>
测试hibernate的save方法(insert)
 1 public class TeacherTest {
 2     public static void main(String[] args) {
 3         Teacher t = new Teacher();
 4         t.setAge(21);
 5         t.setId(3);
 6         t.setName("xzk");
 7         t.setTeach("Math");
 8
 9         Configuration cfg = new AnnotationConfiguration();
10         SessionFactory sessionFactory = cfg.configure().buildSessionFactory();
11         Session session = sessionFactory.openSession();
12         session.beginTransaction();
13         session.save(t);
14         session.getTransaction().commit();
15         sessionFactory.close();
16     }
17 }