zoukankan      html  css  js  c++  java
  • 实验 7: OpenDaylight 实验——Python 中的 REST API 调用

    一、实验目的
    对 Python 调用 OpenDaylight 的 REST API 方法有初步了解。
     
    二、实验任务
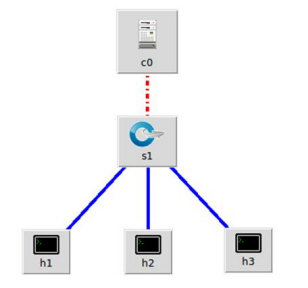
    本实验需要用另一种方法完成上一个实验相同的功能,即通过 Python 程序调用
    OpenDaylight 的北向接口下发关于硬超时的流表,实现拓扑内主机在一定时间
    内的网络通断。实验拓扑如下
     
    、实验步骤
    1. 实验环境
     
    安装了 Ubuntu 18.04.5 Desktop amd64 的虚拟机
     
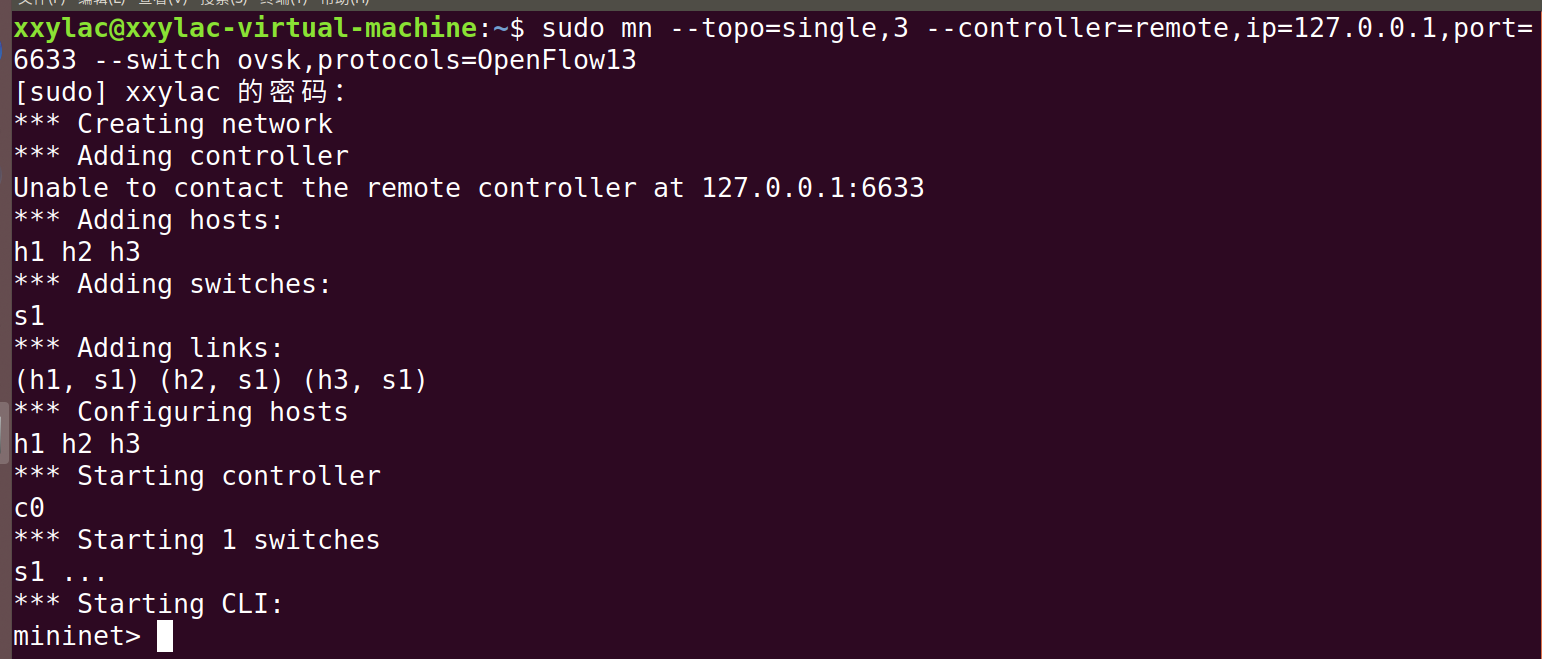
    2. 实验过程(1)生成拓跋。
    sudo mn --topo=single,3 --controller=remote,ip=127.0.0.1,port=6633 --switch ovsk,protocols=OpenFlow13
    接下来走一遍实验6
    (2)编写 Python 代码和 JSON 格式的请求内容。
    nano odlnorth.py
    #!/usr/bin/python
    import requests
    from requests.auth import HTTPBasicAuth
      
    def http_put(url,jstr):    
        url= url    
        headers = {'Content-Type':'application/json'}    
        resp = requests.put(url,jstr,headers=headers,auth=HTTPBasicAuth('admin', 'admin'))    
        return resp          
    if __name__ == "__main__":    
        url = 'http://127.0.0.1:8181/restconf/config/opendaylight-inventory:nodes/node/openflow:1/flow-node-inventory:table/0/flow/1'    
        with open('hardtimeout.json') as f:        
            jstr = f.read()    
        resp = http_put(url,jstr)    
        print resp.content

    由于是下发流表,因此需要有 http 请求的具体内容,同之前的 Postman 一样,
    也是以 JSON 格式来表示。

    nano hardtimeout.json
    {    
        "flow": [   
            {            
            "id": "1",            
            "match": {           
                    "in-port": "1",                
                "ethernet-match": {                    
                    "ethernet-type": {                        
                        "type": "0x0800"                    
                    }
                     },                
                "ipv4-destination": "10.0.0.3/32"            
                },            
                "instructions": {                
                    "instruction": [                    
                    {                        
                    "order": "0",                        
                    "apply-actions": {                            
                        "action": [                                
                             {                                    
                            "order": "0",                                    
                            "drop-action": {}                               
                             }                           
                            ]                        
                      }                    
                    }               
                 ]
                },            
            "flow-name": "flow1",            
            "priority": "65535",           
            "hard-timeout": "10",    
                "cookie": "2",            
            "table_id": "0"       
         }    
         ]
    }
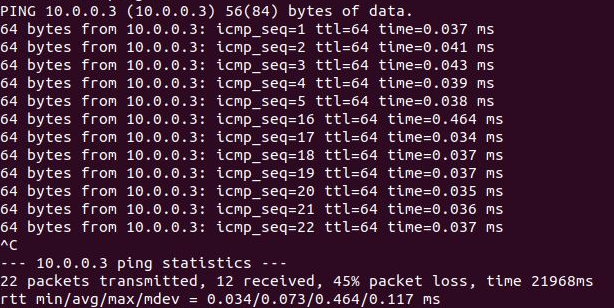
    (3)运行 Python 代码,完成流表下发。
    python odlnorth.py


  • 相关阅读:
    HBase(2) Java 操作 HBase 教程
    HBase(1) 基本入门篇
    MongoDB 谨防索引seek的效率问题
    MongoDB一次节点宕机引发的思考(源码剖析)
    MongoDB-系统时钟跳变引发的风波
    是什么造成了数据库的卡顿
    了解 MongoDB 看这一篇就够了
    Reactive(3)5分钟理解 SpringBoot 响应式的核心-Reactor
    Reactive(2) 响应式流与制奶厂业务
    suanec-rotatelogs
  • 原文地址:https://www.cnblogs.com/xxylac/p/13845195.html
Copyright © 2011-2022 走看看