1、centos 6.8安装nginx-1.12.2
2、centos6.5安装nginx1.8.0
3、ubuntu18.04安装nginx
1、centos 6.8安装nginx-1.12.2 <--返回目录
第一步:安装pcre
1)去 https://ftp.pcre.org/pub/pcre/ 找对应链接
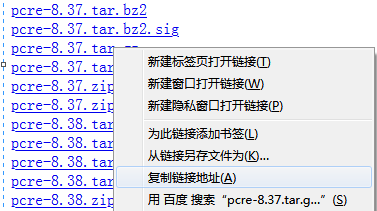
2)wget https://ftp.pcre.org/pub/pcre/

3)解压:tar -xzvf pcre-8.37.tar.gz -C /usr/local/
4)进入解压后的目录/usr/local/pcre-8.37,执行./configure
提示configure: error: You need a C++ compiler for C++ support.,因为缺少c++编译器,执行yum -y install gcc-c++进行安装。安装gcc后再执行./configure。
5)在目录/usr/local/pcre-8.37, 执行make && make install
6)pcre-config --version查看pcre是否安装成功

第二步:安装openssl和zlib
yum -y install make zlib zlib-devel gcc-c++ libtool openssl openssl-devel
第三步:安装nginx
1)获取官网获取下载链接:http://nginx.org/en/download.html
nginx下在链接:http://nginx.org/download/nginx-1.12.2.tar.gz

2)执行命令 wget http://nginx.org/download/nginx-1.12.2.tar.gz
3)解压 tar -xzvf nginx-1.12.2.tar.gz -C /usr/local
4)进入到/usr/local/nginx-1.12.2目录,执行./configure
5)进入到/usr/local/nginx-1.12.2目录,执行 make && make install
6) 启动nginx
nginx默认编译安装到/usr/local/nginx目录下

安装完后启动nginx

启动nginx报错:./nginx: error while loading shared libraries: libpcre.so.1: cannot open shared object file: No such file or directory
参考https://blog.csdn.net/weixin_44297303/article/details/89505398,搜索文件*libpcre.so*, 建立软连接

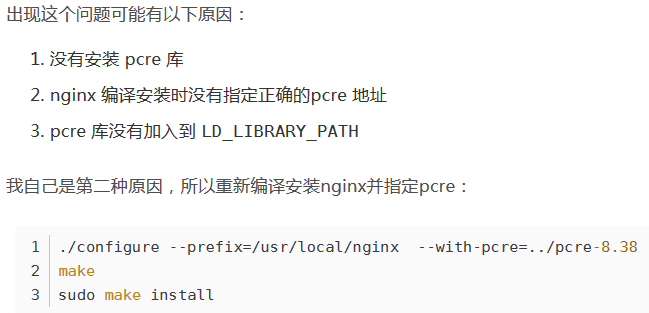
出现这个原因是:https://blog.csdn.net/guangyacyb/article/details/86508790
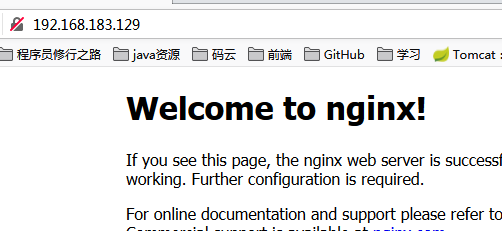
访问nginx
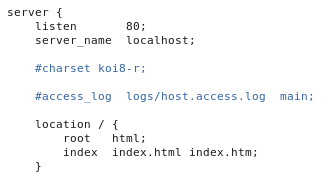
vim /usr/local/nginx/conf/nginx.conf, nginx监听了80端口
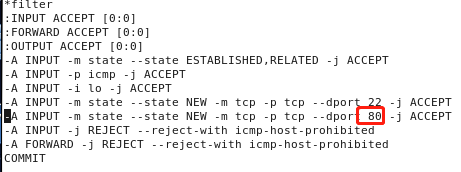
查看防火墙status:service iptables status,发现没有开放80端口
编辑/etc/sysconfig/iptables文件,开放80端口,然后重启服务service iptables restart
访问
2、centos6.5安装nginx1.8.0 <--返回目录
第一步:下载nginx
进入http://nginx.org/en/download.html 下载nginx1.8.0版本
第二步:安装nginx依赖的包
- gcc
安装nginx需要先将官网下载的源码进行编译,编译依赖gcc环境,如果没有gcc环境,需要安装gcc:yum install gcc-c++
- PCRE
PCRE(Perl Compatible Regular Expressions)是一个Perl库,包括 perl 兼容的正则表达式库。
nginx的http模块使用pcre来解析正则表达式,所以需要在linux上安装pcre库。
yum install -y pcre pcre-devel
注:pcre-devel是使用pcre开发的一个二次开发库。nginx也需要此库。
- zlib
zlib库提供了很多种压缩和解压缩的方式,nginx使用zlib对http包的内容进行gzip,所以需要在linux上安装zlib库。
yum install -y zlib zlib-devel
- openssl
OpenSSL 是一个强大的安全套接字层密码库,囊括主要的密码算法、常用的密钥和证书封装管理功能及SSL协议,
并提供丰富的应用程序供测试或其它目的使用。
nginx不仅支持http协议,还支持https(即在ssl协议上传输http),所以需要在linux安装openssl库。
yum install -y openssl openssl-devel
第三步:解压
tar -zxvf nginx-1.8.0.tar.gz
cd nginx-1.8.0 进入到该目录
第四步:执行configure, 当前目录下生成makefile
./configure
--prefix=/usr/local/nginx
--pid-path=/var/run/nginx/nginx.pid
--lock-path=/var/lock/nginx.lock
--error-log-path=/var/log/nginx/error.log
--http-log-path=/var/log/nginx/access.log
--with-http_gzip_static_module
--http-client-body-temp-path=/var/temp/nginx/client
--http-proxy-temp-path=/var/temp/nginx/proxy
--http-fastcgi-temp-path=/var/temp/nginx/fastcgi
--http-uwsgi-temp-path=/var/temp/nginx/uwsgi
--http-scgi-temp-path=/var/temp/nginx/scgi
注意:上边将临时文件目录指定为/var/temp/nginx,需要手动创建/var/temp/nginx目录
第五步:nginx-1.8.0目录下执行make
第六步:make install
第七步:开启nginx
cd /usr/local/nginx/sbin 进入到sbin文件夹, 该目录下有可执行文件nginx
./nginx   启动
ps aux|grep nginx  查看与nginx相关的进程,有两个,一个master,一个worker
./nginx -s stop  关闭nginx
./nginx -t 检查配置文件是否有语法问题
./nginx -s reload  刷新配置
第八步:在浏览器输入http://ip也可以访问nginx服务器(如果没反应,检查防火墙配置)
3、ubuntu18.04安装nginx <--返回目录
安装
sudo apt update
sudo apt install nginx
查看版本:nginx -v

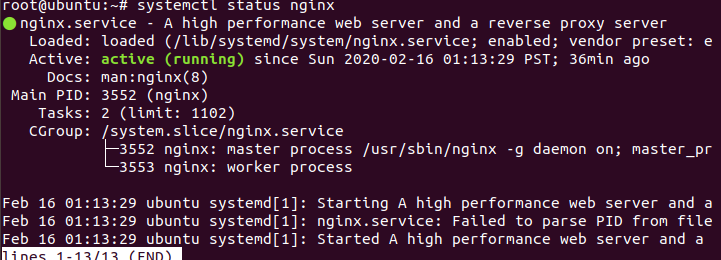
查看服务启动情况:systemctl status nginx
nginx相关配置文件位于 /etc/nginx 目录下

查看nginx.conf, 关于virtual host configs

自己想配置一个虚拟主机,可以在/etc/nginx/sites-enabled/default里面配置,也可以新建一个文件(可以参考default)
---