1、安装rabbitmq
2、添加用户和虚拟主机
3、hello world
4、work 模式
5、Publish/Subscribe发布订阅模式
6、route 路由模式
7、topic模式
8、spring整合rabbitmq--自动模式
1、安装rabbitmq <--返回目录
下面安装rabbitmq的版本比较旧,最新安装参考centos7 安装企业级消息队列 RabbitMQ
1.下载erlang solution
wget https://packages.erlang-solutions.com/erlang-solutions-1.0-1.noarch.rpm

2.安装erlang
rpm -Uvh erlang-solutions-1.0-1.noarch.rpm
yum install epel-release
yum install erlang
查看erlang版本:erl

3. 下载rabbitmq
wget http://www.rabbitmq.com/releases/rabbitmq-server/v3.6.6/rabbitmq-server-3.6.6-1.el7.noarch.rpm

4. 安装rabbitmq
yum install rabbitmq-server-3.6.6-1.el7.noarch.rpm

5.开启允许远程访问(非必须)
vim /etc/rabbitmq/rabbitmq.config
[{rabbit, [{loopback_users, []}]}].

6.开启web端管理访问(非必须,如果要开启,需要首先开启允许远程访问)
rabbitmq-plugins enable rabbitmq_management

7.安装消息延迟插件
cd /usr/lib/rabbitmq/lib/rabbitmq_server-3.6.6/plugins
wget https://dl.bintray.com/rabbitmq/community-plugins/rabbitmq_delayed_message_exchange-0.0.1.ez
rabbitmq-plugins enable rabbitmq_delayed_message_exchange

8.放行端口
firewall-cmd --add-port=15672/tcp --permanent
firewall-cmd --add-port=5672/tcp --permanent

9.启动rabbitmq
启动rabbitmq: service rabbitmq-server start
查看状态:     service rabbitmq-server status
重启:        service rabbitmq-server restart
停止:        service rabbitmq-server stop
2、添加用户和虚拟主机 <--返回目录
账号级别
 超级管理员administrator,可以登陆控制台,查看所有信息,可以对用户和策略进行操作
 监控者monitoring,可以登陆控制台,查看节点的相关信息,比如进程数、内存磁盘使用情况
 策略制定者policymaker可以登陆控制台,制定策略,但是无法查看节点信息
 普通管理员management仅能登陆控制台
 其他,无法登陆控制台,一般指的是提供者和消费者
命令模式
rabbitctl add_user luck luck #添加账号luck 密码是luck
rabbitctl set_user_tags luck administrator #设置luck为administrator级别的用户
web方式(需要开启web端管理访问):访问 http://192.168.213.200:15672,guest/guest登陆
添加用户:
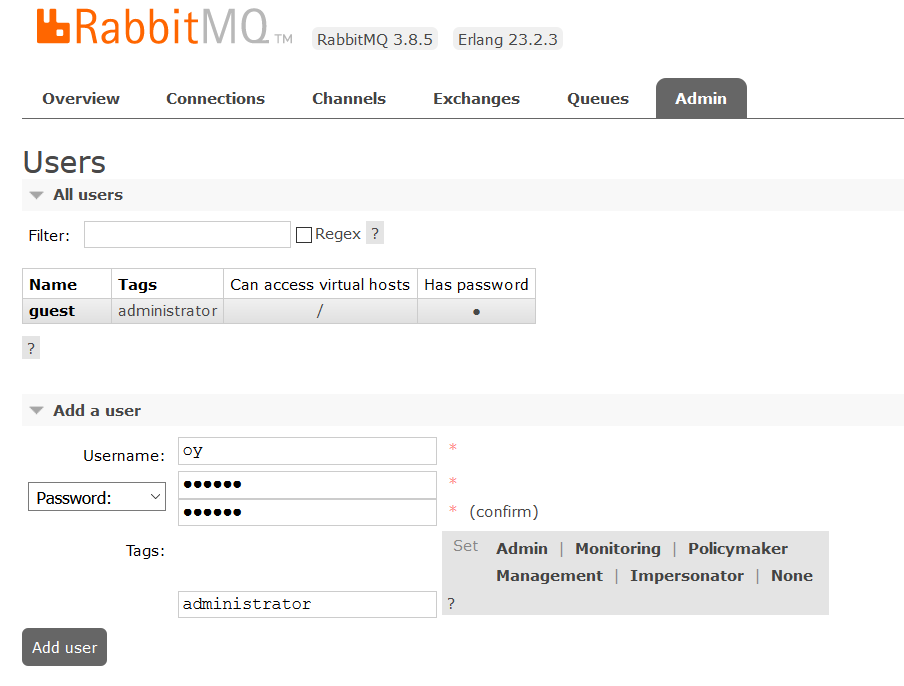
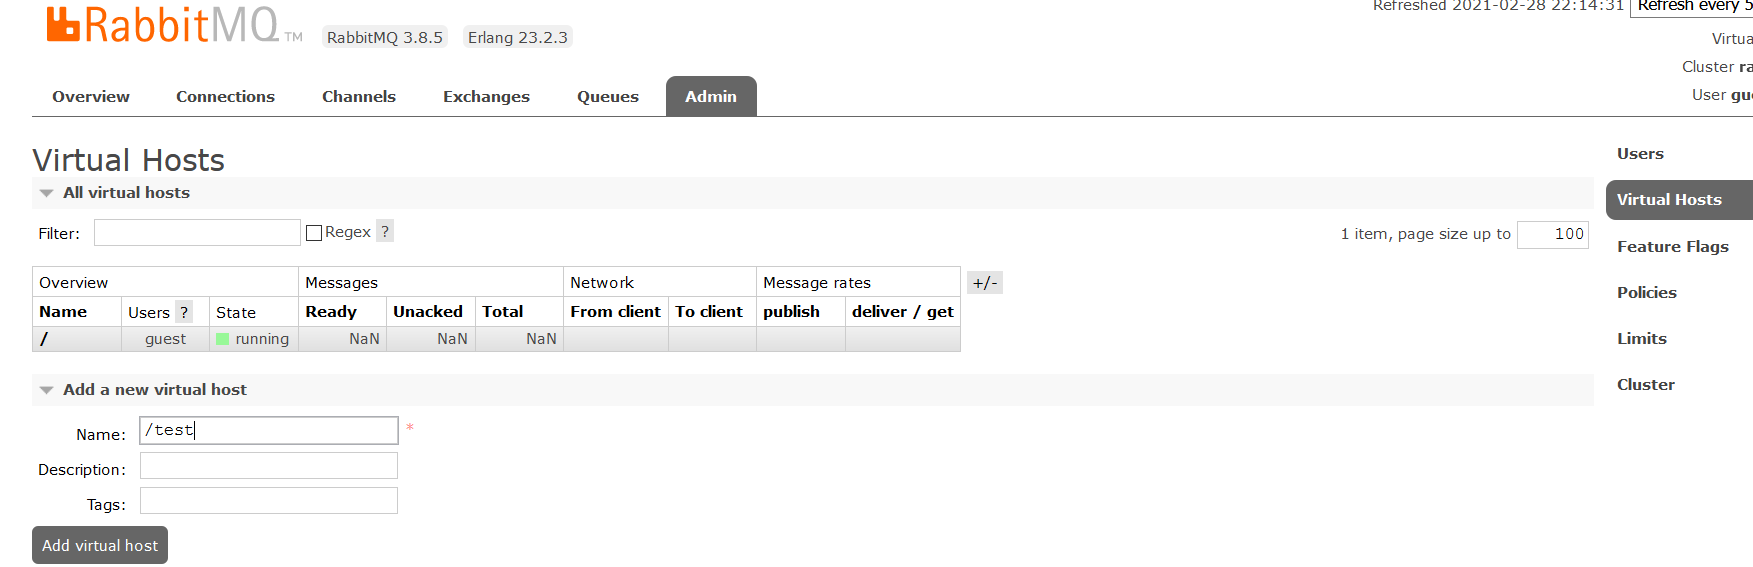
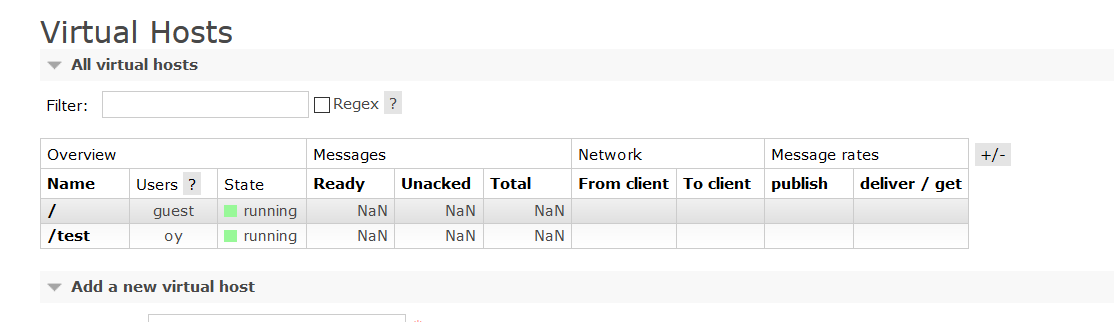
添加一个虚拟主机,并且给这个虚拟主机指定哪个用户可以访问
3、hello world <--返回目录
参考:https://www.rabbitmq.com/#getstarted
依赖
<dependency>
    <groupId>com.rabbitmq</groupId>
    <artifactId>amqp-client</artifactId>
    <version>4.5.0</version>
</dependency>

<dependency>
    <groupId>org.slf4j</groupId>
    <artifactId>slf4j-log4j12</artifactId>
    <version>1.7.25</version>
</dependency>

<dependency>
    <groupId>org.apache.commons</groupId>
    <artifactId>commons-lang3</artifactId>
    <version>3.3.2</version>
</dependency>

<dependency>
    <groupId>junit</groupId>
    <artifactId>junit</artifactId>
    <version>4.12</version>
    <scope>test</scope>
</dependency>
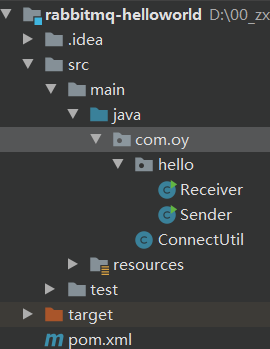
ConnectUtil:获取连接的工具类
public class ConnectUtil {
    public static Connection getConnection() throws Exception {
        ConnectionFactory factory = new ConnectionFactory();
        factory.setHost("192.168.213.200");
        factory.setPort(5672);
        factory.setUsername("oy");
        factory.setPassword("123456");
        factory.setVirtualHost("/test");
        return factory.newConnection();
    }
}
生产者
package com.oy.hello;

import com.oy.ConnectUtil;
import com.rabbitmq.client.Channel;
import com.rabbitmq.client.Connection;

import java.util.Date;

/**
 * @Auther: oy
 * @Date: 2021/2/28 22:43
 * @Version 1.0
 */
public class Sender {

    private final static String TEST_QUEUE = "test-queue";

    public static void main(String[] args) throws Exception {
        // 获取连接
        Connection connection = ConnectUtil.getConnection();
        // 创建通道
        Channel channel = connection.createChannel();

        // 声明队列:如果队列存在什么也不做,不存在才创建
        // queueDeclare(String queue, boolean durable, boolean exclusive, boolean autoDelete, Map<String, Object> arguments)
        // 参数1 队列名称,参数2 是否持久化队列.队列数据是在内存中的,如果rabbitmq重启则数据丢失,如果设置该参数为true,则会保存到erlang自带的数据库中,rabbitmq重启后重新读取.
        // 参数3 是否排外,有两个作用:1) 当连接关闭后是否会自动删除队列; 2) 是否私有当前队列,如果私有了,其他通道不可以访问当前队列,如果为true,一般是一个队列只适用于一个消费者的时候
        // 参数4 是否自动删除   参数5 我们的一些其他参数
        channel.queueDeclare(TEST_QUEUE, false, false, false, null);

        // 发送内容
        while(true) {
            channel.basicPublish("", TEST_QUEUE, null, ("hello, 发送消息测试。now: " + new Date().getTime()/1000).getBytes());
            Thread.sleep(1000);
        }

        // 关闭连接
        //channel.close();
        //connection.close();
    }

}
消费者
package com.oy.hello;

import com.oy.ConnectUtil;
import com.rabbitmq.client.Channel;
import com.rabbitmq.client.Connection;
import com.rabbitmq.client.QueueingConsumer;

import javax.xml.namespace.QName;

/**
 * @Auther: oy
 * @Date: 2021/2/28 23:05
 * @Version 1.0
 */
public class Receiver {

    private final static String TEST_QUEUE = "test-queue";

    public static void main(String[] args) throws Exception {
        Connection connection = ConnectUtil.getConnection();
        Channel channel = connection.createChannel();
        channel.queueDeclare(TEST_QUEUE, false, false, false, null);

        QueueingConsumer consumer = new QueueingConsumer(channel); // 定义一个消费者
        channel.basicConsume(TEST_QUEUE, true, consumer); // 接收消息, 参数2 是否自动确认

        while(true) {
            QueueingConsumer.Delivery delivery = consumer.nextDelivery(); // 如果没有消息会等待, 有的话就获取执行然后销毁,是一次性的
            String message = new String(delivery.getBody());
            System.out.println(message);
        }
    }
}
4、work 模式 <--返回目录
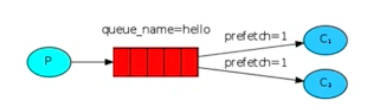
work模式:消息分发给不同的消费者, 每个消息只能分发给其他一个消费者。
但是每个消费者消费能力不同,如果按照默认轮询进行消息分发,你一个我一个,则没有充分利用(或考虑)消费者的负载能力。
由于每个消费者消费能力不同,消费快的多消费一些消息;只需要设置如下即可:
// 告诉服务器,在我没有确认当前消息完成之前,不要给我发新的消息
channel.basicQos(1);
生产者
package com.oy.work;

import com.oy.ConnectUtil;
import com.rabbitmq.client.Channel;
import com.rabbitmq.client.Connection;

import java.util.Date;

/**
 * @Auther: oy
 * @Date: 2021/2/28 22:43
 * @Version 1.0
 */
public class Sender {

    private final static String TEST_QUEUE = "test-work";

    public static void main(String[] args) throws Exception {
        // 获取连接
        Connection connection = ConnectUtil.getConnection();
        // 创建通道
        Channel channel = connection.createChannel();

        // 声明队列:如果队列存在什么也不做,不存在才创建
        // queueDeclare(String queue, boolean durable, boolean exclusive, boolean autoDelete, Map<String, Object> arguments)
        // 参数1 队列名称,参数2 是否持久化队列.队列数据是在内存中的,如果rabbitmq重启则数据丢失,如果设置该参数为true,则会保存到erlang自带的数据库中,rabbitmq重启后重新读取.
        // 参数3 是否排外,有两个作用:1) 当连接关闭后是否会自动删除队列; 2) 是否私有当前队列,如果私有了,其他通道不可以访问当前队列,如果为true,一般是一个队列只适用于一个消费者的时候
        // 参数4 是否自动删除   参数5 我们的一些其他参数
        channel.queueDeclare(TEST_QUEUE, false, false, false, null);

        // 发送内容
        for (int i = 0; i < 100; i++) {
            channel.basicPublish("", TEST_QUEUE, null, ("hello, 发送消息测试。i: " + i).getBytes());
        }

        // 关闭连接
        channel.close();
        connection.close();
    }

}
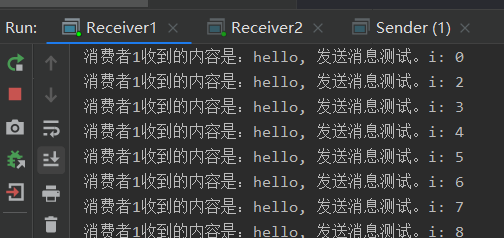
消费者Receiver1
public class Receiver1 {
    private final static String TEST_QUEUE = "test-work";

    public static void main(String[] args) throws Exception {
        Connection connection = ConnectUtil.getConnection();
        final Channel channel = connection.createChannel();
        channel.queueDeclare(TEST_QUEUE, false, false, false, null);

        // 告诉服务器,在我没有确认当前消息完成之前,不要给我发新的消息
        channel.basicQos(1);

        DefaultConsumer consumer = new DefaultConsumer(channel) {
            @Override
            public void handleDelivery(String consumerTag, Envelope envelope, AMQP.BasicProperties properties, byte[] body) throws IOException {
                // 当我们收到消息的时候调用
                System.out.println("消费者1收到的内容是:" + new String(body));

                // 模拟耗时
                try {
                    Thread.sleep(10);
                } catch (InterruptedException e) {
                    e.printStackTrace();
                }

                // 确认收到消息 参数2:false为确认收到消息, true为拒绝收到消息
                channel.basicAck(envelope.getDeliveryTag(), false);
            }
        };
        // 注册消费者 参数2:手动确认, 代表我们收到消息后需要手动告诉服务器, 我收到消息了
        channel.basicConsume(TEST_QUEUE, false, consumer);
    }
}
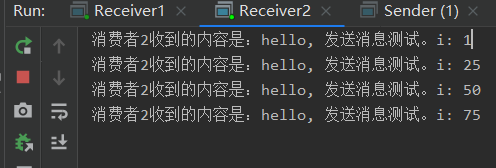
消费者Receiver2
public class Receiver2 {
    private final static String TEST_QUEUE = "test-work";

    public static void main(String[] args) throws Exception {
        Connection connection = ConnectUtil.getConnection();
        final Channel channel = connection.createChannel();
        channel.queueDeclare(TEST_QUEUE, false, false, false, null);

        // 告诉服务器,在我没有确认当前消息完成之前,不要给我发新的消息
        channel.basicQos(1);

        DefaultConsumer consumer = new DefaultConsumer(channel) {
            @Override
            public void handleDelivery(String consumerTag, Envelope envelope, AMQP.BasicProperties properties, byte[] body) throws IOException {
                // 当我们收到消息的时候调用
                System.out.println("消费者2收到的内容是:" + new String(body));

                // 模拟耗时
                try {
                    Thread.sleep(300);
                } catch (InterruptedException e) {
                    e.printStackTrace();
                }

                // 确认收到消息 参数2:false为确认收到消息, true为拒绝收到消息
                channel.basicAck(envelope.getDeliveryTag(), false);
            }
        };
        // 注册消费者 参数2:手动确认, 代表我们收到消息后需要手动告诉服务器, 我收到消息了
        channel.basicConsume(TEST_QUEUE, false, consumer);
    }
}
测试:先启动生产者Sender,然后依次启动Receiver1和Receiver2。
5、Publish/Subscribe发布订阅模式 <--返回目录
发布订阅模式:生产者发送消息到交换机; 不同的队列注册到交换机; 不同的消费者注册到队列上面;消费者都能收到消息。
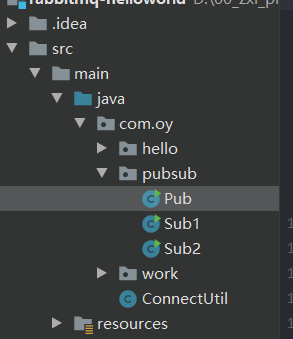
发布者Pub
package com.oy.pubsub;

import com.oy.ConnectUtil;
import com.rabbitmq.client.Channel;
import com.rabbitmq.client.Connection;

import java.util.Date;

/**
 * @Auther: oy
 * @Date: 2021/3/1 00:27
 * @Version 1.0
 */
public class Pub {
    private final static String TEST_EXCHANGE = "test-exchange";

    public static void main(String[] args) throws Exception {
        Connection connection = ConnectUtil.getConnection();
        Channel channel = connection.createChannel();

        // 声明交换机 类型是fanout,也就是发布订阅模式
        channel.exchangeDeclare(TEST_EXCHANGE,"fanout");

        while (true) {
            // 发布订阅模式,因为消息是发送到交换机中,而交换机没有保存功能,所以如果没有消费者,消息会丢失
            channel.basicPublish(TEST_EXCHANGE, "", null, ("发布订阅模式的消息. now: " + new Date().getTime()/1000).getBytes());
            Thread.sleep(1000);
        }

        //channel.close();
        //connection.close();
    }
}
订阅者1
package com.oy.pubsub;

import com.oy.ConnectUtil;
import com.rabbitmq.client.*;
import com.sun.corba.se.impl.orb.ParserTable;

import java.io.IOException;

/**
 * @Auther: oy
 * @Date: 2021/3/1 00:36
 * @Version 1.0
 */
public class Sub1 {
    private final static String TEST_EXCHANGE = "test-exchange";
    private final static String SUB_QUEUE_1 = "sub_queue_1";

    public static void main(String[] args) throws Exception {
        Connection connection = ConnectUtil.getConnection();
        final Channel channel = connection.createChannel();
        channel.queueDeclare(SUB_QUEUE_1, false, false, false, null);

        // 绑定队列到交换机
        channel.queueBind(SUB_QUEUE_1, TEST_EXCHANGE, "");

        // 告诉服务器,在我没有确认当前消息完成之前,不要给我发新的消息
        channel.basicQos(1);

        DefaultConsumer consumer = new DefaultConsumer(channel) {
            @Override
            public void handleDelivery(String consumerTag, Envelope envelope, AMQP.BasicProperties properties, byte[] body) throws IOException {
                System.out.println("sub1: " + new String(body));
                // 确认收到消息 参数2:false为确认收到消息, true为拒绝收到消息
                channel.basicAck(envelope.getDeliveryTag(), false);
            }
        };

        channel.basicConsume(SUB_QUEUE_1, false, consumer); // 参数2 false 不自动确认收到消息,需要手动确认
    }
}
订阅者2
package com.oy.pubsub;

import com.oy.ConnectUtil;
import com.rabbitmq.client.*;

import java.io.IOException;

/**
 * @Auther: oy
 * @Date: 2021/3/1 00:43
 * @Version 1.0
 */
public class Sub2 {
    private final static String TEST_EXCHANGE = "test-exchange";
    private final static String SUB_QUEUE_2 = "sub_queue_2";

    public static void main(String[] args) throws Exception {
        Connection connection = ConnectUtil.getConnection();
        final Channel channel = connection.createChannel();
        channel.queueDeclare(SUB_QUEUE_2, false, false, false, null);

        // 绑定队列到交换机
        channel.queueBind(SUB_QUEUE_2, TEST_EXCHANGE, "");

        // 告诉服务器,在我没有确认当前消息完成之前,不要给我发新的消息
        channel.basicQos(1);

        DefaultConsumer consumer = new DefaultConsumer(channel) {
            @Override
            public void handleDelivery(String consumerTag, Envelope envelope, AMQP.BasicProperties properties, byte[] body) throws IOException {
                System.out.println("sub2: " + new String(body));
                // 确认收到消息 参数2:false为确认收到消息, true为拒绝收到消息
                channel.basicAck(envelope.getDeliveryTag(), false);
            }
        };

        channel.basicConsume(SUB_QUEUE_2, false, consumer); // 参数2 false 不自动确认收到消息,需要手动确认
    }
}
测试:先启动Pub, 这时会创建出交换机;然后启动Sub1和Sub2


6、route 路由模式 <--返回目录
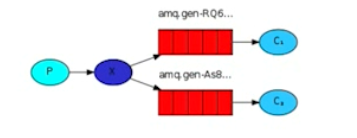
路由模式:发布订阅模式的升级,可以指定routingKey。消费者可以根据指定routingKey进行订阅。
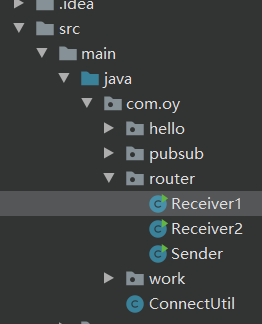
生产者
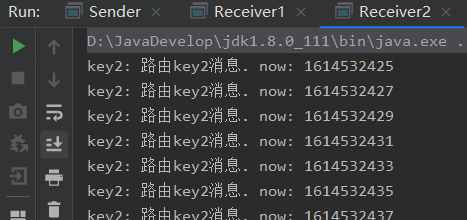
package com.oy.router;

import com.oy.ConnectUtil;
import com.rabbitmq.client.Channel;
import com.rabbitmq.client.Connection;

import java.util.Date;

/**
 * @Auther: oy
 * @Date: 2021/3/1 01:03
 * @Version 1.0
 */
public class Sender {
    private final static String TEST_EXCHANGE_ROUTER = "test-exchange-router";

    public static void main(String[] args) throws Exception {
        Connection connection = ConnectUtil.getConnection();
        Channel channel = connection.createChannel();

        // 声明交换机 类型是direct,也就是路由模式的交换机
        channel.exchangeDeclare(TEST_EXCHANGE_ROUTER,"direct");

        int i = 0;
        while (true) {
            if (i % 2 == 0) {
                // 路由模式,因为消息是发送到交换机中,而交换机没有保存功能,所以如果没有消费者,消息会丢失
                channel.basicPublish(TEST_EXCHANGE_ROUTER, "key1", null, ("路由key1消息. now: " + new Date().getTime()/1000).getBytes());
                Thread.sleep(1000);
            } else {
                channel.basicPublish(TEST_EXCHANGE_ROUTER, "key2", null, ("路由key2消息. now: " + new Date().getTime()/1000).getBytes());
                Thread.sleep(1000);
            }
            i++;
        }

        //channel.close();
        //connection.close();
    }
}
消费者1
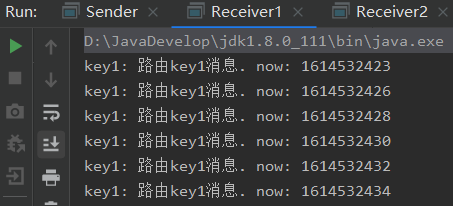
package com.oy.router;

import com.oy.ConnectUtil;
import com.rabbitmq.client.*;

import java.io.IOException;

/**
 * @Auther: oy
 * @Date: 2021/2/28 23:43
 * @Version 1.0
 */
public class Receiver1 {
    private final static String TEST_EXCHANGE_ROUTER = "test-exchange-router";
    private final static String ROUTER_QUEUE_1 = "router_queue_1";
    private final static String KEY_1 = "key1";

    public static void main(String[] args) throws Exception {
        Connection connection = ConnectUtil.getConnection();
        final Channel channel = connection.createChannel();
        channel.queueDeclare(ROUTER_QUEUE_1, false, false, false, null);

        // 绑定队列到交换机
        channel.queueBind(ROUTER_QUEUE_1, TEST_EXCHANGE_ROUTER, KEY_1);

        // 告诉服务器,在我没有确认当前消息完成之前,不要给我发新的消息
        channel.basicQos(1);

        DefaultConsumer consumer = new DefaultConsumer(channel) {
            @Override
            public void handleDelivery(String consumerTag, Envelope envelope, AMQP.BasicProperties properties, byte[] body) throws IOException {
                System.out.println("key1: " + new String(body));
                // 确认收到消息 参数2:false为确认收到消息, true为拒绝收到消息
                channel.basicAck(envelope.getDeliveryTag(), false);
            }
        };

        channel.basicConsume(ROUTER_QUEUE_1, false, consumer); // 参数2 false 不自动确认收到消息,需要手动确认
    }
}
消费者2
package com.oy.router;

import com.oy.ConnectUtil;
import com.rabbitmq.client.*;

import java.io.IOException;

/**
 * @Auther: oy
 * @Date: 2021/3/1 01:09
 * @Version 1.0
 */
public class Receiver2 {
    private final static String TEST_EXCHANGE_ROUTER = "test-exchange-router";
    private final static String ROUTER_QUEUE_2 = "router_queue_2";
    private final static String KEY_2 = "key2";

    public static void main(String[] args) throws Exception {
        Connection connection = ConnectUtil.getConnection();
        final Channel channel = connection.createChannel();
        channel.queueDeclare(ROUTER_QUEUE_2, false, false, false, null);

        // 绑定队列到交换机
        channel.queueBind(ROUTER_QUEUE_2, TEST_EXCHANGE_ROUTER, KEY_2);

        // 告诉服务器,在我没有确认当前消息完成之前,不要给我发新的消息
        channel.basicQos(1);

        DefaultConsumer consumer = new DefaultConsumer(channel) {
            @Override
            public void handleDelivery(String consumerTag, Envelope envelope, AMQP.BasicProperties properties, byte[] body) throws IOException {
                System.out.println("key2: " + new String(body));
                // 确认收到消息 参数2:false为确认收到消息, true为拒绝收到消息
                channel.basicAck(envelope.getDeliveryTag(), false);
            }
        };

        channel.basicConsume(ROUTER_QUEUE_2, false, consumer); // 参数2 false 不自动确认收到消息,需要手动确认
    }
}
测试:先启动生产者,然后依次启动消费者
7、topic模式 <--返回目录
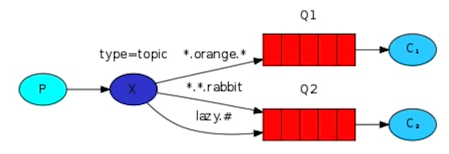
topic模式:router模式router key必须一致; topic模式是某一类的匹配(通配符);"#"匹配一个或多个词,"*"匹配不多不少一个词,比如"key.#"可以匹配"key.aaa.bbb.ccc", “key.*”之后匹配"key.aaa"。
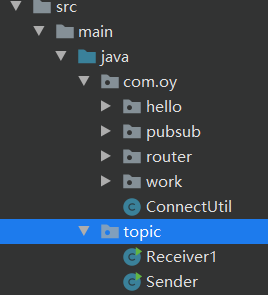
生产者
package topic;

import com.oy.ConnectUtil;
import com.rabbitmq.client.Channel;
import com.rabbitmq.client.Connection;

import java.util.Date;

/**
 * @Auther: oy
 * @Date: 2021/3/1 01:03
 * @Version 1.0
 */
public class Sender {
    private final static String TEST_EXCHANGE_TOPIC = "test-exchange-topic";

    public static void main(String[] args) throws Exception {
        Connection connection = ConnectUtil.getConnection();
        Channel channel = connection.createChannel();

        // 声明交换机 类型是topic,也就是路由模式的交换机
        channel.exchangeDeclare(TEST_EXCHANGE_TOPIC,"topic");

        int i = 0;
        while (true) {
            if (i % 2 == 0) {
                // topic模式,因为消息是发送到交换机中,而交换机没有保存功能,所以如果没有消费者,消息会丢失
                channel.basicPublish(TEST_EXCHANGE_TOPIC, "key.1.1", null, ("路由key.1.1消息. now: " + new Date().getTime()/1000).getBytes());
                Thread.sleep(1000);
            } else {
                channel.basicPublish(TEST_EXCHANGE_TOPIC, "key.2.2", null, ("路由key.2.2消息. now: " + new Date().getTime()/1000).getBytes());
                Thread.sleep(1000);
            }
            i++;
        }

        //channel.close();
        //connection.close();
    }
}
消费者
package topic;

import com.oy.ConnectUtil;
import com.rabbitmq.client.*;

import java.io.IOException;

/**
 * @Auther: oy
 * @Date: 2021/2/28 23:43
 * @Version 1.0
 */
public class Receiver1 {
    private final static String TEST_EXCHANGE_TOPIC = "test-exchange-topic";
    private final static String TOPIC_QUEUE_1 = "topic_queue_1";
    //private final static String KEY_1 = "key.*";
    private final static String KEY_1 = "key.#";

    public static void main(String[] args) throws Exception {
        Connection connection = ConnectUtil.getConnection();
        final Channel channel = connection.createChannel();
        channel.queueDeclare(TOPIC_QUEUE_1, false, false, false, null);

        // 绑定队列到交换机
        channel.queueBind(TOPIC_QUEUE_1, TEST_EXCHANGE_TOPIC, KEY_1);

        // 告诉服务器,在我没有确认当前消息完成之前,不要给我发新的消息
        channel.basicQos(1);

        DefaultConsumer consumer = new DefaultConsumer(channel) {
            @Override
            public void handleDelivery(String consumerTag, Envelope envelope, AMQP.BasicProperties properties, byte[] body) throws IOException {
                System.out.println(new String(body));
                // 确认收到消息 参数2:false为确认收到消息, true为拒绝收到消息
                channel.basicAck(envelope.getDeliveryTag(), false);
            }
        };

        channel.basicConsume(TOPIC_QUEUE_1, false, consumer); // 参数2 false 不自动确认收到消息,需要手动确认
    }
}
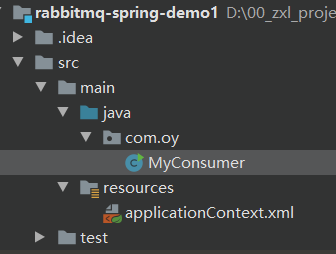
8、spring整合rabbitmq--自动模式 <--返回目录
依赖
<dependency>
    <groupId>org.springframework.amqp</groupId>
    <artifactId>spring-rabbit</artifactId>
    <version>2.3.5</version>
</dependency>
<!--<dependency>
    <groupId>com.rabbitmq</groupId>
    <artifactId>amqp-client</artifactId>
    <version>4.5.0</version>
</dependency>-->

<dependency>
    <groupId>org.slf4j</groupId>
    <artifactId>slf4j-log4j12</artifactId>
    <version>1.7.25</version>
</dependency>

<dependency>
    <groupId>org.apache.commons</groupId>
    <artifactId>commons-lang3</artifactId>
    <version>3.3.2</version>
</dependency>

<dependency>
    <groupId>junit</groupId>
    <artifactId>junit</artifactId>
    <version>4.12</version>
    <scope>test</scope>
</dependency>

<dependency>
    <groupId>org.springframework</groupId>
    <artifactId>spring-beans</artifactId>
    <version>4.3.7.RELEASE</version>
</dependency>
<dependency>
    <groupId>org.springframework</groupId>
    <artifactId>spring-context</artifactId>
    <version>4.3.7.RELEASE</version>
</dependency>
<dependency>
    <groupId>org.springframework</groupId>
    <artifactId>spring-test</artifactId>
    <version>4.3.7.RELEASE</version>
</dependency>
applicationContext.xml
<?xml version="1.0" encoding="UTF-8"?>
<beans xmlns="http://www.springframework.org/schema/beans"
       xmlns:xsi="http://www.w3.org/2001/XMLSchema-instance"
       xmlns:rabbit="http://www.springframework.org/schema/rabbit"
       xsi:schemaLocation="http://www.springframework.org/schema/rabbit
                        http://www.springframework.org/schema/rabbit/spring-rabbit-2.3.xsd
                        http://www.springframework.org/schema/beans
                        http://www.springframework.org/schema/beans/spring-beans.xsd">

    <!--定义 rabbitmq 连接工厂-->
    <rabbit:connection-factory id="connectionFactory" host="192.168.213.200" port="5672" username="oy" password="123456" virtual-host="/test"/>

    <!--定义 rabbitmq 的模板
        queue: 如果发送到队列写队列   exchange: 如果发送到交换机写交换机
    -->
    <rabbit:template id="template" connection-factory="connectionFactory" exchange="fanoutExchange"/>
    <rabbit:admin connection-factory="connectionFactory" />

    <!--定义队列-->
    <rabbit:queue name="myQueue" auto-declare="true" />

    <!--定义交换机-->
    <rabbit:fanout-exchange name="fanoutExchange" auto-declare="true">
        <!--将队列绑定到交换机-->
        <rabbit:bindings>
            <rabbit:binding queue="myQueue">
            </rabbit:binding>
        </rabbit:bindings>
    </rabbit:fanout-exchange>


    <!--定义消费者-->
    <bean id="myConsumer"  class="com.oy.MyConsumer"/>

    <!--定义监听容器:当收到消息时会执行内部的配置-->
    <rabbit:listener-container connection-factory="connectionFactory">
        <!--定义到底哪个类里面的哪个方法用于处理收到的消息-->
        <rabbit:listener ref="myConsumer" method="test" queue-names="myQueue" />
    </rabbit:listener-container>

</beans>
测试类
public class MyConsumer {

    /**
     * 接收消息
     *
     * @param message
     */
    public void test(String message) {
        System.out.println(message);
    }

    public static void main(String[] args) {
        ApplicationContext context = new ClassPathXmlApplicationContext("classpath:applicationContext.xml");
        RabbitTemplate template = context.getBean(RabbitTemplate.class);
        template.convertAndSend("测试发送的消息");
        ((ClassPathXmlApplicationContext)context).destroy();
    }
}
其它阅读资料:
1) https://www.jianshu.com/p/78847c203b76
---