一、Config简介
在分布式系统中,由于服务数量巨多,为了方便服务配置文件统一管理,实时更新,所以需要分布式配置中心组件。市面上开源的配置中心有很多。如:360的QConf、淘宝的diamond、百度的disconf都是解决这类问题。国外也有很多开源的配置中心Apache的Apache Commons Configuration、owner、cfg4j等等。在Spring Cloud中,有分布式配置中心组件spring cloud config ,它支持配置服务放在配置服务的内存中(即本地),也支持放在远程Git仓库中。在spring cloud config 组件中,分两个角色,一是config server,二是config client。
二、ConfigServer入门
- Maven
 <parent>
        <artifactId>cloud-parent</artifactId>
        <groupId>com.yk</groupId>
        <version>0.0.1-SNAPSHOT</version>
    </parent>
    <modelVersion>4.0.0</modelVersion>

    <artifactId>springcloud-config-server</artifactId>
<dependencies>
    <dependency>
        <groupId>org.springframework.cloud</groupId>
        <artifactId>spring-cloud-config-server</artifactId>
    </dependency>
</dependencies>
- 启动入口类
@SpringBootApplication(exclude = DataSourceAutoConfiguration.class)
@EnableConfigServer

public class ConfigServerApplication {
    public static void main(String[] args) {
        SpringApplication.run(ConfigServerApplication.class,args);
    }
}
- application.properties
spring.application.name=spring-cloud-config-server
server.port=901

#配置Git 仓库位置
spring.cloud.config.server.git.uri=https://github.com/xxxxx/configDemo.git
#配置仓库路径下的相对搜索位置, 可以配置多个
spring.cloud.config.server.git.searchPaths=config
spring.cloud.config.server.git.username=username
spring.cloud.config.server.git.password=password
到这里就简单的完成了使用Git完成分布式配置中心。
- 配置规则详解
-
验证分布式配置中心,根据配置的git仓库,在configDemo.git下面创建config目录作为配置仓库。

-
并创建四个不同环境的配置文件
-
didispace.properties
didispace-dev.properties
didispace-test.properties
didispace-prod.properties
- 四个配置文件均设置一个from属性,并设置不同的值
from =git-default-1.0
from =git-dev-1.0
from =git-test-1.0
frorn=git-prod-1.0

- 访问配置信息的Url与配置文件映射关系
/{application}/{profile} [/{label}]
/{application}-{profile}. yrnl
/{label}/{applica七ion}-{profile}.yrnl
/{application}-{profile}.properties
/{label}/{application}-{profile}.properties
上面的url会映射{application}-{profile} .properties 对应的配置文件, 其中{label}对应Git上不同的分支,默认为 master。


三、ConfigClient入门
- maven
 <parent>
        <artifactId>cloud-parent</artifactId>
        <groupId>com.yk</groupId>
        <version>0.0.1-SNAPSHOT</version>
    </parent>
    <modelVersion>4.0.0</modelVersion>

    <artifactId>springcloud-config-client</artifactId>
<dependencies>
    <dependency>
        <groupId>org.springframework.cloud</groupId>
        <artifactId>spring-cloud-starter-config</artifactId>
    </dependency>
</dependencies>
- bootstrap.properties
spring.application.name=spring-cloud-config-client
server.port=903
#对应配置规则的{application}
spring.cloud.config.name=didispace
#对应配置规则的{profile}
spring.cloud.config.profile=dev
#对应配置规则的{label}
spring.cloud.config.label=master
#config-server 服务地址
spring.cloud.config.uri=http://localhost:901/
这里的配置必须配置在bootstrap.properties里面,对于本应用jar包之外的配置文件加载会优先于应用jar包内的配置内容,而通过bootstrap.properties对config-server 的配置,使得该应用会从config-server中获取一些外部配置信息,这些信息的优先级比本地的内容要高, 从而实现了外部化配置
- Controleer
@RestController
public class ConfigController {
//获取配置文件里面的from属性
@Value("${from}")
private String from;
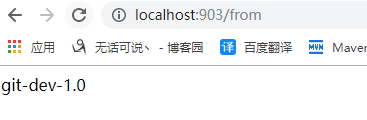
@RequestMapping("/from")
public String from() {
return this.from;
}
}
- 启动

四、动态刷新配置
客户端可以从服务端REST接口获取配置。但客户端并不能主动感知到配置的变化,从而主动去获取新的配置。客户端如何去主动获取新的配置信息呢,springcloud已经给我们提供了解决方案,每个客户端通过POST方法触发各自的/refresh。
- 在Client增加依赖
<!-- 是一套监控的功能,可以监控程序在运行时状态,其中就包括/refresh的功能。-->
		<dependency>
			<groupId>org.springframework.boot</groupId>
			<artifactId>spring-boot-starter-actuator</artifactId>
		</dependency>
- 配置文件增加
management.endpoints.web.exposure.include=*
- 开启更新机制
//在之前Client的Controller类上增加
@RefreshScope
- 重启Client服务
- 修改仓库配置文件的参数
修改didispace.dev.properties里面from的参数
通过postman访问http://localhost:903/actuator/refresh

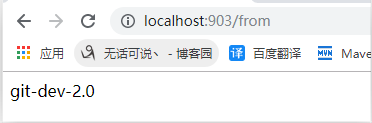
这样就实现了动态获取配置