在Windows2008系统下设置挂载Linux服务器磁盘
一、系统环境
系统平台:CentOS release 5.8 (Final)
NFS Server IP:X....X...153.157
防火墙已关闭
[root@htuidc ~]# setenforce 0
[root@htuidc ~]# service iptables stop
/iptables: Firewall is not running.
SELINUX=disabled
二、安装NFS服务
[root@htuidc ~]# yum install nfs-utils-* portmap-* rpcbind
-y
[root@htuidc ~]# vi /etc/exports
/aaa *(rw,no_root_squash)
/aaa 42.51.0.0/16(rw)
[root@htuidc aaa]# /etc/init.d/rpcbind restart
Stopping rpcbind: [ OK ]
Starting rpcbind: [ OK ]
[root@htuidc aaa]# /etc/init.d/nfs restart
Shutting down NFS daemon: [ OK ]
Shutting down NFS mountd: [ OK ]
Shutting down NFS services: [ OK ]
Shutting down RPC idmapd: [ OK ]
Starting NFS services: [ OK ]
Starting NFS mountd: [ OK ]
Starting NFS daemon: [ OK ]
Starting RPC idmapd: [ OK ]
设置NFS服务器的自动启动状态
[root@htuidc /]# chkconfig --level 35 portmap on
[root@htuidc /]# chkconfig --level 35 nfs on
[root@htuidc /]# chkconfig --list portmap
portmap 0:off 1:off 2:off 3:on 4:on 5:on 6:off
[root@htuidc /]# chkconfig --list nfs
nfs 0:off 1:off 2:off 3:on 4:off 5:on 6:off
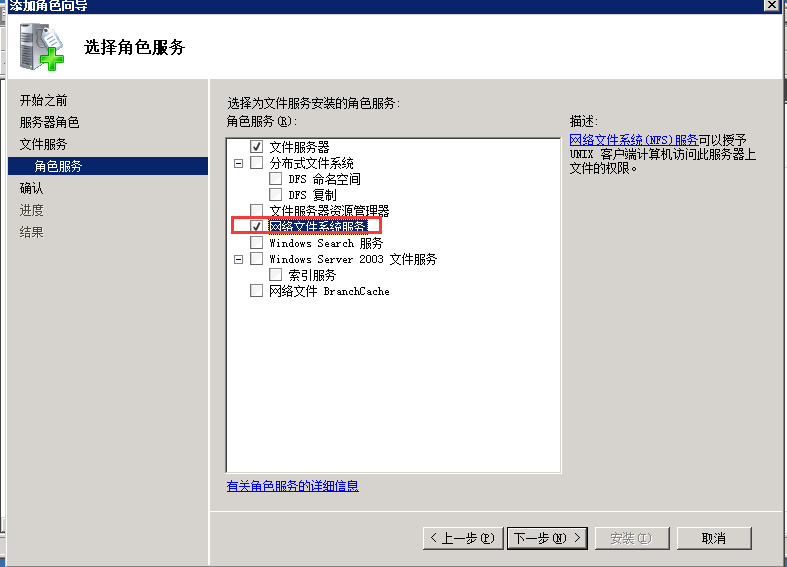
三.Windows2008开启NFS功能


可以看到UID=-2由于在存储设备上共享出来的NFS文件系统归属于root权限,并且无法修改该所属用户,而Windows通过UID=-2的用户去写,肯定写不进去。
解决办法就是让Windows 7在挂载NFS的时候将UID和GID改成0即可:打开注册表:HKEY_LOCAL_MACHINESOFTWAREMicrosoftClientForNFSCurrentVersionDefault,增加两项:AnonymousUid,AnonymousGid,如图:
解决办法就是让Windows 7在挂载NFS的时候将UID和GID改成0即可:打开注册表:HKEY_LOCAL_MACHINESOFTWAREMicrosoftClientForNFSCurrentVersionDefault,增加两项:AnonymousUid,AnonymousGid,如图:

重新启动计算机,重新mount即可。此时就能在Windows 7下对nfs文件系统进行读写操作了,跟本地磁盘一样。
卸载:
umount X:
查看帮助:
mount -t
