一、项目配置
还记得刚开始学习ssm框架时,感觉配置特别的麻烦,总是配置不对。于是三分钟热度的我放弃了很多次,现在了解了,给大家贴出来最简单的SpringMVC配置。不过还是建议大家学习SpringBoot,因为SpringBoot配置简单并且又是新推出的框架,未来发展的趋势。废话不多说,上代码!
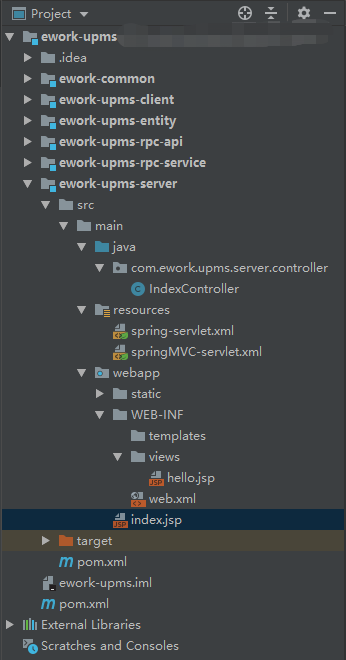
1、项目结构
2、web.xml
<!DOCTYPE web-app PUBLIC
        "-//Sun Microsystems, Inc.//DTD Web Application 2.3//EN"
        "http://java.sun.com/dtd/web-app_2_3.dtd" >
<web-app xmlns="http://java.sun.com/xml/ns/javaee"
         xmlns:xsi="http://www.w3.org/2001/XMLSchema-instance"
         xsi:schemaLocation="http://java.sun.com/xml/ns/javaee http://java.sun.com/xml/ns/javaee/web-app_3_0.xsd"
         version="3.0">
    <display-name>upms-server</display-name>


    <!-- Spring的配置-->
    <context-param>
        <param-name>contextConfigLocation</param-name>
        <param-value>classpath*:spring-servlet.xml</param-value>
    </context-param>
    <listener>
        <listener-class>org.springframework.web.context.ContextLoaderListener</listener-class>
    </listener>

    <!-- springMVC的核心控制器 -->
    <servlet>
        <servlet-name>springMVC</servlet-name>
        <servlet-class>org.springframework.web.servlet.DispatcherServlet</servlet-class>
        <init-param>
            <param-name>contextConfigLocation</param-name>
            <param-value>classpath*:springMVC-servlet.xml</param-value>
        </init-param>
        <load-on-startup>1</load-on-startup>
    </servlet>
    <servlet-mapping>
        <servlet-name>springMVC</servlet-name>
        <url-pattern>/</url-pattern>
    </servlet-mapping>

</web-app>
3、父pom.xml
<properties>
        <spring.version>4.3.20.RELEASE</spring.version>
    </properties>

    <!-- 依赖声明 -->
    <dependencyManagement>
        <dependencies>
            <dependency>
                <groupId>org.springframework</groupId>
                <artifactId>spring-webmvc</artifactId>
                <version>${spring.version}</version>
            </dependency>
        </dependencies>
    </dependencyManagement>
4、pom.xml
     <dependencies>
        <dependency>
            <groupId>junit</groupId>
            <artifactId>junit</artifactId>
            <version>4.11</version>
            <scope>test</scope>
        </dependency>
        <dependency>
            <groupId>org.springframework</groupId>
            <artifactId>spring-webmvc</artifactId>
        </dependency>
    </dependencies>
5、spring-servlet.xml
<?xml version="1.0" encoding="UTF-8"?>
<beans xmlns="http://www.springframework.org/schema/beans"
       xmlns:xsi="http://www.w3.org/2001/XMLSchema-instance"
       xsi:schemaLocation="
        http://www.springframework.org/schema/beans
        http://www.springframework.org/schema/beans/spring-beans-3.0.xsd  ">

</beans>
6、springMVC-servlet.xml
<?xml version="1.0" encoding="UTF-8"?>
<beans xmlns="http://www.springframework.org/schema/beans"
       xmlns:context="http://www.springframework.org/schema/context"
       xmlns:xsi="http://www.w3.org/2001/XMLSchema-instance"
       xsi:schemaLocation="
        http://www.springframework.org/schema/beans
        http://www.springframework.org/schema/beans/spring-beans-3.0.xsd
        http://www.springframework.org/schema/context
        http://www.springframework.org/schema/context/spring-context-3.0.xsd ">

    <!-- 下面是配置扫描包的位置,包名为com.ework.upms.server,也就是说,我们的试图解析器应该放在com.ework.upms.server包下. -->
    <context:component-scan base-package="com.ework.upms.server"/>

    <bean id="viewResolver"
          class="org.springframework.web.servlet.view.InternalResourceViewResolver">
        <!-- 前缀,我们的视图文件应该放到/WEB-INF/views/目录下,这里我们需要在WEB-INF下面创建view文件夹 -->
        <property name="prefix" value="/WEB-INF/views/" />
        <!-- 设置后缀为.jsp -->
        <property name="suffix" value=".jsp" />
    </bean>

</beans>
二、Controller控制器及jsp页面
1、index.jsp
<html>
<body>
  <h2>Hello World!</h2>
  <a href="${pageContext.request.contextPath}/hello">hello</a>
</body>
</html>
2、hello.jsp
<%@ page contentType="text/html;charset=UTF-8" language="java" %>
<html>
<head>
    <title>Title</title>
</head>
<body>
------------------------------${name}
</body>
</html>
3、控制器-IndexController
@Controller
public class IndexController {

    @RequestMapping("/hello")
    public ModelAndView hello() {
        ModelAndView modelAndView=new ModelAndView();
        modelAndView.addObject("name","zhangsan");
        modelAndView.setViewName("hello");
        return modelAndView;
    }
}
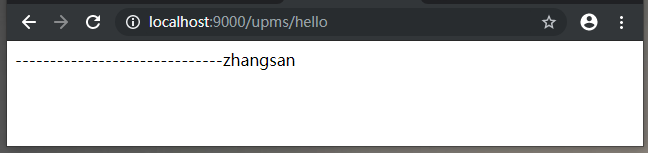
三、运行效果图
1、index页面

2、hello页面