OS:
root@harbor:~# cat /etc/issue
Ubuntu 20.04.2 LTS
 l

root@harbor:~# uname -r
5.4.0-81-generic

IP分配:
172.168.33.201 harbor.ywx.net  k8s-deploy
172.168.33.202 haproxy01
172.168.33.203 haproxy02
172.168.33.204 ecd01
172.168.33.205 ecd02
172.168.33.206 ecd03
172.168.33.207 k8s-master01
172.168.33.208 k8s-master02
172.168.33.209 k8s-master03
172.168.33.210 k8s-node01
172.168.33.211 k8s-node02
172.168.33.212 k8s-node03

VIP:
172.168.33.50  api-server的VIP
172.168.33.51
172.168.33.52
172.168.33.53
在所有设备上部署
#1、部署清华镜像源
cat > /etc/apt/sources.list <<EOF
# 默认注释了源码镜像以提高 apt update 速度,如有需要可自行取消注释
deb https://mirrors.tuna.tsinghua.edu.cn/ubuntu/ focal main restricted universe multiverse
# deb-src https://mirrors.tuna.tsinghua.edu.cn/ubuntu/ focal main restricted universe multiverse
deb https://mirrors.tuna.tsinghua.edu.cn/ubuntu/ focal-updates main restricted universe multiverse
# deb-src https://mirrors.tuna.tsinghua.edu.cn/ubuntu/ focal-updates main restricted universe multiverse
deb https://mirrors.tuna.tsinghua.edu.cn/ubuntu/ focal-backports main restricted universe multiverse
# deb-src https://mirrors.tuna.tsinghua.edu.cn/ubuntu/ focal-backports main restricted universe multiverse
deb https://mirrors.tuna.tsinghua.edu.cn/ubuntu/ focal-security main restricted universe multiverse
# deb-src https://mirrors.tuna.tsinghua.edu.cn/ubuntu/ focal-security main restricted universe multiverse
EOF

apt update

#2、部署基础命令
apt  install iproute2  ntpdate  tcpdump telnet traceroute nfs-kernel-server nfs-common  lrzsz tree  openssl libssl-dev libpcre3 libpcre3-dev zlib1g-dev ntpdate tcpdump telnet traceroute  gcc openssh-server lrzsz tree  openssl libssl-dev libpcre3 libpcre3-dev zlib1g-dev ntpdate tcpdump telnet traceroute iotop unzip zip openjdk-8-jdk -y

#3、时间同步
apt install cron -y
systemctl status cron.service

/usr/sbin/ntpdate time1.aliyun.com &> /dev/null && hwclock -w

 echo "*/5 * * * * /usr/sbin/ntpdate time1.aliyun.com &> /dev/null && hwclock -w" >> /var/spool/cron/crontabs/root

rm -rf /etc/localtime

ln -sf /usr/share/zoneinfo/Asia/Shanghai /etc/localtime

cat >> /etc/default/locale << EOF
LANG=en_US.UTF-8
LC_TIME=en_DK.UTF-8
EOF

#4、修改内核参数
cat >/etc/sysctl.conf <<EOF
# Controls source route verification
net.ipv4.conf.default.rp_filter = 1
net.ipv4.ip_nonlocal_bind = 1
net.ipv4.ip_forward = 1

# Do not accept source routing
net.ipv4.conf.default.accept_source_route = 0

# Controls the System Request debugging functionality of the kernel
kernel.sysrq = 0

# Controls whether core dumps will append the PID to the core filename.
# Useful for debugging multi-threaded
applications. kernel.core_uses_pid = 1

# Controls the use of TCP syncookies
net.ipv4.tcp_syncookies = 1

# Disable netfilter on bridges.
net.bridge.bridge-nf-call-ip6tables = 0
net.bridge.bridge-nf-call-iptables = 0
net.bridge.bridge-nf-call-arptables = 0

# Controls the default maxmimum size of a mesage queue
kernel.msgmnb = 65536

# # Controls the maximum size of a message, in bytes
kernel.msgmax = 65536

# Controls the maximum shared segment size, in bytes
kernel.shmmax = 68719476736

# # Controls the maximum number of shared memory segments, in pages
kernel.shmall = 4294967296

# TCP kernel paramater
net.ipv4.tcp_mem = 786432 1048576 1572864
net.ipv4.tcp_rmem = 4096        87380   4194304
net.ipv4.tcp_wmem = 4096        16384   4194304 n
et.ipv4.tcp_window_scaling = 1
net.ipv4.tcp_sack = 1

# socket buffer
net.core.wmem_default = 8388608
net.core.rmem_default = 8388608
net.core.rmem_max = 16777216
net.core.wmem_max = 16777216
net.core.netdev_max_backlog = 262144
net.core.somaxconn = 20480
net.core.optmem_max = 81920

# TCP conn
net.ipv4.tcp_max_syn_backlog = 262144
net.ipv4.tcp_syn_retries = 3
net.ipv4.tcp_retries1 = 3
net.ipv4.tcp_retries2 = 15

# tcp conn reuse
net.ipv4.tcp_timestamps = 0
net.ipv4.tcp_tw_reuse = 0
net.ipv4.tcp_tw_recycle = 0
net.ipv4.tcp_fin_timeout = 1


net.ipv4.tcp_max_tw_buckets = 20000
net.ipv4.tcp_max_orphans = 3276800
net.ipv4.tcp_synack_retries = 1
net.ipv4.tcp_syncookies = 1

# keepalive conn
net.ipv4.tcp_keepalive_time = 300
net.ipv4.tcp_keepalive_intvl = 30
net.ipv4.tcp_keepalive_probes = 3
net.ipv4.ip_local_port_range = 10001    65000

# swap
vm.overcommit_memory = 0
vm.swappiness = 10

#net.ipv4.conf.eth1.rp_filter = 0
#net.ipv4.conf.lo.arp_ignore = 1
#net.ipv4.conf.lo.arp_announce = 2
#net.ipv4.conf.all.arp_ignore = 1
#net.ipv4.conf.all.arp_announce = 2
EOF

#5、修改文件参数

cat >> /etc/security/limits.conf <<EOF
root                soft    core            unlimited
root                hard    core            unlimited
root                soft    nproc           1000000
root                hard    nproc           1000000
root                soft    nofile          1000000
root                hard    nofile          1000000
root                soft    memlock         32000
root                hard    memlock         32000
root                soft    msgqueue        8192000
root                hard    msgqueue        8192000


*                soft    core            unlimited
*                hard    core            unlimited
*                soft    nproc           1000000
*                hard    nproc           1000000
*                soft    nofile          1000000
*                hard    nofile          1000000
*                soft    memlock         32000
*                hard    memlock         32000
*                soft    msgqueue        8192000
*                hard    msgqueue        8192000
EOF

#6、hosts文件
cat >> /etc/hosts <<EOF
127.0.0.1 localhost
127.0.1.1 ywx

# The following lines are desirable for IPv6 capable hosts
::1     ip6-localhost ip6-loopback
fe00::0 ip6-localnet
ff00::0 ip6-mcastprefix
ff02::1 ip6-allnodes
ff02::2 ip6-allrouters
172.168.33.201 harbor.ywx.net
172.168.33.202 haproxy01
172.168.33.203 haproxy02
172.168.33.204 ecd01
172.168.33.205 ecd02
172.168.33.206 ecd03
172.168.33.207 k8s-master01
172.168.33.208 k8s-master02
172.168.33.209 k8s-master03
172.168.33.210 k8s-node01
172.168.33.211 k8s-node02
172.168.33.212 k8s-node03
EOF

#7、关闭swap
swapoff -a

root@harbor:~# vim /etc/fstab
# /etc/fstab: static file system information.
#
# Use 'blkid' to print the universally unique identifier for a
# device; this may be used with UUID= as a more robust way to name devices
# that works even if disks are added and removed. See fstab(5).
#
# <file system> <mount point>   <type>  <options>       <dump>  <pass>
# / was on /dev/sda2 during curtin installation
/dev/disk/by-uuid/d70a7e92-2d0d-4014-a9a1-4cd95db5e242 / xfs defaults 0 0
#/swap.img      none    swap    sw      0       0
四、部署harbor的https
在harbor 172.168.33.201上部署
#1、部署docker源
curl -fsSL https://download.docker.com/linux/ubuntu/gpg | sudo apt-key add -

sudo add-apt-repository
   "deb [arch=amd64] https://mirrors.tuna.tsinghua.edu.cn/docker-ce/linux/ubuntu
   $(lsb_release -cs)
   stable"

apt-get update

#2、查看支持的docker版本
apt-cache madison docker-ce


#3、安装19.03.15版的docker
apt-get install docker-ce=5:19.03.15~3-0~ubuntu-focal docker-ce-cli=5:19.03.15~3-0~ubuntu-focal

#4、下载docker-compose v1.24.1
wget https://github.com/docker/compose/releases/download/1.24.1/docker-compose-Linux-x86_64
chmod +x docker-compose-Linux-x86_64
mv docker-compose-Linux-x86_64 /usr/bin/docker-compose
2、下载harbor-offine-installer-v2.3.2.tgz,并解压
root@harbor:~# mkdir /apps
root@harbor:~# cd /apps
root@harbor:/apps# wget https://github.com/goharbor/harbor/releases/download/v2.3.2/harbor-offline-installer-v2.3.2.tgz
root@harbor:/apps# tar -xf harbor-offline-installer-v2.3.2.tgz
3、创建证书
root@harbor:/apps# cd harbor/
root@harbor:/apps/harbor# mkdir certs
root@harbor:/apps/harbor# cd certs
root@harbor:/apps/harbor/certs# openssl genrsa -out harbor-ca.key 2048
root@harbor:/apps/harbor/certs# openssl req -x509 -new -nodes -key harbor-ca.key -subj "/CN=harbor.ywx.net" -days 3650 -out harbor-ca.crt
#注意:/CN=harbor.ywx.net必须是我们用来访问harbor的域名
4、编辑harbor的配置文件

5、安装harbor
root@harbor:/apps/harbor# ./install.sh --help

Note: Please set hostname and other necessary attributes in harbor.yml first. DO NOT use localhost or 127.0.0.1 for hostname, because Harbor needs to be accessed by external clients.
Please set --with-notary if needs enable Notary in Harbor, and set ui_url_protocol/ssl_cert/ssl_cert_key in harbor.yml bacause notary must run under https.
Please set --with-trivy if needs enable Trivy in Harbor  #开启镜像扫描
Please set --with-chartmuseum if needs enable Chartmuseum in Harbor


root@harbor:/apps/harbor# ./install.sh --with-trivy
......
✔ ----Harbor has been installed and started successfully.----
6、将harbor的公钥拷贝到docker并测试
#1、在docker中创建存放公钥的目录
root@harbor:/etc/docker# mkdir -p certs.d/harbor.ywx.net
#注意:存放公钥的目录必须为域名地址

#2、把harbor公钥拷贝到docker存放公钥的目录
root@harbor:/etc/docker# cp /apps/harbor/certs/harbor-ca.crt /etc/docker/certs.d/harbor.ywx.net/
root@harbor:/etc/docker/certs.d/harbor.ywx.net# ls
harbor-ca.crt

#3、使用docker登录harbor.ywx.net
root@harbor:~# docker login harbor.ywx.net
Username: admin
Password:
WARNING! Your password will be stored unencrypted in /root/.docker/config.json.
Configure a credential helper to remove this warning. See
https://docs.docker.com/engine/reference/commandline/login/#credentials-store
Login Succeeded

#4、拉取nginx镜像来测试
root@harbor:~# docker pull nginx

#5、更改nginx镜像名称
root@harbor:~# docker tag nginx:latest harbor.ywx.net/k8s-baseimages/nginx:latest

#6、上传镜像
root@harbor:~# docker push harbor.ywx.net/k8s-baseimages/nginx:v1
The push refers to repository [harbor.ywx.net/k8s-baseimages/nginx]
fac15b2caa0c: Pushed
f8bf5746ac5a: Pushed
d11eedadbd34: Pushed
797e583d8c50: Pushed
bf9ce92e8516: Pushed
d000633a5681: Pushed
v1: digest: sha256:6fe11397c34b973f3c957f0da22b09b7f11a4802e1db47aef54c29e2813cc125 size: 1570
在haproxy01 172.168.33.202和haproxy02 172.168.33.203上部署
keepalived中haproxy01为master,haproxy02为
1、部署keepalived
#1、安装keepalived
apt install keepalived

#2、修改haproxy01上的keepalived的配置文件
! Configuration File for keepalived

global_defs {
   notification_email {
     acassen
   }
   notification_email_from Alexandre.Cassen@firewall.loc
   smtp_server 192.168.200.1
   smtp_connect_timeout 30
   router_id LVS_DEVEL
}

vrrp_instance VI_1 {
    interface eth0
    virtual_router_id 50
    nopreempt
    priority 100
    advert_int 1
    virtual_ipaddress {
        172.168.33.50 dev eth0 label eth0:0
        172.168.33.51 dev eth0 label eth0:1
        172.168.33.52 dev eth0 label eth0:2
        172.168.33.53 dev eth0 label eth0:3
    }
}

#3、修改haproxy02上的keepalived的配置文件
! Configuration File for keepalived

global_defs {
   notification_email {
     acassen
   }
   notification_email_from Alexandre.Cassen@firewall.loc
   smtp_server 192.168.200.1
   smtp_connect_timeout 30
   router_id LVS_DEVEL
}

vrrp_instance VI_1 {
    interface eth0
    virtual_router_id 50
    nopreempt
    priority 80
    advert_int 1
    virtual_ipaddress {
        172.168.33.50 dev eth0 label eth0:0
        172.168.33.51 dev eth0 label eth0:1
        172.168.33.52 dev eth0 label eth0:2
        172.168.33.53 dev eth0 label eth0:3
    }
}


#4、启动keepalived
systemctl restart keepalived

#5、验证keepalived
haproxy01上
root@haproxy01:/etc/keepalived# ip a |grep eth0
2: eth0: <BROADCAST,MULTICAST,UP,LOWER_UP> mtu 1500 qdisc fq_codel state UP group default qlen 1000
    inet 172.168.33.202/16 brd 172.168.255.255 scope global eth0
    inet 172.168.33.50/32 scope global eth0:0
    inet 172.168.33.51/32 scope global eth0:1
    inet 172.168.33.52/32 scope global eth0:2
    inet 172.168.33.53/32 scope global eth0:3

haproxy02上
root@haproxy02:/etc/keepalived# ip a | grep eth0
2: eth0: <BROADCAST,MULTICAST,UP,LOWER_UP> mtu 1500 qdisc fq_codel state UP group default qlen 1000
    inet 172.168.33.203/16 brd 172.168.255.255 scope global eth0

关闭haproxy01上的keepalived
root@haproxy01:/etc/keepalived# systemctl stop keepalived

在haproxy02上验证
root@haproxy02:/etc/keepalived# ip a | grep eth0
2: eth0: <BROADCAST,MULTICAST,UP,LOWER_UP> mtu 1500 qdisc fq_codel state UP group default qlen 1000
    inet 172.168.33.203/16 brd 172.168.255.255 scope global eth0
    inet 172.168.33.50/32 scope global eth0:0
    inet 172.168.33.51/32 scope global eth0:1
    inet 172.168.33.52/32 scope global eth0:2
    inet 172.168.33.53/32 scope global eth0:3
#1、部署haproxy
apt install -y haproxy

#2、配置haproxy.cfg
#haproxy01和haproxy02是一样的配置
cat >> /etc/haproxy/haproxy.cfg EOF
listen stats
  mode http
  bind 0.0.0.0:9999
  stats enable
  log global
  stats uri /haproxy-status
  stats auth haadmin:123456

listen api-server
  bind 172.168.33.50:6443
  mode tcp
  log global
  server k8s-master01 172.168.33.207 check inter 3000 fall 2 rise 5
  server k8s-master02 172.168.33.208 check inter 3000 fall 2 rise 5
  server k8s-master03 172.168.33.209 check inter 3000 fall 2 rise 5
EOF

#3、启动haproxy
systemctl restart haproxy

root@haproxy01:~# systemctl status haproxy
● haproxy.service - HAProxy Load Balancer
     Loaded: loaded (/lib/systemd/system/haproxy.service; enabled; vendor preset: enabled)
     Active: active (running) since Fri 2021-09-17 15:43:36 CST; 5min ago
       Docs: man:haproxy(1)
             file:/usr/share/doc/haproxy/configuration.txt.gz
    Process: 32380 ExecStartPre=/usr/sbin/haproxy -f $CONFIG -c -q $EXTRAOPTS (code=exited, status=0/SUCCESS)
   Main PID: 32381 (haproxy)
      Tasks: 2 (limit: 2278)
     Memory: 2.0M
     CGroup: /system.slice/haproxy.service
             ├─32381 /usr/sbin/haproxy -Ws -f /etc/haproxy/haproxy.cfg -p /run/haproxy.pid -S /run/haproxy-master.sock
             └─32388 /usr/sbin/haproxy -Ws -f /etc/haproxy/haproxy.cfg -p /run/haproxy.pid -S /run/haproxy-master.sock
使用harbor 172.168.33.201作为k8s-deploy
1、免密钥认证
#1、安装sshpass
apt install -y sshpass

#2、生成ssh key
ssh-keygen

#3、密钥分发脚本
cat > /tmp/ssh-copy.sh <<EOF
#!/bin/bash
#目标主机列表
IP="
172.168.33.201
#172.168.33.202
#172.168.33.203
#haproxy不需要做密钥分发
172.168.33.204
172.168.33.205
172.168.33.206
172.168.33.207
172.168.33.208
172.168.33.209
172.168.33.210
172.168.33.211
172.168.33.212"

for node in ${IP};do
  sshpass -p 123456 ssh-copy-id ${node}  -o StrictHostKeyChecking=no &> /dev/null
  if [ $? -eq 0 ];then
    echo "${node} 秘钥copy完成"
  else
    echo "${node} 秘钥copy失败"
  fi
done
EOF

#4、密钥分发
bash /tmp/ssh-copy.sh
apt install python3-pip git -y
pip3 install ansible
在部署节点harbor 172.168.33.201
3.1下载项目源码、二进制及离线镜像
# 下载工具脚本ezdown,举例使用kubeasz版本3.0.0
export release=3.0.0
curl -C- -fLO --retry 3 https://github.com/easzlab/kubeasz/releases/download/${release}/ezdown
chmod +x ./ezdown
# 使用工具脚本下载
./ezdown -D

或者直接下载
wget https://github.com/easzlab/kubeasz/releases/download/3.1.0/ezdown
chmod +x ./ezdown
# 使用工具脚本下载
./ezdown -D
我们可以修改kubernetes组件的版本信息,然后再下载
修改docker的版本改为19.03.15
root@harbor:/apps# vim ezdown
#!/bin/bash
#--------------------------------------------------
# This script is used for:
# 1. to download the scripts/binaries/images needed for installing a k8s cluster with kubeasz
# 2. to run kubeasz in a container (optional)
# @author:   gjmzj
# @usage:    ./ezdown
# @repo:     https://github.com/easzlab/kubeasz
# @ref:      https://github.com/kubeasz/dockerfiles
#--------------------------------------------------
set -o nounset
set -o errexit
#set -o xtrace

# default settings, can be overridden by cmd line options, see usage
#DOCKER_VER=20.10.5
DOCKER_VER=19.03.15
KUBEASZ_VER=3.1.0
K8S_BIN_VER=v1.21.0
EXT_BIN_VER=0.9.4
SYS_PKG_VER=0.4.1
HARBOR_VER=v2.1.3
REGISTRY_MIRROR=CN

# images needed by k8s cluster
calicoVer=v3.15.3
flannelVer=v0.13.0-amd64
dnsNodeCacheVer=1.17.0
corednsVer=1.8.0
dashboardVer=v2.2.0
dashboardMetricsScraperVer=v1.0.6
metricsVer=v0.3.6
pauseVer=3.4.1
nfsProvisionerVer=v4.0.1
export ciliumVer=v1.4.1
export kubeRouterVer=v0.3.1
export kubeOvnVer=v1.5.3
export promChartVer=12.10.6
export traefikChartVer=9.12.3
。。。。。。

在执行./ezdown -D下载kubernetes组件
查看下载信息
ezdown -D下载完成后
文件及安装包会自动保存在/etc/kubeasz目录中
root@harbor:/apps# ll /etc/kubeasz/
.gitignore   README.md    ansible.cfg  bin/         docs/        down/        example/     ezctl        ezdown       manifests/   pics/        playbooks/   roles/       tools/
root@harbor:/etc/kubeasz# ./ezctl new k8s-ywx
2021-09-17 20:53:33 DEBUG generate custom cluster files in /etc/kubeasz/clusters/k8s-ywx
2021-09-17 20:53:33 DEBUG set version of common plugins
2021-09-17 20:53:33 DEBUG disable registry mirrors
2021-09-17 20:53:33 DEBUG cluster k8s-ywx: files successfully created.
2021-09-17 20:53:33 INFO next steps 1: to config '/etc/kubeasz/clusters/k8s-ywx/hosts'
2021-09-17 20:53:33 INFO next steps 2: to config '/etc/kubeasz/clusters/k8s-ywx/config.yml'
root@harbor:/etc/kubeasz# ll clusters/k8s-ywx/
total 12
drwxr-xr-x 2 root root   37 Sep 17 20:53 ./
drwxr-xr-x 3 root root   21 Sep 17 20:53 ../
-rw-r--r-- 1 root root 6696 Sep 17 20:53 config.yml
-rw-r--r-- 1 root root 1686 Sep 17 20:53 hosts
修改hosts文件
root@harbor:/etc/kubeasz/clusters/k8s-ywx# vim hosts

# 'etcd' cluster should have odd member(s) (1,3,5,...)
[etcd]
172.168.33.204
172.168.33.205
172.168.33.206

# master node(s)
[kube_master]
172.168.33.207
172.168.33.208
172.168.33.209

# work node(s)
[kube_node]
172.168.33.210
172.168.33.211
172.168.33.212

# [optional] harbor server, a private docker registry
# 'NEW_INSTALL': 'true' to install a harbor server; 'false' to integrate with existed one
[harbor]
#172.168.33.8 NEW_INSTALL=false

# [optional] loadbalance for accessing k8s from outside
[ex_lb]
172.168.33.202 LB_ROLE=backup EX_APISERVER_VIP=172.168.33.50 EX_APISERVER_PORT=8443
172.168.33.203 LB_ROLE=master EX_APISERVER_VIP=172.168.33.50 EX_APISERVER_PORT=8443

# [optional] ntp server for the cluster
[chrony]
#172.168.33.201

[all:vars]
# --------- Main Variables ---------------
# Secure port for apiservers
SECURE_PORT="6443"

# Cluster container-runtime supported: docker, containerd
CONTAINER_RUNTIME="docker"

# Network plugins supported: calico, flannel, kube-router, cilium, kube-ovn
#使用calico网络
CLUSTER_NETWORK="calico"

# Service proxy mode of kube-proxy: 'iptables' or 'ipvs'
PROXY_MODE="ipvs"

#注意:service CICR和Cluster CIDR地址不要冲突
# K8S Service CIDR, not overlap with node(host) networking
SERVICE_CIDR="10.68.0.0/16"

# Cluster CIDR (Pod CIDR), not overlap with node(host) networking
CLUSTER_CIDR="172.20.0.0/16"

# NodePort Range
NODE_PORT_RANGE="30000-32767"

# Cluster DNS Domain
#修改集群域名,这里使用默认,多集群需要修改
CLUSTER_DNS_DOMAIN="cluster.local"

# -------- Additional Variables (don't change the default value right now) ---
# Binaries Directory
bin_dir="/usr/local/bin"

# Deploy Directory (kubeasz workspace)
base_dir="/etc/kubeasz"

# Directory for a specific cluster
cluster_dir="{{ base_dir }}/clusters/k8s-ywx"

# CA and other components cert/key Directory
ca_dir="/etc/kubernetes/ssl"
修改config.yml文件
root@harbor:/etc/kubeasz/clusters/k8s-ywx# vim config.yml
############################
# prepare
############################
# 可选离线安装系统软件包 (offline|online)
INSTALL_SOURCE: "online"

# 可选进行系统安全加固 github.com/dev-sec/ansible-collection-hardening
OS_HARDEN: false

# 设置时间源服务器【重要:集群内机器时间必须同步】
ntp_servers:
  - "ntp1.aliyun.com"
  - "time1.cloud.tencent.com"
  - "0.cn.pool.ntp.org"

# 设置允许内部时间同步的网络段,比如"10.0.0.0/8",默认全部允许
local_network: "0.0.0.0/0"


############################
# role:deploy
############################
# default: ca will expire in 100 years
# default: certs issued by the ca will expire in 50 years
CA_EXPIRY: "876000h"
CERT_EXPIRY: "438000h"

# kubeconfig 配置参数
CLUSTER_NAME: "cluster1"
CONTEXT_NAME: "context-{{ CLUSTER_NAME }}"


############################
# role:etcd
############################
# 设置不同的wal目录,可以避免磁盘io竞争,提高性能
ETCD_DATA_DIR: "/var/lib/etcd"
ETCD_WAL_DIR: ""


############################
# role:runtime [containerd,docker]
############################
# ------------------------------------------- containerd
# [.]启用容器仓库镜像
ENABLE_MIRROR_REGISTRY: false

# [containerd]基础容器镜像
SANDBOX_IMAGE: "easzlab/pause-amd64:3.4.1"

# [containerd]容器持久化存储目录
CONTAINERD_STORAGE_DIR: "/var/lib/containerd"

# ------------------------------------------- docker
# [docker]容器存储目录
DOCKER_STORAGE_DIR: "/var/lib/docker"

# [docker]开启Restful API
ENABLE_REMOTE_API: false

# [docker]信任的HTTP仓库
INSECURE_REG: '["127.0.0.1/8","172.168.33.201"]'


############################
# role:kube-master
############################
# k8s 集群 master 节点证书配置,可以添加多个ip和域名(比如增加公网ip和域名)
MASTER_CERT_HOSTS:
  - "10.1.1.1"
  - "k8s.test.io"
  #- "www.test.com"

# node 节点上 pod 网段掩码长度(决定每个节点最多能分配的pod ip地址)
# 如果flannel 使用 --kube-subnet-mgr 参数,那么它将读取该设置为每个节点分配pod网段
# https://github.com/coreos/flannel/issues/847
NODE_CIDR_LEN: 24


############################
# role:kube-node
############################
# Kubelet 根目录
KUBELET_ROOT_DIR: "/var/lib/kubelet"

# node节点最大pod 数
MAX_PODS: 110

# 配置为kube组件(kubelet,kube-proxy,dockerd等)预留的资源量
# 数值设置详见templates/kubelet-config.yaml.j2
KUBE_RESERVED_ENABLED: "yes"

# k8s 官方不建议草率开启 system-reserved, 除非你基于长期监控,了解系统的资源占用状况;
# 并且随着系统运行时间,需要适当增加资源预留,数值设置详见templates/kubelet-config.yaml.j2
# 系统预留设置基于 4c/8g 虚机,最小化安装系统服务,如果使用高性能物理机可以适当增加预留
# 另外,集群安装时候apiserver等资源占用会短时较大,建议至少预留1g内存
SYS_RESERVED_ENABLED: "no"

# haproxy balance mode
BALANCE_ALG: "roundrobin"


############################
# role:network [flannel,calico,cilium,kube-ovn,kube-router]
############################
# ------------------------------------------- flannel
# [flannel]设置flannel 后端"host-gw","vxlan"等
FLANNEL_BACKEND: "vxlan"
DIRECT_ROUTING: false

# [flannel] flanneld_image: "quay.io/coreos/flannel:v0.10.0-amd64"
flannelVer: "v0.13.0-amd64"
flanneld_image: "easzlab/flannel:{{ flannelVer }}"

# [flannel]离线镜像tar包
flannel_offline: "flannel_{{ flannelVer }}.tar"

# ------------------------------------------- calico
# [calico]设置 CALICO_IPV4POOL_IPIP=“off”,可以提高网络性能,条件限制详见 docs/setup/calico.md
CALICO_IPV4POOL_IPIP: "Always"   #跨网段使用,建议默认开启

# [calico]设置 calico-node使用的host IP,bgp邻居通过该地址建立,可手工指定也可以自动发现
IP_AUTODETECTION_METHOD: "can-reach={{ groups['kube_master'][0] }}"

# [calico]设置calico 网络 backend: brid, vxlan, none
CALICO_NETWORKING_BACKEND: "brid"

# [calico]更新支持calico 版本: [v3.3.x] [v3.4.x] [v3.8.x] [v3.15.x]
calico_ver: "v3.15.3"

# [calico]calico 主版本
calico_ver_main: "{{ calico_ver.split('.')[0] }}.{{ calico_ver.split('.')[1] }}"

# [calico]离线镜像tar包
calico_offline: "calico_{{ calico_ver }}.tar"

# ------------------------------------------- cilium
# [cilium]CILIUM_ETCD_OPERATOR 创建的 etcd 集群节点数 1,3,5,7...
ETCD_CLUSTER_SIZE: 1

# [cilium]镜像版本
cilium_ver: "v1.4.1"

# [cilium]离线镜像tar包
cilium_offline: "cilium_{{ cilium_ver }}.tar"

# ------------------------------------------- kube-ovn
# [kube-ovn]选择 OVN DB and OVN Control Plane 节点,默认为第一个master节点
OVN_DB_NODE: "{{ groups['kube_master'][0] }}"

# [kube-ovn]离线镜像tar包
kube_ovn_ver: "v1.5.3"
kube_ovn_offline: "kube_ovn_{{ kube_ovn_ver }}.tar"

# ------------------------------------------- kube-router
# [kube-router]公有云上存在限制,一般需要始终开启 ipinip;自有环境可以设置为 "subnet"
OVERLAY_TYPE: "full"

# [kube-router]NetworkPolicy 支持开关
FIREWALL_ENABLE: "true"

# [kube-router]kube-router 镜像版本
kube_router_ver: "v0.3.1"
busybox_ver: "1.28.4"

# [kube-router]kube-router 离线镜像tar包
kuberouter_offline: "kube-router_{{ kube_router_ver }}.tar"
busybox_offline: "busybox_{{ busybox_ver }}.tar"


############################
# role:cluster-addon
############################
# coredns 自动安装  #关闭所有的自动安装
dns_install: "no"    #不自动安装,手动部署
corednsVer: "1.8.0"
ENABLE_LOCAL_DNS_CACHE: false  #不开启dns缓存
dnsNodeCacheVer: "1.17.0"
# 设置 local dns cache 地址
LOCAL_DNS_CACHE: "169.254.20.10"

# metric server 自动安装
metricsserver_install: "no"
metricsVer: "v0.3.6"

# dashboard 自动安装
dashboard_install: "no"
dashboardVer: "v2.2.0"
dashboardMetricsScraperVer: "v1.0.6"

# ingress 自动安装
ingress_install: "no"
ingress_backend: "traefik"
traefik_chart_ver: "9.12.3"

# prometheus 自动安装
prom_install: "no"
prom_namespace: "monitor"
prom_chart_ver: "12.10.6"

# nfs-provisioner 自动安装
nfs_provisioner_install: "no"
nfs_provisioner_namespace: "kube-system"
nfs_provisioner_ver: "v4.0.1"
nfs_storage_class: "managed-nfs-storage"
nfs_server: "192.168.1.10"
nfs_path: "/data/nfs"

############################
# role:harbor
############################
# harbor version,完整版本号
HARBOR_VER: "v2.1.3"
HARBOR_DOMAIN: "harbor.yourdomain.com"
HARBOR_TLS_PORT: 8443

# if set 'false', you need to put certs named harbor.pem and harbor-key.pem in directory 'down'
HARBOR_SELF_SIGNED_CERT: true

# install extra component
HARBOR_WITH_NOTARY: false
HARBOR_WITH_TRIVY: false
HARBOR_WITH_CLAIR: false
HARBOR_WITH_CHARTMUSEUM: true
root@harbor:/etc/kubeasz# ll playbooks/
total 92
drwxrwxr-x  2 root root 4096 Sep 17 21:15 ./
drwxrwxr-x 12 root root  225 Sep 17 20:53 ../
-rw-rw-r--  1 root root  443 Apr 26 10:02 01.prepare.yml
-rw-rw-r--  1 root root   58 Apr 26 10:02 02.etcd.yml
-rw-rw-r--  1 root root  209 Apr 26 10:02 03.runtime.yml
-rw-rw-r--  1 root root  482 Apr 26 10:02 04.kube-master.yml
-rw-rw-r--  1 root root  218 Apr 26 10:02 05.kube-node.yml
-rw-rw-r--  1 root root  408 Apr 26 10:02 06.network.yml
-rw-rw-r--  1 root root   77 Apr 26 10:02 07.cluster-addon.yml
-rw-rw-r--  1 root root   34 Apr 26 10:02 10.ex-lb.yml
-rw-rw-r--  1 root root 3893 Apr 26 10:02 11.harbor.yml
-rw-rw-r--  1 root root 1567 Apr 26 10:02 21.addetcd.yml
-rw-rw-r--  1 root root 1520 Apr 26 10:02 22.addnode.yml
-rw-rw-r--  1 root root 1050 Apr 26 10:02 23.addmaster.yml
-rw-rw-r--  1 root root 3344 Apr 26 10:02 31.deletcd.yml
-rw-rw-r--  1 root root 1566 Apr 26 10:02 32.delnode.yml
-rw-rw-r--  1 root root 1620 Apr 26 10:02 33.delmaster.yml
-rw-rw-r--  1 root root 1891 Apr 26 10:02 90.setup.yml
-rw-rw-r--  1 root root 1054 Apr 26 10:02 91.start.yml
-rw-rw-r--  1 root root  934 Apr 26 10:02 92.stop.yml
-rw-rw-r--  1 root root 1042 Apr 26 10:02 93.upgrade.yml
-rw-rw-r--  1 root root 1786 Apr 26 10:02 94.backup.yml
-rw-rw-r--  1 root root  999 Apr 26 10:02 95.restore.yml
-rw-rw-r--  1 root root  337 Apr 26 10:02 99.clean.yml
部署01.prepare.yml
# [optional] to synchronize system time of nodes with 'chrony'
- hosts:
  - kube_master
  - kube_node
  - etcd
  #- ex_lb
  #- chrony
  #可以不用部署,报错不影响
  roles:
  - { role: os-harden, when: "OS_HARDEN|bool" }
  - { role: chrony, when: "groups['chrony']|length > 0" }

# to create CA, kubeconfig, kube-proxy.kubeconfig etc.
- hosts: localhost
  roles:
  - deploy

# prepare tasks for all nodes
- hosts:
  - kube_master
  - kube_node
  - etcd
  roles:
  - prepare


root@harbor:/etc/kubeasz# pwd
/etc/kubeasz
root@harbor:/etc/kubeasz# ./ezctl setup k8s-ywx 01
#全程无错误即可
部署02.etcd.yml
root@harbor:/etc/kubeasz# ./ezctl setup k8s-ywx 02
#全程无错误即可
部署03.runtime.yml
#将harbor-ca.crt的公钥拷贝到所有的k8s-master和k8s-node节点
vim /tmp/copy-file.sh
#!/bin/bash
#目标主机列表
IP="
172.168.33.207
172.168.33.208
172.168.33.209
172.168.33.210
172.168.33.211
172.168.33.212"

for node in ${IP};do
  ssh ${node} "mkdir -p /etc/docker/certs.d/harbor.ywx.net/"
  scp -r /apps/harbor/certs/harbor-ca.crt ${node}:/etc/docker/certs.d/harbor.ywx.net/ &> /dev/null
  if [ $? -eq 0 ];then
    echo "${node} 公钥copy完成"
  else
    echo "${node} 公钥copy失败"
  fi
done

root@harbor:/tmp# bash copy-file.sh
172.168.33.206 公钥copy完成
172.168.33.207 公钥copy完成
172.168.33.208 公钥copy完成
172.168.33.209 公钥copy完成
172.168.33.210 公钥copy完成
172.168.33.211 公钥copy完成
172.168.33.212 公钥copy完成

#把docker访问的habor的认证信息拷贝到master和node节点

cat >> /tmp/copy-file.sh << EOF
#!/bin/bash
#目标主机列表
IP="
172.168.33.207
172.168.33.208
172.168.33.209
172.168.33.210
172.168.33.211
172.168.33.212"

for node in ${IP};do
  ssh ${node} "mkdir -p /root/.docker"
  scp -r /root/.docker/config.json ${node}:/root/.docker/config.json &> /dev/null
  if [ $? -eq 0 ];then
    echo "${node} 公钥copy完成"
  else
    echo "${node} 公钥copy失败"
  fi
done
EOF


#部署runtime
root@harbor:/etc/kubeasz# ./ezctl setup k8s-ywx 03
#全程无错误即可
部署04.kube-master.yml
root@harbor:/etc/kubeasz# ./ezctl setup k8s-ywx 04
#全程无错误即可
部署05.kube-node.yml
root@harbor:/etc/kubeasz# ./ezctl setup k8s-ywx 05
#全程无错误即可
部署06.network.yml
root@harbor:/etc/kubeasz# ./ezctl setup k8s-ywx 06
#全程无错误即可
在k8s-master01上操作
root@k8s-master01:~# kubectl get nodes
NAME             STATUS                     ROLES    AGE    VERSION
172.168.33.207   Ready,SchedulingDisabled   master   7m9s   v1.21.0
172.168.33.208   Ready,SchedulingDisabled   master   7m9s   v1.21.0
172.168.33.209   Ready,SchedulingDisabled   master   7m9s   v1.21.0
172.168.33.210   Ready                      node     5m5s   v1.21.0
172.168.33.211   Ready                      node     5m5s   v1.21.0
172.168.33.212   Ready                      node     5m5s   v1.21.0

#查看网络
root@k8s-master01:~# kubectl get pods -A -o wide
NAMESPACE     NAME                                       READY   STATUS    RESTARTS   AGE   IP               NODE             NOMINATED NODE   READINESS GATES
kube-system   calico-kube-controllers-647f956d86-z5xjn   1/1     Running   0          87s   172.168.33.210   172.168.33.210   <none>           <none>
kube-system   calico-node-5hz67                          1/1     Running   0          87s   172.168.33.209   172.168.33.209   <none>           <none>
kube-system   calico-node-7f2kc                          1/1     Running   0          87s   172.168.33.207   172.168.33.207   <none>           <none>
kube-system   calico-node-ccv26                          1/1     Running   0          87s   172.168.33.210   172.168.33.210   <none>           <none>
kube-system   calico-node-r4kvx                          1/1     Running   0          87s   172.168.33.208   172.168.33.208   <none>           <none>
kube-system   calico-node-rqm8f                          1/1     Running   0          87s   172.168.33.212   172.168.33.212   <none>           <none>
kube-system   calico-node-vjm2k                          1/1     Running   0          87s   172.168.33.211   172.168.33.211   <none>           <none>
在k8s-master01上部署coredns
#coredns的yaml文件
apiVersion: v1
kind: ServiceAccount
metadata:
  name: coredns
  namespace: kube-system
---
apiVersion: rbac.authorization.k8s.io/v1
kind: ClusterRole
metadata:
  labels:
    kubernetes.io/bootstrapping: rbac-defaults
  name: system:coredns
rules:
  - apiGroups:
    - ""
    resources:
    - endpoints
    - services
    - pods
    - namespaces
    verbs:
    - list
    - watch
  - apiGroups:
    - discovery.k8s.io
    resources:
    - endpointslices
    verbs:
    - list
    - watch
---
apiVersion: rbac.authorization.k8s.io/v1
kind: ClusterRoleBinding
metadata:
  annotations:
    rbac.authorization.kubernetes.io/autoupdate: "true"
  labels:
    kubernetes.io/bootstrapping: rbac-defaults
  name: system:coredns
roleRef:
  apiGroup: rbac.authorization.k8s.io
  kind: ClusterRole
  name: system:coredns
subjects:
- kind: ServiceAccount
  name: coredns
  namespace: kube-system
---
apiVersion: v1
kind: ConfigMap
metadata:
  name: coredns
  namespace: kube-system
data:
  Corefile: |
    .:53 {
        errors
        health {
          lameduck 5s
        }
        bind 0.0.0.0
        ready
        #DNS_DOMAIN为clusters/k8s-ywx/hosts 配置中的CLUSTER_DNS_DOMAIN
        kubernetes cluster.local in-addr.arpa ip6.arpa {
          fallthrough in-addr.arpa ip6.arpa
        }
        prometheus :9153
        #/etc/resolv.conf可以改为公司或者其它的DNS地址
        forward . /etc/resolv.conf {
          max_concurrent 1000
        }
        cache 30
        loop
        reload
        loadbalance
    }
---
apiVersion: apps/v1
kind: Deployment
metadata:
  name: coredns
  namespace: kube-system
  labels:
    k8s-app: kube-dns
    kubernetes.io/name: "CoreDNS"
spec:
  # replicas: not specified here:
  # 1. Default is 1.
  # 2. Will be tuned in real time if DNS horizontal auto-scaling is turned on.
  strategy:
    type: RollingUpdate
    rollingUpdate:
      maxUnavailable: 1
  selector:
    matchLabels:
      k8s-app: kube-dns
  template:
    metadata:
      labels:
        k8s-app: kube-dns
    spec:
      priorityClassName: system-cluster-critical
      serviceAccountName: coredns
      tolerations:
        - key: "CriticalAddonsOnly"
          operator: "Exists"
      nodeSelector:
        kubernetes.io/os: linux
      affinity:
         podAntiAffinity:
           preferredDuringSchedulingIgnoredDuringExecution:
           - weight: 100
             podAffinityTerm:
               labelSelector:
                 matchExpressions:
                   - key: k8s-app
                     operator: In
                     values: ["kube-dns"]
               topologyKey: kubernetes.io/hostname
      containers:
      - name: coredns
        #image: coredns/coredns:1.8.3
        #从harbor仓库拉取镜像文件
        image: harbor.ywx.net/k8s-baseimages/coredns:1.8.3
        imagePullPolicy: IfNotPresent
        resources:
          limits:
            memory: 170Mi
          requests:
            cpu: 100m
            memory: 70Mi
        args: [ "-conf", "/etc/coredns/Corefile" ]
        volumeMounts:
        - name: config-volume
          mountPath: /etc/coredns
          readOnly: true
        ports:
        - containerPort: 53
          name: dns
          protocol: UDP
        - containerPort: 53
          name: dns-tcp
          protocol: TCP
        - containerPort: 9153
          name: metrics
          protocol: TCP
        securityContext:
          allowPrivilegeEscalation: false
          capabilities:
            add:
            - NET_BIND_SERVICE
            drop:
            - all
          readOnlyRootFilesystem: true
        livenessProbe:
          httpGet:
            path: /health
            port: 8080
            scheme: HTTP
          initialDelaySeconds: 60
          timeoutSeconds: 5
          successThreshold: 1
          failureThreshold: 5
        readinessProbe:
          httpGet:
            path: /ready
            port: 8181
            scheme: HTTP
      dnsPolicy: Default
      volumes:
        - name: config-volume
          configMap:
            name: coredns
            items:
            - key: Corefile
              path: Corefile
---
apiVersion: v1
kind: Service
metadata:
  name: kube-dns
  namespace: kube-system
  annotations:
    prometheus.io/port: "9153"
    prometheus.io/scrape: "true"
  labels:
    k8s-app: kube-dns
    kubernetes.io/cluster-service: "true"
    kubernetes.io/name: "CoreDNS"
spec:
  type: NodePort
  selector:
    k8s-app: kube-dns
  clusterIP: 10.68.0.2  #为server CIDR的第二个ip地址
  ports:
  - name: dns
    port: 53
    protocol: UDP
  - name: dns-tcp
    port: 53
    protocol: TCP
  - name: metrics
    port: 9153
    protocol: TCP
    targetPort: 9153
    nodePort: 30009
执行coredns.yaml文件
root@k8s-master01:/apps/k8s-yaml# kubectl apply -f coredns.yaml
serviceaccount/coredns created
clusterrole.rbac.authorization.k8s.io/system:coredns created
clusterrolebinding.rbac.authorization.k8s.io/system:coredns created
configmap/coredns created
deployment.apps/coredns created
service/kube-dns created
#查看coredns的部署
root@k8s-master01:/apps/k8s-yaml# kubectl get pod -A -o wide | grep coredns
kube-system   coredns-55d54f7cfb-fg5jf                   1/1     Running   0          105s   172.20.135.129   172.168.33.212   <none>           <none>

#测试在test01容器中可以ping通域名
root@k8s-master01:/apps/k8s-yaml# kubectl run test01 --image=alpine sleep 999999
root@k8s-master01:/apps/k8s-yaml# kubectl exec -it test01 -- sh
/ # ping www.baidu.com
PING www.baidu.com (14.215.177.39): 56 data bytes
64 bytes from 14.215.177.39: seq=0 ttl=53 time=34.848 ms
64 bytes from 14.215.177.39: seq=1 ttl=53 time=35.722 ms
^C
--- www.baidu.com ping statistics ---
2 packets transmitted, 2 packets received, 0% packet loss
round-trip min/avg/max = 34.848/35.285/35.722 ms

/ # ping kubernetes
PING kubernetes (10.68.0.1): 56 data bytes
64 bytes from 10.68.0.1: seq=0 ttl=64 time=0.077 ms
64 bytes from 10.68.0.1: seq=1 ttl=64 time=0.085 ms
^C
--- kubernetes ping statistics ---
2 packets transmitted, 2 packets received, 0% packet loss
round-trip min/avg/max = 0.077/0.081/0.085 ms
#dashboard-v2.3.1.yaml

# Copyright 2017 The Kubernetes Authors.
#
# Licensed under the Apache License, Version 2.0 (the "License");
# you may not use this file except in compliance with the License.
# You may obtain a copy of the License at
#
#     http://www.apache.org/licenses/LICENSE-2.0
#
# Unless required by applicable law or agreed to in writing, software
# distributed under the License is distributed on an "AS IS" BASIS,
# WITHOUT WARRANTIES OR CONDITIONS OF ANY KIND, either express or implied.
# See the License for the specific language governing permissions and
# limitations under the License.

apiVersion: v1
kind: Namespace
metadata:
  name: kubernetes-dashboard

---

apiVersion: v1
kind: ServiceAccount
metadata:
  labels:
    k8s-app: kubernetes-dashboard
  name: kubernetes-dashboard
  namespace: kubernetes-dashboard

---

kind: Service
apiVersion: v1
metadata:
  labels:
    k8s-app: kubernetes-dashboard
  name: kubernetes-dashboard
  namespace: kubernetes-dashboard
spec:
  type: NodePort
  ports:
    - port: 443
      targetPort: 8443
      nodePort: 30002
  selector:
    k8s-app: kubernetes-dashboard

---

apiVersion: v1
kind: Secret
metadata:
  labels:
    k8s-app: kubernetes-dashboard
  name: kubernetes-dashboard-certs
  namespace: kubernetes-dashboard
type: Opaque

---

apiVersion: v1
kind: Secret
metadata:
  labels:
    k8s-app: kubernetes-dashboard
  name: kubernetes-dashboard-csrf
  namespace: kubernetes-dashboard
type: Opaque
data:
  csrf: ""

---

apiVersion: v1
kind: Secret
metadata:
  labels:
    k8s-app: kubernetes-dashboard
  name: kubernetes-dashboard-key-holder
  namespace: kubernetes-dashboard
type: Opaque

---

kind: ConfigMap
apiVersion: v1
metadata:
  labels:
    k8s-app: kubernetes-dashboard
  name: kubernetes-dashboard-settings
  namespace: kubernetes-dashboard

---

kind: Role
apiVersion: rbac.authorization.k8s.io/v1
metadata:
  labels:
    k8s-app: kubernetes-dashboard
  name: kubernetes-dashboard
  namespace: kubernetes-dashboard
rules:
  # Allow Dashboard to get, update and delete Dashboard exclusive secrets.
  - apiGroups: [""]
    resources: ["secrets"]
    resourceNames: ["kubernetes-dashboard-key-holder", "kubernetes-dashboard-certs", "kubernetes-dashboard-csrf"]
    verbs: ["get", "update", "delete"]
    # Allow Dashboard to get and update 'kubernetes-dashboard-settings' config map.
  - apiGroups: [""]
    resources: ["configmaps"]
    resourceNames: ["kubernetes-dashboard-settings"]
    verbs: ["get", "update"]
    # Allow Dashboard to get metrics.
  - apiGroups: [""]
    resources: ["services"]
    resourceNames: ["heapster", "dashboard-metrics-scraper"]
    verbs: ["proxy"]
  - apiGroups: [""]
    resources: ["services/proxy"]
    resourceNames: ["heapster", "http:heapster:", "https:heapster:", "dashboard-metrics-scraper", "http:dashboard-metrics-scraper"]
    verbs: ["get"]

---

kind: ClusterRole
apiVersion: rbac.authorization.k8s.io/v1
metadata:
  labels:
    k8s-app: kubernetes-dashboard
  name: kubernetes-dashboard
rules:
  # Allow Metrics Scraper to get metrics from the Metrics server
  - apiGroups: ["metrics.k8s.io"]
    resources: ["pods", "nodes"]
    verbs: ["get", "list", "watch"]

---

apiVersion: rbac.authorization.k8s.io/v1
kind: RoleBinding
metadata:
  labels:
    k8s-app: kubernetes-dashboard
  name: kubernetes-dashboard
  namespace: kubernetes-dashboard
roleRef:
  apiGroup: rbac.authorization.k8s.io
  kind: Role
  name: kubernetes-dashboard
subjects:
  - kind: ServiceAccount
    name: kubernetes-dashboard
    namespace: kubernetes-dashboard

---

apiVersion: rbac.authorization.k8s.io/v1
kind: ClusterRoleBinding
metadata:
  name: kubernetes-dashboard
roleRef:
  apiGroup: rbac.authorization.k8s.io
  kind: ClusterRole
  name: kubernetes-dashboard
subjects:
  - kind: ServiceAccount
    name: kubernetes-dashboard
    namespace: kubernetes-dashboard

---

kind: Deployment
apiVersion: apps/v1
metadata:
  labels:
    k8s-app: kubernetes-dashboard
  name: kubernetes-dashboard
  namespace: kubernetes-dashboard
spec:
  replicas: 1
  revisionHistoryLimit: 10
  selector:
    matchLabels:
      k8s-app: kubernetes-dashboard
  template:
    metadata:
      labels:
        k8s-app: kubernetes-dashboard
    spec:
      containers:
        - name: kubernetes-dashboard
          image: kubernetesui/dashboard:v2.3.1
          imagePullPolicy: Always
          ports:
            - containerPort: 8443
              protocol: TCP
          args:
            - --auto-generate-certificates
            - --namespace=kubernetes-dashboard
            - --token-ttl=43200
            # Uncomment the following line to manually specify Kubernetes API server Host
            # If not specified, Dashboard will attempt to auto discover the API server and connect
            # to it. Uncomment only if the default does not work.
            # - --apiserver-host=http://my-address:port
          volumeMounts:
            - name: kubernetes-dashboard-certs
              mountPath: /certs
              # Create on-disk volume to store exec logs
            - mountPath: /tmp
              name: tmp-volume
          livenessProbe:
            httpGet:
              scheme: HTTPS
              path: /
              port: 8443
            initialDelaySeconds: 30
            timeoutSeconds: 30
          securityContext:
            allowPrivilegeEscalation: false
            readOnlyRootFilesystem: true
            runAsUser: 1001
            runAsGroup: 2001
      volumes:
        - name: kubernetes-dashboard-certs
          secret:
            secretName: kubernetes-dashboard-certs
        - name: tmp-volume
          emptyDir: {}
      serviceAccountName: kubernetes-dashboard
      nodeSelector:
        "kubernetes.io/os": linux
      # Comment the following tolerations if Dashboard must not be deployed on master
      tolerations:
        - key: node-role.kubernetes.io/master
          effect: NoSchedule

---

kind: Service
apiVersion: v1
metadata:
  labels:
    k8s-app: dashboard-metrics-scraper
  name: dashboard-metrics-scraper
  namespace: kubernetes-dashboard
spec:
  ports:
    - port: 8000
      targetPort: 8000
  selector:
    k8s-app: dashboard-metrics-scraper

---

kind: Deployment
apiVersion: apps/v1
metadata:
  labels:
    k8s-app: dashboard-metrics-scraper
  name: dashboard-metrics-scraper
  namespace: kubernetes-dashboard
spec:
  replicas: 1
  revisionHistoryLimit: 10
  selector:
    matchLabels:
      k8s-app: dashboard-metrics-scraper
  template:
    metadata:
      labels:
        k8s-app: dashboard-metrics-scraper
      annotations:
        seccomp.security.alpha.kubernetes.io/pod: 'runtime/default'
    spec:
      containers:
        - name: dashboard-metrics-scraper
          image: kubernetesui/metrics-scraper:v1.0.6
          ports:
            - containerPort: 8000
              protocol: TCP
          livenessProbe:
            httpGet:
              scheme: HTTP
              path: /
              port: 8000
            initialDelaySeconds: 30
            timeoutSeconds: 30
          volumeMounts:
          - mountPath: /tmp
            name: tmp-volume
          securityContext:
            allowPrivilegeEscalation: false
            readOnlyRootFilesystem: true
            runAsUser: 1001
            runAsGroup: 2001
      serviceAccountName: kubernetes-dashboard
      nodeSelector:
        "kubernetes.io/os": linux
      # Comment the following tolerations if Dashboard must not be deployed on master
      tolerations:
        - key: node-role.kubernetes.io/master
          effect: NoSchedule
      volumes:
        - name: tmp-volume
          emptyDir: {}
执行dashboard-v2.3.1.yaml
root@k8s-master01:/apps/k8s-yaml# kubectl apply -f dashboard-v2.3.1.yaml
namespace/kubernetes-dashboard created
serviceaccount/kubernetes-dashboard created
service/kubernetes-dashboard created
secret/kubernetes-dashboard-certs created
secret/kubernetes-dashboard-csrf created
secret/kubernetes-dashboard-key-holder created
configmap/kubernetes-dashboard-settings created
role.rbac.authorization.k8s.io/kubernetes-dashboard created
clusterrole.rbac.authorization.k8s.io/kubernetes-dashboard created
rolebinding.rbac.authorization.k8s.io/kubernetes-dashboard created
clusterrolebinding.rbac.authorization.k8s.io/kubernetes-dashboard created
deployment.apps/kubernetes-dashboard created
service/dashboard-metrics-scraper created
deployment.apps/dashboard-metrics-scraper created

root@k8s-master01:/apps/k8s-yaml# kubectl get pod -A | grep dashboard
kubernetes-dashboard   dashboard-metrics-scraper-856586f554-p5db2   1/1     Running   0          3m59s
kubernetes-dashboard   kubernetes-dashboard-79b875f7f8-phwtv        1/1     Running   0          3m59s

root@k8s-master01:/apps/k8s-yaml# kubectl get svc  -A
NAMESPACE              NAME                        TYPE        CLUSTER-IP     EXTERNAL-IP   PORT(S)                                    AGE
default                kubernetes                  ClusterIP   10.68.0.1      <none>        443/TCP                                    17h
kube-system            kube-dns                    NodePort    10.68.0.2      <none>        53:32211/UDP,53:32211/TCP,9153:30009/TCP   40m
kubernetes-dashboard   dashboard-metrics-scraper   ClusterIP   10.68.62.179   <none>        8000/TCP                                   5m19s
kubernetes-dashboard   kubernetes-dashboard        NodePort    10.68.145.21   <none>        443:30002/TCP                              5m20s
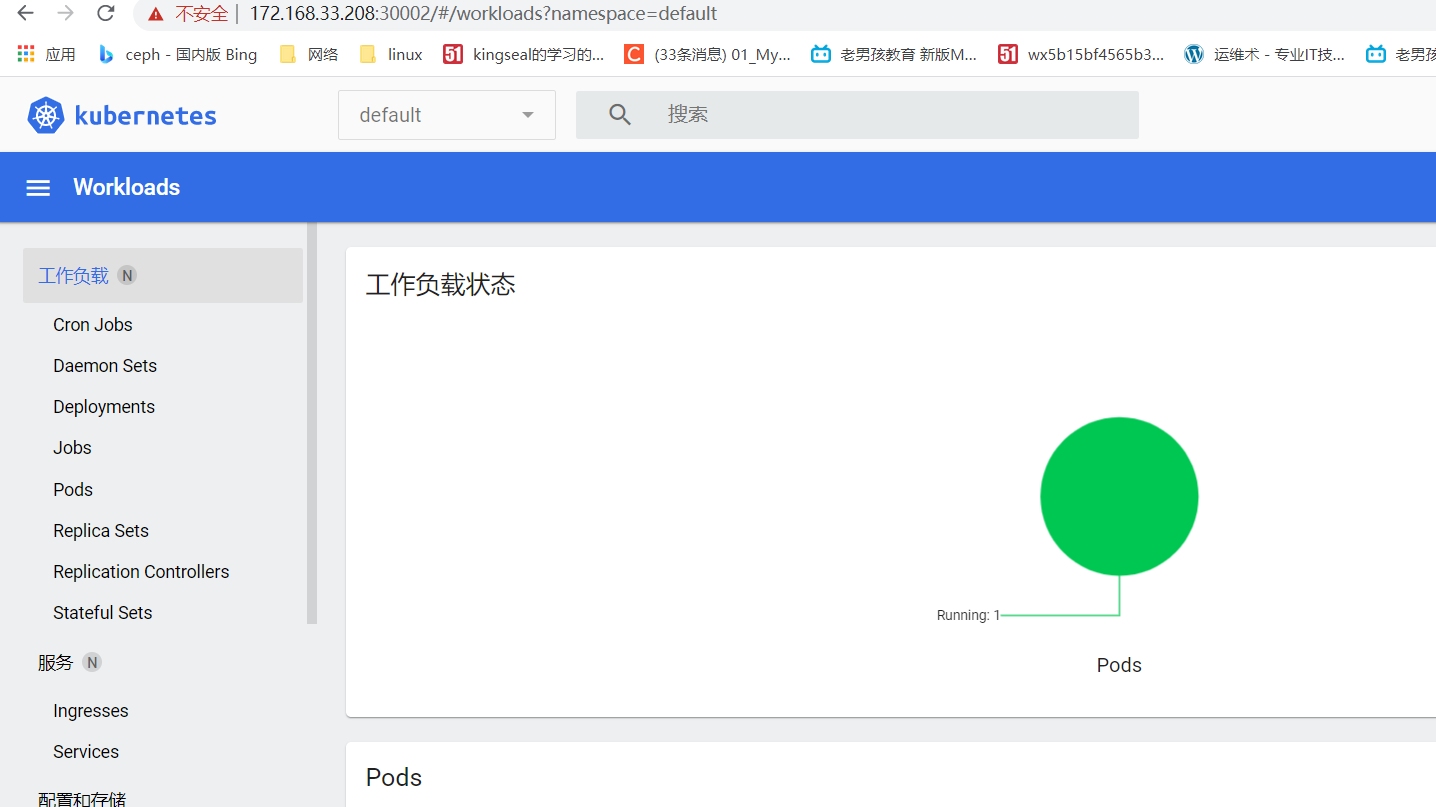
访问dashboard https://172.168.33.208:30002

登录dashboard
#配置dashboard的用户权限admin-user.yml
apiVersion: v1
kind: ServiceAccount
metadata:
  name: admin-user
  namespace: kubernetes-dashboard

---
apiVersion: rbac.authorization.k8s.io/v1
kind: ClusterRoleBinding
metadata:
  name: admin-user
roleRef:
  apiGroup: rbac.authorization.k8s.io
  kind: ClusterRole
  name: cluster-admin
subjects:
- kind: ServiceAccount
  name: admin-user
  namespace: kubernetes-dashboard

#执行admin-user.yml文件
root@k8s-master01:/apps/k8s-yaml# kubectl apply -f admin-user.yml
serviceaccount/admin-user created
clusterrolebinding.rbac.authorization.k8s.io/admin-user created

root@k8s-master01:/apps/k8s-yaml# kubectl get secrets -A | grep kubernetes-dashboard
kubernetes-dashboard   admin-user-token-9zxdl                           kubernetes.io/service-account-token   3      58s
kubernetes-dashboard   default-token-9wjpb                              kubernetes.io/service-account-token   3      21m
kubernetes-dashboard   kubernetes-dashboard-certs                       Opaque                                0      21m
kubernetes-dashboard   kubernetes-dashboard-csrf                        Opaque                                1      21m
kubernetes-dashboard   kubernetes-dashboard-key-holder                  Opaque                                2      21m
kubernetes-dashboard   kubernetes-dashboard-token-g84nz                 kubernetes.io/service-account-token   3      21m

#查看admin-user用户的token信息

root@k8s-master01:/apps/k8s-yaml# kubectl describe secrets admin-user-token-9zxdl -n kubernetes-dashboard
Name:         admin-user-token-9zxdl
Namespace:    kubernetes-dashboard
Labels:       <none>
Annotations:  kubernetes.io/service-account.name: admin-user
              kubernetes.io/service-account.uid: a54bdd60-5116-4827-99e5-7e3dd5fb6400

Type:  kubernetes.io/service-account-token

Data
====
ca.crt:     1350 bytes
namespace:  20 bytes
token:      eyJhbGciOiJSUzI1NiIsImtpZCI6InYyWDRVcktKczh1WVJBWUlXcWFZQVdWV1l4a2FwMXRGRURrMGV2RUxmaUUifQ.eyJpc3MiOiJrdWJlcm5ldGVzL3NlcnZpY2VhY2NvdW50Iiwia3ViZXJuZXRlcy5pby9zZXJ2aWNlYWNjb3VudC9uYW1lc3BhY2UiOiJrdWJlcm5ldGVzLWRhc2hib2FyZCIsImt1YmVybmV0ZXMuaW8vc2VydmljZWFjY291bnQvc2VjcmV0Lm5hbWUiOiJhZG1pbi11c2VyLXRva2VuLTl6eGRsIiwia3ViZXJuZXRlcy5pby9zZXJ2aWNlYWNjb3VudC9zZXJ2aWNlLWFjY291bnQubmFtZSI6ImFkbWluLXVzZXIiLCJrdWJlcm5ldGVzLmlvL3NlcnZpY2VhY2NvdW50L3NlcnZpY2UtYWNjb3VudC51aWQiOiJhNTRiZGQ2MC01MTE2LTQ4MjctOTllNS03ZTNkZDVmYjY0MDAiLCJzdWIiOiJzeXN0ZW06c2VydmljZWFjY291bnQ6a3ViZXJuZXRlcy1kYXNoYm9hcmQ6YWRtaW4tdXNlciJ9.nvqQhGhRAj7dGNbGYn6_6uE0ArDzNvHEMiPh-TGVyY5BRceNvUxKw8IYzcxY_l0v0myNiJ4G1r1Wrqnjlj9TcQx4K2X8xiv8iJCh014u_2_SCTVc12Ptl2uj3ozEbZqwlehxR4sIvf_aBkSzQeIJU5XcJ64Y7TM8DeQl3DGqRDEULvdpIuMR44I_1F80mr2Vu8s9WCsY727x6TwRZjg5FClnbrW8_P3cnH3tMFZoluDiT71MGIc_5PvngS8c8VLID-cfFj-wmXYu1NOGWT6vQuO5a5HaUbFnSYCPFvNV2STU0Fbs3TqvPJYrdRdfFomL7m-NNYQzM_IlLQcvJg2WEw


#将token信息输入dashboard登录页面