架构师成长之路3.1-Cobber原理及部署
Cobbler是一个Linux服务器安装的服务,可以通过网络启动(PXE)的方式来快速安装、重装物理服务器和虚拟机,同时还可以管理DHCP,DNS等。
Cobbler 使用 Python 开发,小巧轻便。( 号称是补鞋匠都能学会的工具 )
Cobbler可以使用命令行方式管理,也提供了基于Web的界面管理工具(cobbler-web),还提供了API接口,可以方便二次开发使用。
Cobbler是较早前的kickstart的升级版,优点是比较容易配置,还自带web界面比较易于管理。
Cobbler内置了一个轻量级配置管理系统,但它也支持和其它配置管理系统集成,如Puppet,暂时不支持SaltStack。
1.Cobbler功能
使用Cobbler,您无需进行人工干预即可安装机器。Cobbler设置一个PXE引导环境(它还可以使用yaboot支持PowerPC),并 控制与安装相关的所有方面,比如网络引导服务(DHCP和TFTP)与存储库镜像。当希望安装一台新机器时,Cobbler可以:
- 使用一个以前定义的模板来配置DHCP服务(如果启用了管理DHCP)。
- 将一个存储库(yum或rsync)建立镜像或解压缩一个媒介,以注册一个新操作系统。
- 在DHCP配置文件中为需要安装的机器创建一个条目,并使用指定的参数(IP和MAC)。
- 在TFTP服务目录下创建适当的PXE文件。
- 重新启动DHCP服务来反应新的更改。
- 重新启动机器以开始安装(如果电源管理已启动)。
2 安装cobbler
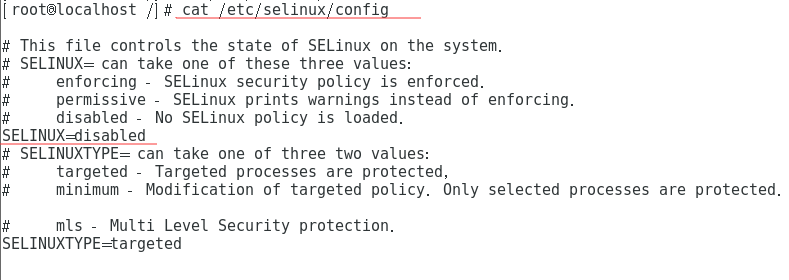
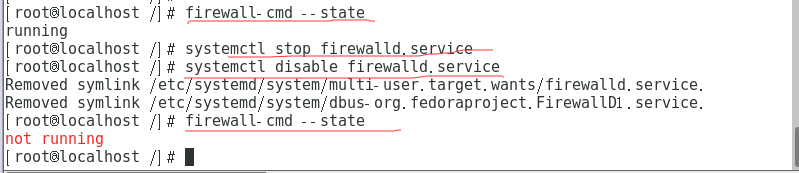
2.1 关闭关闭 SELinux 、iptables
一定要关闭,否则安装一定会出问题。
vi /etc/selinux/config #将SELINUX=enforcing改为SELINUX=disabled 设置后需要重启才能生效

firewall-cmd --state    #查看默认防火墙状态,关闭后显示not running,开启后显示running
systemctl stop firewalld.service    #临时关闭firewall
systemctl disable firewalld.service #禁止firewall开机启动
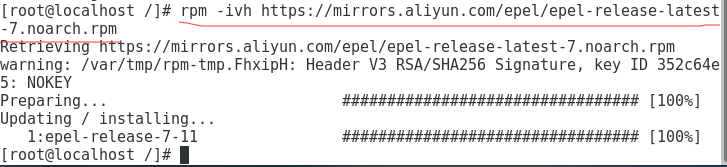
2.2 支撑环境安装
rpm -ivh https://mirrors.aliyun.com/epel/epel-release-latest-7.noarch.rpm
yum -y install cobbler httpd rsync tftp-server xinetd dhcp pykickstart fence-agents
安装完成后将在/etc/yum.repos.d 下面生成一个epel.repo文件


[epel]
name=Extra Packages for Enterprise Linux 7 - $basearch
#baseurl=http://download.fedoraproject.org/pub/epel/7/$basearch
metalink=https://mirrors.fedoraproject.org/metalink?repo=epel-7&arch=$basearch
failovermethod=priority
enabled=1
gpgcheck=1
gpgkey=file:///etc/pki/rpm-gpg/RPM-GPG-KEY-EPEL-7

[epel-debuginfo]
name=Extra Packages for Enterprise Linux 7 - $basearch - Debug
#baseurl=http://download.fedoraproject.org/pub/epel/7/$basearch/debug
metalink=https://mirrors.fedoraproject.org/metalink?repo=epel-debug-7&arch=$basearch
failovermethod=priority
enabled=0
gpgkey=file:///etc/pki/rpm-gpg/RPM-GPG-KEY-EPEL-7
gpgcheck=1

[epel-source]
name=Extra Packages for Enterprise Linux 7 - $basearch - Source
#baseurl=http://download.fedoraproject.org/pub/epel/7/SRPMS
metalink=https://mirrors.fedoraproject.org/metalink?repo=epel-source-7&arch=$basearch
failovermethod=priority
enabled=0
gpgkey=file:///etc/pki/rpm-gpg/RPM-GPG-KEY-EPEL-7
gpgcheck=1


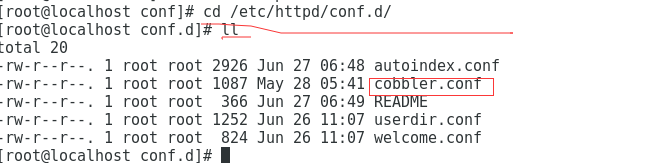
此时安装cobbler-web会在生成/etc/httpd/conf.d/生成cobbler.conf文件

# This configuration file allows cobbler data
# to be accessed over HTTP.

AliasMatch ^/cblr(?!/svc/)(.*)?$ "/var/www/cobbler$1"   #别名匹配
AliasMatch ^/cobbler_track(.*)?$ "/var/www/cobbler$1"
#AliasMatch ^/cobbler(.*)?$ "/var/www/cobbler$1"
Alias /cobbler /var/www/cobbler      #设置别名
Alias /cobbler_webui_content /var/www/cobbler_webui_content  #设置别名

WSGIScriptAliasMatch ^/cblr/svc/([^/]*) /var/www/cobbler/svc/services.py

<Directory "/var/www/cobbler">        #设置目录
    SetEnv VIRTUALENV
    Options Indexes FollowSymLinks
    Order allow,deny
    Allow from all
</Directory>

ProxyRequests off

ProxyPass /cobbler_api http://127.0.0.1:25151/       #设置代理,本机代理
ProxyPassReverse /cobbler_api http://127.0.0.1:25151/

BrowserMatch "MSIE" AuthDigestEnableQueryStringHack=On

# the webui is now part of the "cobbler-web" package
# and is visited at http://.../cobbler_web not this URL.
# this is only a pointer to the new page.

<Directory "/var/www/cobbler/web/">
    Options Indexes FollowSymLinks
    Order allow,deny
    Allow from all
</Directory>

<IfVersion >= 2.4>
    <Location /cblr>
	Require all granted
    </Location>
</IfVersion>
2.3 启动http与cobbler,,, 检查cobbler
systemctl start httpd
systemctl start cobblerd

cobbler check #检查cobbler,告诉你完成cobbler需要完成以下7步骤
The following are potential configuration items that you may want to fix:

1 : The 'server' field in /etc/cobbler/settings must be set to something other than localhost, or kickstarting features will not work.  This should be a resolvable hostname or IP for the boot server as reachable by all machines that will use it.
2 : For PXE to be functional, the 'next_server' field in /etc/cobbler/settings must be set to something other than 127.0.0.1, and should match the IP of the boot server on the PXE network.
3 : change 'disable' to 'no' in /etc/xinetd.d/tftp
4 : Some network boot-loaders are missing from /var/lib/cobbler/loaders, you may run 'cobbler get-loaders' to download them, or, if you only want to handle x86/x86_64 netbooting, you may ensure that you have installed a *recent* version of the syslinux package installed and can ignore this message entirely.  Files in this directory, should you want to support all architectures, should include pxelinux.0, menu.c32, elilo.efi, and yaboot. The 'cobbler get-loaders' command is the easiest way to resolve these requirements.
5 : enable and start rsyncd.service with systemctl
6 : debmirror package is not installed, it will be required to manage debian deployments and repositories
7 : The default password used by the sample templates for newly installed machines (default_password_crypted in /etc/cobbler/settings) is still set to 'cobbler' and should be changed, try: "openssl passwd -1 -salt 'random-phrase-here' 'your-password-here'" to generate new one

Restart cobblerd and then run 'cobbler sync' to apply changes. # 最后一步很重要不要忘记
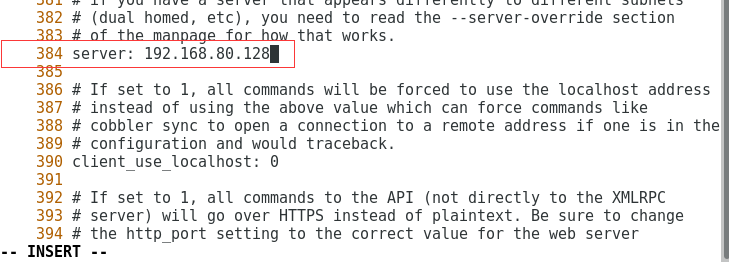
- 1.修改/etc/cobbler/settings文件中的server参数的值为提供cobbler服务的主机相应的IP地址或主机名.
- 2.修改/etc/cobbler/settings文件中的next_server参数的值为提供PXE服务的主机相应的IP地址
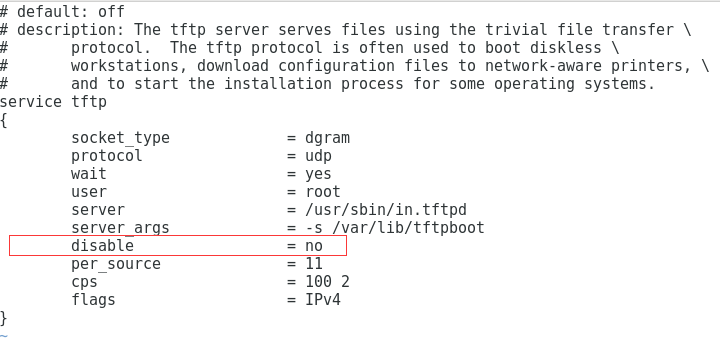
- 3.修改/etc/xinetd.d/tftp文件中的disable参数修改为 disable = no
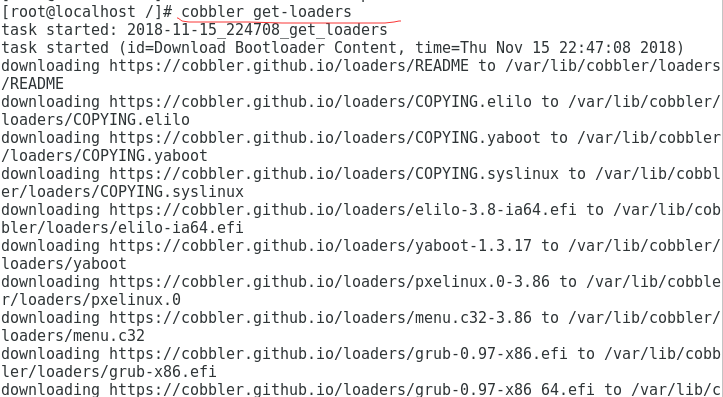
- 4.执行 cobbler get-loaders 命令即可上网上下载相关的文件;否则,需要安装syslinux程序包,而后复制/usr/share/syslinux/{pxelinux.0,memu.c32}等文件至/var/lib/cobbler/loaders/目录中
- 5.运行rsyncd.service服务
- 6.debmirror package没有安装,debian系统需要安装, 我们这里可以忽略。
- 7.生成密码来取代默认的密码,更安全,#据提示your-password-here,这里是自己的密码,random-phrase-here,这里是随机的干扰码
2.4 现在安装以上步骤一步一步安装cobbler
第一步:
vi /etc/cobbler/settings
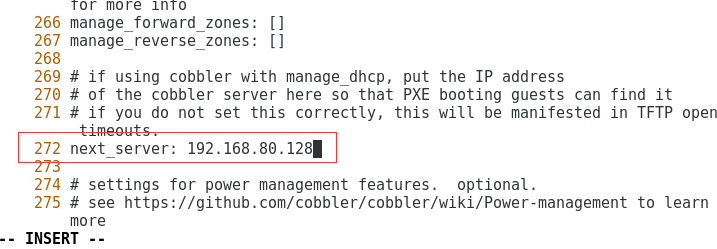
第二步:
第三步:
vi /etc/xinetd.d/tftp
第四步:
cobbler get-loaders
第五步:
systemctl start rsyncd

第六步: 不需要
第七步:
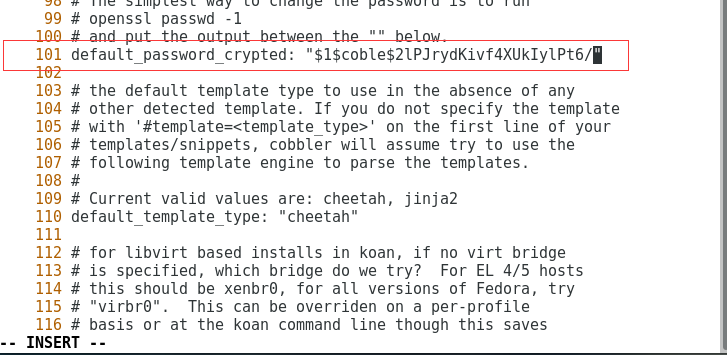
openssl passwd -1 -salt 'coble' 'cobler' # 运行会生成一串随机密码

vi /etc/cobbler/settings #将101行default_password_crypted后面的密码更换成上面的随机密码
重启一下,并cobbler check一下: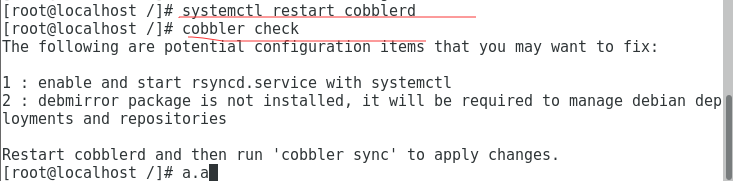
2.5 设置DHCP
第一步:
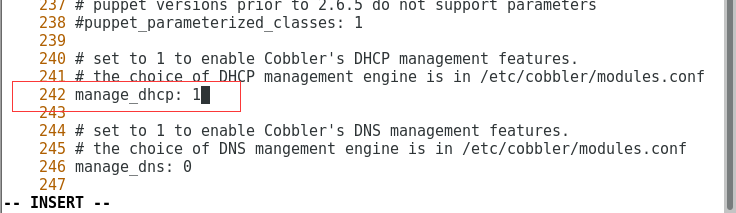
vi /etc/cobbler/settings #将242行manage_dhcp:0 变成 1
第二步:
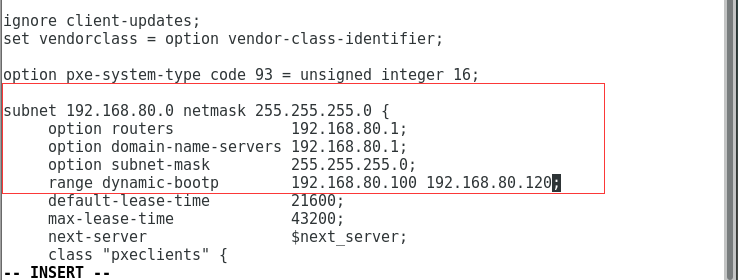
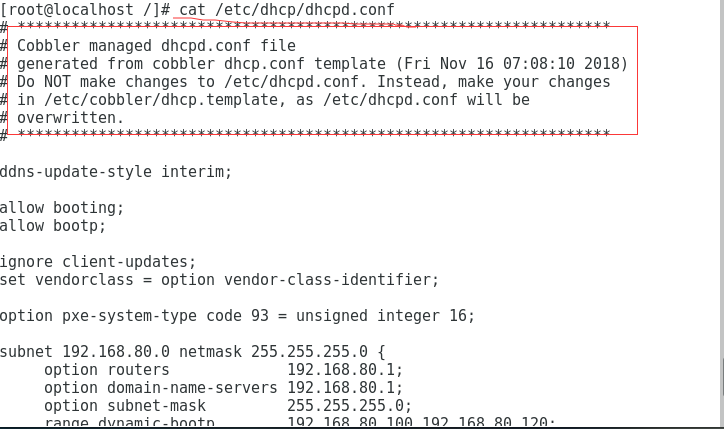
vi /etc/cobbler/dhcp.template # 修改模板文件
systemctl restart cobblerd
cobbler sync
task started: 2018-11-15_230808_sync
task started (id=Sync, time=Thu Nov 15 23:08:08 2018)
running pre-sync triggers
cleaning trees
removing: /var/lib/tftpboot/grub/images
copying bootloaders
trying hardlink /var/lib/cobbler/loaders/pxelinux.0 -> /var/lib/tftpboot/pxelinux.0
trying hardlink /var/lib/cobbler/loaders/menu.c32 -> /var/lib/tftpboot/menu.c32
trying hardlink /var/lib/cobbler/loaders/yaboot -> /var/lib/tftpboot/yaboot
trying hardlink /usr/share/syslinux/memdisk -> /var/lib/tftpboot/memdisk
trying hardlink /var/lib/cobbler/loaders/grub-x86.efi -> /var/lib/tftpboot/grub/grub-x86.efi
trying hardlink /var/lib/cobbler/loaders/grub-x86_64.efi -> /var/lib/tftpboot/grub/grub-x86_64.efi
copying distros to tftpboot
copying images
generating PXE configuration files
generating PXE menu structure
rendering DHCP files
generating /etc/dhcp/dhcpd.conf
rendering TFTPD files
generating /etc/xinetd.d/tftp
cleaning link caches
running post-sync triggers
running python triggers from /var/lib/cobbler/triggers/sync/post/*
running python trigger cobbler.modules.sync_post_restart_services
running: dhcpd -t -q
received on stdout:
received on stderr:
running: service dhcpd restart
received on stdout:
received on stderr: Redirecting to /bin/systemctl restart dhcpd.service

running shell triggers from /var/lib/cobbler/triggers/sync/post/*
running python triggers from /var/lib/cobbler/triggers/change/*
running python trigger cobbler.modules.scm_track
running shell triggers from /var/lib/cobbler/triggers/change/*
*** TASK COMPLETE ***
2.6 导入镜像
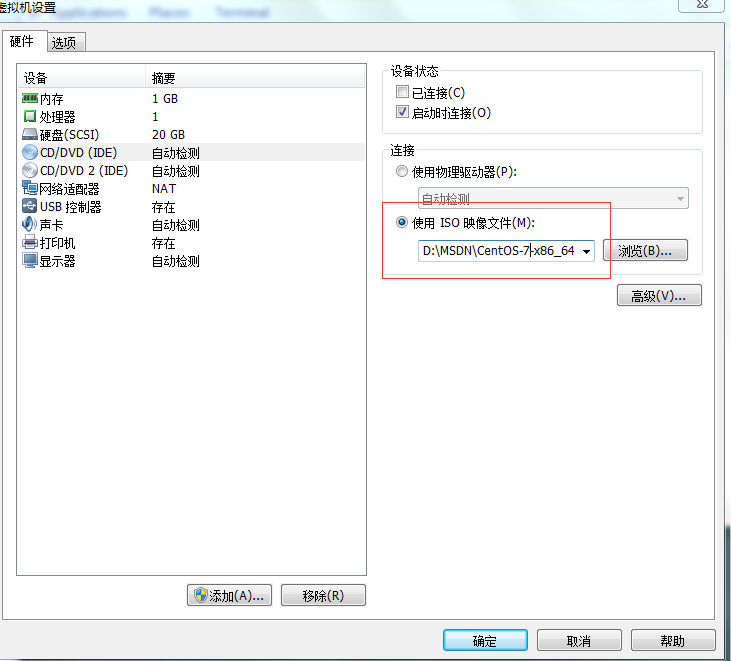
.....