shiro 可以做认证、授权、加密、会话管理、与web集成、缓存。
在本文中,主要使用认证和授权这两个功能。
在shiro框架中,有些很重要的概念:
Subject 很多人把它理解为当前用户,这只是subject的概念的一部分。官方文档上是这么说的,Security specific user ‘view’ of an application user. It can be a human being, a third-party process, a server connecting to you application application, or even a cron job. Basically, it is anything or anyone communicating with your application.就是想要与你的应用的通信的任何事务或者任何人。
Principals 一个subject 的标识,例如用户名、身份证
Credentials 通常用来验证一个subject的私密的数据,例如密码
Realms shiro 需要从realm中获取安全数据(用户、角色、权限)来验证用户是否合法。
1.搭建环境(web.xml和spring-shiro.xml)
在web.xml中需要配置shiro的过滤器。
<!-- shiro的filter -->
<filter>
  <filter-name>shiroFilter</filter-name>
  <filter-class>org.springframework.web.filter.DelegatingFilterProxy</filter-class>
  <init-param>
    <param-name>targetFilterLifecycle</param-name>
    <param-value>true</param-value>
  </init-param>
  <init-param>
    <param-name>targetBeanName</param-name>
    <param-value>shiroFilter</param-value>
  </init-param>
</filter>
<filter-mapping>
  <filter-name>shiroFilter</filter-name>
  <url-pattern>/*</url-pattern>
</filter-mapping>
在spring-shiro.xml中的配置如下:
<!-- 自定义域realm -->
<bean id="custom_Realm" class="com.test.realm.CustomRealm"></bean>
<!-- 安全管理器  ref对象-->
<bean id="securityManager" class="org.apache.shiro.web.mgt.DefaultWebSecurityManager">
    <property name="realm" ref="custom_Realm"/>
</bean>
<!-- shiro filter -->
<bean id="shiroFilter" class="org.apache.shiro.spring.web.ShiroFilterFactoryBean">
    <!-- 安全管理器必须的 -->
    <property name="securityManager" ref="securityManager"/>
    <!-- 身份认证失败   认证提交的地址 -->
    <property name="loginUrl" value="/index.jsp"/>
    <!-- 权限认证失败    没有权限认证提交的地址 -->
    <property name="unauthorizedUrl" value="/unauthorized.jsp"/>
    <!-- Shiro连接约束配置,即过滤链的定义 -->
    <property name="filterChainDefinitions">
        <value>
            <!-- 对静态资源设置匿名访问 -->
            /login = anon
            <!-- /** = authc 所有url都必须认证通过才可以访问 -->
            /admin* = authc
        </value>
    </property>
</bean>
<!-- Shiro生命周期处理器 -->
<bean id="lifecycleBeanPostProcessor" class="org.apache.shiro.spring.LifecycleBeanPostProcessor"></bean>
<bean class="org.apache.shiro.spring.security.interceptor.AuthorizationAttributeSourceAdvisor">
    <property name="securityManager" ref="securityManager"/>
</bean>


2.编写自定义的Realm类
public class CustomRealm extends AuthorizingRealm {
    @Resource
    private UserService  userService;
    private static final Logger logger = LoggerFactory.getLogger(CustomRealm.class);
    @Override
    protected AuthorizationInfo doGetAuthorizationInfo(PrincipalCollection principals) {
        logger.info("======用户授权认证======");
        String userName = principals.getPrimaryPrincipal().toString();
        SimpleAuthorizationInfo simpleAuthorizationInfo = new SimpleAuthorizationInfo();
        simpleAuthorizationInfo.setRoles(userService.queryRolesByName(userName));
        simpleAuthorizationInfo.setStringPermissions(userService.queryPermissonByName(userName));
        return simpleAuthorizationInfo;
    }

    @Override
    protected AuthenticationInfo doGetAuthenticationInfo(AuthenticationToken token) throws AuthenticationException {
        logger.info("======用户登陆认证======");
        String userName = token.getPrincipal().toString();
        User user = userService.findUserByUsername(userName);
        //System.out.println(user.getUsername());
        if (user!=null) {
            AuthenticationInfo authenticationInfo = new SimpleAuthenticationInfo(user.getUsername(), user.getPassword(), "test");
            return authenticationInfo;
        }
        return null;
    }
}
CustomRealm 类需要继承AuthorizingRealm类,并重写两个方法。
doGetAuthorizationInfo() 设置subject的授权和认可。
doGetAuthenticationInfo() 对subject进行认证。

3.编写登录方法
@RequestMapping("/login")
public  String Login(User user , Model model){
    Subject subject = SecurityUtils.getSubject();
    Session session = subject.getSession();
    UsernamePasswordToken usernamePasswordToken = new UsernamePasswordToken(user.getUsername(),user.getPassword());
    try{
        subject.login(usernamePasswordToken);
        if (subject.hasRole("admin")){
            return "admin";
        }else if(subject.hasRole("普通用户")){
            return "user";
        }
    }catch(Exception e){
       e.printStackTrace();
       return "index";
    }
    return "index";
}

4.进行测试

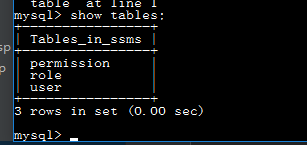
数据库;
在登录页面,输入不同角色的人,就会跳转到不同的页面。
5.shiro对jsp的支持
在jsp页面需要引入标签库
<%@ taglib prefix="shiro" uri="http://shiro.apache.org/tags" %>

在jsp页面,就可以使用shiro的标签。例如:
<shiro:hasRole name="普通用户"> 用户角色
</shiro:hasRole>
<shiro:principal></shiro:principal> 当前用户
<shiro:hasPermission name="user:create"> 用户权限
</shiro:hasPermission>