一、Logstash简介
Logstash 是一个实时数据收集引擎,可收集各类型数据并对其进行分析,过滤和归纳。按照自己条件分析过滤出符合数据导入到可视化界面。它可以实现多样化的数据源数据全量或增量传输,数据标准格式处理,数据格式化输出等的功能,常用于日志处理。工作流程分为三个阶段:
(1)input数据输入阶段,可接收oracle、mysql、postgresql、file等多种数据源;
(2)filter数据标准格式化阶段,可过滤、格式化数据,如格式化时间、字符串等;
(3)output数据输出阶段,可输出到elasticsearch、mongodb、kfka等接收终端。
二、下载
说明:由于我安装的Elasticsearch版本为6.3.1,因此我下载logstash版本为6.31
https://artifacts.elastic.co/downloads/logstash/logstash-6.3.1.tar.gz
解压:
[root@master mnt]# tar -zxvf logstash-6.3.1.tar.gz
[root@master mnt]# mv logstash-6.3.1 logstash
简单输出到控制台,观察是否安装成功:
[root@master bin]# ./logstash -e 'input { stdin { } } output { stdout {} }'
日志:
Sending Logstash's logs to /mnt/logstash/logs which is now configured via log4j2.properties
[2019-04-24T16:19:14,090][INFO ][logstash.setting.writabledirectory] Creating directory {:setting=>"path.queue", :path=>"/mnt/logstash/data/queue"}
[2019-04-24T16:19:14,111][INFO ][logstash.setting.writabledirectory] Creating directory {:setting=>"path.dead_letter_queue", :path=>"/mnt/logstash/data/dead_letter_queue"}
[2019-04-24T16:19:15,079][WARN ][logstash.config.source.multilocal] Ignoring the 'pipelines.yml' file because modules or command line options are specified
[2019-04-24T16:19:15,168][INFO ][logstash.agent           ] No persistent UUID file found. Generating new UUID {:uuid=>"1a5ca4ad-02a5-4f48-91d7-1373799f0fd2", :path=>"/mnt/logstash/data/uuid"}
[2019-04-24T16:19:16,754][INFO ][logstash.runner          ] Starting Logstash {"logstash.version"=>"6.3.1"}
[2019-04-24T16:19:22,045][INFO ][logstash.pipeline        ] Starting pipeline {:pipeline_id=>"main", "pipeline.workers"=>2, "pipeline.batch.size"=>125, "pipeline.batch.delay"=>50}
[2019-04-24T16:19:22,329][INFO ][logstash.pipeline        ] Pipeline started successfully {:pipeline_id=>"main", :thread=>"#<Thread:0x4eb0dbdb run>"}
The stdin plugin is now waiting for input:
[2019-04-24T16:19:22,503][INFO ][logstash.agent           ] Pipelines running {:count=>1, :running_pipelines=>[:main], :non_running_pipelines=>[]}
[2019-04-24T16:19:22,966][INFO ][logstash.agent           ] Successfully started Logstash API endpoint {:port=>9600}
输入:aaaaaaaa,发现安装成功
aaaaaaaaaa
{
       "message" => "aaaaaaaaaa",
          "host" => "master",
    "@timestamp" => 2019-04-24T08:21:07.403Z,
      "@version" => "1"
}
命令行参数:logstash命令
|
1
2
3
4
5
|
参数:执行 -e bin/logstash -e ''文件 --config 或 -f bin/logstash -f agent.conf测试 --configtest 或 -t 用来测试 Logstash 读取到的配置文件语法是否能正常解析。日志 --log 或 -l Logstash 默认输出日志到标准错误。生产环境下你可以通过 bin/logstash -l logs/logstash.log 命令来统一存储日志。 |
实例操作:
以输出到Elasticsearch为例:接收控制台输入,Logstash解析输出到ElasticSearch集群
[root@master bin]# cat test_es.conf
input{
        stdin{}
}
output{
        elasticsearch{
                hosts=>["192.168.200.100:9200"]
                index=>"testeslogstash"
        }
        stdout{codec=>rubydebug}
}
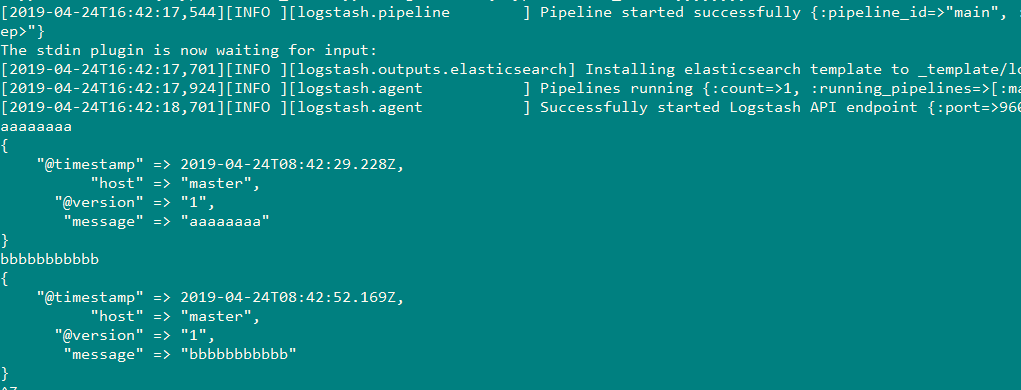
运行:
[root@master bin]# ./logstash -f /mnt/logstash/bin/test_es.conf

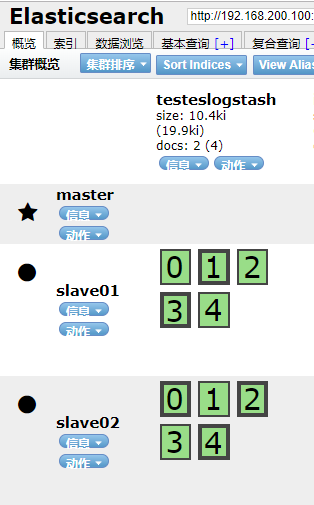
结果:


所以搭建成功。