微服务架构近年来非常的火,阿里 的dubbo 是其中的一种解决方案。

dubbo 的微服务主要分为以下几部分:
1.注册中心
2.服务提供者
3.消费者
4.监控平台
1.一般流程服务提供者向注册中心注册服务。
2.客户端向注册中心请求服务。
3.注册中心通知客户端访问提供者。
4.监控负责服务是否可用。
1.注册中心的安装
就是安装zookeeper ,为了测试我们可以简单的安装一台就好,也可以安装多台做集群。
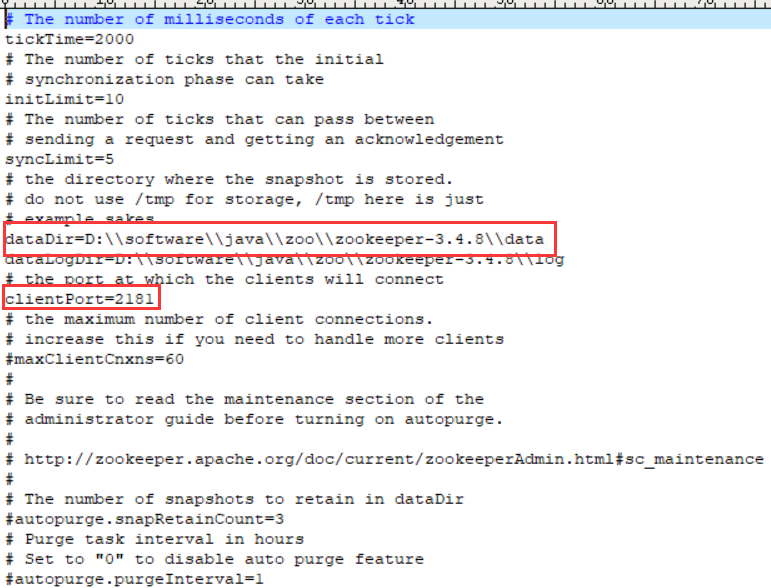
将conf 目录下的 zoo_sample.cfg 改名成为 zoo.cfg 编辑上面两项 就好了。
2.实现微服务的provider 。
实现 服务接口
public interface DemoService {
String sayHello(String name);
}
写个简单的实现
public class DemoServiceImpl implements DemoService {

@Override
public String sayHello(String name) {

return "hello:" + name;
}

}
然后做spring配置。
配置文件如下
<?xml version="1.0" encoding="UTF-8"?>
<beans xmlns="http://www.springframework.org/schema/beans"
    xmlns:xsi="http://www.w3.org/2001/XMLSchema-instance"
    xmlns:dubbo="http://dubbo.apache.org/schema/dubbo"
    xsi:schemaLocation="http://www.springframework.org/schema/beans        http://www.springframework.org/schema/beans/spring-beans-4.3.xsd        http://dubbo.apache.org/schema/dubbo        http://dubbo.apache.org/schema/dubbo/dubbo.xsd">

    <!-- 提供方应用信息,用于计算依赖关系 -->
    <dubbo:application name="hello-world-app"  />

    <!-- 使用multicast广播注册中心暴露服务地址 -->
    <dubbo:registry address="zookeeper://192.168.31.77:2181" />

    <!-- 用dubbo协议在20880端口暴露服务 -->
    <dubbo:protocol name="dubbo" port="2088" />

    <!-- 声明需要暴露的服务接口 -->
    <dubbo:service interface="demo.DemoService" ref="demoService" />

    <!-- 和本地bean一样实现服务 -->
    <bean id="demoService" class="demo.impl.DemoServiceImpl" />
</beans>
这样provider就玩成了。
需要再平台中引入相关的jar包。
<dependency>
            <groupId>com.alibaba</groupId>
            <artifactId>dubbo</artifactId>
            <version>2.6.2</version>
        </dependency>
        <dependency>
            <groupId>org.apache.curator</groupId>
            <artifactId>curator-framework</artifactId>
            <version>2.12.0</version>
        </dependency>
3.安装dubbo WEB 管理
包下载地址 https://github.com/apache/incubator-dubbo-ops/
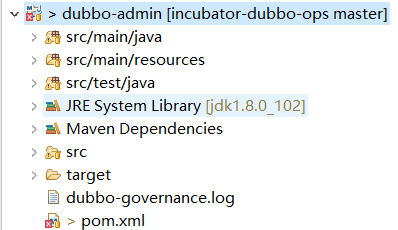
将项目导入 eclipse
执行 mvn clean package 需要注意的是可能会报错
再pom.xml 中增加
<plugin>
                <groupId>org.apache.maven.plugins</groupId>
                <artifactId>maven-compiler-plugin</artifactId>
                <version>3.1</version>
                <configuration>
                    <source>1.7</source>
                    <target>1.7</target>
                    <compilerId>eclipse</compilerId>
                </configuration>
                <dependencies>
                    <dependency>
                        <groupId>org.codehaus.plexus</groupId>
                        <artifactId>plexus-compiler-eclipse</artifactId>
                        <version>2.2</version>
                    </dependency>
                </dependencies>
            </plugin>
修改配置文件
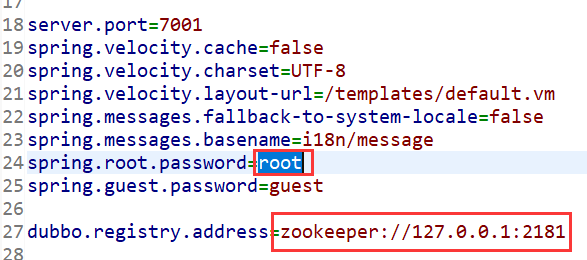
执行 java -jar dubbo-admin-0.0.1-SNAPSHOT.jar 这样 dubbo 管理控制台就可以运行了。
4.开发客户端
增加配置文件
<?xml version="1.0" encoding="UTF-8"?>
<beans xmlns="http://www.springframework.org/schema/beans"
    xmlns:xsi="http://www.w3.org/2001/XMLSchema-instance"
    xmlns:dubbo="http://dubbo.apache.org/schema/dubbo"
    xsi:schemaLocation="http://www.springframework.org/schema/beans        http://www.springframework.org/schema/beans/spring-beans-4.3.xsd        http://dubbo.apache.org/schema/dubbo        http://dubbo.apache.org/schema/dubbo/dubbo.xsd">

    <!-- 消费方应用名,用于计算依赖关系,不是匹配条件,不要与提供方一样 -->
    <dubbo:application name="consumer-of-helloworld-app"  />

    <!-- 使用multicast广播注册中心暴露发现服务地址 -->
    <dubbo:registry address="zookeeper://192.168.31.77:2181" />

    <!-- 生成远程服务代理,可以和本地bean一样使用demoService -->
    <dubbo:reference id="demoServiceClient" interface="demo.DemoService" />
</beans>
开发java代码如下
public class DubboComsumerTest extends SimpleBaseTestCase{
    @Resource
    DemoService demoService;

    @Test
    public void hello(){
        String rtn=demoService.sayHello("ray");
        System.out.println(rtn);
    }
}
@RunWith(JUnit4ClassRunner.class)
@ContextConfiguration({"classpath:spring-test.xml"})
public class SimpleBaseTestCase {

}
这样执行单元测试就可以看到效果了。