分享只为了更好的进步,继续努力!
自己在实习期间使用maven创建web项目,纪录下来。
这个很详细,很好,参考这个就足够了:http://limingnihao.iteye.com/blog/830409
首先可以通过指令建项目:
maven构建通过指令构建java项目:
mvn archetype:generate -DgroupId={project-packaging} -DartifactId={project-name} -DarchetypeArtifactId=maven-archetype-quickstart -DinteractiveMode=false
mvn eclipse:eclipse
下面主要介绍手动构建项目:
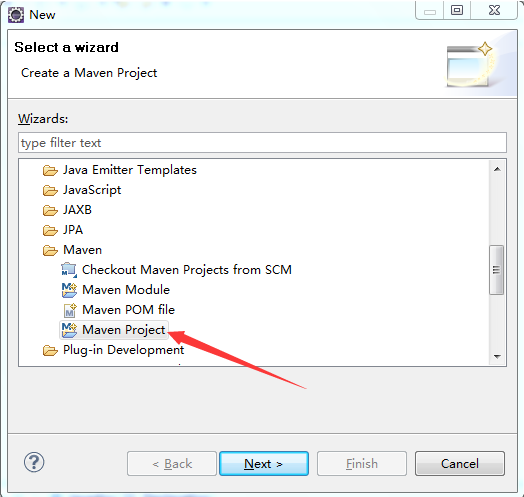
1、新建Maven Project
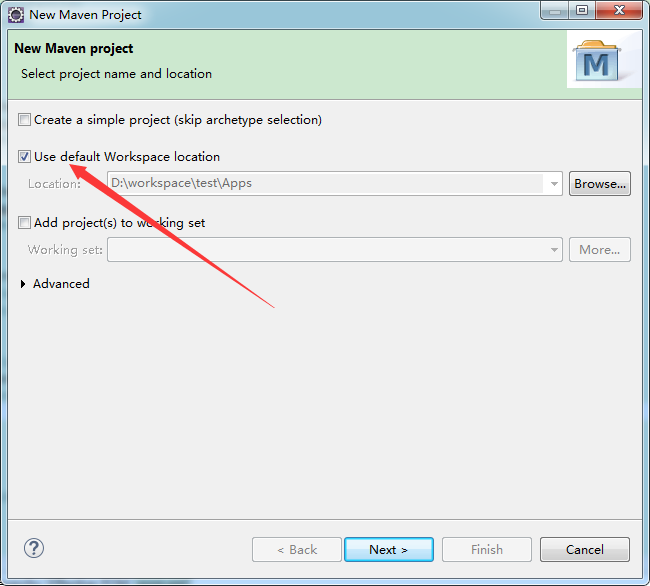
2、选择项目路径Usedefault Workspace location
3、选择项目类型 在Artifact Id中选择maven-archetype-webapp

4、输入Group ID和 Artifact ID,以及Package
Group ID:包目录
Artifact ID:项目名
Package:包名,包目录+项目名就是当前包名

5、刚建好的文件目录如下
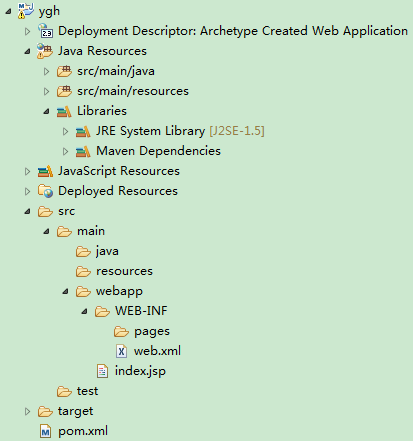
6、配置项目 需要添加src/main/java,src/test/java ,src/test/resources三个文件夹。
右键项目根目录点击New -> Source Folder,建出这三个文件夹即可。
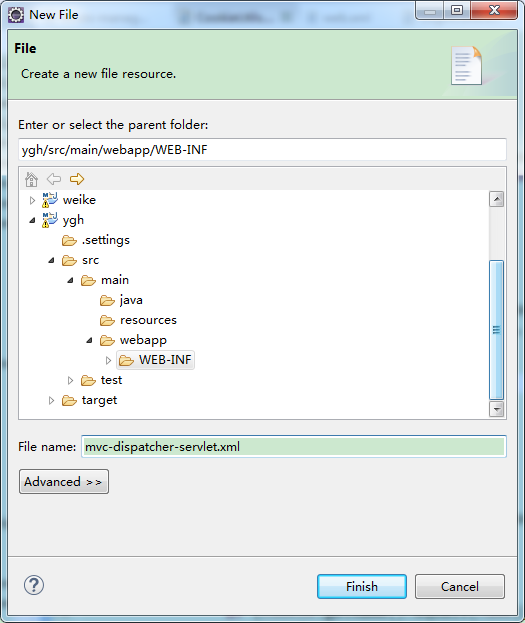
7.在WEB-INF目录下新建文件夹pages,用来存放jsp文件,再在WEB-INF目录下新建spring配置文件 mvc-dispatcher-servlet.xml
8. 编辑mvc-dispatcher-servlet.xml文件
<?xml version="1.0" encoding="UTF-8" ?>
<beans xmlns="http://www.springframework.org/schema/beans"
    xmlns:xsi="http://www.w3.org/2001/XMLSchema-instance"
    xmlns:p="http://www.springframework.org/schema/p"
    xmlns:context="http://www.springframework.org/schema/context"
    xmlns:aop="http://www.springframework.org/schema/aop"
    xmlns:tx="http://www.springframework.org/schema/tx"
    xmlns:mvc="http://www.springframework.org/schema/mvc"
    xsi:schemaLocation="http://www.springframework.org/schema/beans
       http://www.springframework.org/schema/beans/spring-beans-3.0.xsd
       http://www.springframework.org/schema/context
       http://www.springframework.org/schema/context/spring-context-3.0.xsd
       http://www.springframework.org/schema/tx
       http://www.springframework.org/schema/tx/spring-tx-3.0.xsd
       http://www.springframework.org/schema/aop
       http://www.springframework.org/schema/aop/spring-aop-3.0.xsd">

    <context:component-scan base-package="com"/>
    <mvc:annotation-driven/>
    <!-- 配置数据源 -->
    <bean
      class="org.springframework.web.servlet.view.InternalResourceViewResolver">
      <property name="prefix">
        <value>/WEB-INF/pages/</value>
      </property>
      <property name="suffix">
        <value>.jsp</value>
      </property>
    </bean>
</beans>

9. 编辑web.xml文件:
<!DOCTYPE web-app PUBLIC
 "-//Sun Microsystems, Inc.//DTD Web Application 2.3//EN"
 "http://java.sun.com/dtd/web-app_2_3.dtd" >

<web-app xmlns:xsi="http://www.w3.org/2001/XMLSchema-instance"
      xmlns="http://java.sun.com/xml/ns/javaee"
      xsi:schemaLocation="http://java.sun.com/xml/ns/javaee http://java.sun.com/xml/ns/javaee/web-app_2_5.xsd"
      version="2.5">
  <display-name>Archetype Created Web Application</display-name>

  <servlet>
    <servlet-name>mvc-dispatcher</servlet-name>
    <servlet-class>org.springframework.web.servlet.DispatcherServlet</servlet-class>
    <load-on-startup>1</load-on-startup>
  </servlet>
  <servlet-mapping>
    <servlet-name>mvc-dispatcher</servlet-name>
    <url-pattern>/</url-pattern>
  </servlet-mapping>
  <context-param>
    <param-name>contextConfigLocation</param-name>
    <param-value>
            /WEB-INF/mvc-dispatcher-servlet.xml
        </param-value>
  </context-param>
  <listener>
    <listener-class>org.springframework.web.context.ContextLoaderListener</listener-class>
  </listener>
</web-app>