QTableView类用于以表格形式输出信息,可通过自定义的数据模型来显示数据,通过setModel来绑定数据源;
继承结构如下:
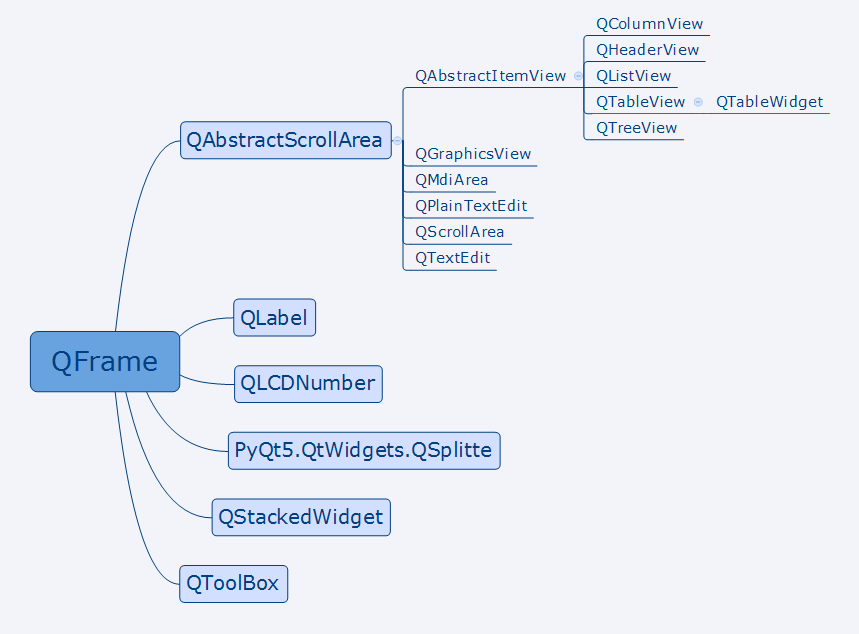
QTableView有以下几种模式:
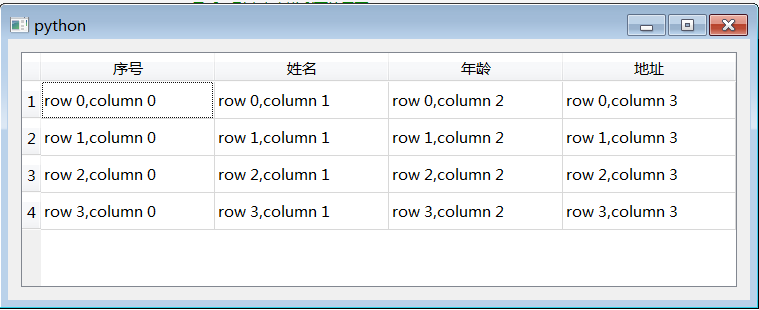
例如:
 1 #QTableView组件的使用
 2 from PyQt5.QtWidgets import QTableView, QHeaderView, QFormLayout,   QVBoxLayout,QWidget,QApplication ,QHBoxLayout, QPushButton,QMainWindow,QGridLayout,QLabel
 3 import sys
 4 from PyQt5.QtCore import  *
 5 from PyQt5.QtGui import  QStandardItemModel,QStandardItem
 6
 7 class WindowClass(QWidget):
 8     #如果集成QMainWindow 则self.setLayout(self.layout) 替换成
 9     """
10         widget=QWidget()
11         widget.setLayout(self.layout)
12         self.setCentralWidget(widget)
13     """
14     #即可, 注意集成QWidget和集成QMainWindow时候区别
15
16     def __init__(self,parent=None):
17         super(WindowClass, self).__init__(parent)
18         self.layout=QVBoxLayout()
19         self.model=QStandardItemModel(4,4)#存储任意结构数据
20         self.model.setHorizontalHeaderLabels(['序号','姓名','年龄','地址'])
21         for row in range(4):
22             for column in range(4):
23                 i=QStandardItem("row %s,column %s"%(row,column))
24                 self.model.setItem(row,column,i)
25         self.tableView=QTableView()
26         self.tableView.setModel(self.model)
27         self.layout.addWidget(self.tableView)
28
29         #继承QMainWidow使用下面三行代码
30         # widget=QWidget()
31         # widget.setLayout(self.layout)
32         # self.setCentralWidget(widget)
33
34         #继承QWidget则使用下面这样代码
35         self.setLayout(self.layout)
36
37         #设置表格充满这个布局QHeaderView
38         #self.tableView.horizontalHeader().setStretchLastSection(True)#最后一列决定充满剩下的界面
39         self.tableView.horizontalHeader().setSectionResizeMode(QHeaderView.Stretch)#所有列自动拉伸,充满界面
40
41
42 if __name__=="__main__":
43     app=QApplication(sys.argv)
44     win=WindowClass()
45     win.show()
46     sys.exit(app.exec_())
对上面实例进行扩充,添加行,删除行操作:
 1 #QTableView组件的使用
 2 from PyQt5.QtWidgets import  QAbstractItemView,QAction, QMenuBar,QTableView, QHeaderView, QFormLayout,
   QVBoxLayout,QWidget,QApplication ,QHBoxLayout, QPushButton,QMainWindow,QGridLayout,QLabel
 3 import sys
 4 from PyQt5.QtCore import  *
 5 from PyQt5.QtGui import  QStandardItemModel,QStandardItem
 6
 7 class WindowClass(QMainWindow):
 8     #如果集成QMainWindow 则self.setLayout(self.layout) 替换成
 9     """
10         widget=QWidget()
11         widget.setLayout(self.layout)
12         self.setCentralWidget(widget)
13     """
14     #即可, 注意集成QWidget和集成QMainWindow时候区别
15
16     def __init__(self,parent=None):
17         super(WindowClass, self).__init__(parent)
18         self.layout=QVBoxLayout()
19         self.model=QStandardItemModel(4,4)#存储任意结构数据
20         self.model.setHorizontalHeaderLabels(['序号','姓名','年龄','地址'])
21         for row in range(4):
22             for column in range(4):
23                 i=QStandardItem("  row %s,column %s"%(row,column))
24                 self.model.setItem(row,column,i)
25         self.tableView=QTableView()
26         self.tableView.setModel(self.model)
27         self.layout.addWidget(self.tableView)
28
29         #继承QMainWidow使用下面三行代码
30         widget=QWidget()
31         widget.setLayout(self.layout)
32         self.setCentralWidget(widget)
33
34         #继承QWidget则使用下面这样代码
35         #self.setLayout(self.layout)
36
37         #设置表格充满这个布局QHeaderView
38         #self.tableView.horizontalHeader().setStretchLastSection(True)#最后一列决定充满剩下的界面
39         self.tableView.horizontalHeader().setSectionResizeMode(QHeaderView.Stretch)#所有列自动拉伸,充满界面
40
41         #添加menu菜单栏,注意:QMainWindow 才可以有菜单栏,QWidget没有,因此上面只能采用继承QMainWIndow
42         tool = self.addToolBar("File") #这里尝试使用QmenuBar,则此时会卡死,无法完成下面appedRow操作(猜测:可能是因为本身不允许menuBar完成这种操作)
43         self.action= QAction("添加", self)
44         self.action2=QAction("删除",self)
45         tool.addAction(self.action)
46         tool.addAction(self.action2)
47         tool.actionTriggered[QAction].connect(self.processtrigger)
48
49         self.tableView.setSelectionMode(QAbstractItemView.SingleSelection)#设置只能选中一行
50         self.tableView.setEditTriggers(QTableView.NoEditTriggers)#不可编辑
51         self.tableView.setSelectionBehavior(QAbstractItemView.SelectRows);#设置只有行选中
52
53     def processtrigger(self,action):
54         if action.text()=="添加":
55             self.model.appendRow([
56                 QStandardItem('row %s,column %s' % (11, 11)),
57                 QStandardItem('row %s,column %s' % (11, 11)),
58                 QStandardItem('row %s,column %s' % (11, 11)),
59                 QStandardItem('row %s,column %s' % (11, 11)),
60             ])
61         if action.text()=="删除":
62
63             r= self.tableView.selectionModel().selectedRows()#获取被选中行
64             print(r)#被选中行的列表,每个元素是ModelIndex对象
65             #indexs = self.tableView.selectionModel().selection().indexes()#返回结果是QModelIndex类对象,里面有row和column方法获取行列索引
66             #print(indexs[0].row())
67             if r:
68                 #下面删除时,选中多行中的最后一行,会被删掉;不选中,则默认第一行删掉
69                 index=self.tableView.currentIndex()
70                 print(index.row())
71                 self.model.removeRow(index.row())
72
73
74 if __name__=="__main__":
75     app=QApplication(sys.argv)
76     win=WindowClass()
77     win.show()
78     sys.exit(app.exec_())
