1. SpringMVC框架认识
Spring MVC是一个基于MVC模式的Web框架,SpringMVC作为Spring中的一个模块,它与Spring能够无缝集成,主要用于解决企业Web开发中常见的问题:如参数接收、文件上传、表单验证、国际化等等。
2. SpringMVC HelloWorld模式使用
2.1.导入Spring与SpringMVC的依赖jar包
① 配置Spring的环境
准备Spring的环境——SpringMVC以Spring为核心,而Spring最核心的模块是DI/IOC容器,也就是SpringMVC的核心类和控制器要交给Spring管理。所以使用SpringMVC必须先保证Spring容器初始化,也就是让项目拥有Spring的运行环境。
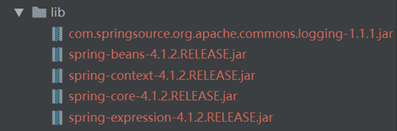
基于Spring的初始化环境需要导入Spring的核心包与beans包(使用spring-framework-4.1.2.RELEASE),jar包目录位置在spring-framework-4.1.2.RELEASElibs文件中:
需要导入:
com.springsource.org.apache.commons.logging-1.1.1.jar
spring-beans-4.1.2.RELEASE.jar
spring-context-4.1.2.RELEASE.jar
spring-core-4.1.2.RELEASE.jar
spring-expression-4.1.2.RELEASE.jar
配置applicationContext.xml,具体配置参照如下:
<?xml version="1.0" encoding="UTF-8"?>
<beans xmlns="http://www.springframework.org/schema/beans"
       xmlns:xsi="http://www.w3.org/2001/XMLSchema-instance"
       xsi:schemaLocation="http://www.springframework.org/schema/beans
http://www.springframework.org/schema/beans/spring-beans.xsd">
    <bean id="myDate" class="java.util.Date">
        <!-- collaborators and configuration for this bean go here -->
    </bean>
</beans>
创建Junit4测试类查看是否获取到配置的Bean对象:
import org.springframework.context.ApplicationContext;
import org.springframework.context.support.ClassPathXmlApplicationContext;

public class SpringEnvTest {

    @org.junit.Test
    public void GetBeanTest(){
        //读取资源文件applicationContext.xml
        //拿到ApplicationContext核心对象
        ApplicationContext applicationContext = new ClassPathXmlApplicationContext("applicationContext.xml");
        System.out.println("-------------实例化分割线--------------------");
        //获取Bean同样具有三种方式:这里不再一一列出
        Object myDate = applicationContext.getBean("myDate");
        System.out.println(myDate);
    }
}
②配置SpringMVC的环境
SpringMVC作为Spring中的一个模块存在,无需单独下载,Spring的lib文件中就包含了SpringMVC的jar包。
jar包目录位置也是在spring-framework-4.1.2.RELEASElibs中,需要导入的jar包:
spring-web-4.1.2.RELEASE.jar
spring-webmvc-4.1.2.RELEASE.jar

2.2.在web.xml中配置核心控制器DispatcherServlet
在SpringMvc框架中使用的是DispatcherServlet作为核心控制器,DispatcherServlet核心控制器会拦截匹配的请求,把拦截下来的请求,依据相应的规则分发到目标Controller来处理。
所以,我们要在web.xml中配置SpringMVC的核心控制器DispatcherServlet,具体配置如下:
web.xml配置:
<?xml version="1.0" encoding="UTF-8"?>
<web-app xmlns="http://xmlns.jcp.org/xml/ns/javaee"
         xmlns:xsi="http://www.w3.org/2001/XMLSchema-instance"
         xsi:schemaLocation="http://xmlns.jcp.org/xml/ns/javaee http://xmlns.jcp.org/xml/ns/javaee/web-app_4_0.xsd"
         version="4.0">
    <!--配置SpringMVC的核心控制器:拦截所有的请求
        启动时会默认到/WEB-INF/dispatcherServlet-servlet.xml路径下去加载
        [servlet-name]-servlet.xml文件;
        在启动时加载文件,需要提前配置load-on-startup(避免在页面访问时才报错)-->
    <servlet>
        <servlet-name>dispatcherServlet</servlet-name>
        <servlet-class>org.springframework.web.servlet.DispatcherServlet</servlet-class>
        <!--加载配置文件:使用放在resources目录下,重新定义加载的路径-->
        <init-param>
            <param-name>contextConfigLocation</param-name>
            <param-value>classpath:applicationContext-mvc.xml</param-value>
        </init-param>
        <load-on-startup>1</load-on-startup>
    </servlet>
    <servlet-mapping>
        <servlet-name>dispatcherServlet</servlet-name>
        <url-pattern>/</url-pattern>
    </servlet-mapping>
</web-app>
2.2.配置SpringMVC的配置文件
SpringMVC的配置文件和Spring的配置差不多,在resources目录中新建一个applicationContext-mvc.xml文件即可,需要配置映射Controller类的映射路径及class:
<?xml version="1.0" encoding="UTF-8"?>
<beans xmlns="http://www.springframework.org/schema/beans"
       xmlns:xsi="http://www.w3.org/2001/XMLSchema-instance"
       xsi:schemaLocation="http://www.springframework.org/schema/beans
http://www.springframework.org/schema/beans/spring-beans.xsd">
    <!--SpringMVC的配置文件:把控制器类交给Spring来管理-->
    <!--name:访问的映射路径-->
    <bean name="/hello" class="cn.yif.controller.HelloController"></bean>
</beans>
2.3.准备Controller控制器并配置
这里需要创建一个HelloController类来实现Controller接口,实现handleRequest()方法:
import javax.servlet.http.HttpServletRequest;
import javax.servlet.http.HttpServletResponse;

public class HelloController implements Controller {
    /***
     * 控制层业务处理:①参数的接收;②调用Service层的业务逻辑;③返回一个视图
     * @param equest
     * @param response
     * @return
     * @throws Exception
     */
    @Override
    public ModelAndView handleRequest(HttpServletRequest equest, HttpServletResponse response) throws Exception {
        System.out.println("进入Springmvc Controller视图模型控制器......");
        String view = "/WEB-INF/views/hello.jsp"; //视图
        String modelName = "msg"; //模型名字
        Object modelObject = "helloObj"; //模型对象
        ModelAndView modelAndView = new ModelAndView(view, modelName, modelObject);
        return modelAndView;
    }
}
2.4.根据applicationContext-mvc.xml访问映射路径
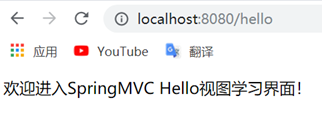
运行Tomcat并启动web项目,访问配置的url路径,即可访问到对应的/hello映射的/WEB-INF/views/hello.jsp文件。
3. SpringMVC入门Demo的执行流程分析
从上面的使用配置过程我们可以分析得出SpringMVC的执行流程:
首先,我们通过浏览器客户端发起请求(localhost:8080/hello),这个请求会被web.xml中配置的核心控制器DispatcherServlet所拦截,拦截到的请求地址会交由配置在classpath下的applicationContext-mvc.xml SpringMVC的配置文件中去找到对应的bean的请求url,并且找到对应的Bean class,通过Bean class配置再找到对应的Controller,通过Controller中的handleRequest()方法返回的对应的ModelAndView视图,返回对应的hello.jsp页面,通过页面hello.jsp去呈现页面上的内容。
4. 静态资源文件访问放行
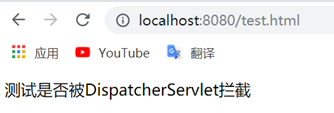
通过上面的配置,我们如果在Webapp路径下存在静态资源(.html与css/js)文件时,我们通过浏览器直接去访问是访问不了的,会出现404 not find问题。
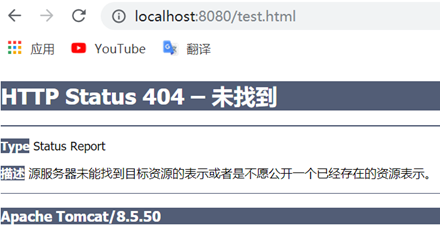
原因就在于我们在web.xml中默认配置了拦截所有的请求,我们需要在SpringMVC的配置文件applicationContext-mvc.xml中去开启对静态资源的访问:
applicationContext-mvc.xml具体配置如下:
<?xml version="1.0" encoding="UTF-8"?>
<beans xmlns="http://www.springframework.org/schema/beans"
       xmlns:xsi="http://www.w3.org/2001/XMLSchema-instance"
       xmlns:mvc="http://www.springframework.org/schema/mvc"
       xsi:schemaLocation="http://www.springframework.org/schema/beans
http://www.springframework.org/schema/beans/spring-beans.xsd
http://www.springframework.org/schema/mvc
http://www.springframework.org/schema/mvc/spring-mvc.xsd">
    <!--开启静态资源的访问-->
    <mvc:default-servlet-handler />
    <!--SpringMVC的配置文件:把控制器类交给Spring来管理-->
    <!--name:访问的映射路径-->
    <bean name="/hello" class="cn.yif.controller.HelloController"></bean>
</beans>
配置之后,通过浏览器页面就能访问到webapp路径下的静态资源文件了。