SpringCloudG版本之Eureka的使用
wiki地址:https://github.com/Netflix/eureka/wiki/Eureka-at-a-glance
github地址:https://github.com/Netflix/eureka
1.Eureka是什么
Eureka是一个基于REST (Representational State Transfer)的服务,主要用于AWS云中定位服务,以实现中间层服务器的负载平衡和故障转移。Eureka还附带了一个基于java的客户端组件,即EurekaClient,它使与服务的交互更加容易。客户端还有一个内置的负载均衡器,可以执行基本的循环负载平衡。
- 1.添加pom文件依赖路径:group ID:org.springframework.cloud artifact ID :spring-cloud-starter-netflix-eureka-server
- 2.添加application.yml 配置文件,添加端口号、应用程序名称、eurekaserver的用户名和密码、注册中心地址
- 3.主程序上添加@EnableEurekaServer注解
3代码案例:
1.添加pom文件
    <dependencies>
        <!--导入eureka的依赖-->
        <dependency>
            <groupId>org.springframework.cloud</groupId>
            <artifactId>spring-cloud-starter-netflix-eureka-server</artifactId>
        </dependency>
        <!--给eureka提供密码保护-->
        <dependency>
            <groupId>org.springframework.boot</groupId>
            <artifactId>spring-boot-starter-security</artifactId>
        </dependency>
    </dependencies>
2.添加application.yml文件
server:
  port: 8761
spring:
  application:
    name: eureka-server
  security:  # 添加用户名和密码。默认的用户名和密码毕竟使用不方便
    user:
      name: user
      password: 123
eureka:
  instance:
    hostname: localhost
    prefer-ip-address: true
    # ip-address: xxx.xxx.32.1 如果电脑上有多个网卡,就指定一下,不然回报各种意想不到的错误
  client:  # 因为是单机版的Eureka,所以需要配置Eureka不要向其他的Eureka上进行注册
    register-with-eureka: false
    fetch-registry: false
    service-url:
      defaultZone: http://user:123@${eureka.instance.hostname}:${server.port}/eureka/
3.配置主程序上添加注解@EnableEurekaServer
@SpringBootApplication
@EnableEurekaServer
public class EurekaServerStartApp {

    public static void main(String[] args) {
        SpringApplication.run(EurekaServerStartApp.class,args);
    }
}
4.配置文件中提供了对密码的保护。以前的版本,到这里就行了。现在的G版本还需要添加一个配置,否则会出现消费者无法访问提供者的情况
官网说明:
您只需通过spring-boot-starter-security将Spring Security添加到服务器的类路径中即可保护Eureka服务器。默认情况下,当Spring Security在类路径上时,它将要求在每次向应用程序发送请求时都发送有效的CSRF令牌。Eureka客户通常不会拥有有效的跨站点请求伪造(CSRF)令牌,您需要为/eureka/**端点禁用此要求。例如:
@EnableWebSecurity
class WebSecurityConfig extends WebSecurityConfigurerAdapter {

    @Override
    protected void configure(HttpSecurity http) throws Exception {
        http.csrf().disable()//禁用掉csrf
                .authorizeRequests()//开启认证配置
                .mvcMatchers("/eureka/*").permitAll()//放行
                .mvcMatchers("/actuator/*").permitAll()//显示一些信息的地址
                .anyRequest().authenticated().and().httpBasic();
    }
}
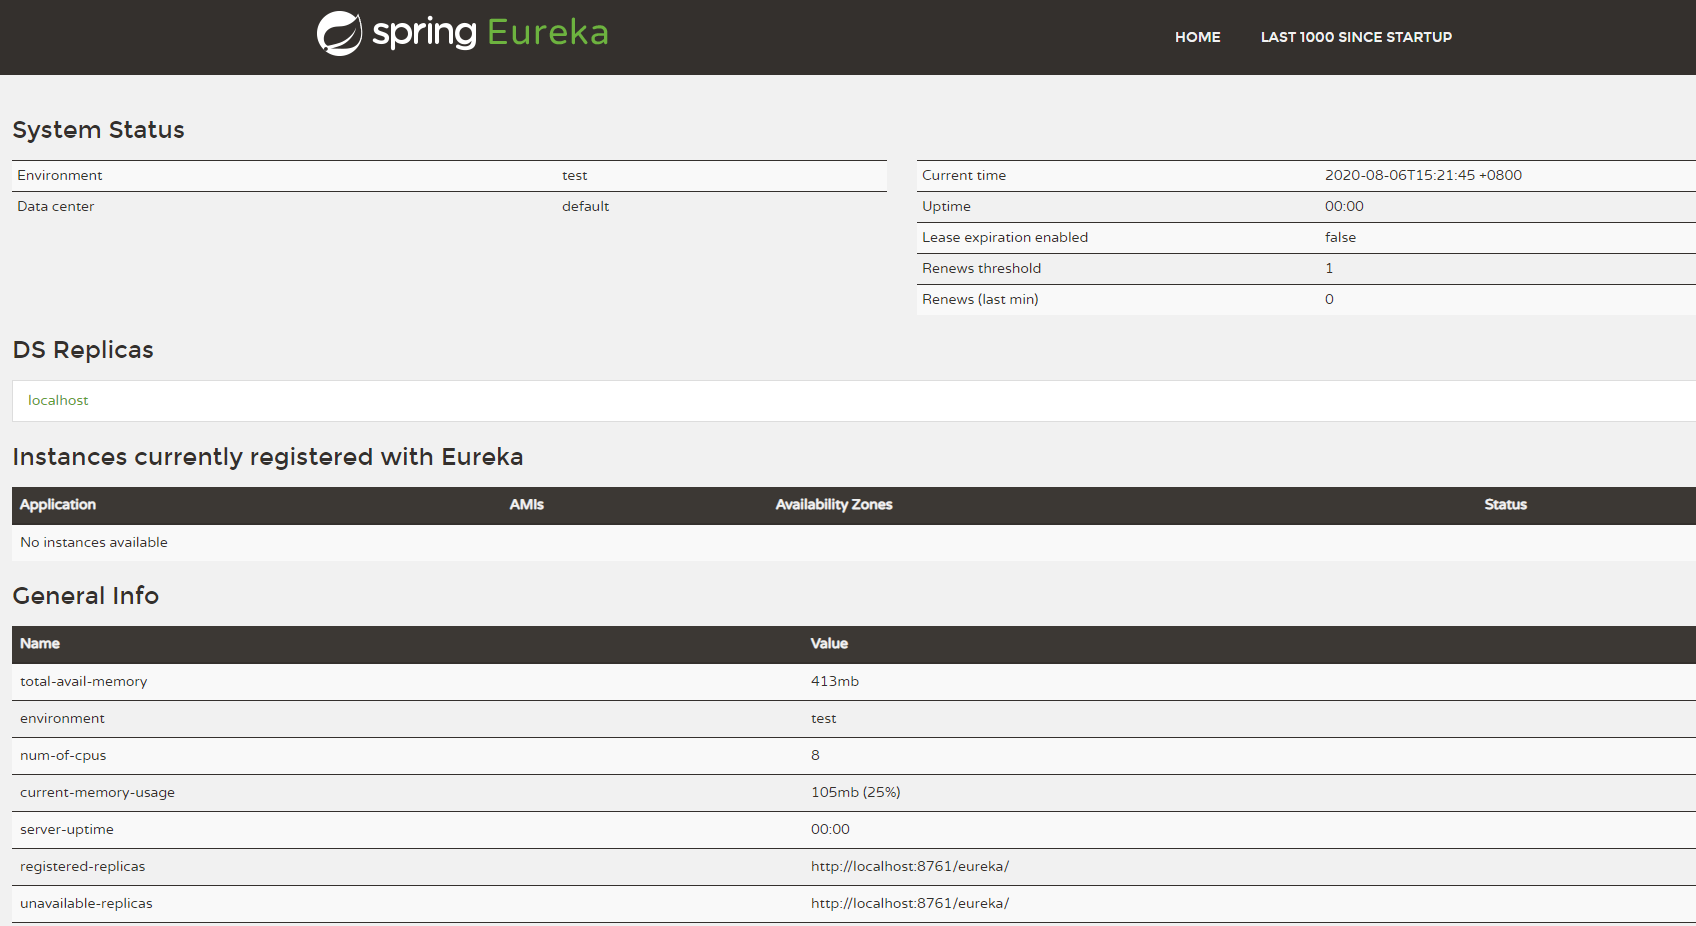
5.启动Eureka主程序,访问http://localhost:8761/ 输入用户名和密码,即可访问控制台页面
5.创建服务提供者
5.1 创建一个提供者,添加pom依赖文件


<dependencies>
        <!--添加EurekaClient客户端依赖的pom-->
        <dependency>
            <groupId>org.springframework.cloud</groupId>
            <artifactId>spring-cloud-starter-netflix-eureka-client</artifactId>
        </dependency>

        <dependency>
            <groupId>org.springframework.boot</groupId>
            <artifactId>spring-boot-starter-web</artifactId>
        </dependency>
        <dependency>
            <groupId>org.projectlombok</groupId>
            <artifactId>lombok</artifactId>
            <version>1.18.8</version>
        </dependency>
    </dependencies>
5.2 创建一个application.yml配置文件
server:
  port: 11000
eureka:
  instance:
    prefer-ip-address: true
  client:
    serviceUrl:
      defaultZone: http://user:123@localhost:8761/eureka/
spring:
  application:
    name: 03userprovider
5.3 创建一个主程序
@SpringBootApplication
public class UserProviderStartApp {
    public static void main(String[] args) {
        SpringApplication.run(UserProviderStartApp.class, args);
    }
}
5.4 创建一个服务提供者controller
@RestController
@RequestMapping("/user")
public class UserProvicerController {

    @RequestMapping("/find/{id}")
    public Student getUserById(@PathVariable Long id) {
        Student student = new Student();
        student.setId(id);
        student.setReason("北京");
        student.setDate(new Date());
        System.out.println(student);
        return student;
    }
}
6.创建一个服务消费者
6.1 添加pom依赖文件
    <dependencies>
        <!--添加EurekaClient客户端依赖的pom-->
        <dependency>
            <groupId>org.springframework.cloud</groupId>
            <artifactId>spring-cloud-starter-netflix-eureka-client</artifactId>
        </dependency>

        <dependency>
            <groupId>org.springframework.boot</groupId>
            <artifactId>spring-boot-starter-web</artifactId>
        </dependency>
        <dependency>
            <groupId>org.projectlombok</groupId>
            <artifactId>lombok</artifactId>
            <version>1.18.8</version>
        </dependency>
    </dependencies>
6.2 添加一个application.yml的配置文件
server:
  port: 12000
spring:
  application:
    name: 04orderconsumer
eureka:
  client:
    service-url:
      defaultZone: http://user:123@localhost:8761/eureka/
  instance: ## 配置是否显示ip
    prefer-ip-address: true
6.3 创建一个主程序
@SpringBootApplication
public class OrderStratApp {


    @Bean
    public RestTemplate restTemplate () {
        return new RestTemplate();
    }

    public static void main(String[] args) {
        SpringApplication.run(OrderStratApp.class,args);
    }
}
6.4 创建一个服务消费者
@RestController
@RequestMapping("/order")
public class OrderController {

    @Autowired
    private RestTemplate restTemplate;

    @RequestMapping("/find/{id}")
    public Student findMemberUserById(@PathVariable Long id) {
        Student me = restTemplate.getForObject("http://localhost:11000/user/find/" + id, Student.class);
        return me;
    }
}
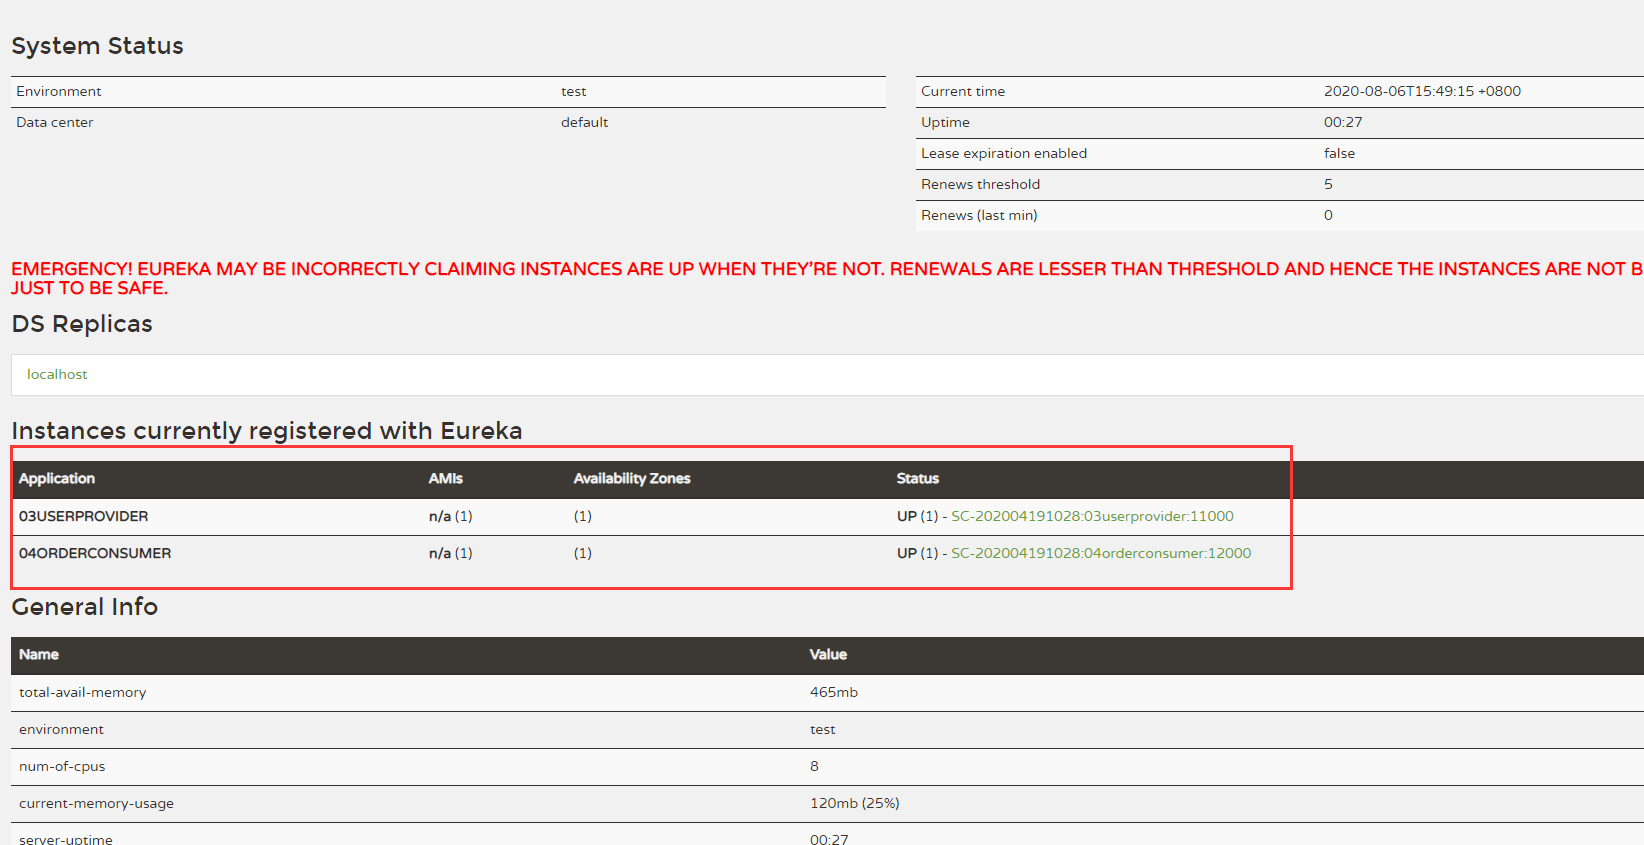
启动服务消费者和服务提供者,进入Eureka查看结果如下:
调用服务提供者看看

可见。服务消费者成功的调用了服务提供者的服务
也可使用EurekaClient访问一个服务
修改消费者如下:
@RestController
@RequestMapping("/order")
@Slf4j
public class OrderController {

    @Autowired
    private EurekaClient eurekaClient;

    @Autowired
    private RestTemplate restTemplate;

    @RequestMapping("/find/{id}")
    public Student findMemberUserById(@PathVariable Long id) {
        InstanceInfo instanceInfo = eurekaClient.getNextServerFromEureka("userprovider-eurekaclient", false);
        String homePageUrl = instanceInfo.getHomePageUrl();
        log.info("地址=================>{}", homePageUrl);
        Student student = restTemplate.getForObject(homePageUrl + "/user/find/" + id, Student.class);
        return student;
    }
}
测试代码:发现也是可以使用的
7.Eureka高可用的配置
Eureka为了保证⾼可⽤,需要搭建集群,Eureka的集群搭建很简单,只要eureka服务端之间相互注册就⾏了
在springboot程序中,创建一个hign-availability-eureka的应用,配置三个配置文件,分别启动
7.1 添加依赖文件
 <dependencies>
        <!--导入eureka的依赖-->
        <dependency>
            <groupId>org.springframework.cloud</groupId>
            <artifactId>spring-cloud-starter-netflix-eureka-server</artifactId>
        </dependency>
        <!--给eureka提供密码保护-->
        <dependency>
            <groupId>org.springframework.boot</groupId>
            <artifactId>spring-boot-starter-security</artifactId>
        </dependency>

        <dependency>
            <groupId>org.springframework.boot</groupId>
            <artifactId>spring-boot-starter-web</artifactId>
        </dependency>
    </dependencies>
7.2 添加eureka安全配置
@EnableWebSecurity
class WebSecurityConfig extends WebSecurityConfigurerAdapter {

    @Override
    protected void configure(HttpSecurity http) throws Exception {
        http.csrf().disable()//禁用掉csrf
                .authorizeRequests()//开启认证配置
                .mvcMatchers("/eureka/*").permitAll()//放行
                .mvcMatchers("/actuator/*").permitAll()//显示一些信息的地址
                .anyRequest().authenticated().and().httpBasic();
    }
}
7.3 添加主程序
@SpringBootApplication
@EnableEurekaServer
public class HighAvailabilityEureka {

    public static void main(String[] args) {
        SpringApplication.run(HighAvailabilityEureka.class, args);
    }
}
7.4 添加application-peer1.yml文件、application-peer2.yml文件、application-peer3.yml文件
spring:
  application:
    name: eureka-server  # 要配置集群,需要相同的应用名称
  security:  # 添加用户名和密码。默认的用户名和密码毕竟使用不方便
    user:
      name: user
      password: 123
  profiles:
    active: peer1
eureka:
  instance:
    hostname: peer1
  client:
    serviceUrl:
      defaultZone: http://user:123@peer2:8762/eureka/,http://user:123@peer3:8763/eureka/  # 多个服务之间要用逗号隔开
server:
  port: 8761
spring:
  application:
    name: eureka-server  # 要配置集群,需要相同的应用名称
  security:  # 添加用户名和密码。默认的用户名和密码毕竟使用不方便
    user:
      name: user
      password: 123
  profiles:
    active: peer2
eureka:
  instance:
    hostname: peer2
  client:
    serviceUrl:
      defaultZone: http://user:123@peer1:8761/eureka/,http://user:123@peer3:8763/eureka/  # 多个服务之间要用逗号隔开
server:
  port: 8762
spring:
  application:
    name: eureka-server  # 要配置集群,需要相同的应用名称
  security:  # 添加用户名和密码。默认的用户名和密码毕竟使用不方便
    user:
      name: user
      password: 123
  profiles:
    active: peer3
eureka:
  instance:
    hostname: peer3
  client:
    serviceUrl:
      defaultZone: http://user:123@peer1:8761/eureka/,http://user:123@peer2:8762/eureka/  # 多个服务之间要用逗号隔开
server:
  port: 8763
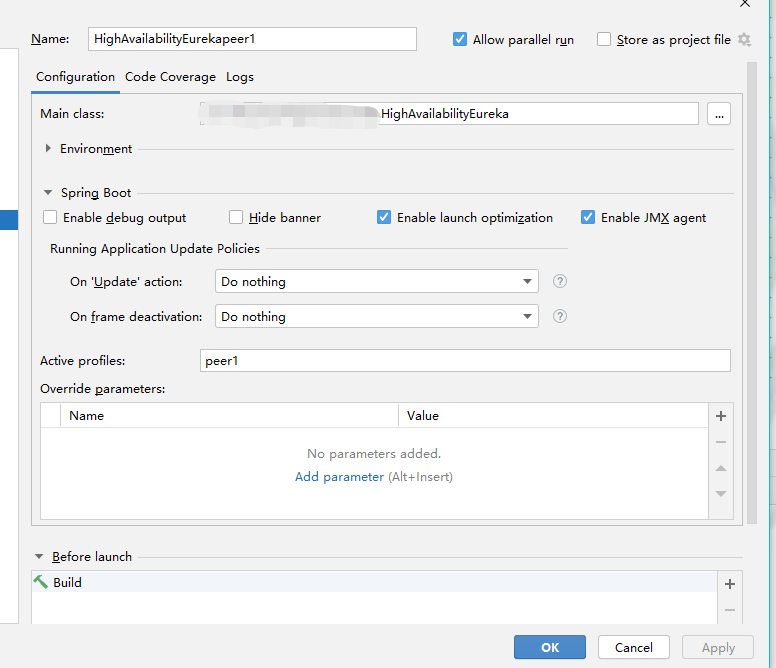
7.4 IDEA配置启动类如下图示:
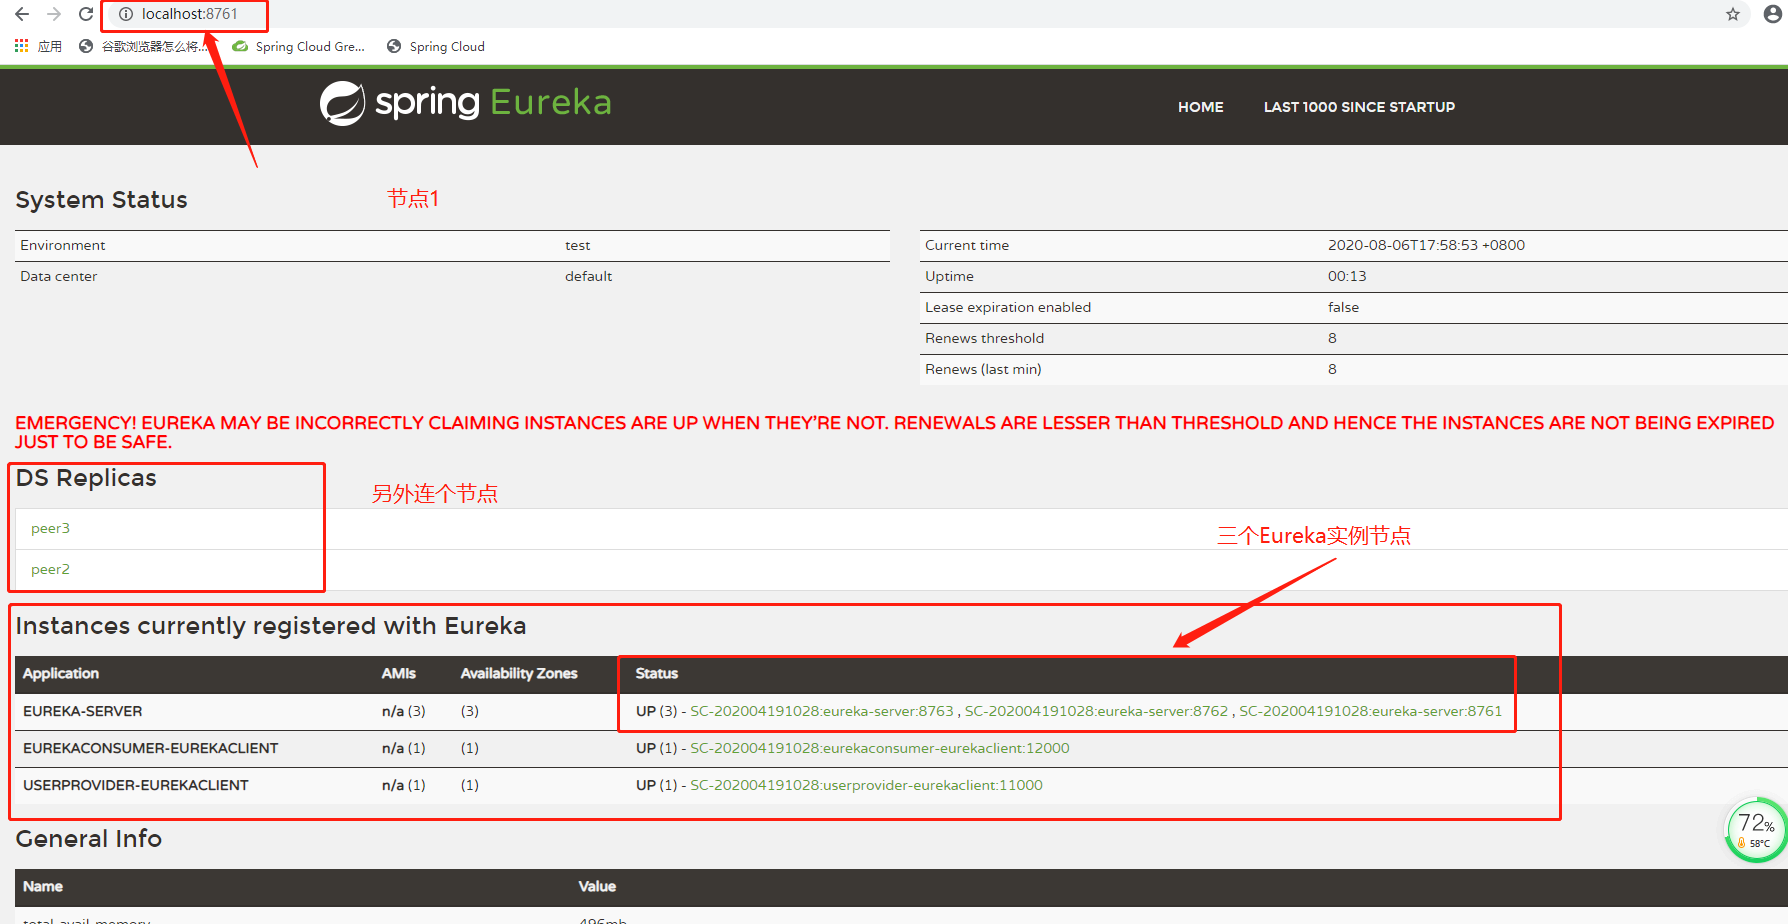
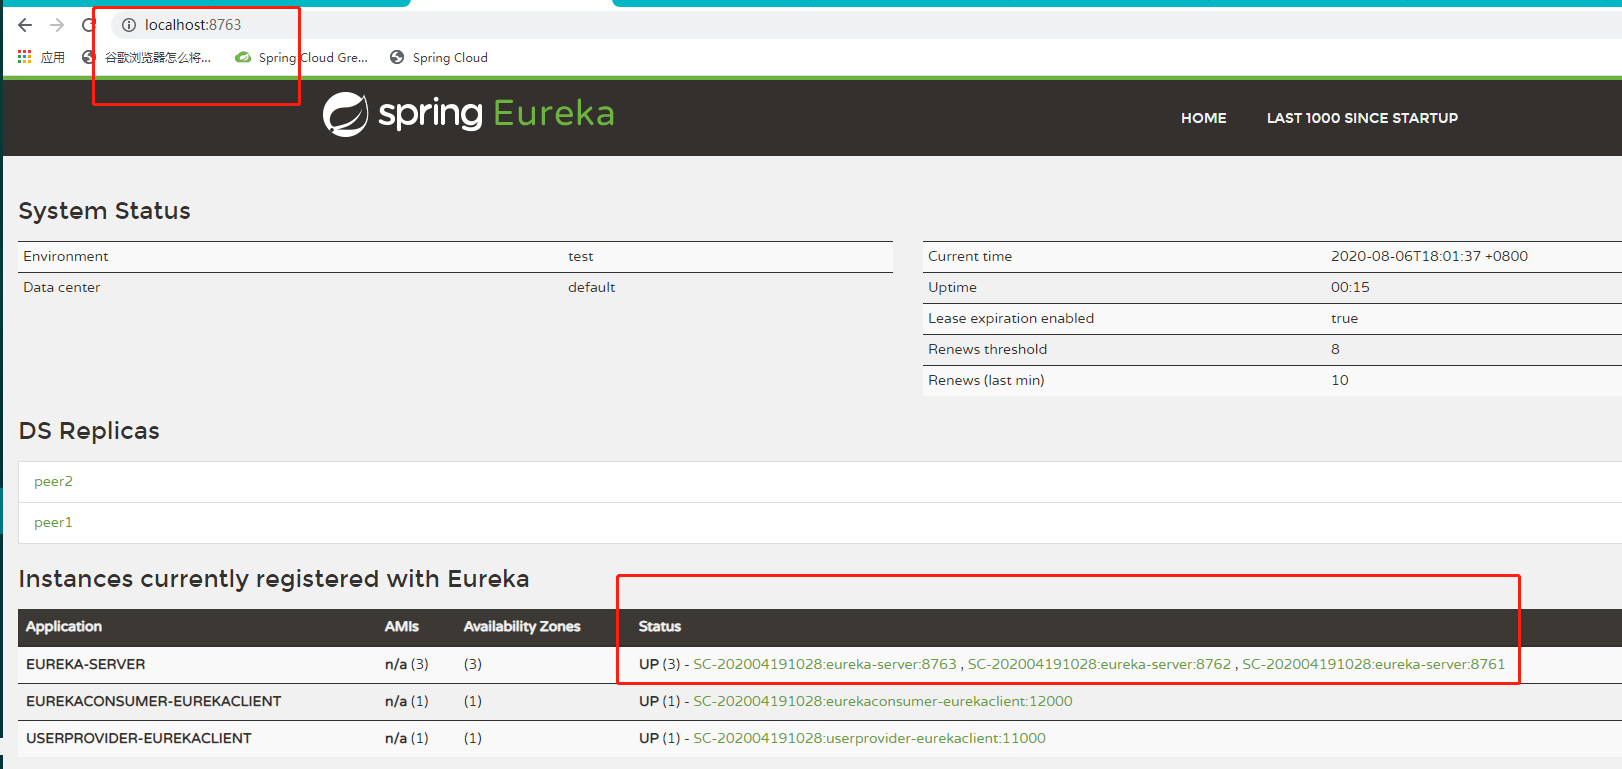
启动三个主引用程序,在启动一个消费者和一个生产者在节点一上面,控制台界面如下:
节点1:
节点二:
节点3:
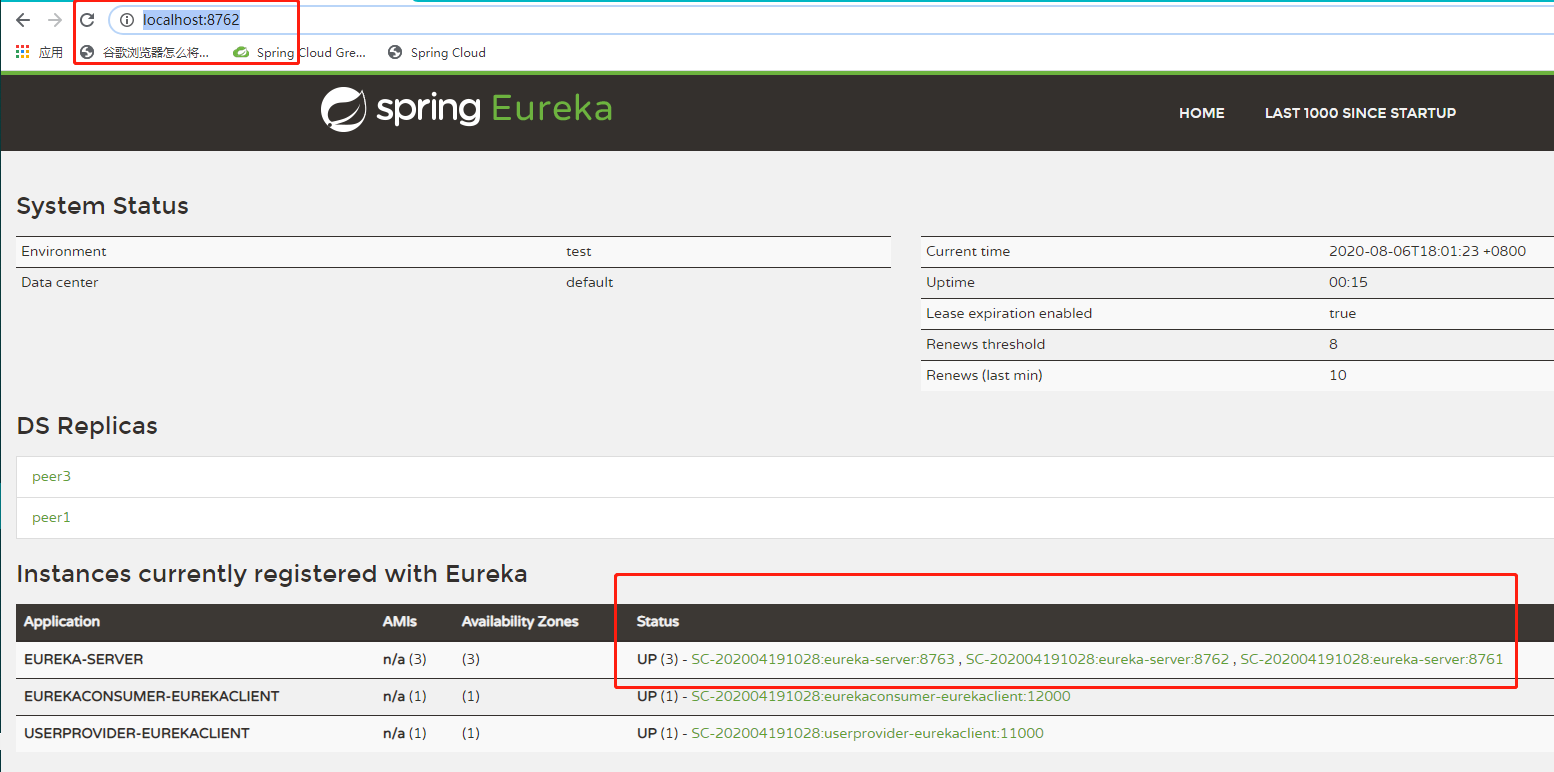
由图可知。只在节点一注册的服务,在节点二和节点三的控制台页面,都能发现服务