完整项目Github链接,欢迎大家下载:FLAGS
更新一下:android 7.0以上版本的系统使用以下代码会出现无法获取path的问题,这是android系统更新后一些接口变动的原因,请直接去github上下载最新版的代码,上面已经进行了修改。
android的EditText其实很强大,它是可以显示一部分Html格式的,而下面则介绍如何使用EditText进行文字和图片的混合编写与显示。
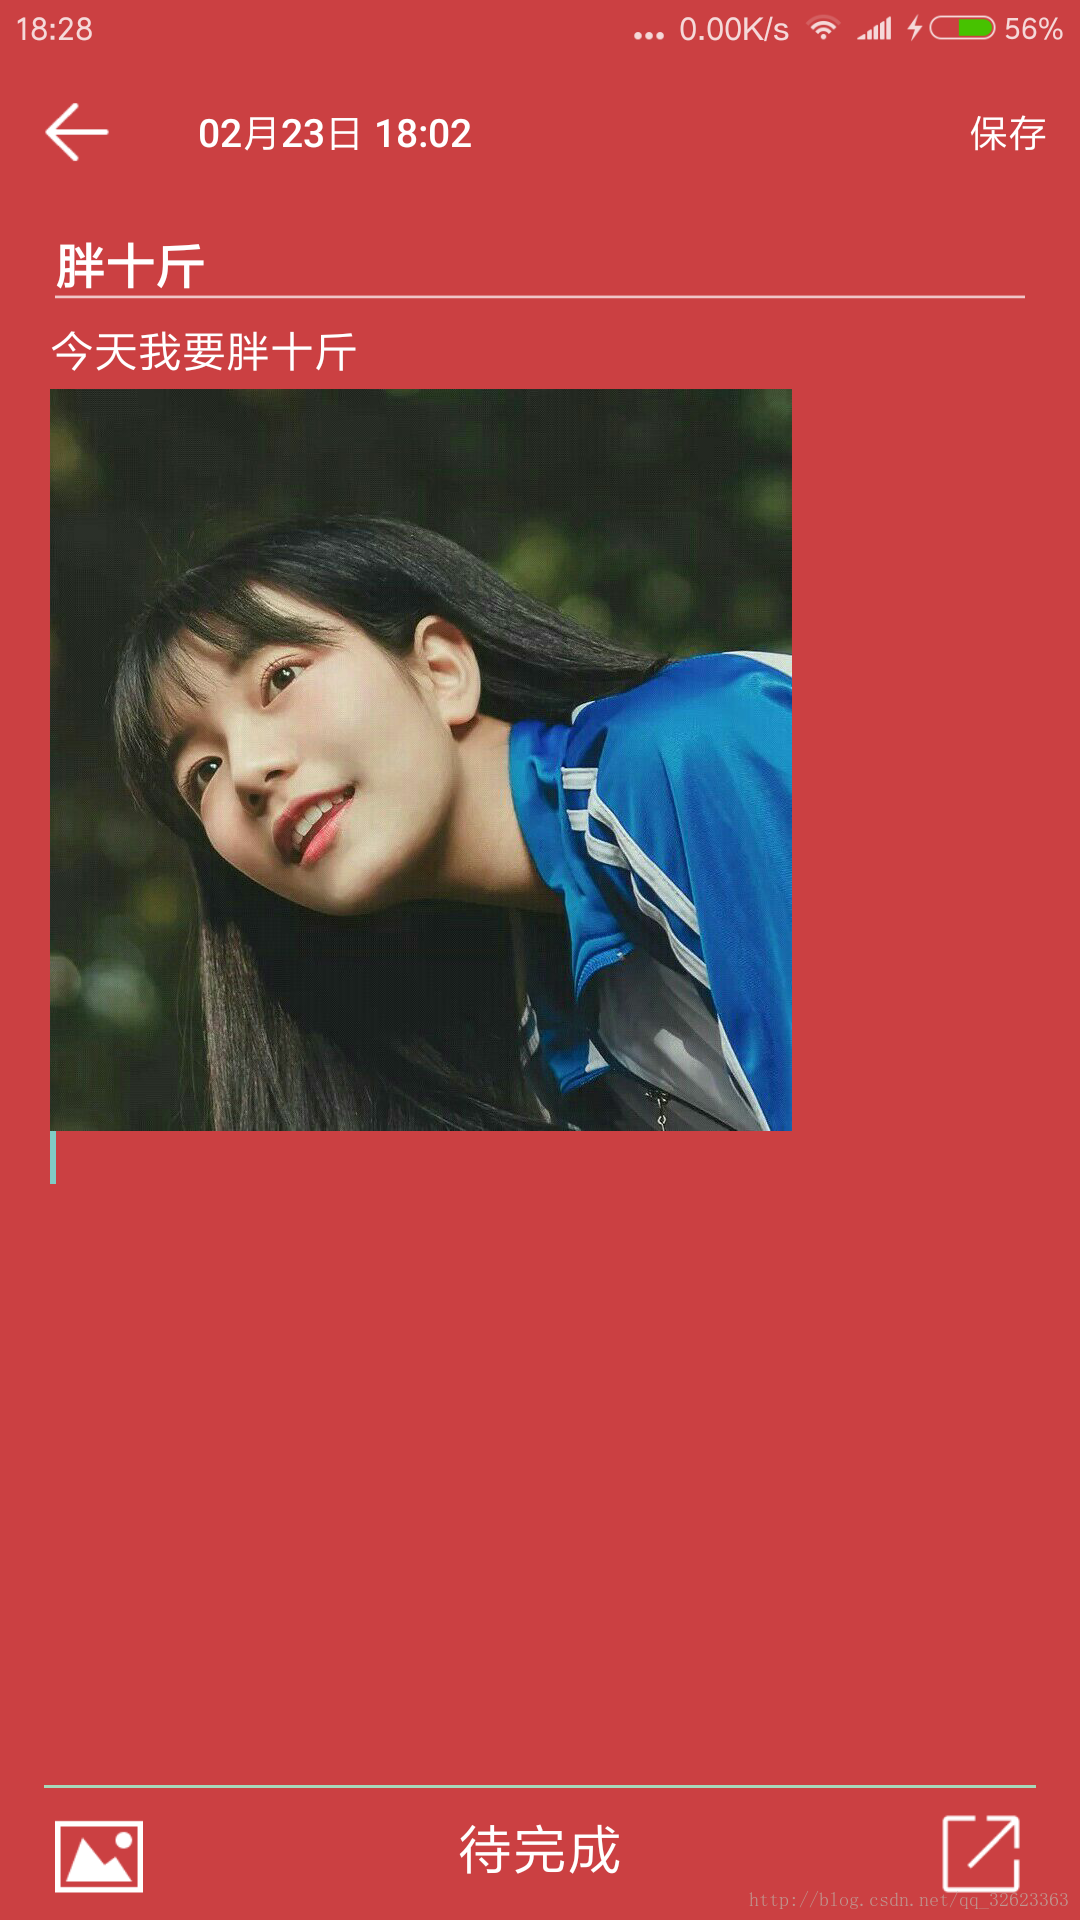
首先放一张效果图(我插入的图片侵删):
插入图片我参考了这篇博客:使用Html在EditText中任意位置插入图片并正确显示
这位博主将插入讲的很好了,不过并没有讲怎么显示啊,对于我等刚刚使用的小白来说完全是一脸懵逼,不过她的源码里倒是有显示的内容,花了我三个积分,我顺便优化了下,不然有的大图显示不了,会报异常:Bitmap too large to be uploaded into a texture (2340x4160, max=4096x4096)
好了废话不多说,直接入正题:
首先说明一下,我的这个editText的对象是content,点击插入图片的按钮触发callGallery()方法
//region 调用图库
    private void callGallery(){
        Intent getAlbum = new Intent(Intent.ACTION_GET_CONTENT);
        getAlbum.setType("image/*");
        startActivityForResult(getAlbum,IMAGE_CODE);
    }
    //endregion
@Override
    protected void onActivityResult(int requestCode, int resultCode, Intent data) {
        //参考网址:http://blog.csdn.net/abc__d/article/details/51790806

        Bitmap bm = null;
        // 外界的程序访问ContentProvider所提供数据 可以通过ContentResolver接口
        ContentResolver resolver = getContentResolver();
        if(requestCode == IMAGE_CODE){
            try{
                // 获得图片的uri
                Uri originalUri = data.getData();
                bm = MediaStore.Images.Media.getBitmap(resolver,originalUri);
                String[] proj = {MediaStore.Images.Media.DATA};
                // 好像是android多媒体数据库的封装接口,具体的看Android文档
                Cursor cursor = managedQuery(originalUri,proj,null,null,null);
                // 按我个人理解 这个是获得用户选择的图片的索引值
                int column_index = cursor.getColumnIndexOrThrow(MediaStore.Images.Media.DATA);
                // 将光标移至开头 ,这个很重要,不小心很容易引起越界
                cursor.moveToFirst();
                // 最后根据索引值获取图片路径
                String path = cursor.getString(column_index);
                insertImg(path);
                //Toast.makeText(AddFlagActivity.this,path,Toast.LENGTH_SHORT).show();
            }catch (Exception e){
                e.printStackTrace();
                Toast.makeText(AddFlagActivity.this,"图片插入失败",Toast.LENGTH_SHORT).show();
            }
        }
    }
可以看到,onActivityResult()的作用就是接收到从图库中选择到的图片,然后获取到它在手机中的储存地址,将地址保存到path中,然后调用insertImg(path)方法,将图片插入到EditText中
下面就是插入的函数:
 //region 插入图片
    private void insertImg(String path){
        String tagPath = "<img src=""+path+""/>";//为图片路径加上<img>标签
        Bitmap bitmap = BitmapFactory.decodeFile(path);
        if(bitmap != null){
            SpannableString ss = getBitmapMime(path,tagPath);
            insertPhotoToEditText(ss);
            content.append("
");
            Log.d("YYPT", content.getText().toString());
        }
    }
    //endregion

    //region 将图片插入到EditText中
    private void insertPhotoToEditText(SpannableString ss){
        Editable et = content.getText();
        int start = content.getSelectionStart();
        et.insert(start,ss);
        content.setText(et);
        content.setSelection(start+ss.length());
        content.setFocusableInTouchMode(true);
        content.setFocusable(true);
    }
    //endregion

    private SpannableString getBitmapMime(String path,String tagPath) {
        SpannableString ss = new SpannableString(tagPath);//这里使用加了<img>标签的图片路径

        int width = ScreenUtils.getScreenWidth(AddFlagActivity.this);
        int height = ScreenUtils.getScreenHeight(AddFlagActivity.this);


        Bitmap bitmap = ImageUtils.getSmallBitmap(path,width,480);
        ImageSpan imageSpan = new ImageSpan(this, bitmap);
        ss.setSpan(imageSpan, 0, tagPath.length(), Spanned.SPAN_EXCLUSIVE_EXCLUSIVE);
        return ss;
    }
ScreenUtils和ImageUtils的代码分别如下(是从github别人代码里直接扒拉下来的,链接在这:XRichText ,本想直接用这个富文本编辑器,但是用他的方法出问题了,干脆自己写):
ScreenUtils:
package com.yinyoupoet.flags;

import android.app.Activity;
import android.content.Context;
import android.graphics.Bitmap;
import android.graphics.Rect;
import android.util.DisplayMetrics;
import android.view.View;
import android.view.WindowManager;

/**
 * Created by sendtion on 2016/5/25.
 */
public class ScreenUtils {

    /**
     * 获得屏幕宽度
     * @param context
     * @return
     */
    public static int getScreenWidth(Context context)
    {
        WindowManager wm = (WindowManager) context.getSystemService(Context.WINDOW_SERVICE);
        DisplayMetrics outMetrics = new DisplayMetrics();
        wm.getDefaultDisplay().getMetrics(outMetrics);
        return outMetrics.widthPixels;
    }

    /**
     * 获得屏幕高度
     * @param context
     * @return
     */
    public static int getScreenHeight(Context context) {
        WindowManager wm = (WindowManager) context
                .getSystemService(Context.WINDOW_SERVICE);
        DisplayMetrics outMetrics = new DisplayMetrics();
        wm.getDefaultDisplay().getMetrics(outMetrics);
        return outMetrics.heightPixels;
    }

    /**
     * 获得状态栏高度
     * @param context
     * @return
     */
    public static int getStatusHeight(Context context) {
        int statusHeight = -1;
        try {
            Class<?> clazz = Class.forName("com.android.internal.R$dimen");
            Object object = clazz.newInstance();
            int height = Integer.parseInt(clazz.getField("status_bar_height")
                    .get(object).toString());
            statusHeight = context.getResources().getDimensionPixelSize(height);
        } catch (Exception e) {
            e.printStackTrace();
        }
        return statusHeight;
    }

    /**
     * 获取当前屏幕截图,包含状态栏
     */
    public static Bitmap snapShotWithStatusBar(Activity activity){
        View view = activity.getWindow().getDecorView();
        view.setDrawingCacheEnabled(true);
        view.buildDrawingCache();
        Bitmap bmp = view.getDrawingCache();
        int width = getScreenWidth(activity);
        int height = getScreenHeight(activity);
        Bitmap bp = null;
        bp = Bitmap.createBitmap(bmp, 0, 0, width, height);
        view.destroyDrawingCache();
        return bp;
    }

    /**
     * 获取当前屏幕截图,不包含状态栏
     *
     */
    public static Bitmap snapShotWithoutStatusBar(Activity activity){
        View view = activity.getWindow().getDecorView();
        view.setDrawingCacheEnabled(true);
        view.buildDrawingCache();
        Bitmap bmp = view.getDrawingCache();
        Rect frame = new Rect();
        activity.getWindow().getDecorView().getWindowVisibleDisplayFrame(frame);
        int statusBarHeight = frame.top;
        int width = getScreenWidth(activity);
        int height = getScreenHeight(activity);
        Bitmap bp = null;
        bp = Bitmap.createBitmap(bmp, 0, statusBarHeight, width, height
                - statusBarHeight);
        view.destroyDrawingCache();
        return bp;
    }
}
ImageUtils:
package com.yinyoupoet.flags;

import android.content.ContentResolver;
import android.content.Context;
import android.content.Intent;
import android.graphics.Bitmap;
import android.graphics.BitmapFactory;
import android.graphics.Matrix;
import android.net.Uri;
import android.util.Base64;
import android.util.Log;

import java.io.ByteArrayInputStream;
import java.io.ByteArrayOutputStream;
import java.io.File;
import java.io.InputStream;

/**
 * Created by sendtion on 2016/5/25.
 */
public class ImageUtils {

    /**
     * 图片压缩处理,size参数为压缩比,比如size为2,则压缩为1/4
     **/
    public static Bitmap compressBitmap(String path, byte[] data, Context context, Uri uri, int size, boolean width) {
        BitmapFactory.Options options = null;
        if (size > 0) {
            BitmapFactory.Options info = new BitmapFactory.Options();
            /**如果设置true的时候,decode时候Bitmap返回的为数据将空*/
            info.inJustDecodeBounds = false;
            decodeBitmap(path, data, context, uri, info);
            int dim = info.outWidth;
            if (!width) dim = Math.max(dim, info.outHeight);
            options = new BitmapFactory.Options();
            /**把图片宽高读取放在Options里*/
            options.inSampleSize = size;
        }
        Bitmap bm = null;
        try {
            bm = decodeBitmap(path, data, context, uri, options);
        } catch (Exception e) {
            e.printStackTrace();
        }
        return bm;
    }


    /**
     * 把byte数据解析成图片
     */
    private static Bitmap decodeBitmap(String path, byte[] data, Context context, Uri uri, BitmapFactory.Options options) {
        Bitmap result = null;
        if (path != null) {
            result = BitmapFactory.decodeFile(path, options);
        } else if (data != null) {
            result = BitmapFactory.decodeByteArray(data, 0, data.length, options);
        } else if (uri != null) {
            ContentResolver cr = context.getContentResolver();
            InputStream inputStream = null;
            try {
                inputStream = cr.openInputStream(uri);
                result = BitmapFactory.decodeStream(inputStream, null, options);
                inputStream.close();
            } catch (Exception e) {
                e.printStackTrace();
            }
        }
        return result;
    }


    /**
     * 把bitmap转换成String
     *
     * @param filePath
     * @return
     */
    public static String bitmapToString(String filePath) {

        Bitmap bm = getSmallBitmap(filePath, 480, 800);

        ByteArrayOutputStream baos = new ByteArrayOutputStream();
        bm.compress(Bitmap.CompressFormat.JPEG, 40, baos);
        byte[] b = baos.toByteArray();

        return Base64.encodeToString(b, Base64.DEFAULT);

    }

    /**
     * 计算图片的缩放值
     *
     * @param options
     * @param reqWidth
     * @param reqHeight
     * @return
     */
    public static int calculateInSampleSize(BitmapFactory.Options options,
                                            int reqWidth, int reqHeight) {
        // Raw height and width of image
        final int height = options.outHeight;
        final int width = options.outWidth;
        int inSampleSize = 1;

        if (height > reqHeight || width > reqWidth) {

            // Calculate ratios of height and width to requested height and
            // width
            final int heightRatio = Math.round((float) height / (float) reqHeight);
            final int widthRatio = Math.round((float) width / (float) reqWidth);

            // Choose the smallest ratio as inSampleSize value, this will
            // guarantee
            // a final image with both dimensions larger than or equal to the
            // requested height and width.
            inSampleSize = heightRatio < widthRatio ? heightRatio : widthRatio;
        }

        return inSampleSize;
    }

    /**
     * 根据路径获得突破并压缩返回bitmap用于显示
     *
     * @return
     */
    public static Bitmap getSmallBitmap(String filePath, int newWidth, int newHeight) {
        final BitmapFactory.Options options = new BitmapFactory.Options();
        options.inJustDecodeBounds = true;
        BitmapFactory.decodeFile(filePath, options);

        // Calculate inSampleSize
        options.inSampleSize = calculateInSampleSize(options, newWidth, newHeight);

        // Decode bitmap with inSampleSize set
        options.inJustDecodeBounds = false;

        Bitmap bitmap = BitmapFactory.decodeFile(filePath, options);
        Bitmap newBitmap = compressImage(bitmap, 500);
        if (bitmap != null){
            bitmap.recycle();
        }
        return newBitmap;
    }

    /**
     * 根据view的宽度,动态缩放bitmap尺寸
     *
     * @param width
     *            view的宽度
     */
//    public Bitmap getScaledBitmap(String filePath, int width) {
//        BitmapFactory.Options options = new BitmapFactory.Options();
//        options.inJustDecodeBounds = true;
//        BitmapFactory.decodeFile(filePath, options);
//        int sampleSize = options.outWidth > width ? options.outWidth / width
//                + 1 : 1;
//        options.inJustDecodeBounds = false;
//        options.inSampleSize = sampleSize;
//        return BitmapFactory.decodeFile(filePath, options);
//    }

    /**
     * 对图片进行按比例设置
     * @param bitmap 要处理的图片
     * @return 返回处理好的图片
     */
//    public static Bitmap getScaleBitmap(Bitmap bitmap, float widthScale, float heightScale){
//        Matrix matrix = new Matrix();
//        matrix.postScale(widthScale, heightScale);
//        if(bitmap == null){
//            return null;
//        }
//        Bitmap resizeBmp  =
//                Bitmap.createBitmap(bitmap, 0, 0, bitmap.getWidth(), bitmap.getHeight(), matrix, true);
//        return resizeBmp;
//    }

    /**
     * 根据路径删除图片
     *
     * @param path
     */
    public static void deleteTempFile(String path) {
        File file = new File(path);
        if (file.exists()) {
            file.delete();
        }
    }

    /**
     * 添加到图库
     */
    public static void galleryAddPic(Context context, String path) {
        Intent mediaScanIntent = new Intent(
                Intent.ACTION_MEDIA_SCANNER_SCAN_FILE);
        File f = new File(path);
        Uri contentUri = Uri.fromFile(f);
        mediaScanIntent.setData(contentUri);
        context.sendBroadcast(mediaScanIntent);
    }

    //使用Bitmap加Matrix来缩放
    public static Bitmap resizeImage(Bitmap bitmapOrg, int newWidth, int newHeight)
    {
//        Bitmap bitmapOrg = BitmapFactory.decodeFile(imagePath);
        // 获取这个图片的宽和高
        int width = bitmapOrg.getWidth();
        int height = bitmapOrg.getHeight();
        //如果宽度为0 保持原图
        if(newWidth == 0){
            newWidth = width;
            newHeight = height;
        }
        // 创建操作图片用的matrix对象
        Matrix matrix = new Matrix();
        // 计算宽高缩放率
        float scaleWidth = newWidth / width;
        float scaleHeight = newHeight / height;
        // 缩放图片动作
        matrix.postScale(scaleWidth, scaleHeight);
        Bitmap resizedBitmap = Bitmap.createBitmap(bitmapOrg, 0, 0, newWidth,
                newHeight, matrix, true);
        //Log.e("###newWidth=", resizedBitmap.getWidth()+"");
        //Log.e("###newHeight=", resizedBitmap.getHeight()+"");
        resizedBitmap = compressImage(resizedBitmap, 100);//质量压缩
        return resizedBitmap;
    }

    //使用BitmapFactory.Options的inSampleSize参数来缩放
    public static Bitmap resizeImage2(String path, int width,int height)
    {
        BitmapFactory.Options options = new BitmapFactory.Options();
        options.inJustDecodeBounds = true;//不加载bitmap到内存中
        BitmapFactory.decodeFile(path,options);
        int outWidth = options.outWidth;
        int outHeight = options.outHeight;
        options.inDither = false;
        options.inPreferredConfig = Bitmap.Config.ARGB_8888;
        options.inSampleSize = 1;

        if (outWidth != 0 && outHeight != 0 && width != 0 && height != 0)
        {
            int sampleSize=(outWidth/width+outHeight/height)/2;
            Log.d("###", "sampleSize = " + sampleSize);
            options.inSampleSize = sampleSize;
        }

        options.inJustDecodeBounds = false;
        return BitmapFactory.decodeFile(path, options);
    }

    /**
     * 通过像素压缩图片,将修改图片宽高,适合获得缩略图,Used to get thumbnail
     * @param srcPath
     * @return
     */
    public static Bitmap compressBitmapByPath(String srcPath, float pixelW, float pixelH) {
        BitmapFactory.Options newOpts = new BitmapFactory.Options();
        //开始读入图片,此时把options.inJustDecodeBounds 设回true了
        newOpts.inJustDecodeBounds = true;
        newOpts.inPreferredConfig = Bitmap.Config.RGB_565;
        Bitmap bitmap = BitmapFactory.decodeFile(srcPath,newOpts);//此时返回bm为空

        newOpts.inJustDecodeBounds = false;
        int w = newOpts.outWidth;
        int h = newOpts.outHeight;
        //现在主流手机比较多是800*480分辨率,所以高和宽我们设置为
        float hh = pixelH;//这里设置高度为800f
        float ww = pixelW;//这里设置宽度为480f
        //缩放比。由于是固定比例缩放,只用高或者宽其中一个数据进行计算即可
        int be = 1;//be=1表示不缩放
        if (w > h && w > ww) {//如果宽度大的话根据宽度固定大小缩放
            be = (int) (newOpts.outWidth / ww);
        } else if (w < h && h > hh) {//如果高度高的话根据宽度固定大小缩放
            be = (int) (newOpts.outHeight / hh);
        }
        if (be <= 0)
            be = 1;
        newOpts.inSampleSize = be;//设置缩放比例
        //重新读入图片,注意此时已经把options.inJustDecodeBounds 设回false了
        bitmap = BitmapFactory.decodeFile(srcPath, newOpts);
        //        return compress(bitmap, maxSize); // 这里再进行质量压缩的意义不大,反而耗资源,删除
        return bitmap;
    }

    /**
     * 通过大小压缩,将修改图片宽高,适合获得缩略图,Used to get thumbnail
     * @param image
     * @param pixelW
     * @param pixelH
     * @return
     */
    public static Bitmap compressBitmapByBmp(Bitmap image, float pixelW, float pixelH) {
        ByteArrayOutputStream os = new ByteArrayOutputStream();
        image.compress(Bitmap.CompressFormat.JPEG, 100, os);
        if( os.toByteArray().length / 1024>1024) {//判断如果图片大于1M,进行压缩避免在生成图片(BitmapFactory.decodeStream)时溢出
            os.reset();//重置baos即清空baos
            image.compress(Bitmap.CompressFormat.JPEG, 50, os);//这里压缩50%,把压缩后的数据存放到baos中
        }
        ByteArrayInputStream is = new ByteArrayInputStream(os.toByteArray());
        BitmapFactory.Options newOpts = new BitmapFactory.Options();
        //开始读入图片,此时把options.inJustDecodeBounds 设回true了
        newOpts.inJustDecodeBounds = true;
        newOpts.inPreferredConfig = Bitmap.Config.RGB_565;
        Bitmap bitmap = BitmapFactory.decodeStream(is, null, newOpts);
        newOpts.inJustDecodeBounds = false;
        int w = newOpts.outWidth;
        int h = newOpts.outHeight;
        float hh = pixelH;// 设置高度为240f时,可以明显看到图片缩小了
        float ww = pixelW;// 设置宽度为120f,可以明显看到图片缩小了
        //缩放比。由于是固定比例缩放,只用高或者宽其中一个数据进行计算即可
        int be = 1;//be=1表示不缩放
        if (w > h && w > ww) {//如果宽度大的话根据宽度固定大小缩放
            be = (int) (newOpts.outWidth / ww);
        } else if (w < h && h > hh) {//如果高度高的话根据宽度固定大小缩放
            be = (int) (newOpts.outHeight / hh);
        }
        if (be <= 0) be = 1;
        newOpts.inSampleSize = be;//设置缩放比例
        //重新读入图片,注意此时已经把options.inJustDecodeBounds 设回false了
        is = new ByteArrayInputStream(os.toByteArray());
        bitmap = BitmapFactory.decodeStream(is, null, newOpts);
        int desWidth = (int) (w / be);
        int desHeight = (int) (h / be);
        bitmap = Bitmap.createScaledBitmap(bitmap, desWidth, desHeight, true);
        //压缩好比例大小后再进行质量压缩
//      return compress(bitmap, maxSize); // 这里再进行质量压缩的意义不大,反而耗资源,删除
        return bitmap;
    }

    /**
     * 质量压缩
     * @param image
     * @param maxSize
     */
    public static Bitmap compressImage(Bitmap image, int maxSize){
        ByteArrayOutputStream os = new ByteArrayOutputStream();
        // scale
        int options = 80;
        // Store the bitmap into output stream(no compress)
        image.compress(Bitmap.CompressFormat.JPEG, options, os);
        // Compress by loop
        while ( os.toByteArray().length / 1024 > maxSize) {
            // Clean up os
            os.reset();
            // interval 10
            options -= 10;
            image.compress(Bitmap.CompressFormat.JPEG, options, os);
        }

        Bitmap bitmap = null;
        byte[] b = os.toByteArray();
        if (b.length != 0) {
            bitmap = BitmapFactory.decodeByteArray(b, 0, b.length);
        }
        return bitmap;
    }


    /**
     * 对图片进行缩放
     * @param bgimage
     * @param newWidth
     * @param newHeight
     * @return
     */
    public static Bitmap zoomImage(Bitmap bgimage, double newWidth, double newHeight) {
//        //使用方式
//        Bitmap bitmap = BitmapFactory.decodeResource(getResources(), R.drawable.default_img);
//        int paddingLeft = getPaddingLeft();
//        int paddingRight = getPaddingRight();
//        int bmWidth = bitmap.getWidth();//图片高度
//        int bmHeight = bitmap.getHeight();//图片宽度
//        int zoomWidth = getWidth() - (paddingLeft + paddingRight);
//        int zoomHeight = (int) (((float)zoomWidth / (float)bmWidth) * bmHeight);
//        Bitmap newBitmap = zoomImage(bitmap, zoomWidth,zoomHeight);
        // 获取这个图片的宽和高
        float width = bgimage.getWidth();
        float height = bgimage.getHeight();
        //如果宽度为0 保持原图
        if(newWidth == 0){
            newWidth = width;
            newHeight = height;
        }
        // 创建操作图片用的matrix对象
        Matrix matrix = new Matrix();
        // 计算宽高缩放率
        float scaleWidth = ((float) newWidth) / width;
        float scaleHeight = ((float) newHeight) / height;
        // 缩放图片动作
        matrix.postScale(scaleWidth, scaleHeight);
        Bitmap bitmap = Bitmap.createBitmap(bgimage, 0, 0, (int) width,
                (int) height, matrix, true);
        bitmap = compressImage(bitmap, 100);//质量压缩
        return bitmap;
    }

}
至此,我们已经可以正确插入图片了,而且我们的内容大致如下:
今天我要胖十斤<img src="/storage/emulated/0/DCIM/Camera/IMG_20180219_144206.jpg"/>
但是如果用这一段拿去显示呢?结果就是直接将上面那一段原原本本显示出来,并没有图片显示出来。那么如何加载图片呢?
代码如下,注释掉的是因为这个方法会因为图片过大而显示不出来,所以采用下面那个没有注册的方式:
Html.ImageGetter imageGetter = new Html.ImageGetter(){
            @Override
            public Drawable getDrawable(String s) {
              /*  Drawable drawable = null;
                drawable = Drawable.createFromPath(s);

                drawable.setBounds(0,0,480,480);
                return drawable;*/
                int width = ScreenUtils.getScreenWidth(AddFlagActivity.this);
                int height = ScreenUtils.getScreenHeight(AddFlagActivity.this);
                Bitmap bitmap = ImageUtils.getSmallBitmap(s,width,480);
                Drawable drawable = new BitmapDrawable(bitmap);
                drawable.setBounds(0,0,width,height);
                return drawable;
            }
        };
再之后就可以直接显示了,代码如下:
content.setText(Html.fromHtml("要显示的字符串", imageGetter,null));
修改x1:上面的做法用于图文混合的编辑与显示是完全正确的,在编辑的时候使用了SpannableString和ImageSpan这两个东西,而在显示的时候使用了ImageGetter,但是上述做法只限于编辑一次后,以后只能看,不能改,否则就会出错。
错误在于,当使用ImageGetter将字符串以Html形式解析出图片并加载到EditText中以后,再从EditText.getText().toString()获取到的字符串,图片部分将无法解析,即不能再次恢复到<img src="xxxx" /> 这个形式,输出的具体表现形式为一个虚线框住的OBJ 。这东西不能当做string保存,因此,捣鼓半天后的解决办法,见这篇博客:EditText利用SpannableString和ImageSpan将字符串解析成图文混合形式
完整项目Github链接,欢迎大家下载:FLAGS
