开发前的准备
- 安装Laravel
- 安装二维码生成器
QrCode,没有安装也可以,接下来会安装
安装拓展
1、运行如下代码安装拓展包:
1 composer require "earnp/laravel-google-authenticator:dev-master"
2 ### 安装二维码生成器
3 ### 若composer require不到文件自行github 下载源码放入vendor相应的目录下
4 composer require simplesoftwareio/simple-qrcode 1.3.*
2、等待下载安装完成,需要在config/app.php中注册服务提供者同时注册下相应门面:
 1 'providers' => [
 2     //........
 3     EarnpGoogleAuthenticatorGoogleAuthenticatorServiceprovider::class,
 4     SimpleSoftwareIOQrCodeQrCodeServiceProvider::class,
 5 ],
 6
 7 'aliases' => [
 8      //..........
 9     'Google' => EarnpGoogleAuthenticatorFacadesGoogleAuthenticator::class,
10     'QrCode' => SimpleSoftwareIOQrCodeFacadesQrCode::class
11 ],
3、服务注入以后,如果要使用自定义的配置,还可以发布配置文件到config/views目录:
1 ###这一步可以不执行:视情况而定
2 php artisan vendor:publish
使用一(项目中使用)
使用方法非常简单,主要为生成验证码和校验验证码
1、生产验证码
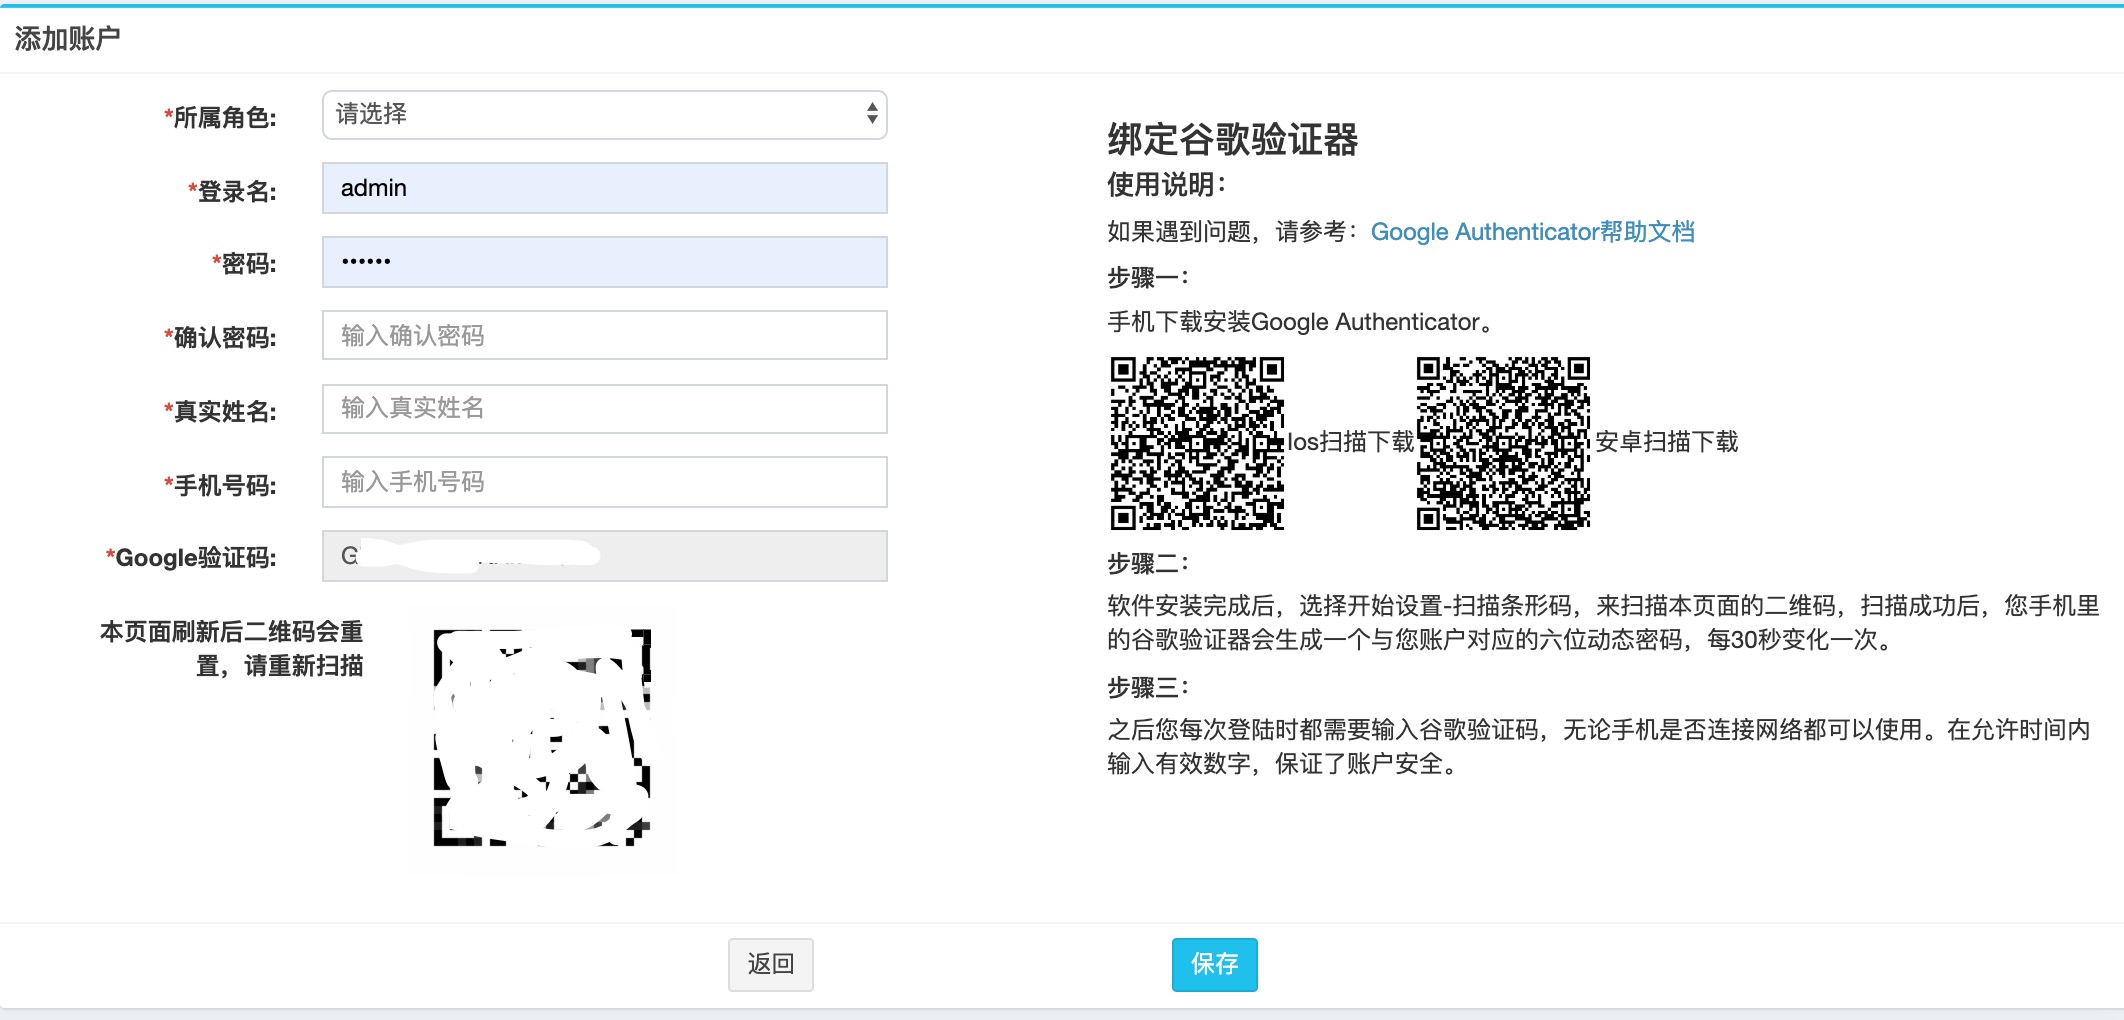
生产验证码使用CreateSecret即可,你需要将其内容生成二维码供手机APP扫描,具体内容在google.blade.php中已经配置成功
 1 public function addUser(Request $request)
 2 {
 3     if($request->isMethod('get')){
 4          // 创建谷歌验证码
 5          $createSecret = GoogleAuthenticator::CreateSecret();
 6          //$createSecret = [
 7          //   "secret" => "NJURUPQN6XNYGSF2"
 8          //   "codeurl" => "otpauth://totp/?secret=NJURUPQN6XNYGSF2"
 9          //]
10          // 生成二维码
11          $createSecret["qrcode"] = QrCode::encoding('UTF-8')->size(180)->margin(1)->generate($createSecret["codeurl"]);
12          //发送页面
13          return view('auth.auth.add',['google'=>$createSecret]);
14     }
15     //获取数据
16     $user_from = $request->only(['role_id','username','pass','pass_confirmation','real_name','mobile','secret']);
17
18     //保存入库 secret会存入数据库
19     $auth_user = new AuthUserService();
20     $res = $auth_user->addUser($user_from);
21     return redirect('admin/auth/index');
22 }
2、校验验证码
 1 //登录验证
 2 public function login(array $param)
 3 {
 4     $model = new AuthUserModel();
 5     //Google 验证
 6     if(!GoogleAuthenticator::CheckCode($userInfo['secret'],$param['secret'])){
 7         return ['status'=>false,'msg'=>['secret'=>['验证码错误,请重新输入']]];
 8     }
 9
10     $update = $model->editLoginInfo($userInfo['id'], $update);
11     if(!$update){
12         return ['status'=>false,'msg'=>['username'=>'更新登录信息失败']];
13     }else{
14         return ['status'=>true,'data'=>$userInfo];
15     }
16 }
使用二(Demo)
1、校验验证码
校验验证码一般用于绑定,登录认证中,使用CheckCode方法即可,需要传入secrect和onecode即验证码即可进行校验,第一个为secrect;返回true或false
if(Google::CheckCode($google,$request->onecode)) {
    // 绑定场景:绑定成功,向数据库插入google参数,跳转到登录界面让用户登录
    // 登录认证场景:认证成功,执行认证操作
    dd("认证成功");
}else {
    // 绑定场景:认证失败,返回重新绑定,刷新新的二维码
    return back()->with('msg','请正确输入手机上google验证码 !')->withInput();
    // 登录认证场景:认证失败,返回重新绑定,刷新新的二维码
    return back()->with('msg','验证码错误,请输入正确的验证码 !')->withInput();
}
这里有一个具体的实际事例:
use Google;

if ($request->isMethod('post')) {
    if (empty($request->onecode) && strlen($request->onecode) != 6) return back()->with('msg','请正确输入手机上google验证码 !')->withInput();
    // google密钥,绑定的时候为生成的密钥;如果是绑定后登录,从数据库取以前绑定的密钥
    $google = $request->google;
    // 验证验证码和密钥是否相同
    if(Google::CheckCode($google,$request->onecode)) {
        // 绑定场景:绑定成功,向数据库插入google参数,跳转到登录界面让用户登录
        // 登录认证场景:认证成功,执行认证操作
        dd("认证成功");
    }else {
        // 绑定场景:认证失败,返回重新绑定,刷新新的二维码
        return back()->with('msg','请正确输入手机上google验证码 !')->withInput();
        // 登录认证场景:认证失败,返回重新绑定,刷新新的二维码
        return back()->with('msg','验证码错误,请输入正确的验证码 !')->withInput();
    }
}else {
    // 创建谷歌验证码
    $createSecret = Google::CreateSecret();
    // 您自定义的参数,随表单返回
    $parameter = [["name"=>"usename","value"=>"123"]];
    return view('login.google.google', ['createSecret' => $createSecret,"parameter" => $parameter]);
}