1.在components下建一个

2.代码如下:
<template>
<!--1.业务是开始有一组数据,序号,姓名,性别,年龄,操作(删除)
2.有三个输入框输入姓名,性别,年龄,(增加)
3.当输入东西后,按了增加按钮,将增加一组数据到数组中
4.当按了删除就会删除一组数据
主要业务如上
细节:(重点)
1.加样式让表格对齐等,像表格的感觉,表格如何设置宽高
2.引入背景图片方式
3.增加时验证是否有值输入在输入框
4.v-model双向绑定,导致增加到数组的数据也会发生变化,引用传递和值传递区别,利用对象复制,开辟新空间来存储
5.===会验证值和类型,==只能验证值
6.splice使用注意
7.css样式的使用
-->
<div>
<center>
<div class="top">
*姓名:<input type="text" v-model="datas.name" placeholder="请输入姓名" >
*性别<input type="text" v-model="datas.sex" placeholder="请输入性别">
*年龄<input type="text" v-model="datas.age" placeholder="请输入年龄">
<button @click="pushUsers" style="color:blue">增加</button>
<table class="top-left" >
<!-- <img src="~@/assets/timg.jpg"> 这是引入图片 -->
<br>
<!--
1.这里加了<thead>表头</thead> <tbody>表体</tbody>,则不对齐
2.其实可以认为th就是表头,td就是表体
3.想要表格变大,就是让每个单元格变大,
tr标签只能改变的是高度,td和th只能改变宽度
-->
<tr>
<th v-for="site in heads" :key="site" class="th1">{{site}}</th>
</tr>
<tr v-for="(user,index) in users" :key="user">
<td class="td1">{{index+1}}</td>
<td class="td1">{{user.name}}</td>
<td class="td1">{{user.sex}}</td>
<td class="td1">{{user.age}}</td>
<td class="td1"><button @click="deleteUsers(index)" style="color:blue">删除</button></td>
</tr>
</table>
</div>
</center>
</div>
</template>
<script>
export default{
data(){
return {
heads:['序号','姓名','性别','年龄','操作'],
datas:{name:'',sex:'',age:''},
users:[
{name:'张三',sex:'男',age:'22'},
{name:'李四',sex:'女',age:'24'},
{name:'小何',sex:'男',age:'25'}
]
}
},
methods:{
pushUsers(){
//这个要好好理解一下,这里目的是把datas对象复制,就是开辟个新空间。
//为啥具体要这步骤呢,
//1.当你不加的时候,当你增加了一个对象后,你改变输入框的值,数组中增加的对象的值也会跟着改变,因为数组和对象都是引用传递
//这里引用传递,相当就是我们一直是给一个内存地址赋值,所以才会跟着联改。引用传递:保存的是引用值(还是一个地址),值传递保存的是一个数据
//进行了一些表单验证
if(this.datas.name.trim()===""){
window.alert('请输入姓名');
return false;
}
if(this.datas.sex.trim()===''){
window.alert('请输入性别');
return false;
}
if(this.datas.age.trim()===''){
window.alert('请输入年龄');
return false;
}
let copy =Object.assign({},this.datas)
this.users.push(copy);
console.log("name:"+this.datas.name+",sex:"+this.datas.sex+",age:"+this.datas.age)
},
deleteUsers(index){
console.log("index:"+index)
this.users.splice(index,1);
//splice(index,num,item1,item2,item3....) 新增/删除/替换
//index,代表数组新增/删除时的索引值,num:删除多少个,item:代表新增哪些/替换掉删除的哪些
},
}
}
</script>
<style>
.top-left th,td{
border:1px solid #ccc;
margin: auto;
text-align: center;
/* 1px:代表边框的宽度 ,solid:代表实线,dotted(点状),double(双线),dashed(虚线)
这里 th和td间要加一个,号
margin:外边距,auto:浏览器自动计算 ,也可以自己设置值
text-align:文本对齐方式,left 左对齐,right:右对齐,center:居中
*/
}
.top{
position: absolute;
700px;
height:400px;
border: 1px solid red;
left: 0px;
top: 0px;
bottom: 0px;
right: 0px;
margin: auto;
font-size: 16px;
color: blue;
/* 引入背景图方式 */
background: url('~@/assets/timg.jpg') center center no-repeat;
background-size : 700px,200px;
}
.th1 {
80px;
}
.td1 {
80px;
}
tr{
height: 80px;
}
</style>
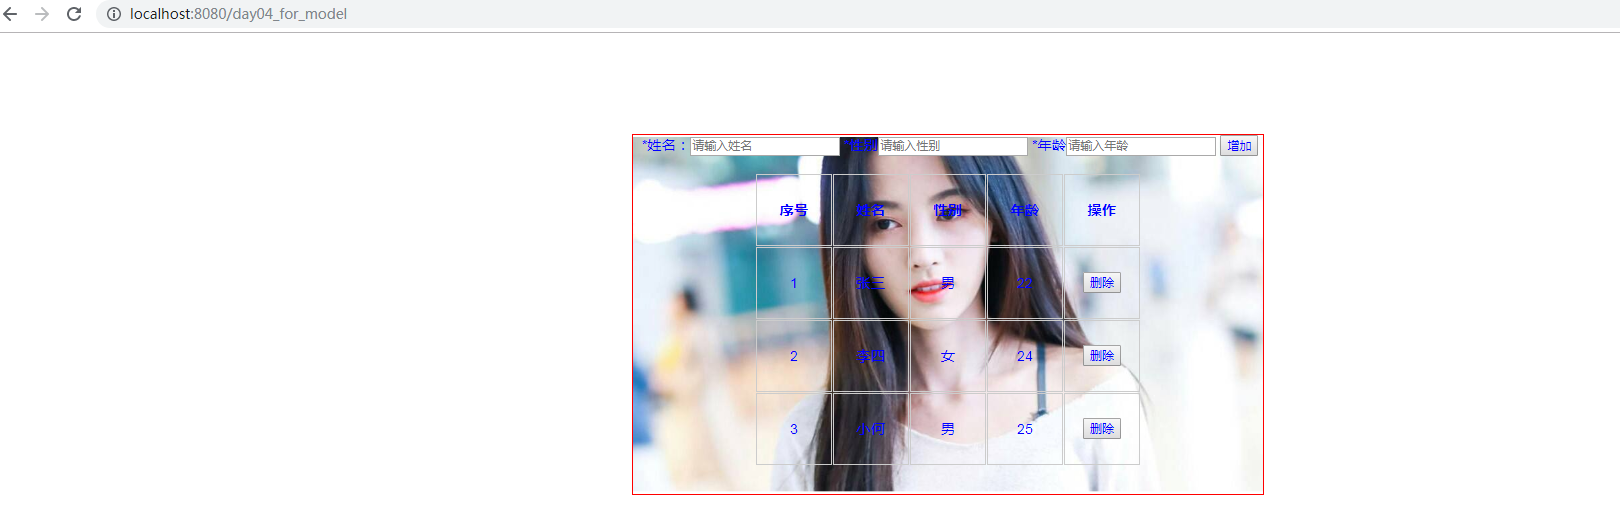
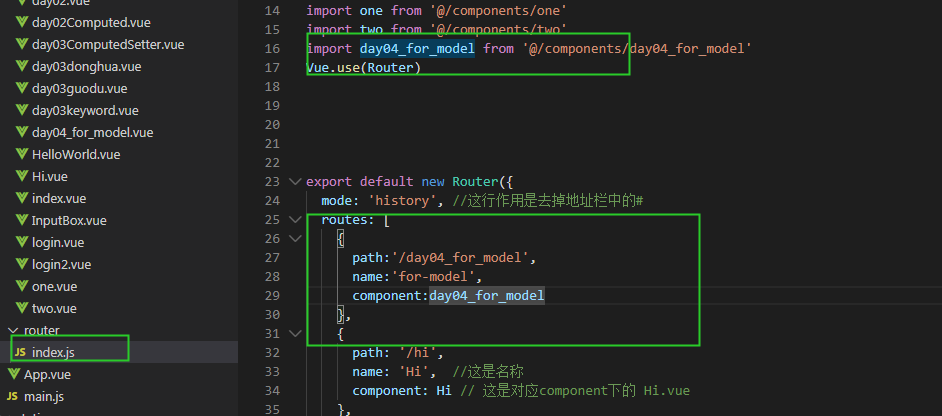
3..index.js下添加路由
4.效果如图: