继续学习prometheus,上一节演示了用http方式使用curl向pushgateway发送数据,本节将研究如何利用client jar包,以java代码的方式写入数据。
一、依赖的jar包


 1 <dependency>
 2     <groupId>io.prometheus</groupId>
 3     <artifactId>simpleclient</artifactId>
 4     <version>0.9.0</version>
 5 </dependency>
 6
 7 <dependency>
 8     <groupId>io.prometheus</groupId>
 9     <artifactId>simpleclient_pushgateway</artifactId>
10     <version>0.9.0</version>
11 </dependency>
主要就是上面2个(这是最小配置),考虑到我们通常是在spring环境中使用,一般还要加1个spring依赖,完整pom如下:
<?xml version="1.0" encoding="UTF-8"?>
<project xmlns="http://maven.apache.org/POM/4.0.0" xmlns:xsi="http://www.w3.org/2001/XMLSchema-instance"
         xsi:schemaLocation="http://maven.apache.org/POM/4.0.0 https://maven.apache.org/xsd/maven-4.0.0.xsd">
    <modelVersion>4.0.0</modelVersion>

    <groupId>com.cnblogs.yjmyzz</groupId>
    <artifactId>spring-boot-demo</artifactId>
    <version>0.0.1-SNAPSHOT</version>

    <properties>
        <java.version>1.8</java.version>
    </properties>

    <dependencies>
        <!-- spring应用最小依赖-->
        <dependency>
            <groupId>org.springframework</groupId>
            <artifactId>spring-context</artifactId>
            <version>5.2.4.RELEASE</version>
        </dependency>

        <!-- The client -->
        <dependency>
            <groupId>io.prometheus</groupId>
            <artifactId>simpleclient</artifactId>
            <version>0.9.0</version>
        </dependency>

        <dependency>
            <groupId>io.prometheus</groupId>
            <artifactId>simpleclient_pushgateway</artifactId>
            <version>0.9.0</version>
        </dependency>

        <!--        下面2个也常用,但在本例中用不到-->
        <!--        <dependency>-->
        <!--            <groupId>io.prometheus</groupId>-->
        <!--            <artifactId>simpleclient_hotspot</artifactId>-->
        <!--            <version>0.9.0</version>-->
        <!--        </dependency>-->
        <!--        <dependency>-->
        <!--            <groupId>io.prometheus</groupId>-->
        <!--            <artifactId>simpleclient_httpserver</artifactId>-->
        <!--            <version>0.9.0</version>-->
        <!--        </dependency>-->

    </dependencies>

    <build>
        <plugins>
            <plugin>
                <artifactId>maven-compiler-plugin</artifactId>
                <version>3.1</version>
                <configuration>
                    <source>1.8</source>
                    <target>1.8</target>
                </configuration>
            </plugin>

        </plugins>
    </build>

</project>
二、示例代码
package com.cnblogs.yjmyzz.springbootdemo;

import io.prometheus.client.Counter;
import io.prometheus.client.Gauge;
import io.prometheus.client.exporter.PushGateway;
import org.springframework.context.annotation.AnnotationConfigApplicationContext;
import org.springframework.context.annotation.Bean;
import org.springframework.context.annotation.ComponentScan;

import java.io.IOException;
import java.util.Random;


/**
 * @author 菩提树下的杨过(http : / / yjmyzz.cnblogs.com)
 * 利用client写入prometheus示例
 */
@ComponentScan("com.cnblogs.yjmyzz")
public class SampleApplication {

    /**
     * push网关
     *
     * @return
     */
    @Bean
    public PushGateway getPushGateway() {
        return new PushGateway("localhost:9091");
    }

    /**
     * counter实例
     *
     * @return
     */
    @Bean
    public Counter getCounter() {
        return Counter.build()
                .name("blog_visit") //这里模拟博客访问量
                .labelNames("blog_id") //博客id
                .help("counter_blog_visit") //这个名字随便起
                .register(); //注:通常只能注册1次,1个实例中重复注册会报错
    }

    @Bean
    public Gauge getGauge() {
        return Gauge.build()
                .name("blog_fans") //这里模拟粉丝数(注:这里我们没设置label)
                .help("gauge_blog_fans")
                .register();
    }

    public static void main(String[] args) throws IOException, InterruptedException {
        AnnotationConfigApplicationContext context = new AnnotationConfigApplicationContext(SampleApplication.class);

        //从spring上下文中取出这些实例
        Counter counter = context.getBean(Counter.class);
        Gauge gauge = context.getBean(Gauge.class);
        PushGateway gateway = context.getBean(PushGateway.class);
        Random rnd = new Random();

        //粉丝数先预设50
        gauge.inc(50);
        while (true) {
            //随机生成1个blogId
            int blogId = rnd.nextInt(100000);
            //该blogId的访问量+1
            counter.labels(blogId + "").inc();
            //模拟粉丝数的变化
            if (blogId % 2 == 0) {
                gauge.inc();
            } else {
                gauge.dec();
            }
            //利用网关采集数据
            gateway.push(counter, "job-counter-test");
            gateway.push(gauge, "job-gauge-test");

            //辅助输出日志
            System.out.println("blogId:" + blogId);
            Thread.sleep(5000);
        }
    }
}
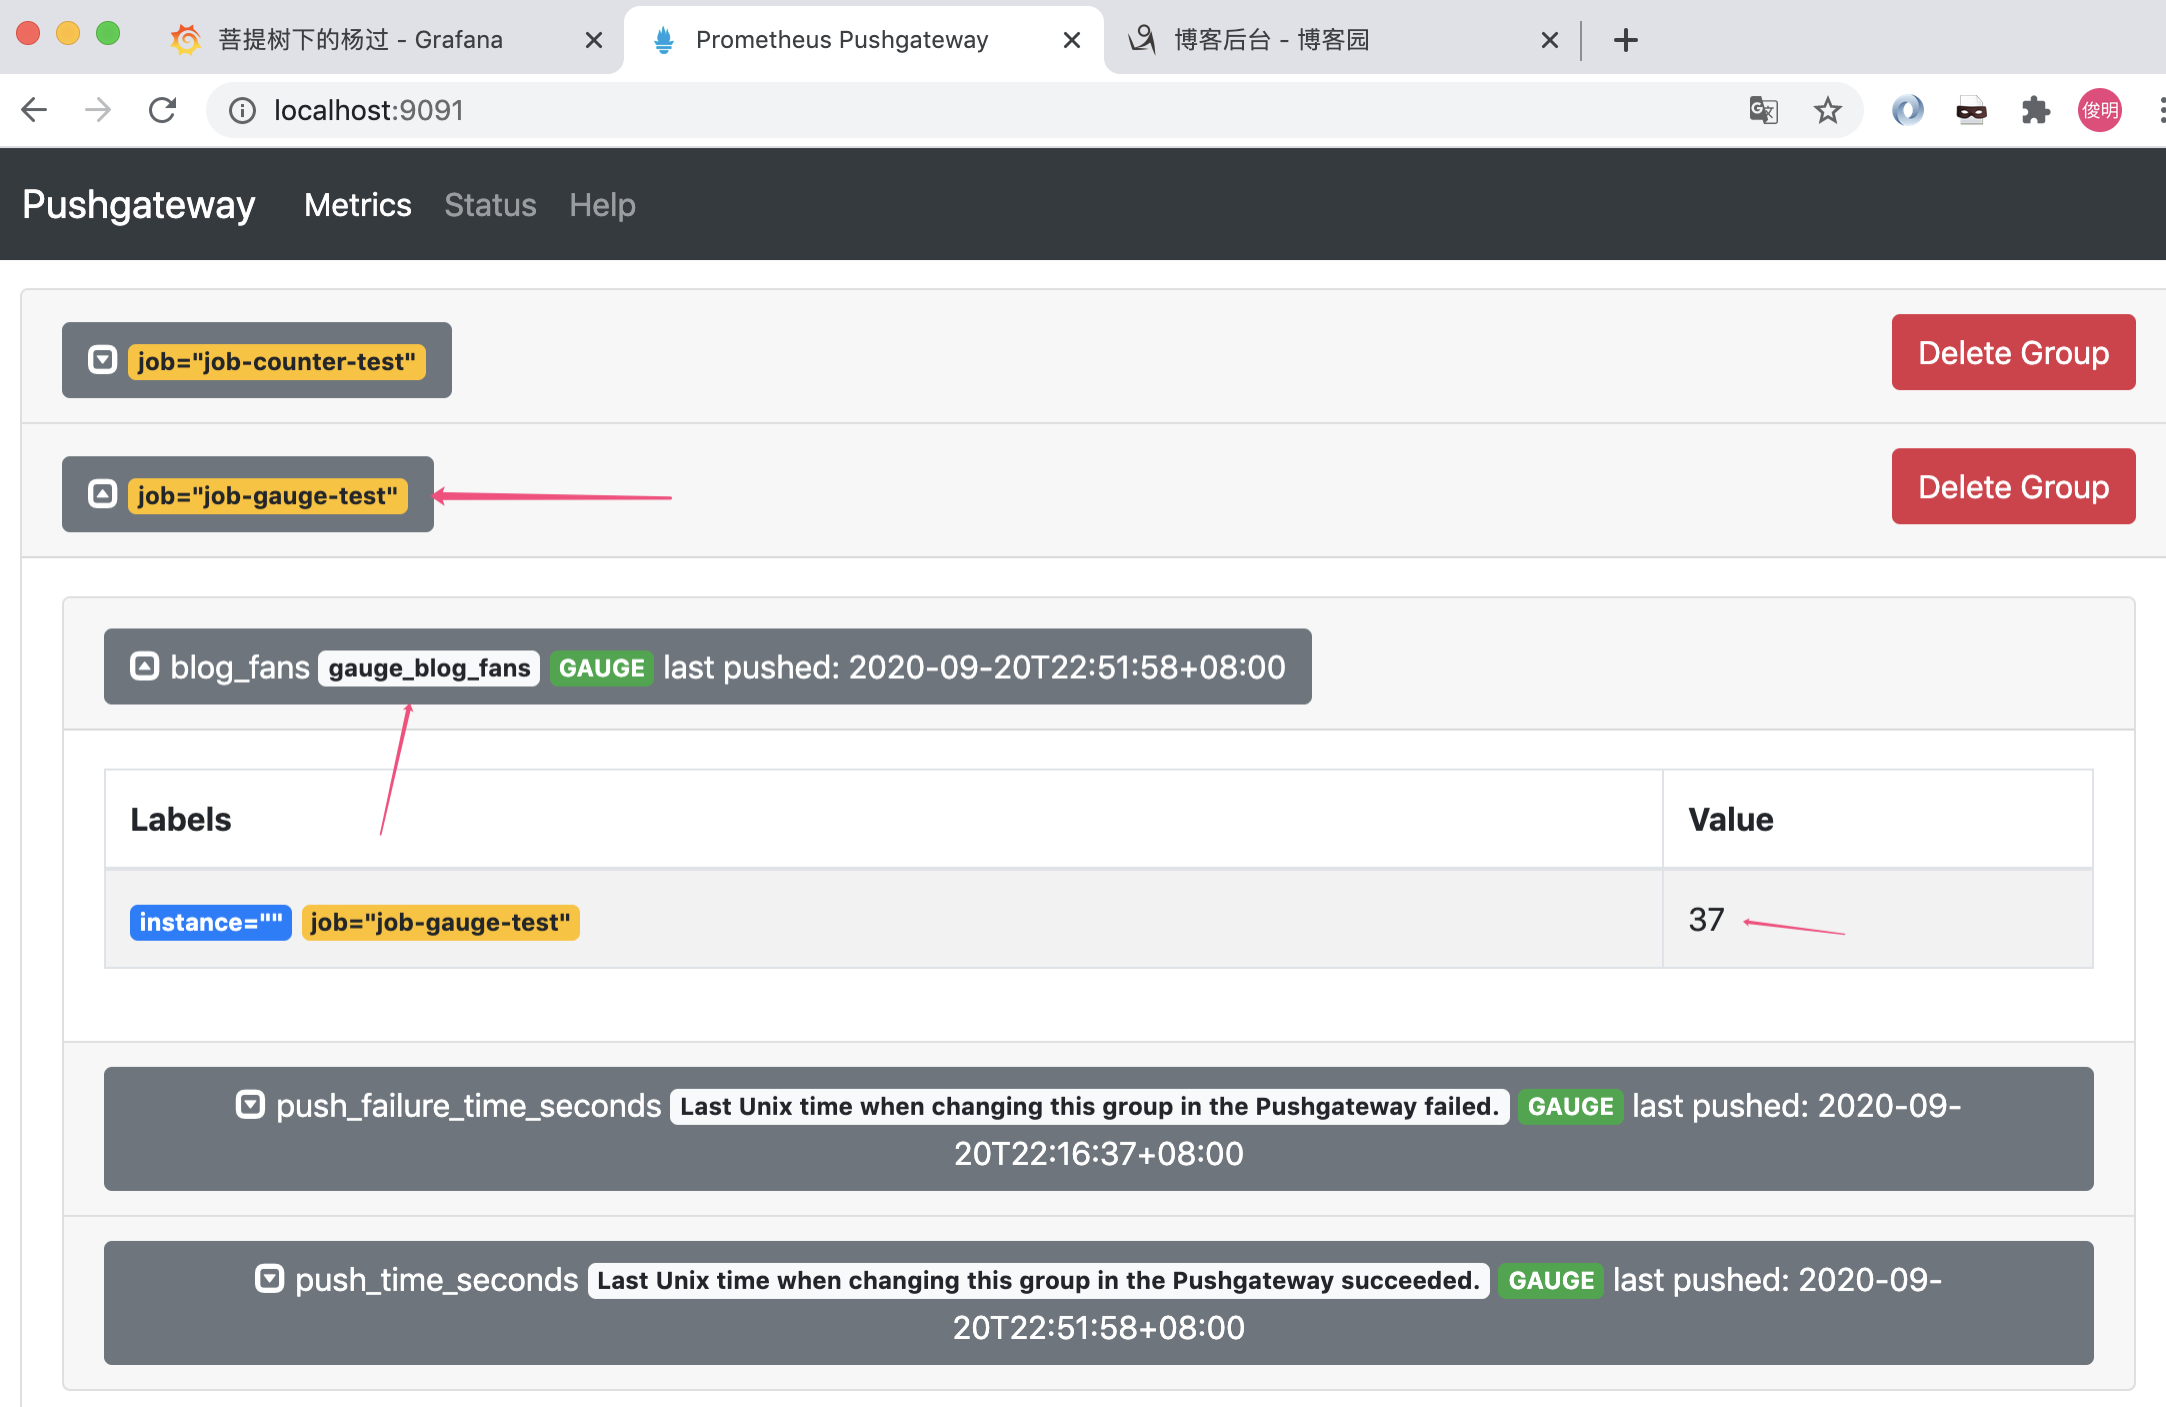
代码运行起来后,可以通过http://localhost:9091,确认job是否执行成功
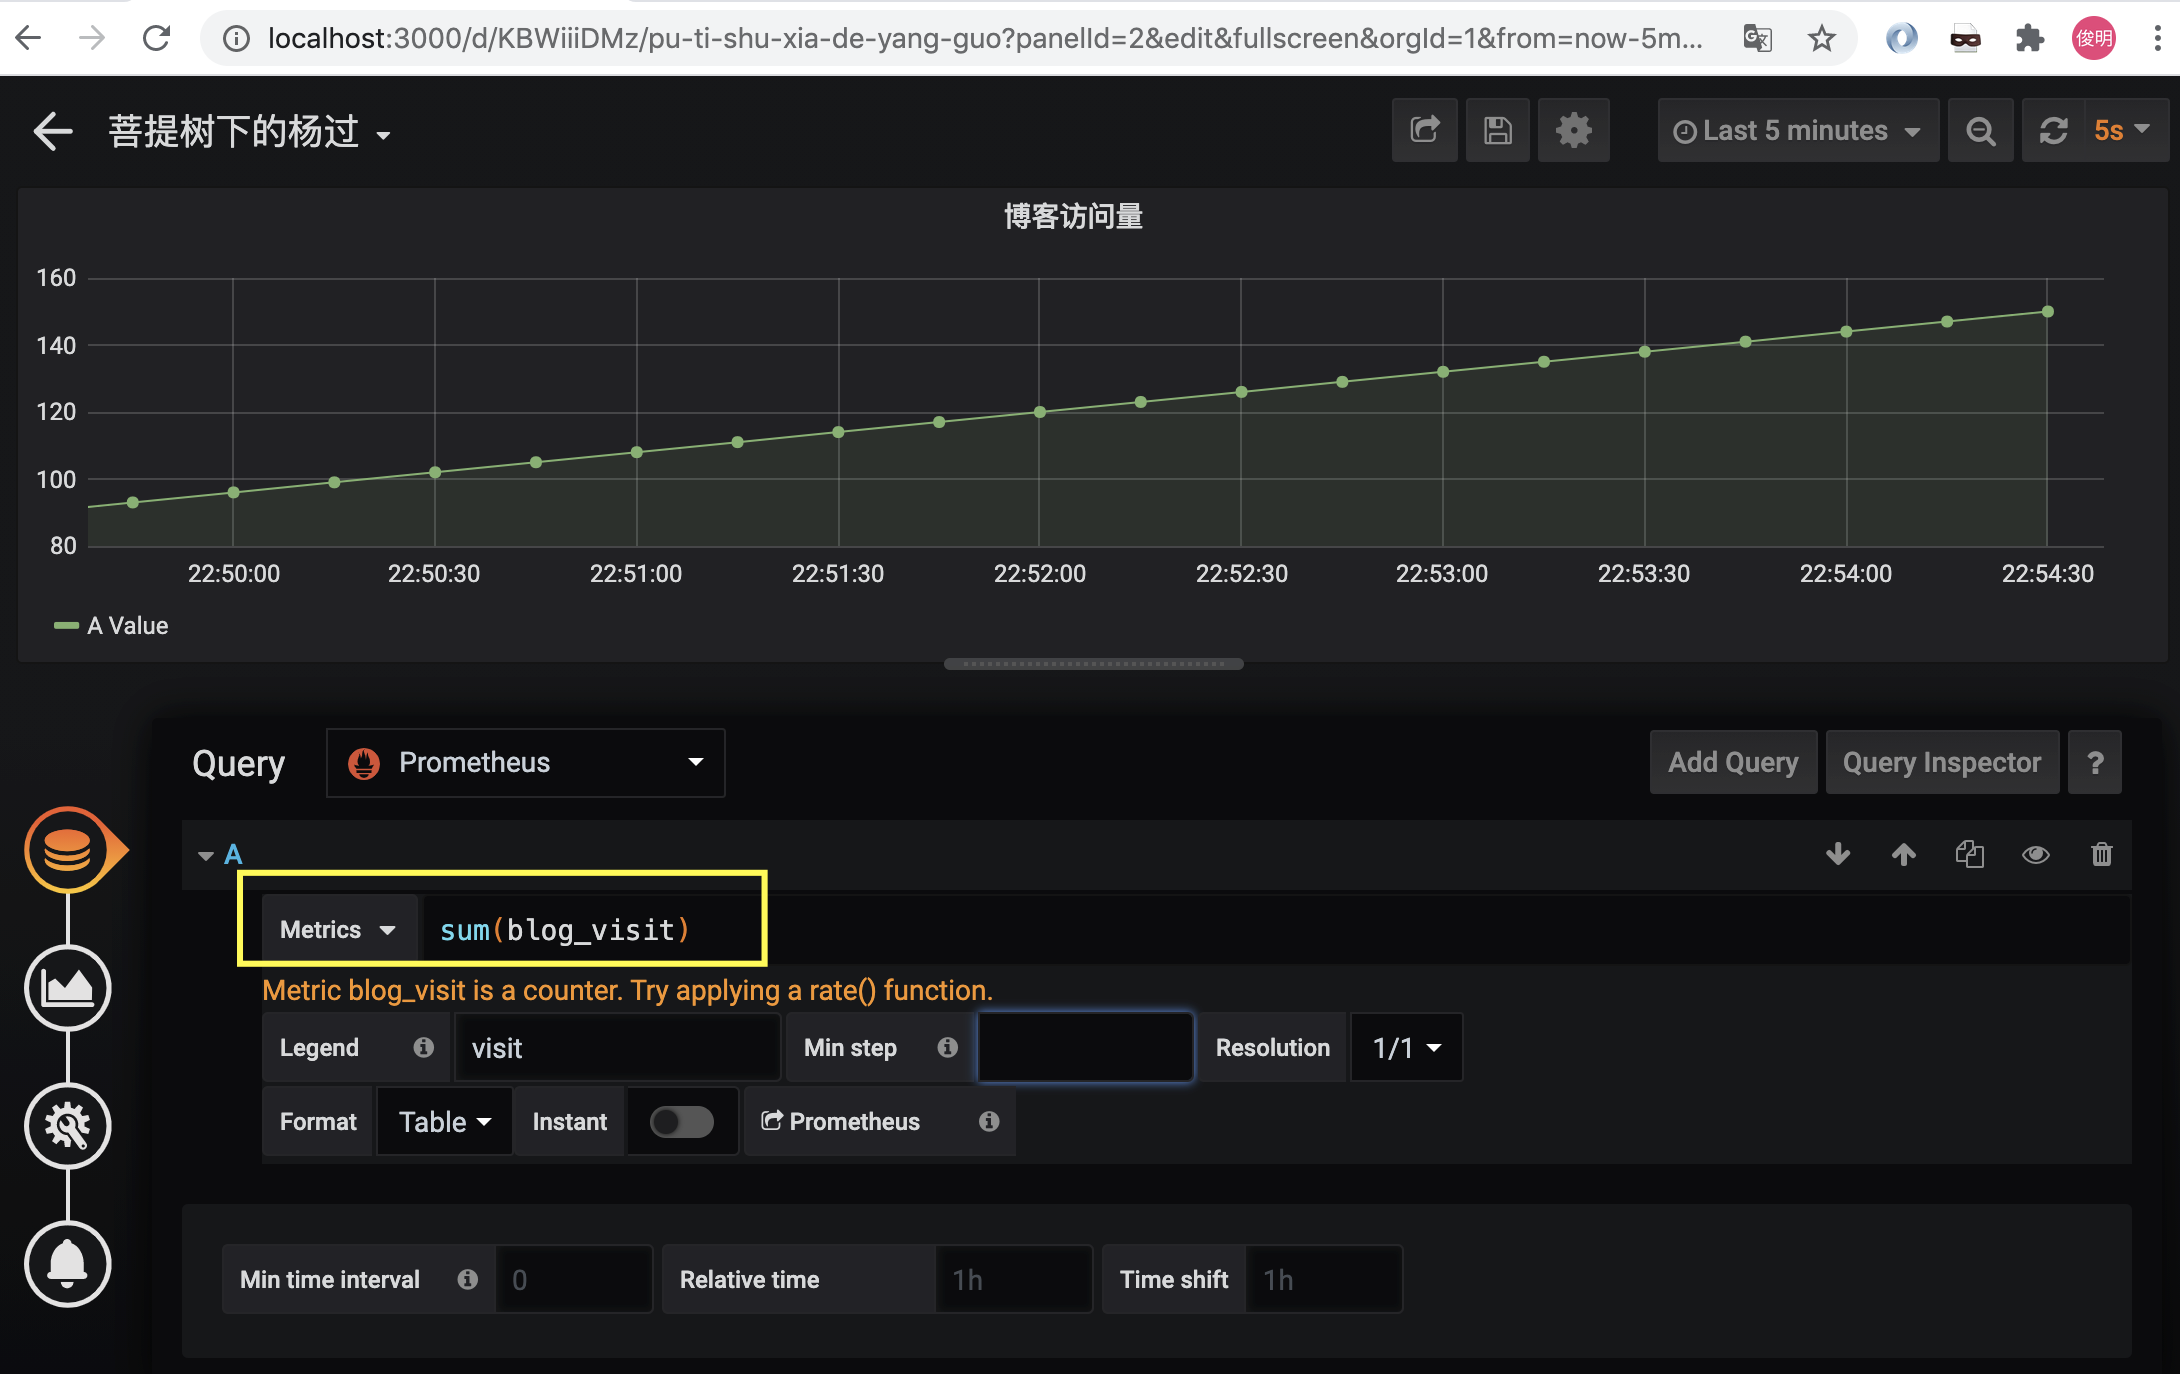
三、配置grafana图表
写入成功后,grafana里就能识别出这2个指标了:

参考文章: