前言
Ninject是一款开源的轻量级的依赖注入插件。从接触ioc以来,一直都是使用这个,感觉用起来还是不错的,配置起来也很方便简单。在mvc中更是基本傻瓜式的配置。
开发前的准备
- 新建一个mvc3项目。
- 安装Ninject.mvc3. 这个产检是ninject在mvc3中的一个扩展。可以直接在nuget中安装。如下图:

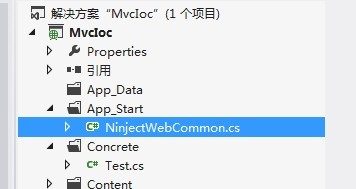
搜索出来以后,点击安装到自己的相应的项目层即可(我这里只有一层,所以就直接安装到网站根目录下),这样项目中就会出现一个文件夹App_Start下面有一个cs文件,是ninject.mvc3这个插件为我写好的ioc类。
这样我们就配置好了环境,可以开始依赖注入的开发了。
开发
- 新建一个接口类ITest:
 1 using System;
 2 using System.Collections.Generic;
 3 using System.Linq;
 4 using System.Web;
 5
 6 namespace MvcIoc.Interface
 7 {
 8     public interface ITest
 9     {
10         string GetMsg(string str);
11
12     }
13 }
2.再新建一个类Test,实现ITest接口
 1 using System;
 2 using System.Collections.Generic;
 3 using System.Linq;
 4 using System.Web;
 5 using MvcIoc.Interface;
 6
 7 namespace MvcIoc.Concrete
 8 {
 9     public class Test:ITest
10     {
11         public string GetMsg(string str)
12         {
13             return "依赖注入测试消息:" + str;
14         }
15     }
16 }
3.打开我们安装Ninject.mvc3的时候App_Start下自动创建的cs类。在代码中将Itest和Test绑定。代码如下:
[assembly: WebActivator.PreApplicationStartMethod(typeof(MvcIoc.App_Start.NinjectWebCommon), "Start")]
[assembly: WebActivator.ApplicationShutdownMethodAttribute(typeof(MvcIoc.App_Start.NinjectWebCommon), "Stop")]

namespace MvcIoc.App_Start
{
    using System;
    using System.Web;

    using Microsoft.Web.Infrastructure.DynamicModuleHelper;

    using Ninject;
    using Ninject.Web.Common;
    using MvcIoc.Interface;
    using MvcIoc.Concrete;
    public static class NinjectWebCommon
    {
        private static readonly Bootstrapper bootstrapper = new Bootstrapper();

        /// <summary>
        /// Starts the application
        /// </summary>
        public static void Start()
        {
            DynamicModuleUtility.RegisterModule(typeof(OnePerRequestHttpModule));
            DynamicModuleUtility.RegisterModule(typeof(NinjectHttpModule));
            bootstrapper.Initialize(CreateKernel);
        }

        /// <summary>
        /// Stops the application.
        /// </summary>
        public static void Stop()
        {
            bootstrapper.ShutDown();
        }

        /// <summary>
        /// Creates the kernel that will manage your application.
        /// </summary>
        /// <returns>The created kernel.</returns>
        private static IKernel CreateKernel()
        {
            var kernel = new StandardKernel();
            kernel.Bind<Func<IKernel>>().ToMethod(ctx => () => new Bootstrapper().Kernel);
            kernel.Bind<IHttpModule>().To<HttpApplicationInitializationHttpModule>();

            RegisterServices(kernel);
            return kernel;
        }

        /// <summary>
        /// Load your modules or register your services here!
        /// </summary>
        /// <param name="kernel">The kernel.</param>
        private static void RegisterServices(IKernel kernel)
        {
            //所有接口和实现类的绑定都在写在此处
            kernel.Bind<ITest>().To<Test>();
        }
    }
}
这样我们就将一个接口和一个实现改接口的类绑定在一起了。
4.新建一个HomeController,然后写一个Index的action,并创建index的视图。并在构造器中给接口Itest初始化一个对象。
 1 using System;
 2 using System.Collections.Generic;
 3 using System.Linq;
 4 using System.Web;
 5 using System.Web.Mvc;
 6 using MvcIoc.Interface;
 7 namespace MvcIoc.Controllers
 8 {
 9     public class HomeController : Controller
10     {
11         //
12         // GET: /Home/
13
14         public ITest test;//定义要调用的接口在构造器初始化。
15         public HomeController(ITest test)
16         {
17             this.test = test;
18         }
19
20         public ActionResult Index()
21         {
22             ViewBag.test = test.GetMsg("测试成功");
23             return View();
24         }
25
26     }
27 }
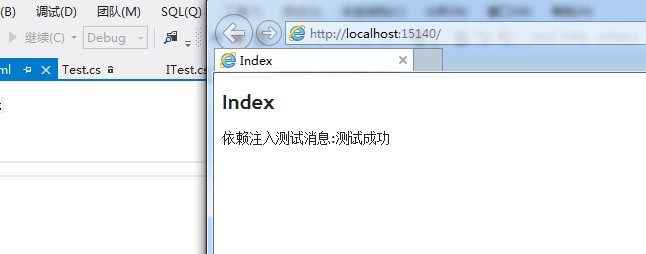
然后视图代码:在页面上显示调用的GetMsg返回的消息。
1 @{
2     ViewBag.Title = "Index";
3 }
4
5 <h2>Index</h2>
6 @ViewBag.test
5.这样一个依赖注入的项目就完成了,运行代码。结果如下: