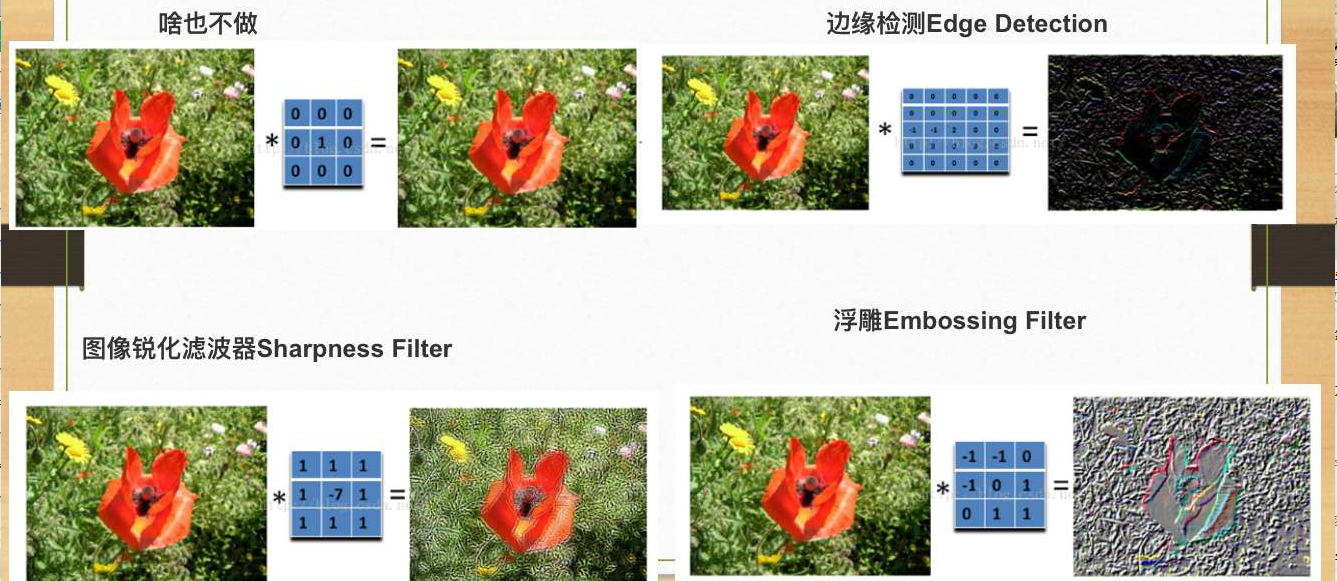
之前在看卷积神经网络,很好奇卷积到底是什么,最后看到了这篇文章http://blog.csdn.net/zouxy09/article/details/49080029,讲得很清楚,这篇文章中提到了对图像的滤波处理就是对图像应用一个小小的卷积核,并给出了以下例子:
对图像的卷积,opencv已经有实现的函数filter2D,注意,卷积核需要是奇数行,奇数列,这样才能有一个中心点。opencv卷积的简单实践如下:
import matplotlib.pyplot as plt
import pylab
import cv2
import numpy as np

img = plt.imread("apic.jpg")                        #在这里读取图片

plt.imshow(img)                                     #显示读取的图片
pylab.show()

fil = np.array([[ -1,-1, 0],                        #这个是设置的滤波,也就是卷积核
                [ -1, 0, 1],
                [  0, 1, 1]])

res = cv2.filter2D(img,-1,fil)                      #使用opencv的卷积函数

plt.imshow(res)                                     #显示卷积后的图片
plt.imsave("res.jpg",res)
pylab.show()
知道了原理以后,就想自己实现一个简单的卷积,卷积的过程如下,对于mxn的图像,用kxk的滤波依次扫描,扫描的过程就是把原图的矩阵和卷积核依次进行逐点相乘(wise-element)并求和(需要注意求和结果可能大于255或小于0),在卷积特征提取ufldl讲了卷积的具体过程。
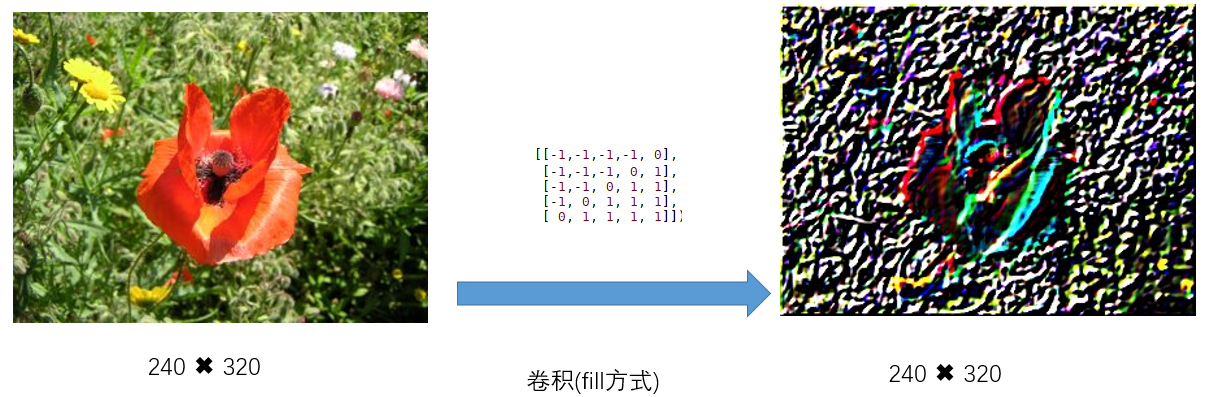
可以发现一个规律,就是卷积后的图像的大小为(m - k + 1)x(n - k + 1),写代码的时候需要根据这个规律来确定卷积后的图像的大小。

根据原理,实现代码如下:
 1 import matplotlib.pyplot as plt
 2 import pylab
 3 import numpy as np
 4
 5 def convolve(img,fil,mode = 'same'):                #分别提取三个通道
 6
 7     if mode == 'fill':
 8         h = fil.shape[0] // 2
 9         w = fil.shape[1] // 2
10         img = np.pad(img, ((h, h), (w, w),(0, 0)), 'constant')
11     conv_b = _convolve(img[:,:,0],fil)              #然后去进行卷积操作
12     conv_g = _convolve(img[:,:,1],fil)
13     conv_r = _convolve(img[:,:,2],fil)
14
15     dstack = np.dstack([conv_b,conv_g,conv_r])      #将卷积后的三个通道合并
16     return dstack                                   #返回卷积后的结果
17 def _convolve(img,fil):
18
19     fil_heigh = fil.shape[0]                        #获取卷积核(滤波)的高度
20     fil_width = fil.shape[1]                        #获取卷积核(滤波)的宽度
21
22     conv_heigh = img.shape[0] - fil.shape[0] + 1    #确定卷积结果的大小
23     conv_width = img.shape[1] - fil.shape[1] + 1
24
25     conv = np.zeros((conv_heigh,conv_width),dtype = 'uint8')
26
27     for i in range(conv_heigh):
28         for j in range(conv_width):                 #逐点相乘并求和得到每一个点
29             conv[i][j] = wise_element_sum(img[i:i + fil_heigh,j:j + fil_width ],fil)
30     return conv
31
32 def wise_element_sum(img,fil):
33     res = (img * fil).sum()
34     if(res < 0):
35         res = 0
36     elif res > 255:
37         res  = 255
38     return res
39
40 img = plt.imread("photo.jpg")                        #在这里读取图片
41
42 plt.imshow(img)                                     #显示读取的图片
43 pylab.show()
44
45
46 #卷积核应该是奇数行,奇数列的
47 fil = np.array([[-1,-1,-1, 0, 1],
48                 [-1,-1, 0, 1, 1],
49                 [-1, 0, 1, 1, 1]])
50
51 res = convolve(img,fil,'fill')
52 print("img shape :" + str(img.shape))
53 plt.imshow(res)                                     #显示卷积后的图片
54 print("res shape :" + str(res.shape))
55 plt.imsave("res.jpg",res)
56 pylab.show()
使用图像水平边缘滤波和浮雕滤波的结果如下,效果和opencv结果一致:

另外这里也有关于卷积c/c++实现:http://lodev.org/cgtutor/filtering.html