Statement执行更新操作
Statement:Statement 是 Java 执行数据库操作的一个重要方法,用于在已经建立数据库连接的基础上,向数据库发送要执行的SQL语句。Statement对象,用于执行不带参数的简单SQL语句。
通过JDBC向指定的数据表中插入一条记录,需要注意下面的几点:
* 1.Statement:用于执行SQL语句的对象
     * 1).通过COnnection的createStatement()方法来获取
     * 2).通过excuteUpdate(sql)可以执行SQL语句
     * 3).传入的SQL可以是insert,update或者delete,但是不能是select
    * 2.Connection、Statement都是应用程序和数据库服务器的连接   资源,使用后一定要关闭
     * 需要在finally中关闭Connection和Statement对象
     * 异常可以不处理,但是连接一定要关闭
     * 3.关闭的顺序:先关闭后获取的,即先关闭Statement,后关闭Connection
具体的代码实现:
public void testStatement() throws Exception{
        //1.获取数据库连接
        //        Connection conn=getConnection();
        Connection conn=null;
        //4.执行插入
                //1).获取操作SQL语句的Statement对象:调用Connection的createStatement()方法来获取
                //注意Statement这里是java.sql包中的,而不是java.mysql.jdbc中的
        //        Statement statement=conn.createStatement();
        Statement statement=null;
        try {
            //3.准备插入的SQL语句
            conn=getConnection();
            String sql=null;
            //sql的插入操作
//            sql="insert into customers(NAME,email,birth) values('xyz','xyz@atguigu.com','1988-7-1')";
            //删除操作
//            sql="delete from customers where id =1";
            //修改操作
            sql="update customers set name='Tom' where id =2";
            statement = conn.createStatement();
            //2).调用Statement对象的excuteUpdate(sql),执行SQL语句进行插入
            statement.execute(sql);
            //5.关闭Statement对象
        } catch (Exception e) {
            e.printStackTrace();
        } finally {
            try {
                if (statement != null) {
                    statement.close();
                }
            } catch (Exception e) {
                e.printStackTrace();
            } finally {

                // 2.关闭连接
                if (conn != null) {

                    conn.close();
                }
            }
        }
    }
【提示】:代码中的getConnction方法是在笔记一中定义的,可以看到我们可以对数据库中的记录进行插入(insert),更新(update),删除(delete)操作,使用Connection对象的createStatement( )方法创建一个statement对象,并且调用Statement对象的excuteUpdate(sql),执行SQL语句进行插入;
我们的getConnection方法和关闭statement以及conn的操作稍显复杂,我们可以定义一个工具类,里面包含一些通用的方法,实现我们的插入、删除、更新数据的操作
具体代码:
public class JDBCTools {
    // 关闭conn和statement的操作
    public static void release(Statement statement, Connection conn) {
        if (statement != null) {
            try {
                statement.close();

            } catch (Exception e2) {
                // TODO: handle exception
            }
        }
        if (conn != null) {
            try {
                conn.close();
            } catch (SQLException e) {
                e.printStackTrace();
            }
        }
    }

    /**
     * 1。获取连接的方法 通过读取配置文件从数据库服务器获取一个连接
     *
     * @author Administrator
     *
     */
    public static Connection getConnection() throws Exception {
        String driverClass = null;
        String jdbcUrl = null;
        String user = null;
        String password = null;
        // 读取类路径下的jdbc.properties文件
        InputStream in = JDBCTools.class.getClassLoader().getResourceAsStream(
                "jdbc.properties");
        Properties properties = new Properties();
        properties.load(in);
        driverClass = properties.getProperty("driver");
        jdbcUrl = properties.getProperty("jdbcUrl");
        user = properties.getProperty("user");
        password = properties.getProperty("password");
        // 通过反射创建Driver对象
        Driver driver = (Driver) Class.forName(driverClass).newInstance();
        Properties info = new Properties();
        info.put("user", user);
        info.put("password", password);
        Connection connection = driver.connect(jdbcUrl, info);
        return connection;
    }
}
我们更新数据的操作可以写成这样:这里update就是这个通用的方法;
public void update(String sql){
        Connection conn=null;
        Statement statement=null;
        try {
            //用到了我们写的一个工具类JDBCTools
            conn=JDBCTools.getConnection();
            statement=conn.createStatement();
            statement.execute(sql);
        } catch (Exception e) {
            // TODO: handle exception
        }finally{
            JDBCTools.release(statement, conn);
        }
    }
传入不同的sql,执行相应的操作;
通过ResultSet执行查询操作
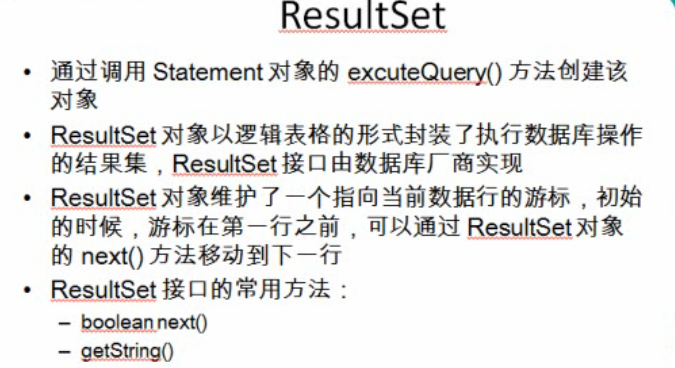
ResultSet:
 /**
     * ResultSet:结果集,封装了使用JDBC进行查询的结果
     * 1.调用Statement对象的excuteQuery(sql)方法可以得到结果集
     * 2.ResultSet返回的实际上就是一张数据表,有一个指针
     *   指向数据表的第一样的前面,可以调用next()方法检测下一行是否有效,若有效则返回true
     *   ,并且指针下移,相当于迭代器对象的hasNext()和next()的结合体
     * 3.当指针对位到确定的一行时,可以通过调用getXxx(index)或者getXxx(columnName)
     * 获取每一列的值,例如:getInt(1),getString("name")
     * 4.ResultSet当然也需要进行关闭
     */
ResultSet的返回结果:

具体的代码实现:
@Test
    public void testResultSet(){
        //获取id=2的customers数据表的记录,并打印
        //面向接口的编程
        Connection conn=null;
        Statement statement=null;
        ResultSet rs=null;
        try {
            //1.获取Connection
            conn=JDBCTools.getConnection();
            System.out.println(conn);
            //2.获取Statement
            statement=conn.createStatement();
            System.out.println(statement);
            //3.准备SQL
            String sql="select id,name,email,birth from customers";
            //4.执行查询,得到ResultSet
            rs=statement.executeQuery(sql);
            System.out.println(rs);
            //5.处理ResultSet
            while(rs.next()){
                int id=rs.getInt(1);
                String name=rs.getString("name");
                String email=rs.getString(3);
                Date birth=rs.getDate(4);
                System.out.println(id);
                System.out.println(name);
                System.out.println(email);
                System.out.println(birth);
                System.out.println("--------------");
            }
            //6.关闭数据库资源

        } catch (Exception e) {
            e.printStackTrace();
        }finally{
            JDBCTools.release(rs, statement, conn);
        }
    }
到目前为止的完整代码:
package com.atguigu.jdbc;

import java.io.InputStream;
import java.sql.*;
import java.util.Properties;

import org.junit.Test;

import com.mysql.jdbc.Driver;

//JDBC学习
public class JDBCTest {
    /**
     * ResultSet:结果集,封装了使用JDBC进行查询的结果
     * 1.调用Statement对象的excuteQuery(sql)方法可以得到结果集
     * 2.ResultSet返回的实际上就是一张数据表,有一个指针
     *   指向数据表的第一样的前面,可以调用next()方法检测下一行是否有效,若有效则返回true
     *   ,并且指针下移,相当于迭代器对象的hasNext()和next()的结合体
     * 3.当指针对位到确定的一行时,可以通过调用getXxx(index)或者getXxx(columnName)
     * 获取每一列的值,例如:getInt(1),getString("name")
     * 4.ResultSet当然也需要进行关闭
     */
    @Test
    public void testResultSet(){
        //获取id=2的customers数据表的记录,并打印
        //面向接口的编程
        Connection conn=null;
        Statement statement=null;
        ResultSet rs=null;
        try {
            //1.获取Connection
            conn=JDBCTools.getConnection();
            System.out.println(conn);
            //2.获取Statement
            statement=conn.createStatement();
            System.out.println(statement);
            //3.准备SQL
            String sql="select id,name,email,birth from customers";
            //4.执行查询,得到ResultSet
            rs=statement.executeQuery(sql);
            System.out.println(rs);
            //5.处理ResultSet
            while(rs.next()){
                int id=rs.getInt(1);
                String name=rs.getString("name");
                String email=rs.getString(3);
                Date birth=rs.getDate(4);
                System.out.println(id);
                System.out.println(name);
                System.out.println(email);
                System.out.println(birth);
                System.out.println("--------------");
            }
            //6.关闭数据库资源

        } catch (Exception e) {
            e.printStackTrace();
        }finally{
            JDBCTools.release(rs, statement, conn);
        }
    }
    /**
     * 通用的更新的方法:包括insert,update,delete
     * 版本1.
     */
    /*public void update(String sql){
        Connection conn=null;
        Statement statement=null;
        try {
            //用到了我们写的一个工具类JDBCTools
            conn=JDBCTools.getConnection();
            statement=conn.createStatement();
            statement.execute(sql);
        } catch (Exception e) {
            // TODO: handle exception
        }finally{
            JDBCTools.release(statement, conn);
        }
    }*/
    /*
     * 通过JDBC向指定的数据表中插入一条记录
     * 我这里用的是图形化界面SQLyog
     * SQLyog图形化界面连接mysql数据库,注册码:
     * 这个可用【我用了还是可以】
        Name:BAKA!
        Code:560f17bf57745cf9
     */
    /**
     * 通过JDBC向指定的数据表中插入一条记录
     * 1.Statement:用于执行SQL语句的对象
     * 1).通过COnnection的createStatement()方法来获取
     * 2).通过excuteUpdate(sql)可以执行SQL语句
     * 3).传入的SQL可以是insert,update或者delete,但是不能是select
     * 2.Connection、Statement都是应用程序和数据库服务器的连接资源,使用
     *   后一定要关闭
     * 需要在finally中关闭Connection和Statement对象
     * 异常可以不处理,但是连接一定要关闭
     * 3.关闭的顺序:先关闭后获取的,即先关闭Statement,后关闭Connection
     * @throws Exception
     */
    @Test
    public void testStatement() throws Exception{
        //1.获取数据库连接
        //        Connection conn=getConnection();
        Connection conn=null;
        //4.执行插入
                //1).获取操作SQL语句的Statement对象:调用Connection的createStatement()方法来获取
                //注意Statement这里是java.sql包中的,而不是java.mysql.jdbc中的
        //        Statement statement=conn.createStatement();
        Statement statement=null;
        try {
            //3.准备插入的SQL语句
            conn=getConnection();
            String sql=null;
            //sql的插入操作
//            sql="insert into customers(NAME,email,birth) values('xyz','xyz@atguigu.com','1988-7-1')";
            //删除操作
//            sql="delete from customers where id =1";
            //修改操作
            sql="update customers set name='Tom' where id =2";
            statement = conn.createStatement();
            //2).调用Statement对象的excuteUpdate(sql),执行SQL语句进行插入
            statement.execute(sql);
            //5.关闭Statement对象
        } catch (Exception e) {
            e.printStackTrace();
        } finally {
            try {
                if (statement != null) {
                    statement.close();
                }
            } catch (Exception e) {
                e.printStackTrace();
            } finally {

                // 2.关闭连接
                if (conn != null) {

                    conn.close();
                }
            }
        }
    }

    public Connection testGetConnection2() throws Exception{
        //1.准备连接数据库的四个字符串
        //1).创建Properties对象
        Properties properties=new Properties();
        //2).获取jdbc.properties对应的输入流
        InputStream in=this.getClass().
                getClassLoader().getResourceAsStream("jdbc.properties");
        //3).加载2)对应的输入流
        properties.load(in);
        //4).具体决定user,password等四个字符串
        String user=properties.getProperty("user");
        String jdbcUrl=properties.getProperty("jdbcUrl");
        String password=properties.getProperty("password");
        String driver=properties.getProperty("driver");
        //2.加载数据库驱动程序(对应的Driver实现类中注册驱动的静态代码块)
        Class.forName(driver);
        //3.通过DriverManager的getConnection()方法获取数据库连接
        return DriverManager.getConnection(jdbcUrl,user,password);
    }
    /**
     * DriverManager是驱动的管理类
     * 1).可以通过重载的getConnection()方法获取数据库连接,较为方便
     * 2).可以同时管理多个驱动程序:若注册了多个数据库连接
     * ,则调用getConnection()方法时传入的参数不同,即返回不同的数据库连接
     * @throws Exception
     */
    public void testDriverManager() throws Exception{
        //1.准备连接数据库的四个字符串
        //驱动的全类名
        String driverClass="com.mysql.jdbc.Driver";
        //url
        String jdbcUrl="dbc:mysql://localhost:3306/atguigu";
        //user
        String user="root";
        //password
        String password="123456";
        //读取类路径下的jdbc.properties文件
        InputStream in=getClass().getClassLoader()
                .getResourceAsStream("jdbc.properties");
        Properties properties=new Properties();
        properties.load(in);
        driverClass=properties.getProperty("driver");
        jdbcUrl=properties.getProperty("jdbcUrl");
        user=properties.getProperty("user");
        //2.加载数据库驱动程序(对应的Driver实现类中注册驱动的静态代码块)
        /*
         *使用Drivermanager的好处:可以加载多个驱动
        DriverManager
        .registerDriver(Class.forName(driverClass).newInstance());
         *
         */
        Class.forName(driverClass);
        password=properties.getProperty("password");
        //3.通过DriverManager的getConnection()方法获取数据库连接
        Connection connection=DriverManager
                .getConnection(jdbcUrl, user, password);
        System.out.println(connection);
    }

    /**
     * Driver是一个接口,数据库厂商必须提供实现的接口
     * 能从其中获取数据库连接,可以通过Driver的实现类的对象获取连接
     * 1.加入mysql驱动
     * 1).解压mysql-connector-java-5.1.18.zip
     * 2).在当前目录下新建lib目录
     * 3).把mysql-connector-java-5.1.18-bin.jar复制到lib目录
     * 4).右键->build-path->add build path加载到类路径下
     * @throws SQLException
     *
     */
        /*
         * MySQL附带了一个空密码有的root用户。成功后安装了数据库和客户端,需要进行如下设置root密码:

    D:softwaremysql-5.6.25-winx64in> mysqladmin -u root password "123456";
    注:

    1. 关闭正在运行的MySQL服务。
    2. 打开DOS窗口,转到 D:softwaremysql-5.6.25-winx64in 目录。
    3. 输入mysqld --skip-grant-tables 回车。--skip-grant-tables 的意思是启动MySQL服务的时候跳过权限表认证。
    4. 再开一个DOS窗口(因为刚才那个DOS窗口已经不能动了),转到mysqlin目录。
    5. 输入mysql回车,如果成功,将出现MySQL提示符 >。
    6. 连接权限数据库: use mysql; 。
    6. 改密码:update user set password=password("123456") where user="root";(别忘了最后加分号) 。
    7. 刷新权限(必须步骤):flush privileges;
    8. 退出 quit。
    9. 注销系统,再进入,使用用户名root和刚才设置的新密码 123456 登录。
    现在使MySQL服务器的连接,那么使用下面的命令:
     */
    public static void main(String[] args) throws SQLException {
        //1.创建一个Driver实现类的对象
        Driver driver=new com.mysql.jdbc.Driver();
        /*
         * JDBC URL的标准由三部分组成
         * jdbc:<子协议>:<子名称>
         * 1).协议:JDBC URL中的协议总是JDBC
         * 2).子协议:子协议用于标识一个数据库驱动程序
         * 3).紫明成:一种标识数据库的方法。子名称可以一句不同的
         * 子协议而变化,用子名称的目的是为了定位数据库提供足够的信息
         * 例如:jdbc:mysql://127.0.0.1:3306/test【这是我的主机上的,你的不一定】
         * 查看端口号:在mysql后面输入show global variables like 'port';别写错了,切记别忘记写英文状态下的分号
         */
        //2.准备连接数据库的基本信息,url,user,password
        String url="jdbc:mysql://localhost:3306/test";
        Properties info=new Properties();
        info.put("user", "root");
        info.put("password", "123456");
        //3.调用Driver接口实现类对象的connect(url,info)方法获取数据库的连接
        //此处Connection是一个接口,java.sql包下的接口
        Connection connection=driver.connect(url, info);
        System.out.println(connection);
    }
    /**
     * 编写一个通用的方法,在不修改源程序的情况下,可以获取任何数据库的连接
     * 解决方案:把数据库驱动Driver实现类的全类名、url、user、password
     * 放入一个配置文件中,通过修改配置文件的方法实现和具体的数据库解耦
     * @throws ClassNotFoundException
     * @throws IllegalAccessException
     * @throws InstantiationException
     */
    public Connection getConnection() throws Exception{
        String driverClass=null;
        String jdbcUrl=null;
        String user=null;
        String password=null;
        //读取类路径下的jdbc.properties文件
        InputStream in=getClass().getClassLoader()
                .getResourceAsStream("jdbc.properties");
        Properties properties=new Properties();
        properties.load(in);
        driverClass=properties.getProperty("driver");
        jdbcUrl=properties.getProperty("jdbcUrl");
        user=properties.getProperty("user");
        password=properties.getProperty("password");
        //通过反射创建Driver对象
        Driver driver=(Driver) Class.forName(driverClass).newInstance();
        Properties info=new Properties();
        info.put("user", user);
        info.put("password", password);
        Connection connection=driver.connect(jdbcUrl, info);
        return connection;
    }
    @Test
    public void testGetConnection() throws Exception{
        System.out.println(getConnection());
    }
}
JDBCTools:
package com.atguigu.jdbc;

import java.io.InputStream;
import java.sql.Connection;
import java.sql.ResultSet;
import java.sql.SQLException;
import java.sql.Statement;
import java.util.Properties;

import com.mysql.jdbc.Driver;

/**
 * 操作JDBC的工具类,其中封装了一些工具方法
 * Version 1
 * @author Administrator
 *
 */
public class JDBCTools {
    // 关闭conn和statement的操作
    public static void release(ResultSet rs,Statement statement, Connection conn) {
        if(rs!=null){
            try {
                rs.close();
            } catch (Exception e) {
                // TODO: handle exception
            }
        }
        if (statement != null) {
            try {
                statement.close();

            } catch (Exception e2) {
                // TODO: handle exception
            }
        }
        if (conn != null) {
            try {
                conn.close();
            } catch (SQLException e) {
                e.printStackTrace();
            }
        }
    }

    /**
     * 1。获取连接的方法 通过读取配置文件从数据库服务器获取一个连接
     *
     * @author Administrator
     *
     */
    public static Connection getConnection() throws Exception {
        String driverClass = null;
        String jdbcUrl = null;
        String user = null;
        String password = null;
        // 读取类路径下的jdbc.properties文件
        InputStream in = JDBCTools.class.getClassLoader().getResourceAsStream(
                "jdbc.properties");
        Properties properties = new Properties();
        properties.load(in);
        driverClass = properties.getProperty("driver");
        jdbcUrl = properties.getProperty("jdbcUrl");
        user = properties.getProperty("user");
        password = properties.getProperty("password");
        // 通过反射创建Driver对象
        Driver driver = (Driver) Class.forName(driverClass).newInstance();
        Properties info = new Properties();
        info.put("user", user);
        info.put("password", password);
        Connection connection = driver.connect(jdbcUrl, info);
        return connection;
    }
}
本文为博主原创文章,转载请注明出处:http://www.cnblogs.com/ysw-go/
1、本博客的原创原创文章,都是本人平时学习所做的笔记,如有错误,欢迎指正。
2、如有侵犯您的知识产权和版权问题,请通知本人,本人会即时做出处理文章。
3、本博客的目的是知识交流所用,转载自其它博客或网站,作为自己的参考资料的,感谢这些文章的原创人员