由于现在的教程大都是linux环境下deeplabv3+的实现,并且很多都是使用的voc数据集,因此本人在windows中使用cityscapes数据集训练deeplabv3+的过程中遇到了很多问题,查阅了很多前辈和大佬的博文才能够实现,在此我对整个训练过程中遇到的问题进行了整理。由于问题较多,没有分先问题出现的先后问题。
在最开始下载deeplab源码时,选择不同branch可能会导致不同问题,参见Issue #6567。本人最开始选择了master branch,最后出现 eval.py 和 vis.py 不出结果,及tensorflow:Waiting for new checkpoint at ...问题,切换r1.12.0 branch可用。
在此首先提醒各位读者,在实现deeplab之前一定要先阅读官方提供的文档以及文件内容,从官网下载下来的源代码中默认的大都是基于voc数据集的,并且不能像在linux中使用命令直接设置参数,因此很多参数需要我们手动去修改,否则我们会走很多弯路,遇到各式各样的问题。
官方提供的cityscapes数据集训练教程:https://github.com/tensorflow/models/blob/r1.12.0/research/deeplab/g3doc/cityscapes.md
参数设置:
1.train.py
其中 model_variant 在common文件中,将其修改为 xception_65 的同时将 decoder_output_stride 设置为4。
在训练时,batch_size和 crop_size 要根据自己的电脑显存而定,由于本人机子较为落后,2g的独显,因此将 train_batch_size 设置为1,fine_tune_batch_norm 设置为false,train_crop_size设置为[321,321],其中train_crop_size最小为321。如果仅为测试,training_number_of_steps 可以设置小一点,比如1000,否则会训练很长时间。
tf_initial_checkpoint 为预训练模型路径,可在 https://github.com/tensorflow/models/blob/r1.12.0/research/deeplab/g3doc/model_zoo.md 中下载,大小为439兆。
train_logdir 为检查点保存路径,使用官方提供的目录结构可保存在 cityscapes/exp/train_on_train_set/train 目录中。
使用 xception_65 将 output_stride 设置为16,atrous_rates 设置为 [6, 12, 18]。
dataset 改为 cityscapes。dataset_dir 为读取数据集的路径,及tfrecord保存路径。
2.eval.py 和 vis.py
这两个文件中的大部分参数和train.py保持一致,个别参数在下方作出说明:
checkpoint_dir 为检查点的路径,及train.py中的 cityscapes/exp/train_on_train_set/train 目录。
eval_logdir 和 vis_logdir 为写入评估事件的目录,分别保存在 cityscapes/exp/train_on_train_set/eval 和 cityscapes/exp/train_on_train_set/vis 中。
eval_crop_size 和 vis_crop_size 设置为读入图片的大小,cityscapes数据集为[1025,2049]。
其他问题及解决方法:
问题:ModuleNotFoundError: No module named 'nets' 和 No module named 'deployment'
在运行model_test和train时会现,这两个文件在models/research文件夹下,将其添加到环境中即可。或者直接将其中用到的文件复制到外部库中。
问题:InvalidArgumentError (see above for traceback): padded_shape[0]=49 is not divisible by block_shape[0]=2
官方默认给的crop_size为[1025,2049]为测试的原图片的大小,如果将其更改可能会出现此问题。
问题:data split name train not recognized
此问题出现在master分支中,出现的原因为代码中已经没有“train”这个变量,而是train_fine,后面的eval和vis同理。此时需要把生成的tfrecord文件名修改一下
 改为
改为 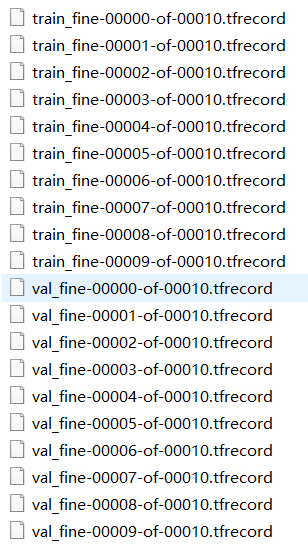
如果使用r1.12.0分支则没有此问题。
问题:OOM when allocating tensor with shape ... and type ...
出现原因:显卡内存不够,可将batch_size或crop_size调小
问题:lhs shape= [1,1,512,256] rhs shape= [1,1,1280,256]
出现原因可能是由于export_model中atrous_rates参数没有设置
问题:tensorflow:Waiting for new checkpoint at ...
master分支下运行eval和vis出现的问题,具体原因不清楚,可使用r1.12.0分支下的源代码

使用导出的模型进行测试:
其中官方给出了deeplab_demo.ipynb,大家可以将其转换为 py 文件,或从网上直接查询其 py 源代码,将其中图片路径和模型路径修改为自己本地的存储目录。并将其中类别和颜色修改为cityscapes数据集的。具体可参考 https://blog.csdn.net/zz2230633069/article/details/84591532
修改后的文件:


  1 # -*- coding: utf-8 -*-
  2 import os
  3
  4 from matplotlib import gridspec
  5 from matplotlib import pyplot as plt
  6 import numpy as np
  7 from PIL import Image
  8
  9 import tensorflow as tf
 10 from tensorflow import ConfigProto
 11 from tensorflow import InteractiveSession
 12
 13 config = ConfigProto()
 14 config.gpu_options.allow_growth = True
 15 session = InteractiveSession(config=config)
 16
 17
 18 #这个地方指定输出的模型路径
 19 TEST_PB_PATH    = './output_model/frozen_inference_graph.pb'
 20
 21 #这个地方指定需要测试的图片
 22 TEST_IMAGE_PATH = "./image/1.jpg"
 23
 24
 25 class DeepLabModel(object):
 26   INPUT_TENSOR_NAME  = 'ImageTensor:0'
 27   OUTPUT_TENSOR_NAME = 'SemanticPredictions:0'
 28   INPUT_SIZE         = 513
 29   FROZEN_GRAPH_NAME  = 'frozen_inference_graph'
 30
 31   def __init__(self):
 32     self.graph = tf.Graph()
 33
 34     graph_def = None
 35
 36     with open(TEST_PB_PATH, 'rb') as fhandle:
 37         graph_def = tf.GraphDef.FromString(fhandle.read())
 38
 39     if graph_def is None:
 40       raise RuntimeError('Cannot find inference graph in tar archive.')
 41
 42     with self.graph.as_default():
 43       tf.import_graph_def(graph_def, name='')
 44
 45     self.sess = tf.Session(graph=self.graph)
 46
 47   def run(self, image):
 48     width, height = image.size
 49     resize_ratio = 1.0 * self.INPUT_SIZE / max(width, height)
 50     target_size = (int(resize_ratio * width), int(resize_ratio * height))
 51     resized_image = image.convert('RGB').resize(target_size, Image.ANTIALIAS)
 52     batch_seg_map = self.sess.run(
 53         self.OUTPUT_TENSOR_NAME,
 54         feed_dict={self.INPUT_TENSOR_NAME: [np.asarray(resized_image)]})
 55     seg_map = batch_seg_map[0]
 56     return resized_image, seg_map
 57
 58
 59 def create_pascal_label_colormap():
 60   return np.asarray([
 61     [128, 64, 128],
 62     [244, 35, 232],
 63     [70, 70, 70],
 64     [102, 102, 156],
 65     [190, 153, 153],
 66     [153, 153, 153],
 67     [250, 170, 30],
 68     [220, 220, 0],
 69     [107, 142, 35],
 70     [152, 251, 152],
 71     [70, 130, 180],
 72     [220, 20, 60],
 73     [255, 0, 0],
 74     [0, 0, 142],
 75     [0, 0, 70],
 76     [0, 60, 100],
 77     [0, 80, 100],
 78     [0, 0, 230],
 79     [119, 11, 32],
 80   ])
 81
 82
 83 def label_to_color_image(label):
 84   if label.ndim != 2:
 85     raise ValueError('Expect 2-D input label')
 86
 87   colormap = create_pascal_label_colormap()
 88
 89   if np.max(label) >= len(colormap):
 90     raise ValueError('label value too large.')
 91
 92   return colormap[label]
 93
 94
 95 def vis_segmentation(image, seg_map):
 96   plt.figure(figsize=(15, 5))
 97   grid_spec = gridspec.GridSpec(1, 4, width_ratios=[6, 6, 6, 1])
 98
 99   plt.subplot(grid_spec[0])
100   plt.imshow(image)
101   plt.axis('off')
102   plt.title('input image')
103
104   plt.subplot(grid_spec[1])
105   seg_image = label_to_color_image(seg_map).astype(np.uint8)
106   plt.imshow(seg_image)
107   plt.axis('off')
108   plt.title('segmentation map')
109
110   plt.subplot(grid_spec[2])
111   plt.imshow(image)
112   plt.imshow(seg_image, alpha=0.7)
113   plt.axis('off')
114   plt.title('segmentation overlay')
115
116   unique_labels = np.unique(seg_map)
117   ax = plt.subplot(grid_spec[3])
118   plt.imshow(FULL_COLOR_MAP[unique_labels].astype(np.uint8), interpolation='nearest')
119   ax.yaxis.tick_right()
120   plt.yticks(range(len(unique_labels)), LABEL_NAMES[unique_labels])
121   plt.xticks([], [])
122   ax.tick_params(width=0.0)
123   plt.grid('off')
124   plt.show()
125
126
127 LABEL_NAMES = np.asarray([
128     'road', 'sidewalk', 'building', 'wall', 'fence', 'pole', 'traffic light',
129     'traffic sign', 'vegetation', 'terrain', 'sky', 'person', 'rider', 'car', 'truck',
130     'bus', 'train', 'motorcycle', 'bicycle'
131 ])
132
133 FULL_LABEL_MAP = np.arange(len(LABEL_NAMES)).reshape(len(LABEL_NAMES), 1)
134 FULL_COLOR_MAP = label_to_color_image(FULL_LABEL_MAP)
135
136
137 MODEL = DeepLabModel()
138 print('model loaded successfully!')
139
140
141 def run_visualization(path):
142     oringnal_im = Image.open(path)
143     print('running deeplab on image %s...' % path)
144     resized_im, seg_map = MODEL.run(oringnal_im)
145     vis_segmentation(resized_im, seg_map)
146
147 run_visualization(TEST_IMAGE_PATH)