一、ActiveMQ简介
1). ActiveMQ
ActiveMQ是Apache所提供的一个开源的消息系统,完全采用Java来实现,因此,它能很好地支持J2EE提出的JMS(Java Message Service,即Java消息服务)规范。JMS是一组Java应用程序接口,它提供消息的创建、发送、读取等一系列服务。JMS提供了一组公共应用程序接口和响应的语法,类似于Java数据库的统一访问接口JDBC,它是一种与厂商无关的API,使得Java程序能够与不同厂商的消息组件很好地进行通信。
2). Java Message Service(JMS)
JMS支持两种消息发送和接收模型。
-
一种称为P2P(Ponit to Point)模型,即采用点对点的方式发送消息。P2P模型是基于队列的,消息生产者发送消息到队列,消息消费者从队列中接收消息,队列的存在使得消息的异步传输称为可能,P2P模型在点对点的情况下进行消息传递时采用。
 图1.png
 -
另一种称为Pub/Sub(Publish/Subscribe,即发布-订阅)模型,发布-订阅模型定义了如何向一个内容节点发布和订阅消息,这个内容节点称为topic(主题)。主题可以认为是消息传递的中介,消息发布这将消息发布到某个主题,而消息订阅者则从主题订阅消息。主题使得消息的订阅者与消息的发布者互相保持独立,不需要进行接触即可保证消息的传递,发布-订阅模型在消息的一对多广播时采用。
 图2.png
3). JMS术语
- Provider/MessageProvider:生产者
- Consumer/MessageConsumer:消费者
- PTP:Point To Point,点对点通信消息模型
- Pub/Sub:Publish/Subscribe,发布订阅消息模型
- Queue:队列,目标类型之一,和PTP结合
- Topic:主题,目标类型之一,和Pub/Sub结合
- ConnectionFactory:连接工厂,JMS用它创建连接
- Connnection:JMS Client到JMS Provider的连接
- Destination:消息目的地,由Session创建
- Session:会话,由Connection创建,实质上就是发送、接受消息的一个线程,因此生产者、消费者都是Session创建的
二、Windows安装 ActiveMq
1、下载地址:http://activemq.apache.org/download-archives.html ,本文用的是windows版的5.15.3版本,下载下来是压缩包。apache-activemq-5.15.3-bin.zip
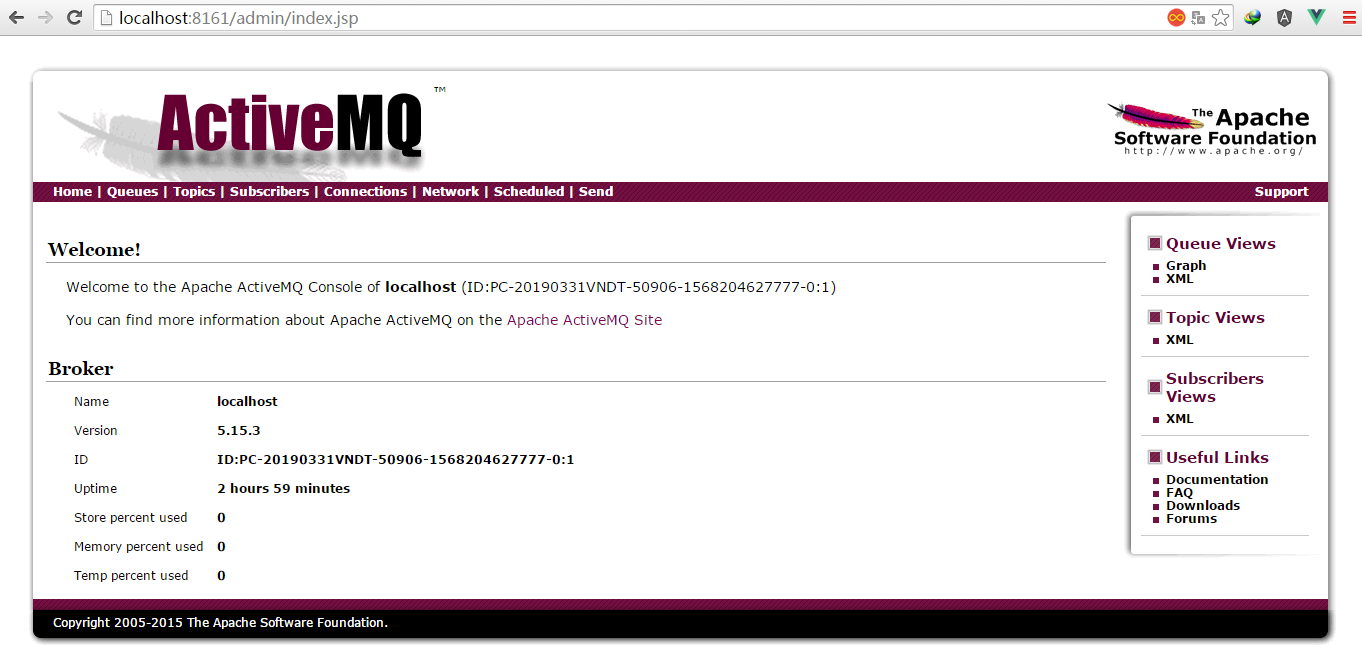
2、将压缩包解压一个到目录下,CMD进入到解压目录下的bin目录下,执行 activemq.bat start 启动。 如果能成功访问 http://localhost:8161/admin(用户名和密码默认为admin),则启动成功。
三、SpringBoot 集成 ActiveMQ
1. 创建一个springboot项目,添加依赖
        <!--ActiveMq-->
        <dependency>
            <groupId>org.springframework.boot</groupId>
            <artifactId>spring-boot-starter-activemq</artifactId>
            <version>1.5.0.RELEASE</version>
        </dependency>
        <!--消息队列连接池-->
        <dependency>
            <groupId>org.apache.activemq</groupId>
            <artifactId>activemq-pool</artifactId>
            <version>5.15.0</version>
        </dependency>
2、application.yml文件的配置
server:
  port: 8080

spring:
  activemq:
    broker-url: tcp://127.0.0.1:61616
    user: admin
    password: admin
    close-timeout: 15s   # 在考虑结束之前等待的时间
    in-memory: true      # 默认代理URL是否应该在内存中。如果指定了显式代理,则忽略此值。
    non-blocking-redelivery: false  # 是否在回滚回滚消息之前停止消息传递。这意味着当启用此命令时,消息顺序不会被保留。
    send-timeout: 0     # 等待消息发送响应的时间。设置为0等待永远。
    queue-name: active.queue
    topic-name: active.topic.name.model

#  packages:
#    trust-all: true #不配置此项,会报错
  pool:
    enabled: true
    max-connections: 10   #连接池最大连接数
    idle-timeout: 30000   #空闲的连接过期时间,默认为30秒

 # jms:
 #   pub-sub-domain: true  #默认情况下activemq提供的是queue模式,若要使用topic模式需要配置下面配置

# 是否信任所有包
#spring.activemq.packages.trust-all=
# 要信任的特定包的逗号分隔列表(当不信任所有包时)
#spring.activemq.packages.trusted=
# 当连接请求和池满时是否阻塞。设置false会抛“JMSException异常”。
#spring.activemq.pool.block-if-full=true
# 如果池仍然满,则在抛出异常前阻塞时间。
#spring.activemq.pool.block-if-full-timeout=-1ms
# 是否在启动时创建连接。可以在启动时用于加热池。
#spring.activemq.pool.create-connection-on-startup=true
# 是否用Pooledconnectionfactory代替普通的ConnectionFactory。
#spring.activemq.pool.enabled=false
# 连接过期超时。
#spring.activemq.pool.expiry-timeout=0ms
# 连接空闲超时
#spring.activemq.pool.idle-timeout=30s
# 连接池最大连接数
#spring.activemq.pool.max-connections=1
# 每个连接的有效会话的最大数目。
#spring.activemq.pool.maximum-active-session-per-connection=500
# 当有"JMSException"时尝试重新连接
#spring.activemq.pool.reconnect-on-exception=true
# 在空闲连接清除线程之间运行的时间。当为负数时,没有空闲连接驱逐线程运行。
#spring.activemq.pool.time-between-expiration-check=-1ms
# 是否只使用一个MessageProducer
#spring.activemq.pool.use-anonymous-producers=true
3、启动类增加 @EnableJms 注解
import org.springframework.boot.SpringApplication;
import org.springframework.boot.autoconfigure.SpringBootApplication;
import org.springframework.jms.annotation.EnableJms;

@SpringBootApplication
@EnableJms    //启动消息队列
public class SpringbootActivemqApplication {

    public static void main(String[] args) {
        SpringApplication.run(SpringbootActivemqApplication.class, args);
    }

}
4、初始化和配置 ActiveMQ 的连接
import org.apache.activemq.ActiveMQConnectionFactory;
import org.apache.activemq.command.ActiveMQQueue;
import org.apache.activemq.command.ActiveMQTopic;
import org.springframework.beans.factory.annotation.Value;
import org.springframework.context.annotation.Bean;
import org.springframework.context.annotation.Configuration;
import org.springframework.jms.config.JmsListenerContainerFactory;
import org.springframework.jms.config.SimpleJmsListenerContainerFactory;
import org.springframework.jms.core.JmsMessagingTemplate;
import javax.jms.ConnectionFactory;
import javax.jms.Queue;
import javax.jms.Topic;

@Configuration
publicclass BeanConfig
{

    @Value("${spring.activemq.broker-url}")
    private String brokerUrl;

    @Value("${spring.activemq.user}")
    private String username;

    @Value("${spring.activemq.topic-name}")
    private String password;

    @Value("${spring.activemq.queue-name}")
    private String queueName;

    @Value("${spring.activemq.topic-name}")
    private String topicName;

    @Bean(name = "queue")
    public Queue queue() {
        return new ActiveMQQueue(queueName);
    }

    @Bean(name = "topic")
    public Topic topic() {
        return new ActiveMQTopic(topicName);
    }

    @Bean
    public ConnectionFactory connectionFactory(){
        return new ActiveMQConnectionFactory(username, password, brokerUrl);
    }

    @Bean
    public JmsMessagingTemplate jmsMessageTemplate(){
        return new JmsMessagingTemplate(connectionFactory());
    }

    // 在Queue模式中,对消息的监听需要对containerFactory进行配置
    @Bean("queueListener")
    public JmsListenerContainerFactory<?> queueJmsListenerContainerFactory(ConnectionFactory connectionFactory){
        SimpleJmsListenerContainerFactory factory = new SimpleJmsListenerContainerFactory();
        factory.setConnectionFactory(connectionFactory);
        factory.setPubSubDomain(false);
        return factory;
    }

    //在Topic模式中,对消息的监听需要对containerFactory进行配置
    @Bean("topicListener")
    public JmsListenerContainerFactory<?> topicJmsListenerContainerFactory(ConnectionFactory connectionFactory){
        SimpleJmsListenerContainerFactory factory = new SimpleJmsListenerContainerFactory();
        factory.setConnectionFactory(connectionFactory);
        factory.setPubSubDomain(true);
        return factory;
    }
}
5、生产者(queue 和 topic)
import org.springframework.beans.factory.annotation.Autowired;
import org.springframework.jms.core.JmsMessagingTemplate;
import org.springframework.web.bind.annotation.PostMapping;
import org.springframework.web.bind.annotation.RequestBody;
import org.springframework.web.bind.annotation.RestController;
import javax.jms.Destination;
import javax.jms.Queue;
import javax.jms.Topic;

@RestController
public class ProducerController
{
    @Autowired
    private JmsMessagingTemplate jmsMessagingTemplate;

    @Autowired
    private Queue queue;

    @Autowired
    private Topic topic;

    @PostMapping("/queue/test")
    public String sendQueue(@RequestBody String str) {
        this.sendMessage(this.queue, str);
        return "success";
    }

    @PostMapping("/topic/test")
    public String sendTopic(@RequestBody String str) {
        this.sendMessage(this.topic, str);
        return "success";
    }

    // 发送消息,destination是发送到的队列,message是待发送的消息
    private void sendMessage(Destination destination, final String message){
        jmsMessagingTemplate.convertAndSend(destination, message);
    }
}
6、Queue模式的消费者
import org.springframework.jms.annotation.JmsListener;
import org.springframework.stereotype.Component;
@Component
public class QueueConsumerListener
{
    //queue模式的消费者
    @JmsListener(destination="${spring.activemq.queue-name}", containerFactory="queueListener")
    public void readActiveQueue(String message) {
        System.out.println("queue接受到:" + message);
    }
}
7、topic模式的消费者
import org.springframework.jms.annotation.JmsListener;
import org.springframework.stereotype.Component;

@Component
public class TopicConsumerListener
{
    //topic模式的消费者
    @JmsListener(destination="${spring.activemq.topic-name}", containerFactory="topicListener")
    public void readActiveQueue(String message) {
        System.out.println("topic接受到:" + message);
    }
}
8、测试(使用Postman发消息)
(1) POST: http://localhost:8080/queue/test 消息体:{"aaa" : "queue"}
控制台打印:queue接受到:{"aaa" : "queue"}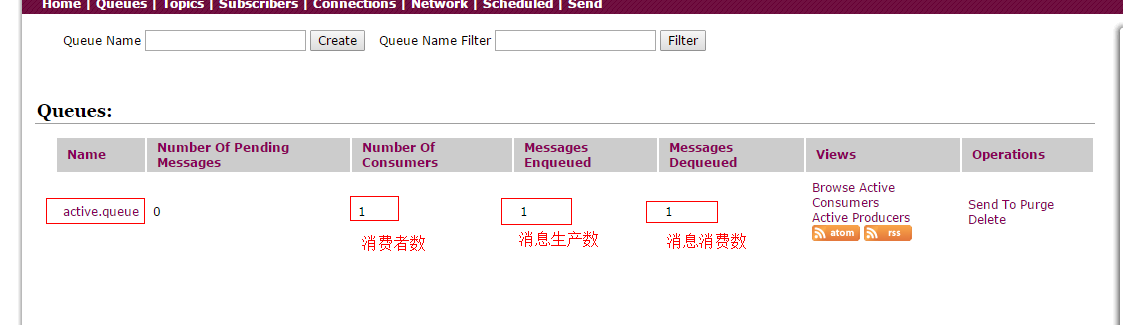
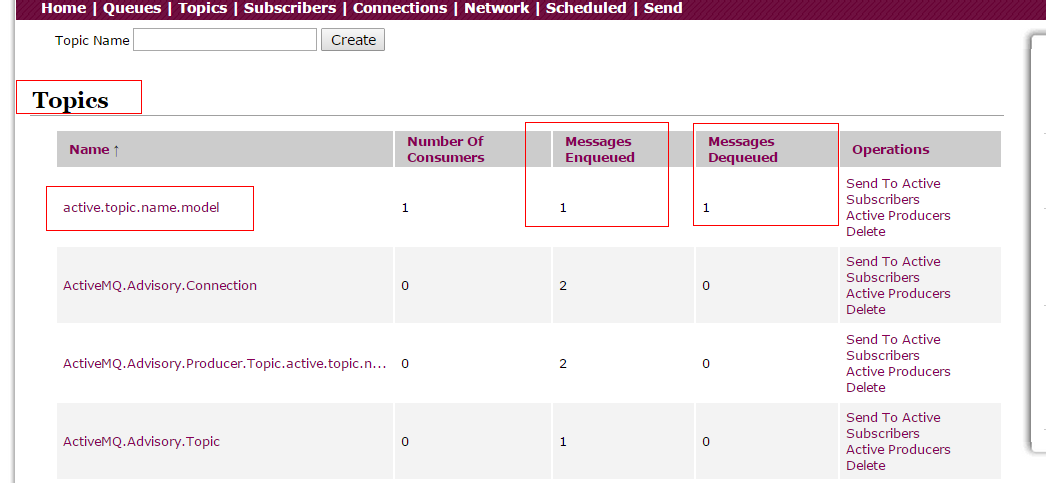
(2) POST: http://localhost:8080/topic/test 消息体:{"aaa" : "topic"}
控制台打印:topic接受到:{"aaa" : "topic"}
topic模式有普通订阅和持久化订阅
普通订阅:在消费者启动之前发送过来的消息,消费者启动之后不会去消费;
持久化订阅: 在消费者启动之前发送过来的消息,消费者启动之后会去消费;