环境:
centos7
jdk8
参考:
https://www.elastic.co/guide/en/elasticsearch/reference/current/rpm.html
http://blog.csdn.net/wh211212/article/details/54015645
1. 将Elasticsearch公共GPG密钥导入rpm
rpm --import https://artifacts.elastic.co/GPG-KEY-elasticsearch
2.在/etc/yum.repos.d/目录中创建一个名为elasticsearch.repo的文件
touch /etc/yum.repos.d/elasticsearch.repo
vi /etc/yum.repos.d/elasticsearch.repo
[elasticsearch-5.x]
name=Elasticsearch repository for 5.x packages
baseurl=https://artifacts.elastic.co/packages/5.x/yum
gpgcheck=1
gpgkey=https://artifacts.elastic.co/GPG-KEY-elasticsearch
enabled=1
autorefresh=1
type=rpm-md
3.Elasticsearch 源创建完成之后,通过makecache查看源是否可用,然后通过yum安装Elasticsearch
yum makecache
yum install elasticsearch -y
4.关闭防火墙
systemctl stop firewalld.service
5.禁用防火墙
system disable firewalld.service
6.启动 elasticsearch
systemctl start elasticsearch.service
7.访问是否成功启动
curl -XGET localhost:9200
响应
curl: (7) Failed connect to localhost:9200; Connection refused
查看端口
netstat -ano|grep elasticsearch

[root@guo yum.repos.d]# netstat -ano|grep 9200
tcp6       0      0 127.0.0.1:9200          :::*                    LISTEN      off (0.00/0/0)
tcp6       0      0 ::1:9200                :::*                    LISTEN
访问 curl -XGET 127.0.0.1:9200 正常
[root@guo yum.repos.d]# curl -XGET 127.0.0.1:9200
{
  "name" : "QcB_mvr",
  "cluster_name" : "elasticsearch",
  "cluster_uuid" : "-eNBlNxoRfeCRwLMDVQQcw",
  "version" : {
    "number" : "5.5.1",
    "build_hash" : "19c13d0",
    "build_date" : "2017-07-18T20:44:24.823Z",
    "build_snapshot" : false,
    "lucene_version" : "6.6.0"
  },
  "tagline" : "You Know, for Search"
}
添加/etc/hosts
127.0.0.1 localhost
再次访问就ok了
[root@guo yum.repos.d]# curl -XGET localhost:9200
{
  "name" : "QcB_mvr",
  "cluster_name" : "elasticsearch",
  "cluster_uuid" : "-eNBlNxoRfeCRwLMDVQQcw",
  "version" : {
    "number" : "5.5.1",
    "build_hash" : "19c13d0",
    "build_date" : "2017-07-18T20:44:24.823Z",
    "build_snapshot" : false,
    "lucene_version" : "6.6.0"
  },
  "tagline" : "You Know, for Search"
}
8.修改配置,打开注释 network.host,http.port
vi /etc/elasticsearch/elasticsearch.yml
# ---------------------------------- Network -----------------------------------
#
# Set the bind address to a specific IP (IPv4 or IPv6):
#
network.host: guo
#
# Set a custom port for HTTP:
#
http.port: 9200
#
# For more information, consult the network module documentation.
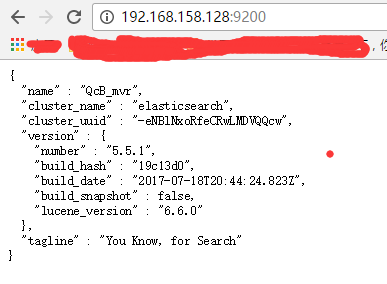
9.重启,然后再宿主机浏览器访问
systemctl stop elasticsearch.service
systemctl start elasticsearch.service

10.查看日志
tail -f /var/log/elasticsearch/elasticsearch.log