安装
基础
django is a framework .lightweight
MVC MTV
Django的MTV模式本质是各组件之间为了保持松耦合关系,Django的MTV分别代表:
Model(模型):负责业务对象与数据库的对象(ORM)
Template(模版):负责如何把页面展示给用户
View(视图):负责业务逻辑,并在适当的时候调用Model和Template
此外,Django还有一个url分发器,它的作用是将一个个URL的页面请求分发给不同的view处理,view再调用相应的Model和Template
安装
cmd>>pip install django
查看是否安装及版本
python -m django --version
create project
cmd>>django-admin startproject website
note:
You’ll need to avoid naming projects after built-in Python or Django components. In particular,
this means you should avoid using names like django (which will conflict with Django itself) or test (which conflicts with a built-in Python package).
This will create a mysite directory in your current directory.

These files are:
- The outer
mysite/root directory is just a container for your project. Its name doesn’t matter to Django; you can rename it to anything you like. manage.py: A command-line utility that lets you interact with this Django project in various ways. You can read all the details aboutmanage.pyin django-admin and manage.py.- The inner
mysite/directory is the actual Python package for your project. Its name is the Python package name you’ll need to use to import anything inside it (e.g.mysite.urls). mysite/__init__.py: An empty file that tells Python that this directory should be considered a Python package. If you’re a Python beginner, read more about packages in the official Python docs.mysite/settings.py: Settings/configuration for this Django project. Django settings will tell you all about how settings work.mysite/urls.py: The URL declarations for this Django project; a “table of contents” of your Django-powered site. You can read more about URLs in URL dispatcher.mysite/wsgi.py: An entry-point for WSGI-compatible web servers to serve your project. See How to deploy with WSGIfor more details.
the development server
启动服务端
type python manage.py runserver
you will see that:
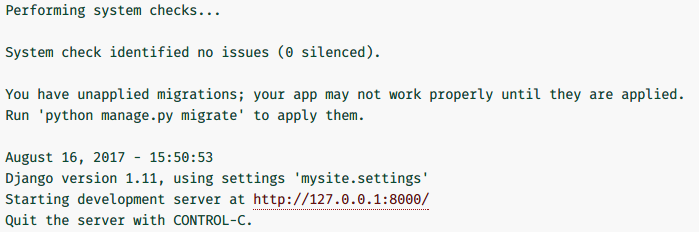
by defalut ,port is 8000,
you also can change the port and host.for example,
python manage.py runserver 8800
python manage.py runserver 0:8800
note:Automatic reloading of runserver
The development server automatically reloads Python code for each request as needed.
You don’t need to restart the server for code changes to take effect. However, some actions like adding files don’t trigger a restart,
so you’ll have to restart the server in these cases.
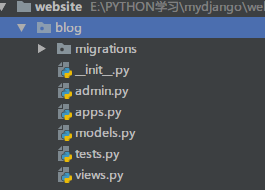
create an app
python manage.py startapp app_name
将会创建一个文件夹,目录如下
write your first views;
like this


from django.shortcuts import render
from django.http import HttpResponse
# Create your views here.
def login(request):
    if request.method == "POST":
        usr=request.POST.get("user")
        pwd=request.POST.get("password")
        if usr=="yuyang" and pwd=="123":
            return HttpResponse("<h1>login successfully</h1>")
    elif request.method=="GET":
        return render(request,"blog/login.html")
def register(request):
    if request.method == "POST":
        usr=request.POST.get("user")
        gender=request.POST.get("gender")
        age=request.POST.get("age")
        pwd=request.POST.get("password")
        return HttpResponse("<h1>register successfully</h1>")
    elif request.method=="GET":
        return render(request,"blog/register.html")
另外需要在website/urls.py添加如下内容
from django.conf.urls import url,include
from django.contrib import admin
from blog import views

urlpatterns = [
    url(r'^admin/', admin.site.urls),
url(r'^login/',views.login),
url(r'^sign/',views.register),
]
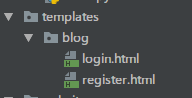
我们一般在前面显示的内容,会创建一个template folder,然后写一个html文件,一般我们会在template文件夹下创建一个以应用为名的文件夹。然后将html放到这个文件夹下
Introducing the Django Admin
overviews
Generating admin sites for your staff or clients to add, change, and delete content is tedious work that doesn’t require much creativity.
For that reason, Django entirely automates creation of admin interfaces for models.
Django was written in a newsroom environment, with a very clear separation between “content publishers” and the “public” site.
Site managers use the system to add news stories, events, sports scores, etc., and that content is displayed on the public site.
Django solves the problem of creating a unified interface for site administrators to edit content.
The admin isn’t intended to be used by site visitors. It’s for site managers.
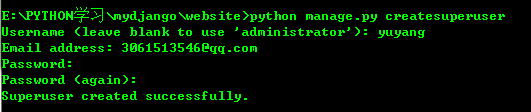
create admin user
>>python mange.py createsuperuser
Enter your desired username and press enter.
Username: admin
You will then be prompted for your desired email address:
Email address: admin@example.com
the final step is input password
then
you can activate ydevelopment server
python manage.py runserver
Now, open a Web browser and go to “/admin/” on your local domain – e.g., http://127.0.0.1:8000/admin/. You should see the admin’s login screen:

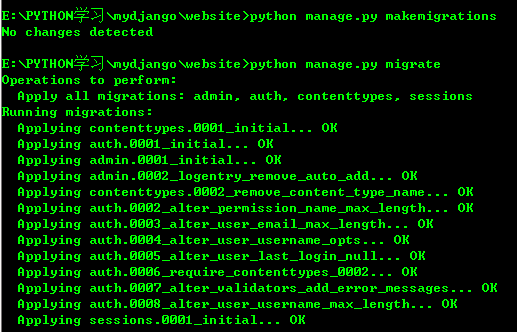
你首先需要执行以下命令
python manage.py makemigrations
python manage.py migrate
这两条命令会创建表
执行
python manage.py createsuperuser
用户名是 yuyang
密码 1055979970yuya
用户名是administrator
邮箱 15166672108@163.com
密码 1055979970yy