Ansible的roles标准化与Jenkins持续集成(三)
链接:https://pan.baidu.com/s/1A3Iq3gGkGS27L_Gt37_I0g
提取码:ncy2
复制这段内容后打开百度网盘手机App,操作更方便哦
1. 使用roles标准化Playbook
1.1 创建roles基本原型的目录结构
[root@Ansible /]# tree /myroles/
/myroles/
├── nginx.yaml          #入口触发配置文件
└── roles               #playbook的原型配置目录
    └── nginx           #nginx相关模组配置目录
        ├── files       #copy模块和script模块的参数src默认会从这个文件夹查找
        ├── handlers    #用来存放notify的
        ├── tasks       #用来存放ansible模块任务的
        ├── templates   #用来存放j2的
        └── vars        #用来存放变量的
7 directories, 1 file
1.2 入口触发配置文件
[root@Ansible /]# mkdir -p /myroles/roles/nginx
[root@Ansible /]# cat /myroles/nginx.yaml
---
- hosts: all             #执行的主机范围
  gather_facts: True     #开启系统内置变量
  roles:                 #启用roles原型配置
  - nginx                #执行nginx原型模组
1.3 roles中tasks任务编排模组的使用
1.3.1 在nginx模组添加tasks任务配置文件
[root@Ansible /]# mkdir -p /myroles/roles/nginx/tasks/
[root@Ansible /]# cat /myroles/roles/nginx/tasks/main.yaml
---
- name: check alived      #任务1的名字
  ping:                   #执行ping模块
- name:                   #任务2的名字
  shell: ls /             #执行shell模块
  register: ls_result     #将执行结果保存给变量
- debug: var=ls_result    #变量的值赋值给debug进行输出
1.3.2 完成后的目录结构如下所示
[root@Ansible /]# tree /myroles/
/myroles/
├── nginx.yaml    #nginx模组入口配置文件
└── roles
    └── nginx     #nginx原型模组目录
        └── tasks
            └── main.yaml    #nginx模组的tasks任务配置文件

3 directories, 2 files
1.3.3 执行nginx.yaml入口配置文件查看结果
[root@Ansible myroles]# pwd
/myroles
[root@Ansible myroles]# ansible-playbook nginx.yaml

PLAY [all] *************************************************************************************

TASK [Gathering Facts] *************************************************************************
ok: [Web02]
ok: [Web01]

TASK [nginx : check alived] ********************************************************************
ok: [Web02]
ok: [Web01]

TASK [nginx : shell] ***************************************************************************
changed: [Web01]
changed: [Web02]

TASK [nginx : debug] ***************************************************************************
ok: [Web01] => {
    "ls_result": {
        "changed": true,
        "cmd": "ls /",
        "delta": "0:00:00.008101",
        "end": "2018-09-09 03:33:26.602832",
        "failed": false,
        "rc": 0,
        "start": "2018-09-09 03:33:26.594731",
        "stderr": "",
        "stderr_lines": [],
        "stdout": "bin
boot
dev
etc
home
lib
lib64
media
mnt
opt
proc
root
run
sbin
srv
sys
tmp
usr
var",
        "stdout_lines": [
            "bin",
            "boot",
            "dev",
            "etc",
            "home",
            "lib",
            "lib64",
            "media",
            "mnt",
            "opt",
            "proc",
            "root",
            "run",
            "sbin",
            "srv",
            "sys",
            "tmp",
            "usr",
            "var"
        ]
    }
}
ok: [Web02] => {
    "ls_result": {
        "changed": true,
        "cmd": "ls /",
        "delta": "0:00:00.007408",
        "end": "2018-09-09 03:33:26.609171",
        "failed": false,
        "rc": 0,
        "start": "2018-09-09 03:33:26.601763",
        "stderr": "",
        "stderr_lines": [],
        "stdout": "bin
boot
dev
etc
home
lib
lib64
media
mnt
opt
proc
root
run
sbin
srv
sys
tmp
usr
var",
        "stdout_lines": [
            "bin",
            "boot",
            "dev",
            "etc",
            "home",
            "lib",
            "lib64",
            "media",
            "mnt",
            "opt",
            "proc",
            "root",
            "run",
            "sbin",
            "srv",
            "sys",
            "tmp",
            "usr",
            "var"
        ]
    }
}

PLAY RECAP *************************************************************************************
Web01                      : ok=4    changed=1    unreachable=0    failed=0
Web02                      : ok=4    changed=1    unreachable=0    failed=0
ansible-playbook执行入口配置文件nginx.yaml后,它会自动在roles目录下查找nginx目录并进入后查找tasks任务目录并执行main.yaml的任务配置文件
#本配置和之前的roles配置等效
[root@Ansible /]# cat /service/scripts/test.yaml
---
- hosts: all
  gather_facts: True
  tasks:                #其实roles的本质就是将tasks任务单独写了。
  - name: check alived  #并在入口文件里追加了roles去查找tasks配置文件路径
    ping:
  - name:
    shell: ls /
    register: ls_result
  - debug: var=ls_result
1.4 roles中vars自定义变量模组的使用
1.4.1 在nginx模组添加vars任务配置文件
[root@Ansible nginx]# pwd
/myroles/roles/nginx
[root@Ansible nginx]# mkdir vars
[root@Ansible nginx]# cat vars/main.yaml       #vars模组的配置文件
---
my_name: yangwenbo
phone: 17310658206

[root@Ansible nginx]# cat tasks/main.yaml      #tasks模组的配置文件
---
- name: check alived
  ping:
- name:
  shell: ls /
  register: ls_result
- debug: var=ls_result
- name:          #添加对变量引用的任务编排
  shell: echo my phone is {{ phone }}
  register: echo_result
- debug: var=echo_result
1.4.2 完成后的目录结构如下所示
[root@Ansible nginx]# tree /myroles/
/myroles/
├── nginx.retry
├── nginx.yaml     #nginx模组入口配置文件
└── roles
    └── nginx      #nginx原型模组目录
        ├── tasks
        │   └── main.yaml   #nginx模组的tasks任务配置文件
        └── vars
            └── main.yaml   #nginx模组的vars任务配置文件

5 directories, 5 files
1.4.3 执行nginx.yaml入口配置文件查看结果
[root@Ansible myroles]# pwd
/myroles
[root@Ansible myroles]# ansible-playbook nginx.yaml

PLAY [all] *************************************************************************************

TASK [Gathering Facts] *************************************************************************
ok: [Web01]
ok: [Web02]

TASK [nginx : check alived] ********************************************************************
ok: [Web02]
ok: [Web01]

TASK [nginx : shell] ***************************************************************************
changed: [Web02]
changed: [Web01]

TASK [nginx : debug] ***************************************************************************
ok: [Web01] => {
    #中间省略。。。
ok: [Web02] => {
   #中间省略。。。
TASK [nginx : shell] ***************************************************************************
changed: [Web01]
changed: [Web02]

TASK [nginx : debug] ***************************************************************************
ok: [Web01] => {
    "echo_result": {
        "changed": true,
        "cmd": "echo my phone is 17310658206",
        "delta": "0:00:00.004659",
        "end": "2018-09-09 03:48:24.375861",
        "failed": false,
        "rc": 0,
        "start": "2018-09-09 03:48:24.371202",
        "stderr": "",
        "stderr_lines": [],
        "stdout": "my phone is 17310658206",
        "stdout_lines": [
            "my phone is 17310658206"   #输出的结果
        ]
    }
}
ok: [Web02] => {
    "echo_result": {
        "changed": true,
        "cmd": "echo my phone is 17310658206",
        "delta": "0:00:00.006155",
        "end": "2018-09-09 03:48:24.397609",
        "failed": false,
        "rc": 0,
        "start": "2018-09-09 03:48:24.391454",
        "stderr": "",
        "stderr_lines": [],
        "stdout": "my phone is 17310658206",
        "stdout_lines": [
            "my phone is 17310658206"   #输出的结果
        ]
    }
}

PLAY RECAP *************************************************************************************
Web01                      : ok=6    changed=2    unreachable=0    failed=0
Web02                      : ok=6    changed=2    unreachable=0    failed=0
1.5 使用copy,script模块的标准化
roles模型里使用copy,script模块,默认从roles/nginx/files这里面找
1.5.1 在nginx模组添加files任务配置文件
[root@Ansible nginx]# pwd
/myroles/roles/nginx
[root@Ansible nginx]# mkdir files
[root@Ansible nginx]# cat files/test        #files模组的配置文件
welcome to yunjisuan
[root@Ansible nginx]# cat files/test.sh     #files模组的配置文件
echo "My name is yangwenbo" >> /tmp/test
[root@Ansible nginx]# chmod +x files/test.sh
[root@Ansible nginx]# ll files/test.sh
-rwxr-xr-x. 1 root root 41 Sep  9 04:11 files/test.sh

[root@Ansible nginx]# cat tasks/main.yaml   #tasks模组的配置文件
---
- name: check alived
  ping:
- name:
  shell: ls /
  register: ls_result
- debug: var=ls_result
- name:
  shell: echo my phone is {{ phone }}
  register: echo_result
- debug: var=echo_result
- name:          #添加copy模块
  copy: src=test dest=/root/
- name:          #添加script模块(自动在目标IP机器上执行脚本)
  script: test.sh
1.5.2 完成后的目录结构如下所示
[root@Ansible nginx]# tree /myroles/
/myroles/
├── nginx.retry
├── nginx.yaml
└── roles
    └── nginx      #nginx原型模组目录
        ├── files
        │   ├── test         #nginx模组的files任务配置文件
        │   └── test.sh      #nginx模组的files的脚本
        ├── tasks
        │   └── main.yaml    #nginx模组的tasks任务配置文件
        └── vars
            └── main.yaml    #nginx模组的vars任务配置文件

5 directories, 6 files
1.5.3 执行nginx.yaml入口配置文件
[root@Ansible myroles]# ansible-playbook nginx.yaml

PLAY [all] *************************************************************************************

TASK [Gathering Facts] *************************************************************************
ok: [Web01]
ok: [Web02]

TASK [nginx : check alived] ********************************************************************
ok: [Web01]
ok: [Web02]

TASK [nginx : shell] ***************************************************************************
changed: [Web01]
changed: [Web02]

TASK [nginx : debug] ***************************************************************************
ok: [Web01] => {
    #中间省略。。。
ok: [Web02] => {
    #中间省略。。。
TASK [nginx : shell] ***************************************************************************
changed: [Web01]
changed: [Web02]

TASK [nginx : debug] ***************************************************************************
ok: [Web01] => {
   #中间省略。。。
ok: [Web02] => {
    #中间省略。。。
TASK [nginx : copy] ****************************************************************************
changed: [Web02]
changed: [Web01]

TASK [nginx : script] **************************************************************************
changed: [Web02]
changed: [Web01]

PLAY RECAP *************************************************************************************
Web01                      : ok=8    changed=4    unreachable=0    failed=0
Web02                      : ok=8    changed=4    unreachable=0    failed=0
1.5.4 查看执行结果
[root@Web01 ~]# cat /root/test
welcome to yunjisuan
[root@Web01 ~]# cat /tmp/test
My name is yangwenbo

[root@Web02 ~]# cat /root/test
welcome to yunjisuan
[root@Web02 ~]# cat /tmp/test
My name is yangwenbo
1.6 roles中template模块的使用
roles模型里使用template模块,默认从roles/nginx/template里面找
1.6.1 在nginx模组添加template任务配置文件
[root@Ansible nginx]# pwd
/myroles/roles/nginx
[root@Ansible nginx]# mkdir templates
[root@Ansible nginx]# cat templates/test.j2         #templates模组的配置文件
myname is {{ my_name }},my phone is {{ phone }}     #引用自定义变量
my ipaddress is {{ansible_all_ipv4_addresses[0]}}   #引用内置变量

[root@Ansible nginx]# cat tasks/main.yaml           #tasks模组的配置文件
---
- name: check alived
  ping:
- name:
  shell: ls /
  register: ls_result
- debug: var=ls_result
- name:
  shell: echo my phone is {{ phone }}
  register: echo_result
- debug: var=echo_result
- name:
  copy: src=test dest=/root/
- name:
  script: test.sh
- name:
  template: src=test.j2 dest=/root/test2    #下发可变配置文件
1.6.2 完成后的目录结构如下所示
[root@Ansible nginx]# tree /myroles/
/myroles/
├── nginx.retry
├── nginx.yaml
└── roles
    └── nginx      #nginx原型模组目录
        ├── files
        │   ├── test         #nginx模组的files任务配置文件
        │   └── test.sh      #nginx模组的files的脚本
        ├── tasks
        │   └── main.yaml    #nginx模组的tasks任务配置文件
        ├── templates
        │   └── test.j2      #nginx模组的templates任务配置文件
        └── vars
            └── main.yaml    #nginx模组的vars任务配置文件

5 directories, 6 files
1.6.3 执行nginx.yaml入口配置文件
[root@Ansible myroles]# pwd
/myroles
[root@Ansible myroles]# ansible-playbook nginx.yaml

PLAY [all] *************************************************************************************

TASK [Gathering Facts] *************************************************************************
ok: [Web01]
ok: [Web02]

TASK [nginx : check alived] ********************************************************************
ok: [Web01]
ok: [Web02]

TASK [nginx : shell] ***************************************************************************
changed: [Web01]
changed: [Web02]

TASK [nginx : debug] ***************************************************************************
ok: [Web01] => {
     #中间省略。。。
ok: [Web02] => {
     #中间省略。。。
TASK [nginx : shell] ***************************************************************************
changed: [Web01]
changed: [Web02]

TASK [nginx : debug] ***************************************************************************
ok: [Web01] => {
     #中间省略。。。
ok: [Web02] => {
     #中间省略。。。
TASK [nginx : copy] ****************************************************************************
ok: [Web02]
ok: [Web01]

TASK [nginx : script] **************************************************************************
changed: [Web01]
changed: [Web02]

TASK [nginx : template] ************************************************************************
changed: [Web02]
changed: [Web01]

PLAY RECAP *************************************************************************************
Web01                      : ok=9    changed=4    unreachable=0    failed=0
Web02                      : ok=9    changed=4    unreachable=0    failed=0
1.6.4 查看执行结果
[root@Web01 ~]# cat /root/test2
myname is yangwenbo,my phone is 17310658206
my ipaddress is 192.168.200.74

[root@Web02 ~]# cat /root/test2
myname is yangwenbo,my phone is 17310658206
my ipaddress is 192.168.200.75
1.7 roles中notify模块的使用
roles使用notify模块,默认从roles/nginx/handles里面找
1.7.1 在nginx模组添加template任务配置文件
[root@Ansible nginx]# pwd
/myroles/roles/nginx
[root@Ansible nginx]# mkdir handlers
[root@Ansible nginx]# cat handlers/main.yaml     #handlers模组的配置文件
---
- name: start_nginx      #定义handlers的动作类型
  shell: /usr/local/nginx/sbin/nginx
- name: stop_nginx       #定义handlers的动作类型
  shell: /usr/local/nginx/sbin/nginx -s stop
- name: reload_nginx     #定义handlers的动作类型
  shell: /usr/local/nginx/sbin/nginx -s reload

[root@Ansible nginx]# cat tasks/main.yaml        #tasks模组的配置文件
---
- name: check alived
  ping:
- name:
  shell: ls /
  register: ls_result
- debug: var=ls_result
- name:
  shell: echo my phone is {{ phone }}
  register: echo_result
- debug: var=echo_result
- name:
  copy: src=test dest=/root/
- name:
  script: test.sh
- name:
  template: src=test.j2 dest=/root/test2
  notify: start_nginx        #执行template任务后下发通知给handlers执行start_nginx
1.7.2 完成后的目录结构如下所示
[root@Ansible nginx]# tree /myroles/
/myroles/
├── nginx.retry
├── nginx.yaml
└── roles
    └── nginx      #nginx原型模组目录
        ├── files
        │   ├── test         #nginx模组的files任务配置文件
        │   └── test.sh      #nginx模组的files的脚本
        ├── handlers
        │   └── main.yaml    #nginx模组的handlers任务配置文件
        ├── tasks
        │   └── main.yaml    #nginx模组的tasks任务配置文件
        ├── templates
        │   └── test.j2      #nginx模组的templates任务配置文件
        └── vars
            └── main.yaml    #nginx模组的vars任务配置文件

5 directories, 6 files
1.7.3执行nginx.yaml入口配置文件
[root@Ansible myroles]# pwd
/myroles
[root@Ansible myroles]# ansible-playbook nginx.yaml

PLAY [all] *************************************************************************************

TASK [Gathering Facts] *************************************************************************
ok: [Web02]
ok: [Web01]

TASK [nginx : check alived] ********************************************************************
ok: [Web01]
ok: [Web02]

TASK [nginx : shell] ***************************************************************************
changed: [Web02]
changed: [Web01]

TASK [nginx : debug] ***************************************************************************
ok: [Web01] => {
     #中间省略。。。
ok: [Web02] => {
     #中间省略。。。
TASK [nginx : shell] ***************************************************************************
changed: [Web01]
changed: [Web02]

TASK [nginx : debug] ***************************************************************************
ok: [Web01] => {
    #中间省略。。。
ok: [Web02] => {
    #中间省略。。。
TASK [nginx : copy] ****************************************************************************
ok: [Web01]
ok: [Web02]

TASK [nginx : script] **************************************************************************
changed: [Web01]
changed: [Web02]

TASK [nginx : template] ************************************************************************
ok: [Web01]
ok: [Web02]

PLAY RECAP *************************************************************************************
Web01                      : ok=9    changed=3    unreachable=0    failed=0
Web02                      : ok=9    changed=3    unreachable=0    failed=0
特别提示:notify下发通知只有当之前的任务造成了变化那么才会被执行,如果没有发生任何改变,则notify不会被执行。例如:
1.7.4 tasks任务造成改变,触发notify
[root@Ansible /]# cat /tmp/test.yaml    #notify模组的配置文件
---
- hosts: Web01
  gather_facts: True
  tasks:
  - name:
    copy: src=/tmp/test dest=/root/    #这步造成目标改变才能出发notify
    notify: start_nginx
  handlers:
  - name: start_nginx
    shell: /usr/local/nginx/sbin/nginx
1.7.5 执行notify入口配置文件
#第一次执行/tmp/test.yaml
[root@Ansible /]# ansible-playbook /tmp/test.yaml

PLAY [Web01] ***********************************************************************************

TASK [Gathering Facts] *************************************************************************
ok: [Web01]

TASK [copy] ************************************************************************************
changed: [Web01]    #发生了改变

RUNNING HANDLER [start_nginx]     #触了发notify ******************************************************************
changed: [Web01]

PLAY RECAP *************************************************************************************
Web01                      : ok=3    changed=2    unreachable=0    failed=0
#再次执行/tmp/test.yaml
[root@Ansible /]# ansible-playbook /tmp/test.yaml

PLAY [Web01] ***********************************************************************************

TASK [Gathering Facts] *************************************************************************
ok: [Web01]

TASK [copy] ************************************************************************************
ok: [Web01]        #没有造成任务改变,未触发notify通知

PLAY RECAP *************************************************************************************
Web01                      : ok=2    changed=0    unreachable=0    failed=0
2. Jenkins环境搭建
由于Jenkins是依赖于java的,所以先介绍java环境的搭建
2.1 使用官方的二进制包解压安装,官方二进制包的下载地址:
http://www.oracle.com/technetwork/java/javase/downloads/jdk8-downloads-2133151.html
2.2 安装java(解压,移动即可)
[root@Ansible yang]# pwd
/yang
[root@Ansible yang]# ls
jdk-8u171-linux-x64.tar.gz
[root@Ansible yang]# tar xf jdk-8u171-linux-x64.tar.gz -C /usr/local/
[root@Ansible yang]# cd /usr/local/
[root@Ansible local]# mv jdk1.8.0_171 jdk
[root@Ansible local]# /usr/local/jdk/bin/java -version    #全路径验证java是否安装成功
java version "1.8.0_171"
Java(TM) SE Runtime Environment (build 1.8.0_171-b11)
Java HotSpot(TM) 64-Bit Server VM (build 25.171-b11, mixed mode)
2.3 配置java环境变量/etc/profile
[root@Ansible local]# sed -i.org '$a export JAVA_HOME=/usr/local/jdk/' /etc/profile
[root@Ansible local]# sed -i.org '$a export PATH=$PATH:$JAVA_HOME/bin' /etc/profile
[root@Ansible local]# sed -i.org '$a export CLASSPATH=.$CLASSPATH:$JAVA_HOME/lib:$JAVA_HOME/lib/tools.jar' /etc/profile
[root@Ansible local]# tail -3 /etc/profile
export JAVA_HOME=/usr/local/jdk/
export PATH=$PATH:$JAVA_HOME/bin
export CLASSPATH=.$CLASSPATH:$JAVA_HOME/lib:$JAVA_HOME/lib/tools.jar

[root@Ansible local]# source /etc/profile
[root@Ansible local]# java -version
java version "1.8.0_171"
Java(TM) SE Runtime Environment (build 1.8.0_171-b11)
Java HotSpot(TM) 64-Bit Server VM (build 25.171-b11, mixed mode)
2.4 Jenkins的下载和运行
#下载jinkins
[root@Ansible yang]# wget http://ftp-chi.osuosl.org/pub/jenkins/war-stable/2.107.2/jenkins.war
[root@Ansible yang]# ls
jenkins.war
#启动jenkins并后台运行
[root@Ansible ~]# nohup java -jar jenkins.war &> /tmp/jenkins.out &
[root@Ansible yang]# netstat -antup | grep java | grep -v grep
tcp6       0      0 :::8080                 :::*                    LISTEN      1405/java
tcp6       1      0 192.168.200.73:48132    52.202.51.185:443       CLOSE_WAIT  1405/java
udp        0      0 192.168.200.73:54730    192.168.200.2:53        ESTABLISHED 1472/java
udp6       0      0 :::5353                 :::*                                1405/java
udp6       0      0 :::33848                :::*                                1405/java
2.5 然后我们在浏览器上进行访问:http://192.168.200.73:8080 出现如下界面
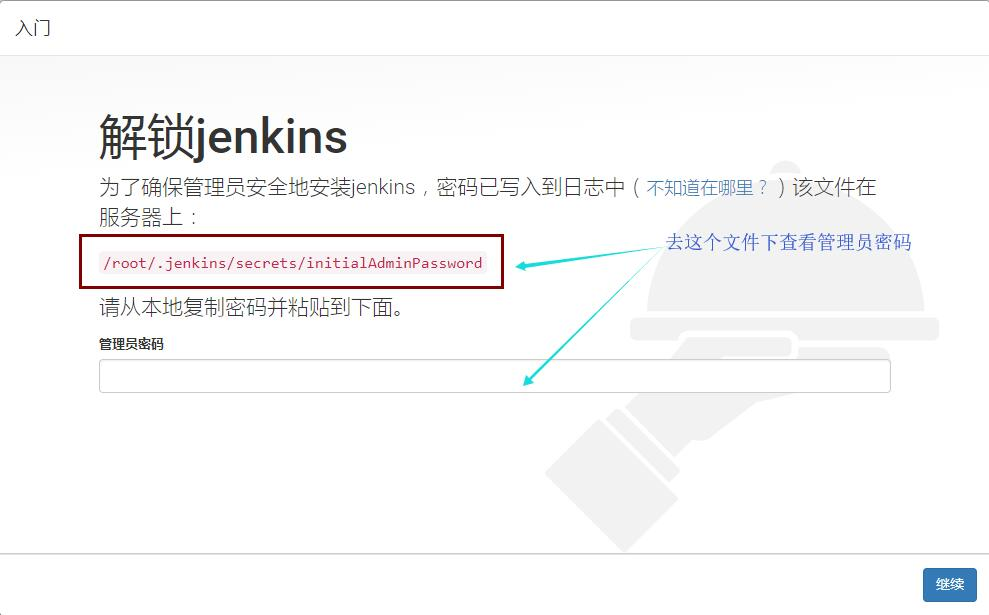
[root@Ansible ~]# cat .jenkins/secrets/initialAdminPassword
a21db34167d442f1bb23ff335016b5d3
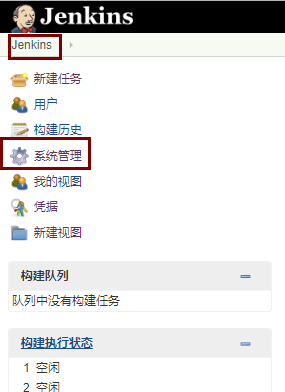
3. Jenkins介绍和初始化配置
Jenkins的作用?
- 可视化管理服务器
- 持续构建,可以直接去svn或者git上拉取代码并下发到服务器上
- 可视化ansible
Jenkins监听端口8080
- 启动Jenkins方式:nohup java -jar jenkins.war &> /tmp/jenkins.out &
- 查看监听端口:netstat -antup | grep java
- 访问方式:http://192.168.200.73:8080
- Jenkins默认密码路径,需要到Jenkins所在的服务器进行查看:/root/.jenkins/secrets/initialAdminPassword
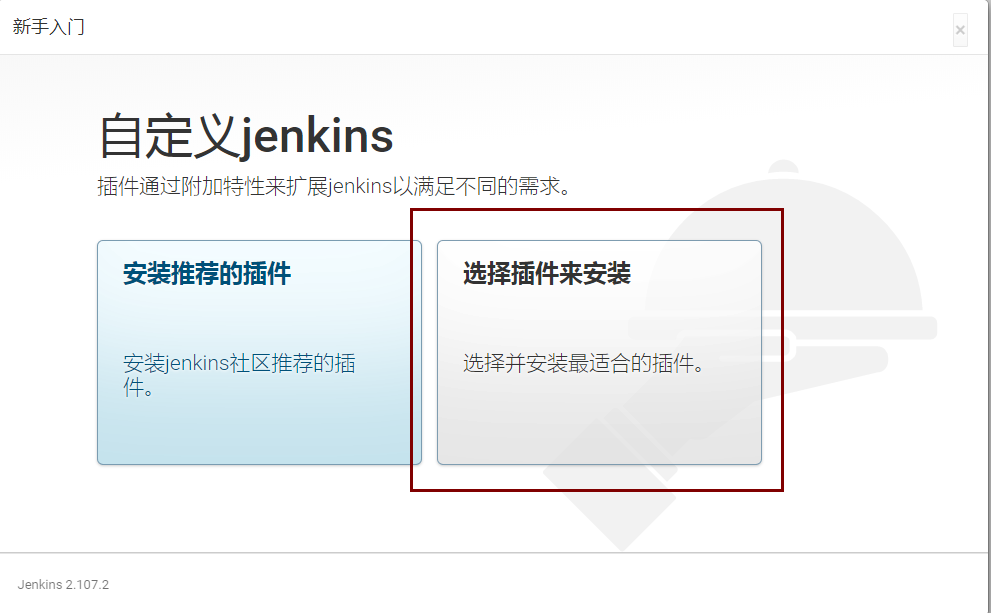
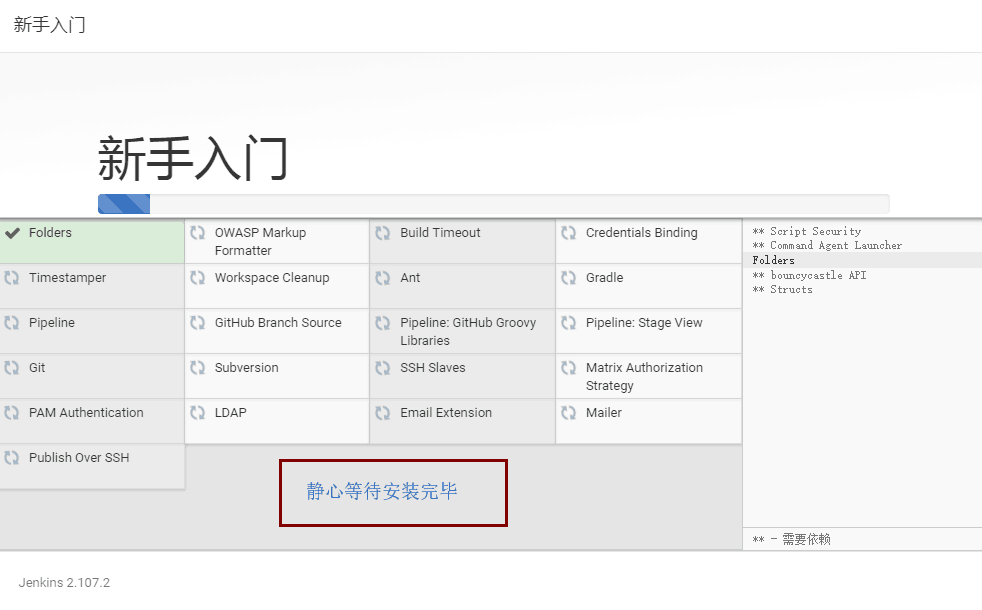
- Jenkins初始化配置:将服务器上的密码复制过来到浏览器上提交后,静心等待,出现如下界面
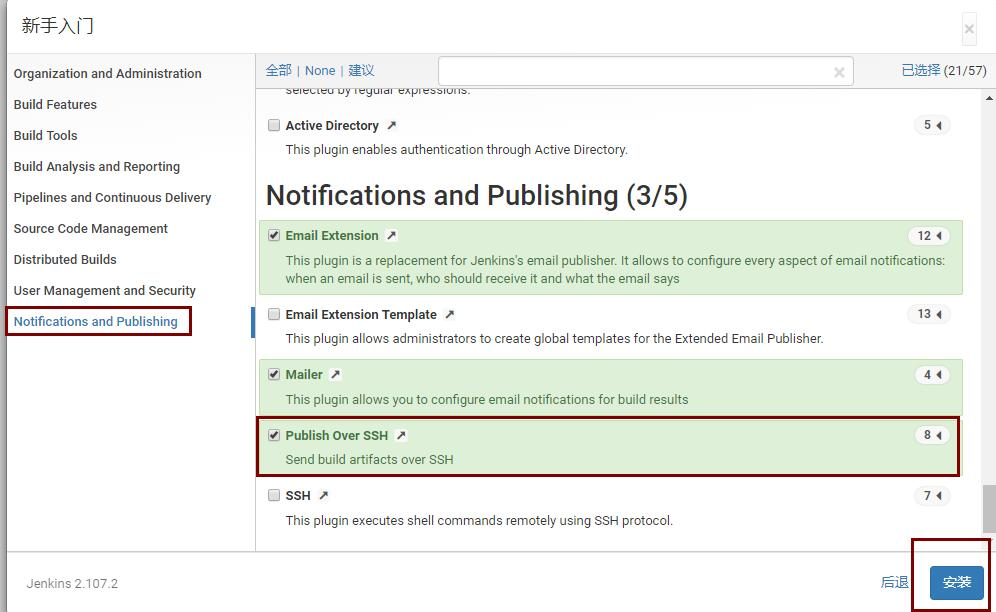
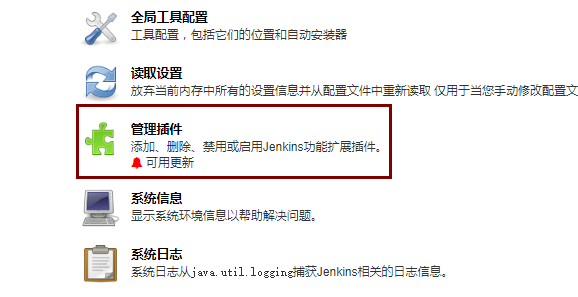
3.1 安装必要的插件
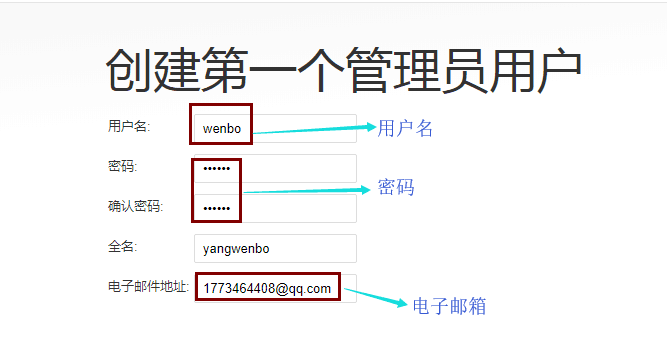
3.2新添加一个用户yunjisuan
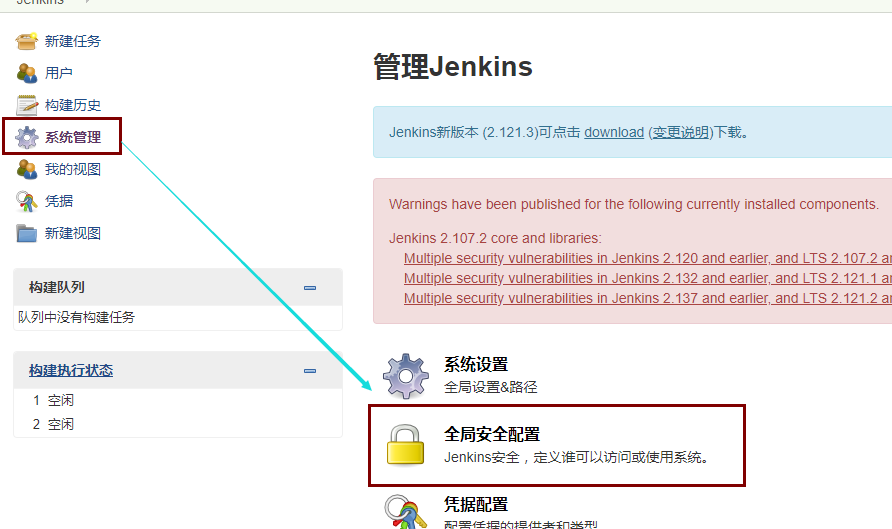
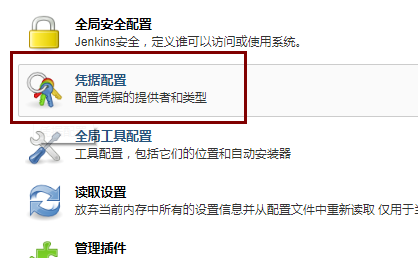
3.3查看Jenkins的权限(登录用户可以做任何事情)
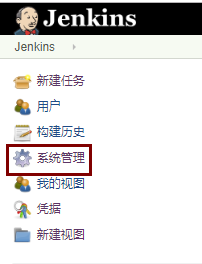
系统管理--->全局安全配置


4. Jenkins实现命令结果的可视化
4.1 添加ssh方式的被管理服务器
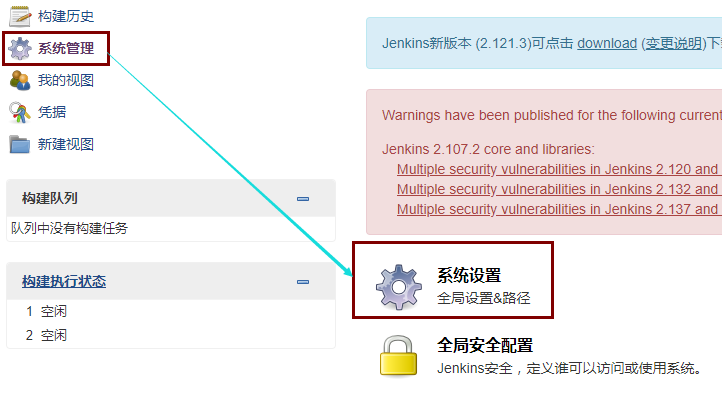
系统管理--->系统设置--->找到Publish over SSH可以添加对应的操作服务器
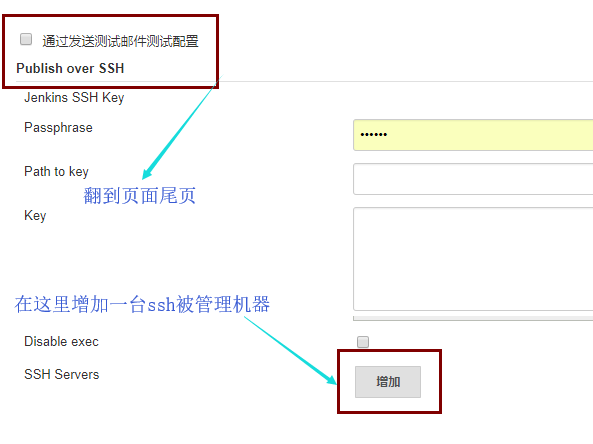
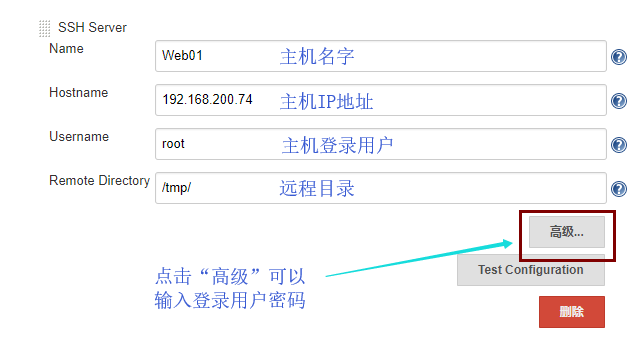
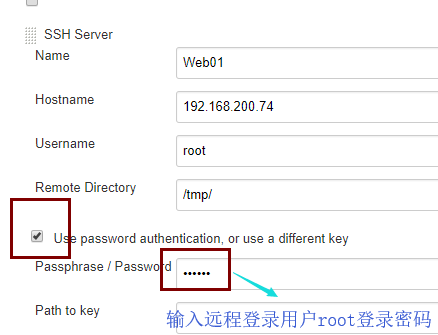
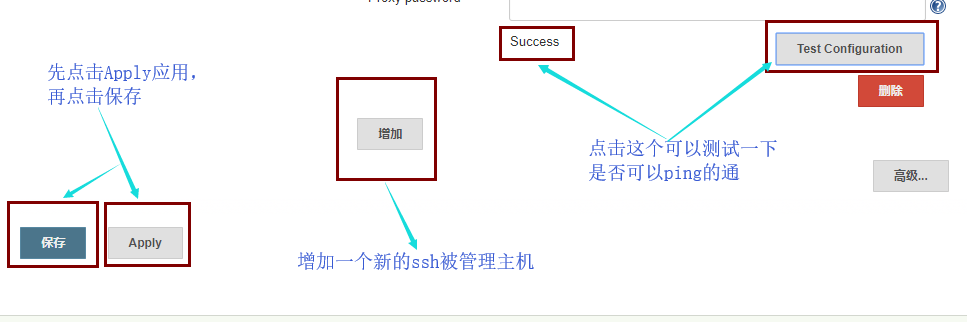
这就添加好一台被管理的主机了。要继续添加被管理的主机只需要重复之前的过程
4.2 创建新任务
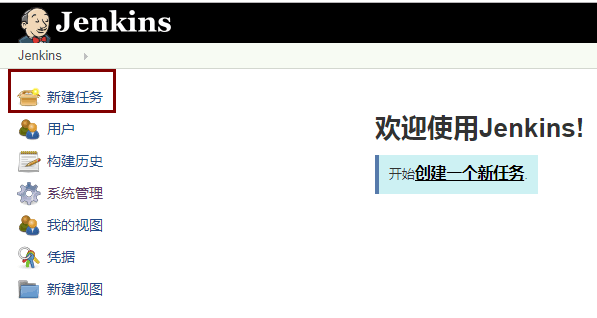
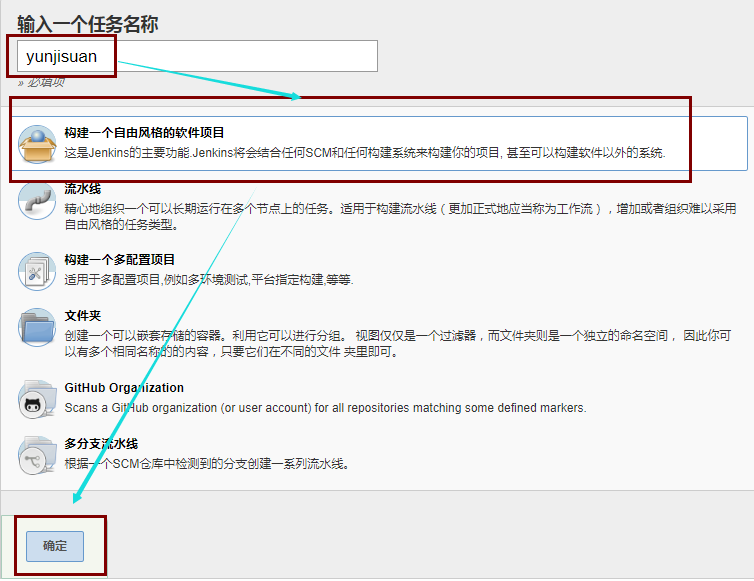
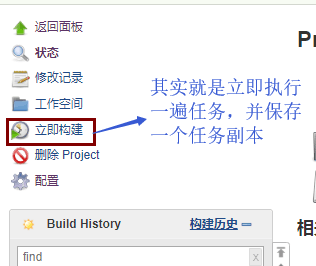
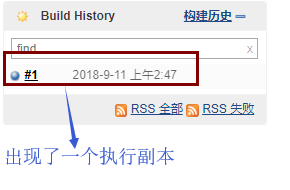
4.3 立刻构建任务并执行
5. Jenkins+svn实现持续化集成
需求,开发改完代码上传到svn上,然后运维打包最新版本代码部署到业务服务器上。
svn的部署与应用请参考专题(一)
5.1 设置svn的连接密码,并进行代码的部署测试

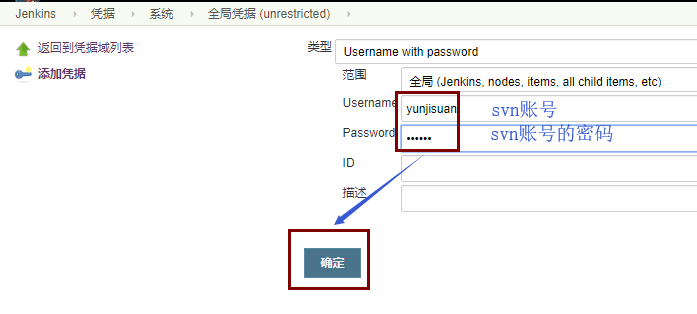
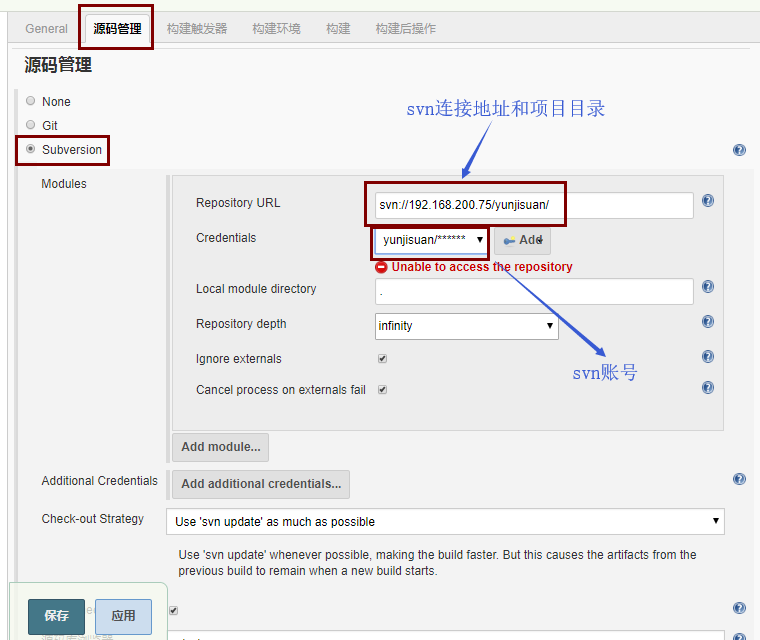
设置完毕后,应用保存。
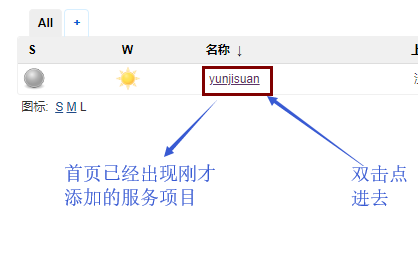
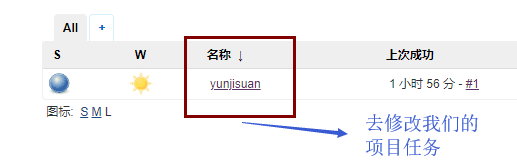
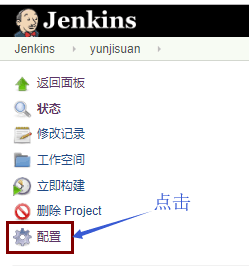
在windows上对svn的yunjisuan项目进行版本提交后
选择立刻构建项目
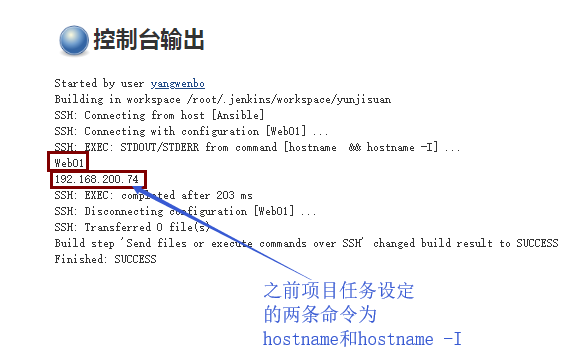
[root@Web01 /]# hostname -I
192.168.200.74
[root@Web01 /]# ls /tmp/test/
新建文本文档.txt
5.2 模拟真实环境web服务器的代码部署和备份
5.2.1 模拟真实环境web服务器的代码部署和备份
[root@Web01 /]# mkdir -p /www/{html,backup}
[root@Web02 /]# mkdir -p /www/{html,backup}
[root@Web01 /]# tree /www
/www
├── backup    #html网页目录的备份放置目录
└── html      #网页目录

2 directories, 0 files
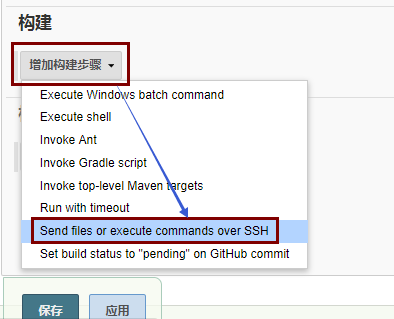
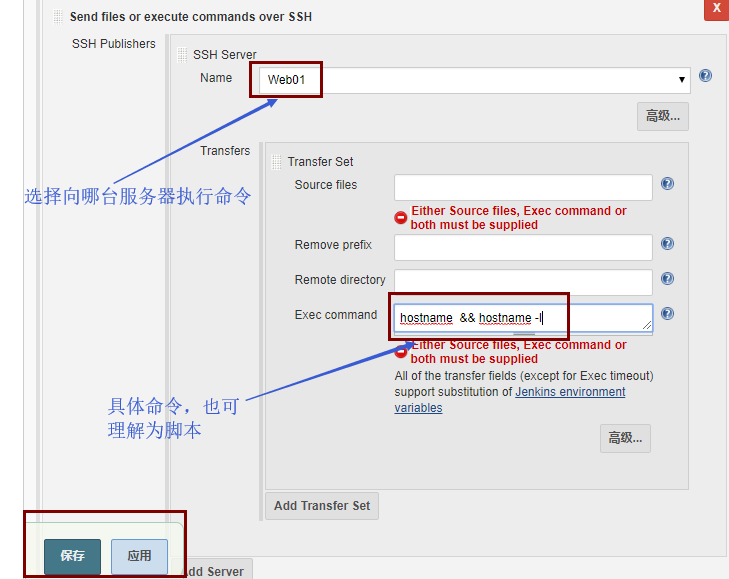
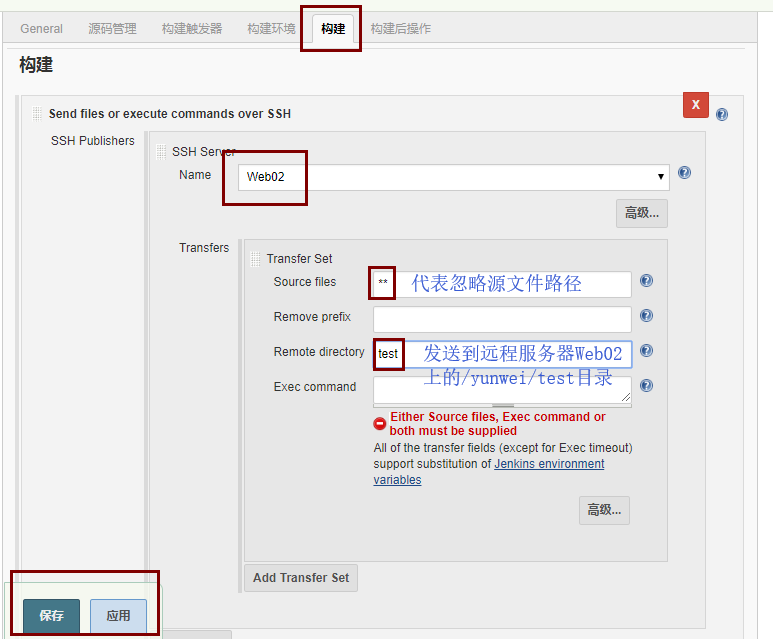
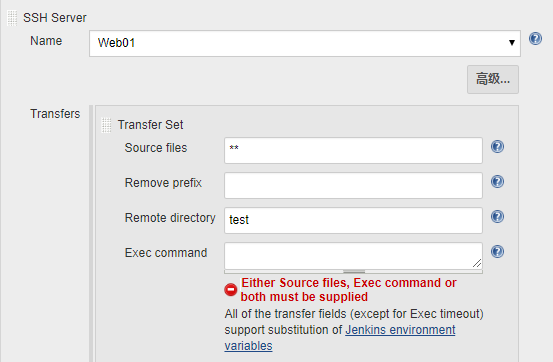
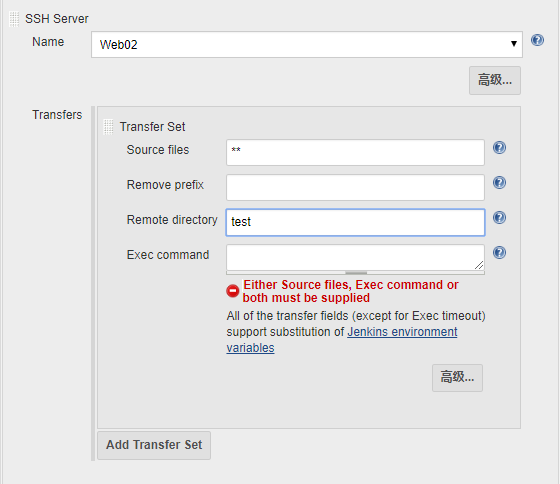
5.2.2 在jenkins上设置Web01,Web02两台服务器作为项目的构建目标
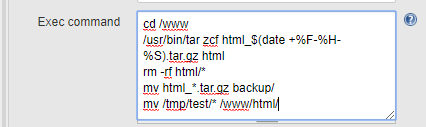
5.2.3将以下shell脚本代码复制到构建目标的Exec command里
#备份web服务器旧网页目录代码,并将部署到服务器上的新代码覆盖到网页目录里
cd /www
/usr/bin/tar zcf html_$(date +%F-%H-%S).tar.gz html
rm -rf html/*
mv html_*.tar.gz backup/
mv /tmp/test/* /www/html/
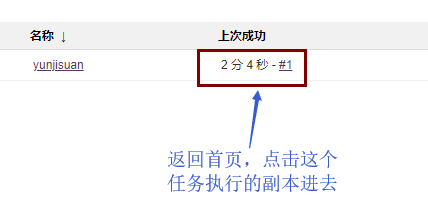
5.2.4 选择立刻构建进行测试
[root@Web01 /]# tree /www
/www
├── backup
│   └── html_2018-09-11-06-53.tar.gz
└── html
    ├── 123123.txt
    └── 346226260345273272346226207346234254346226207346241243.txt

2 directories, 3 files
[root@Web02 /]# tree /www
/www
├── backup
│   └── html_2018-09-11-06-53.tar.gz
└── html
    ├── 123123.txt
    └── 346226260345273272346226207346234254346226207346241243.txt

2 directories, 3 files
5.3 模拟真实环境,开发进行代码回滚

5.3.1 右键点击共享目录选择TortoiseSVN--->Show log
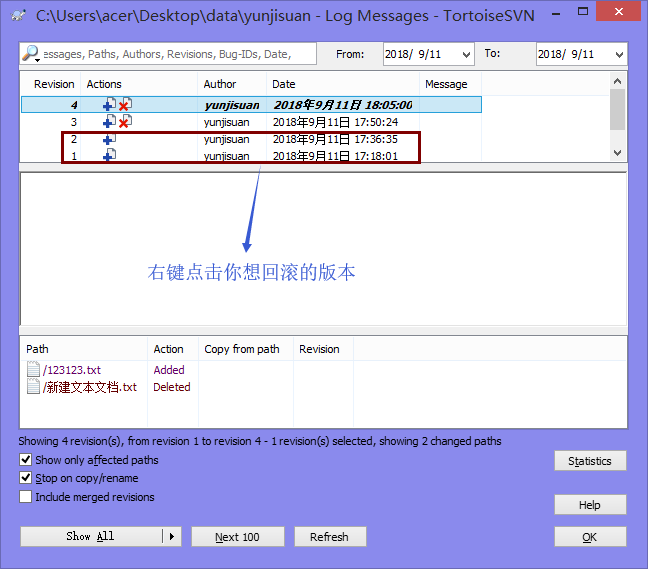
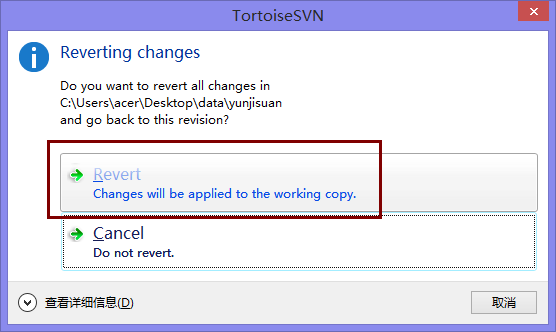
右键点击想要回滚的版本选择Revert to this revision
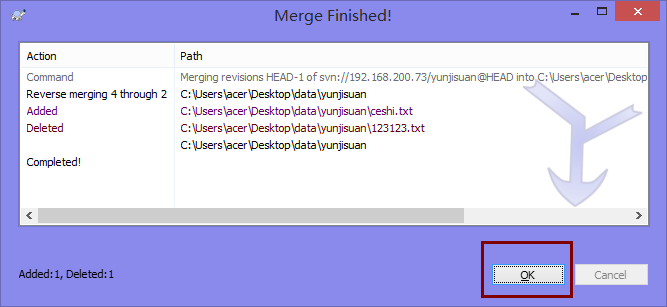
此时你发现你的共享目录里的东西已经被回滚到了指定的版本。
最后我们千万别忘记了右键点击共享目录,将结果进行提交(SVN commit)
5.3.2 重新进行jenkins项目构建,并检查部署情况
[root@Web01 /]# tree /www
/www
├── backup
│?? ├── html_2018-09-11-06-34.tar.gz
│?? └── html_2018-09-11-06-53.tar.gz
└── html
    └── 123123.txt

2 directories, 3 files
[root@Web02 /]# tree /www
/www
├── backup
│?? ├── html_2018-09-11-06-34.tar.gz
│?? └── html_2018-09-11-06-53.tar.gz
└── html
    └── 123123.txt

2 directories, 3 files
至此,测试成功!
6. Jenkins实现ansible可视化
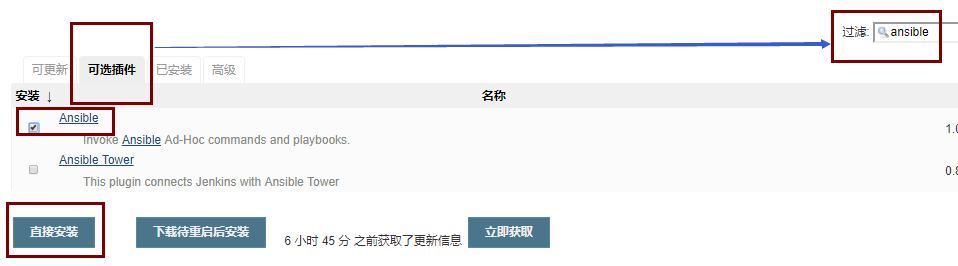
6.1 安装jenkins ansible插件,启动ansible插件
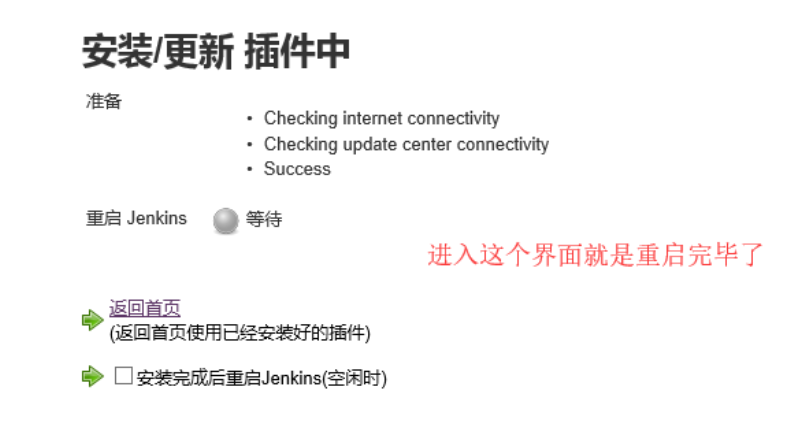
最后进入安装界面最下方勾选,安装完成时重启Jenkins
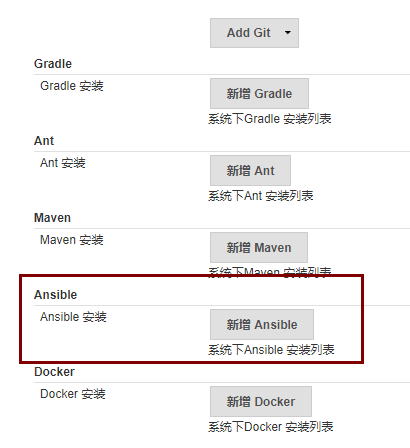
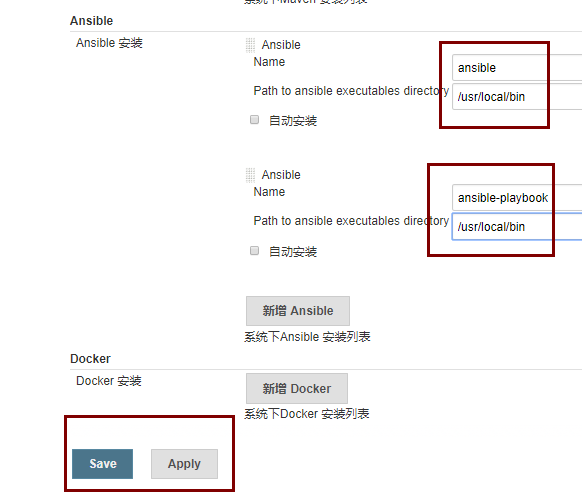
6.2 系统管理--->全局工具配置---->配置ansible
6.3 新建一个项目任务,使用ansible进行构建,跑个shell和copy模块
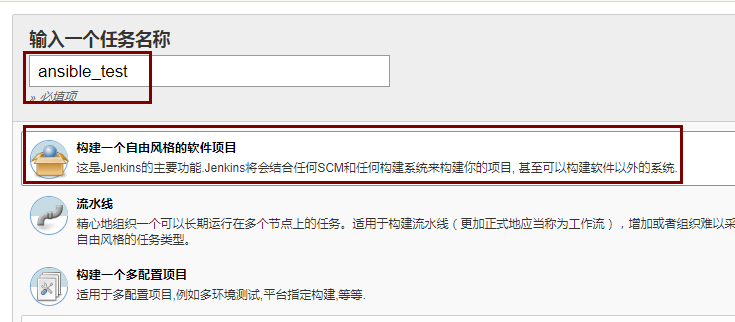
6.3.1 新建一个叫做ansible_test的新项目任务
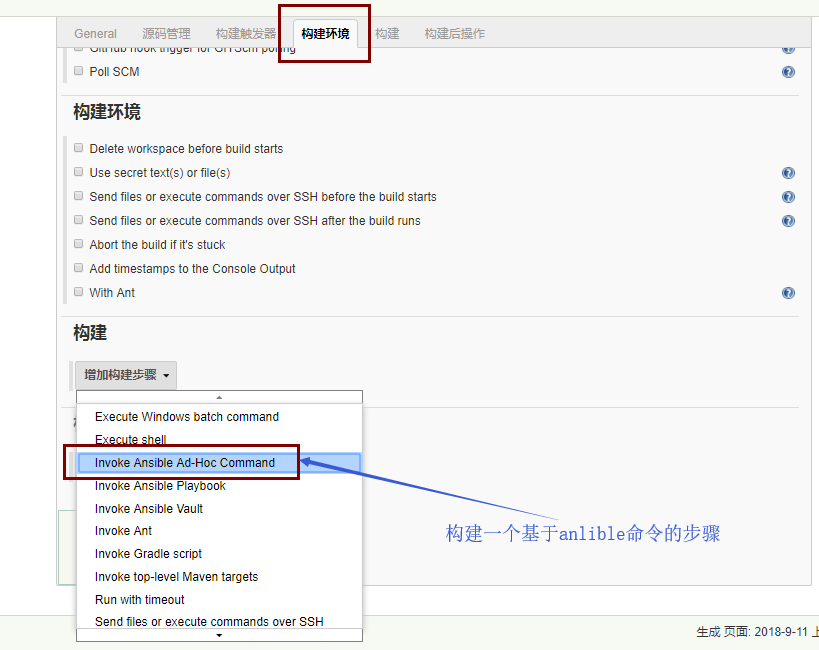
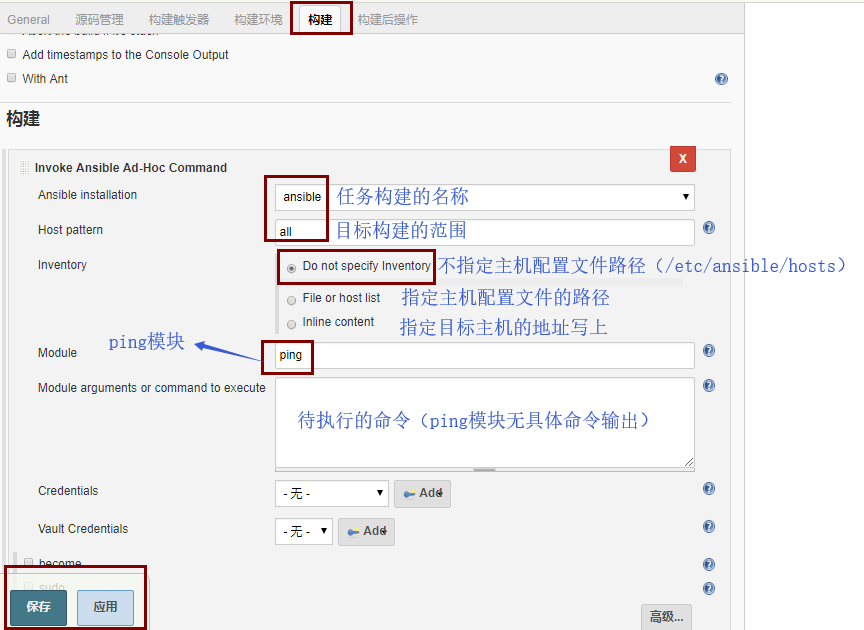
6.3.2 进入项目的配置里。构建一个基于ansible的任务
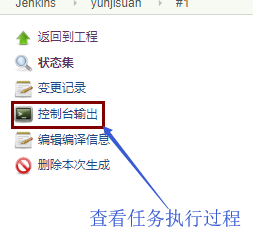
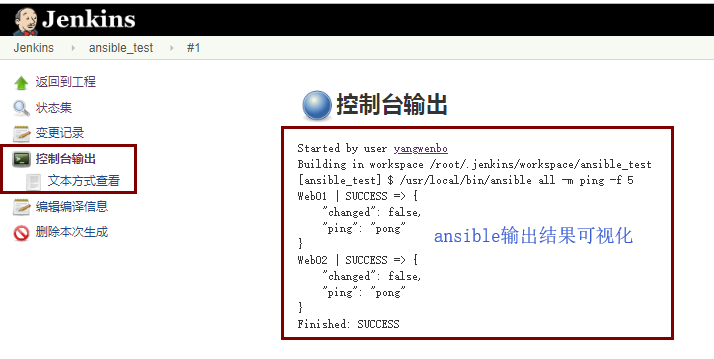
6.3.3 然后点击立刻构建功能,并查看输出结果
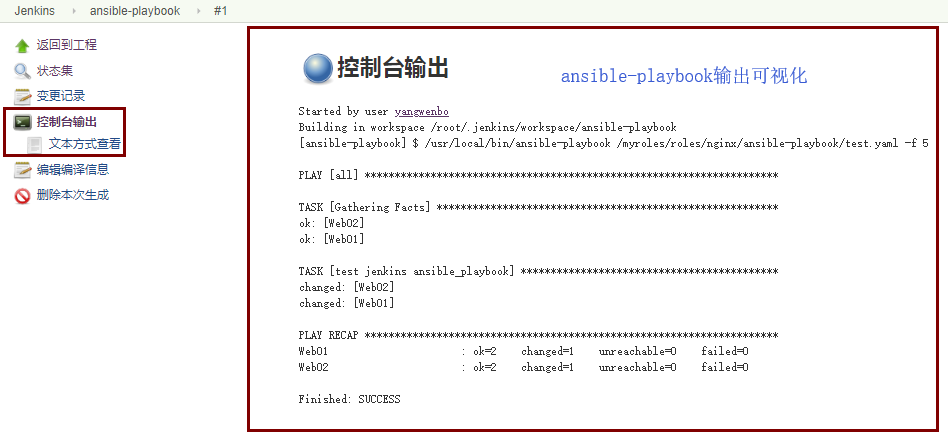
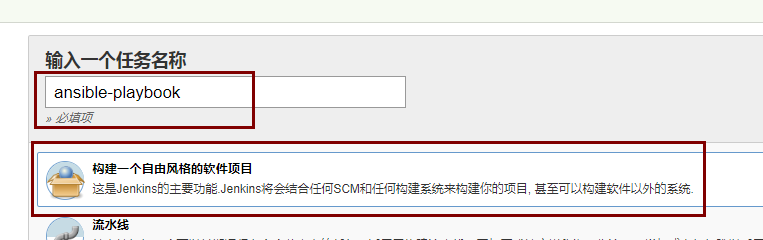
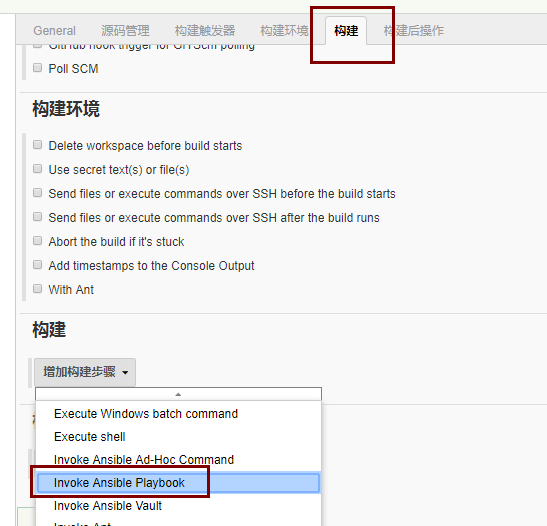
6.3.4 新建一个项目任务,使用ansible-playbook进行构建
[root@Ansible /]# cat /myroles/roles/nginx/ansible-playbook/test.yaml
#准备一个playbook的配置文件
---
- hosts: all
  tasks:
  - name: test jenkins ansible_playbook
    shell: echo "welcome to yunjisuan" >> /tmp/yunwei.txt
然后新建一个新的项目任务,进行配置
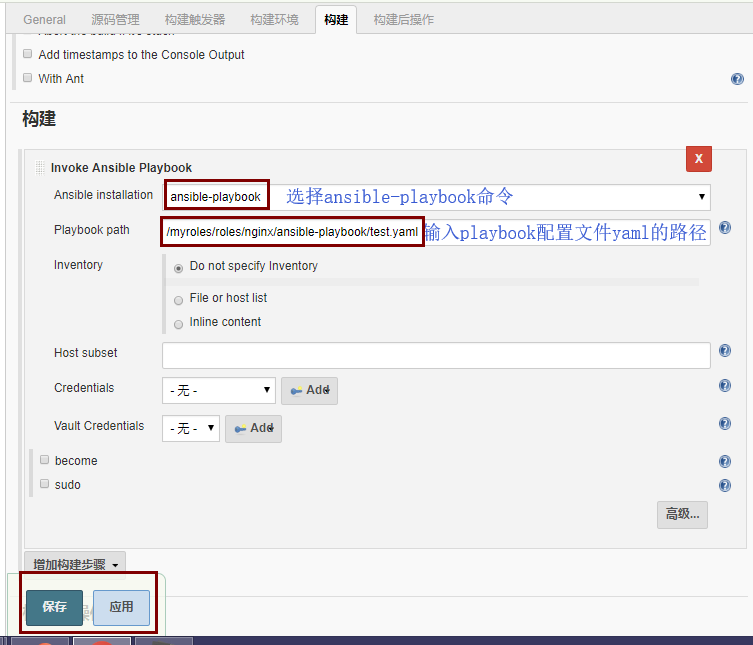
选择立刻构建进行测试并查看构建的可视化输出结果