首先在处理iOS-UI中,也许在很多地方需要用到两种甚至多种不同界面之间的传值,相比这也是很多iOS入门成员头疼问题,同样作为新手的我在接触这类传值时候也一脸懵然,经过一段时间的研究,对于简单的传值有一定的了解,下面依次对属性传值,代理传值做一定的说明,希望对于部分有需要的朋友有帮助。
一、属性传值: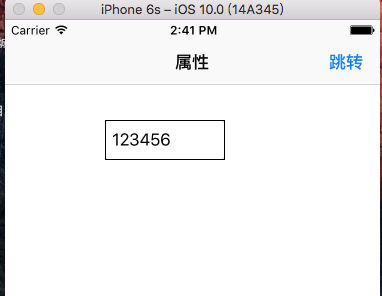

通过图片可以看出,属性传值的是当前界面往后面的界面传值。首先根据个人的需要创建两个不同的界面,在前面的
UITextField中输入需要的值然后点击跳转就可以进入下一届面,然后对应的值会显示在下界面的提示框中:这里用两个例子(firstViewController,secondViewController),在secondViewController的.h文件中声明属性:
@property(nonatomic,strong)NSString *textString;(属性传值第一步)
然后在.m文件中声明属性
@property(nonatomic,strong)UILabel *label;
接着:
- (void)viewDidLoad {
[super viewDidLoad];
self.view.backgroundColor = [UIColor whiteColor];
//配置导航栏标题
self.navigationItem.title = @"属性";
[self uibuttongs];
//创建lable
[self customLable];
//属性传值第三步
//将属性中存储的值取出来赋值给_lable.text
_label.text= _textString;
}
- (void)dealloc{
self.textString = nil;
}
- (void)customLable{
//创建lable对象
_label = [[UILabel alloc]initWithFrame:CGRectMake(100, 100, 120, 40)];
_label.layer.cornerRadius = 7;
_label.backgroundColor = [UIColor cyanColor];
_label.textColor = [UIColor blackColor];
[self.view addSubview:_label];
}
- (void)uibuttongs{
UIButton *button = [[UIButton alloc]initWithFrame:CGRectMake(100, 160, 60, 30)];
button.backgroundColor =[UIColor lightGrayColor];
[button setTitle:@"上一页" forState:UIControlStateNormal];
[button addTarget:self action:@selector(acction_butong:) forControlEvents:UIControlEventTouchUpInside];
[self.view addSubview:button];
}
- (void)acction_butong:(UIButton *)sender//这里是返回上界面
{
[self.navigationController popViewControllerAnimated:YES];
}
然后只需要在 firstViewController中的.m文件完成如下声明属性:
@property(nonatomic,strong)UITextField *textField;
然后:
- (void)viewDidLoad {
[super viewDidLoad];
self.view.backgroundColor = [UIColor whiteColor];
//配置导航栏标题
self.tabBarItem.title = @"属性传值";
//创建导航栏右功能键
[self customRightItem];
//创建textField
[self customTextFied];
}
#pragma mark - 创建导航栏右侧按钮
- (void)customTextFied{
//创建控件
_textField = [[UITextField alloc]initWithFrame:CGRectMake(100, 100, 120, 40)];
_textField.borderStyle = UITextBorderStyleRoundedRect;
_textField.layer.borderWidth = 1;
[self.view addSubview:_textField];
}
#pragma mark - 创建导航栏右侧按钮
- (void)customRightItem{
UIBarButtonItem *rightItem =[[UIBarButtonItem alloc]initWithTitle:@"跳转" style:UIBarButtonItemStyleDone target:self action:@selector(handleRight:)];
self.navigationItem.rightBarButtonItem = rightItem;
}
#pragma mark - 导航栏右侧按钮关联方法
- (void)handleRight:(UIBarButtonItem *)sender{
//创建跳转页面视图
scendViewController *scender = [[scendViewController alloc]init];
//属性传值第二步
//在push之前将——textField的值取出来赋值给second.textString
scender.textString = _textField.text;
[self.navigationController pushViewController:scender animated:YES];
}
二、代理传值:
a.后一个页面(找代理) 制定协议
b.写delegate属性
c.在合适的时候, 让代理执行协议方法
d.前一个页面(成为代理) 建立关系
e.遵守协议
f.实现协议方法
g.通知代理执行协议方法
*/
1、 2、
2、 3、
3、
这里依旧用(firstViewController,secondViewController)两个界面来做例子,具体的界面根据个人的需求来定义声明。
从图片不难看出代理传值时一种传值方式从后界面往前界面往前传值的过程,首先在secondViewController的.h文件中制定协议;
@protocol senderViewControllerDelegate <NSObject>
//代理传值第一步:制定协议
//根据要传的数据类型设计方法的参数
- (void)passValue:(NSString *)string;
@end
然后定义属性:
@property(nonatomic,assign)id<senderViewControllerDelegate>delegate;
//代理传值第二步,定义代理协议属性
然后在其.m文件中封装的属性:
@property(nonatomic,strong)UITextField *textField;
接着:
- (void)viewDidLoad {
[super viewDidLoad];
self.view.backgroundColor = [UIColor whiteColor];
self.navigationItem.rightBarButtonItem = [[UIBarButtonItem alloc]initWithTitle:@"返回" style:UIBarButtonItemStylePlain target:self action:@selector(hengde:)];
_textField = [[UITextField alloc]initWithFrame:CGRectMake(50, 100, 220, 40)];
_textField.layer.borderWidth = 1;
[self.view addSubview:_textField];
}
- (void)hengde:(UIBarButtonItem *)sender{
//代理传值第六步:在pop之前代理对象执行协议中的方法
if ([_delegate respondsToSelector:@selector(passValue:)]) {
[_delegate passValue:_textField.text];
}
[self.navigationController popViewControllerAnimated:YES];
}
完成在 secondViewController的操作后,在firstViewController中.m文件的操作:
//代理传值第四步:代理对象所在的类遵循协议
@interface firstViewController ()<senderViewControllerDelegate>
@property(nonatomic,strong)UILabel *lable;//封装属性
@end
- (void)viewDidLoad {
[super viewDidLoad];
self.view.backgroundColor = [UIColor whiteColor];
self.title = @"代理";
_lable = [[UILabel alloc]initWithFrame:CGRectMake(100, 100, 120, 40)];
_lable.layer.borderWidth = 1;
[self.view addSubview:_lable];
UIButton *button = [[UIButton alloc]initWithFrame:CGRectMake(130, 180, 100, 50)];
[button setTitle:@"下一页" forState:UIControlStateNormal];
[button addTarget:self action:@selector(hended:) forControlEvents:UIControlEventTouchUpInside];
[button setTitleColor:[UIColor blackColor] forState:UIControlStateNormal];
[self.view addSubview:button];
}
- (void)hended:(UIBarButtonItem *)sender{
senderViewController *sendedfr = [[senderViewController alloc]init];
//代理传值第三步:指定代理对象
sendedfr.delegate = self;
[self.navigationController pushViewController:sendedfr animated:YES];
}
//代理传值第五步:实现协议方法
- (void)passValue:(NSString *)string{
_lable.text = string;
}
然后代理的简单传值方式大概即使这样!
附:别忘了在firstViewController或者secondVIewController中导入对应的文件.h文件!