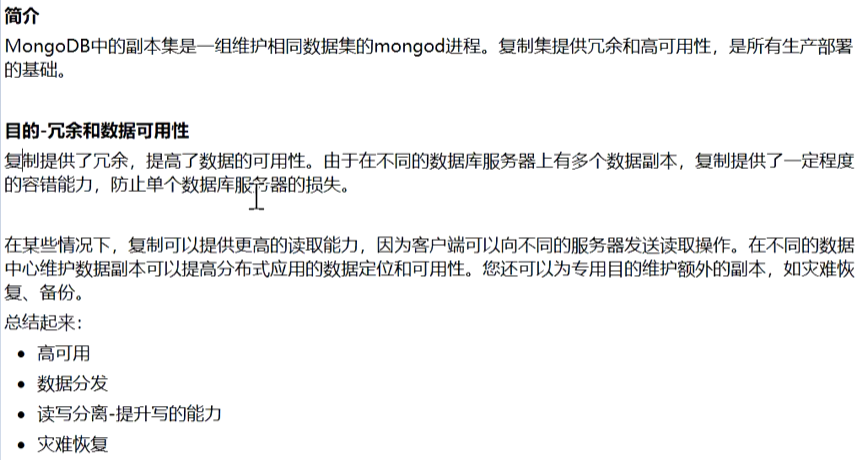
副本集
副本集是一组维护相同数据集的mongod的进程.
副本集没有提高集群的写能力,只提高了数据库集群的读能力
读写能力操作


MongoDB索引基础
索引覆盖
需要查询的字段全都在索引上,不再需要通过索引定位到其它位置的数据
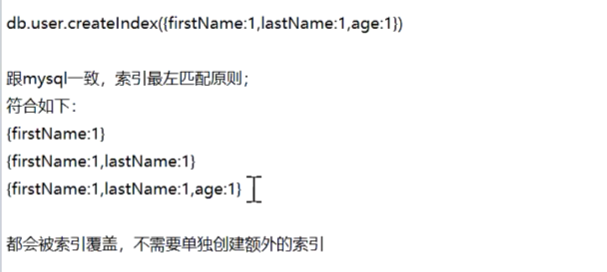
索引最左匹配原则
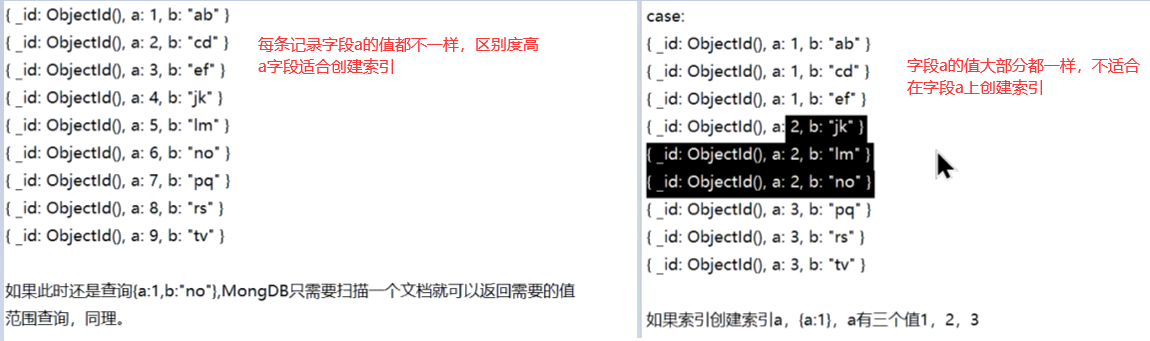
索引过滤性
查询计划
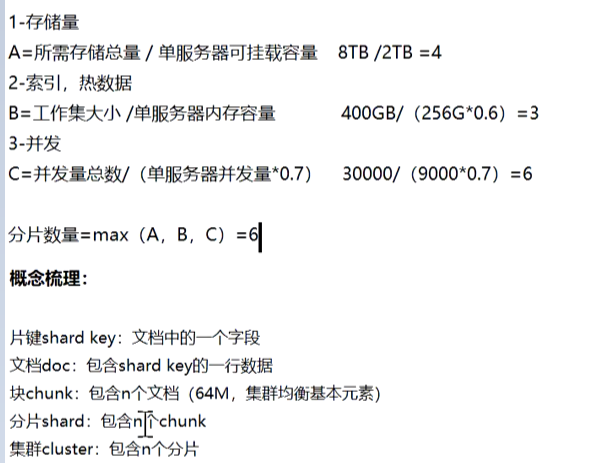
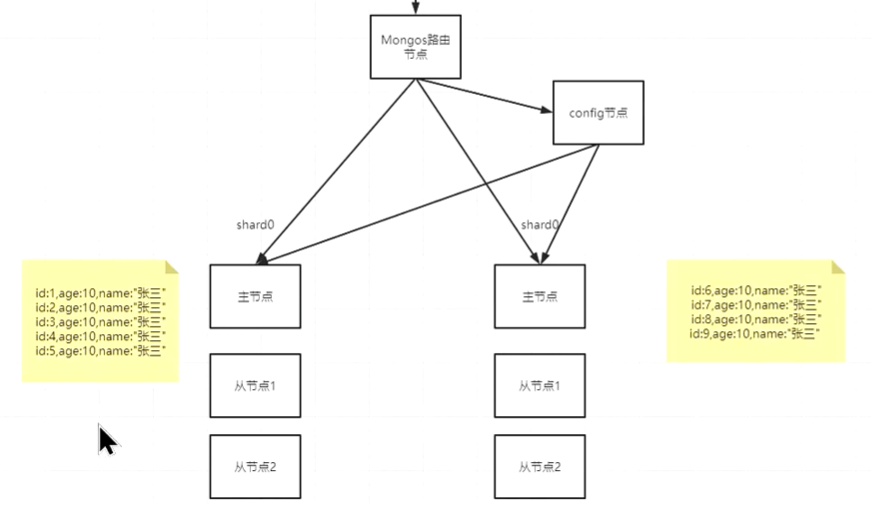
MongoDB分片集群
1.副本集是每个副本节点上存储的是全量数据
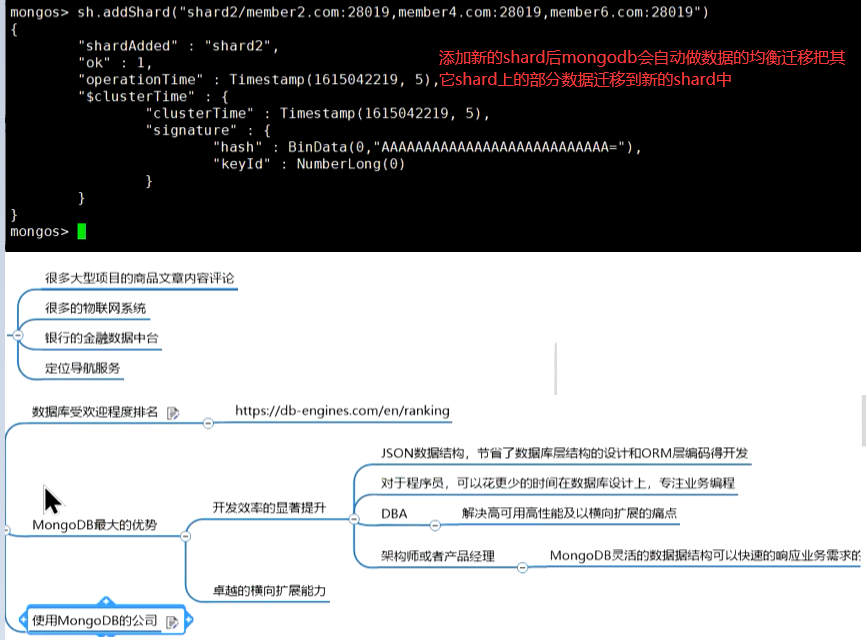
2.分片是多个分片节点的数据组合在一起才是一份全量数据,每个分片节点存储的是部分数据。相当于mysql中的分库分表

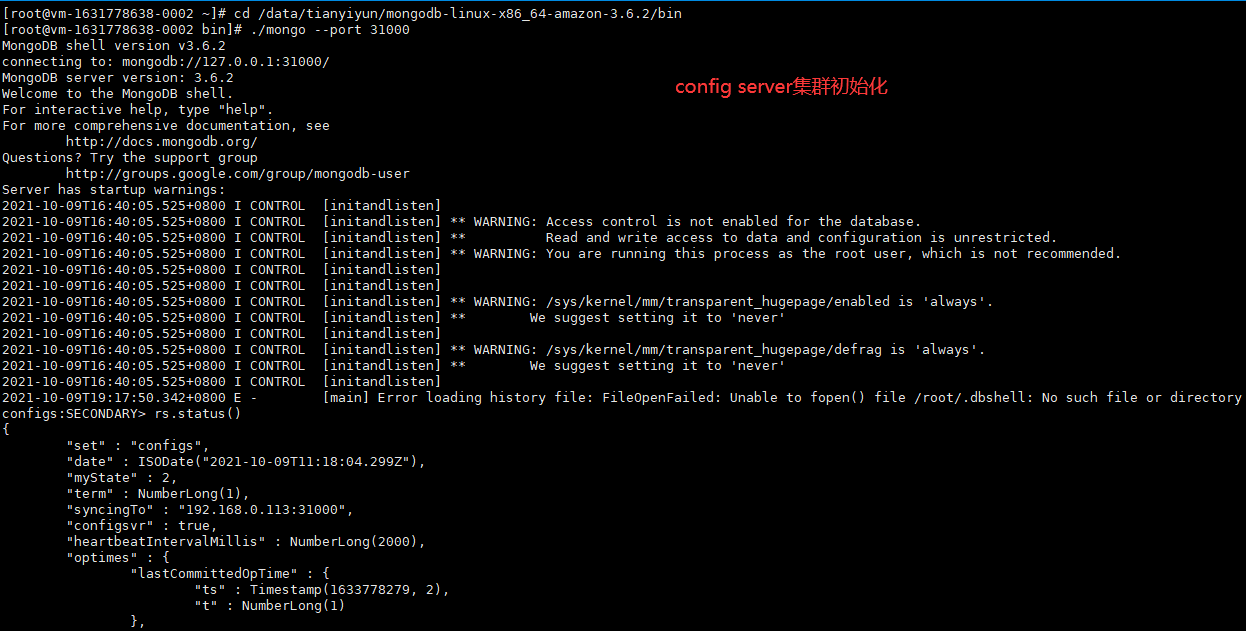
mongodb集群初始化
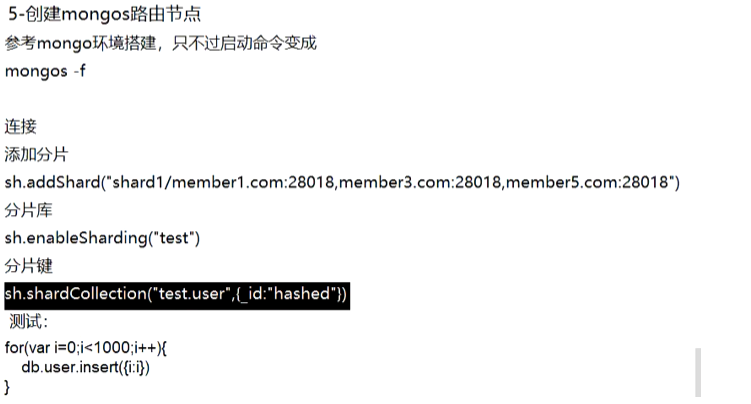
mongos路由中添加分片 登录任何一台mongos

实例步骤
1.初始化configserver配置
2.初始化shards配置
3.初始化mongos配置
4.客户端连接mongos地址操作数据库


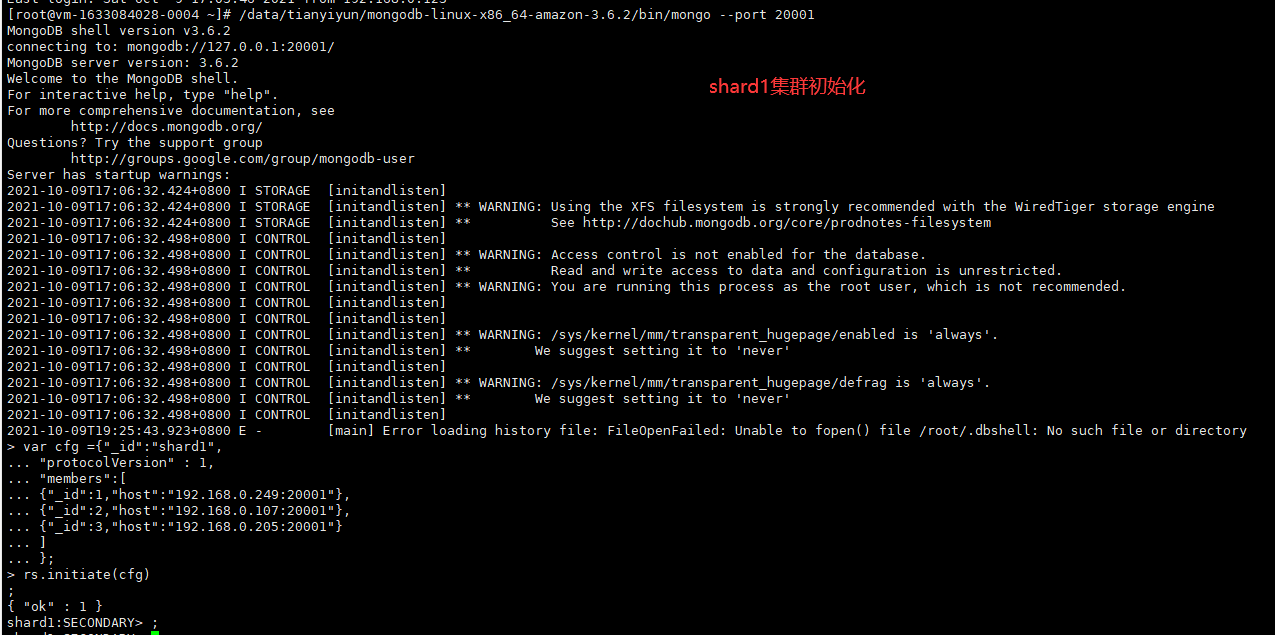
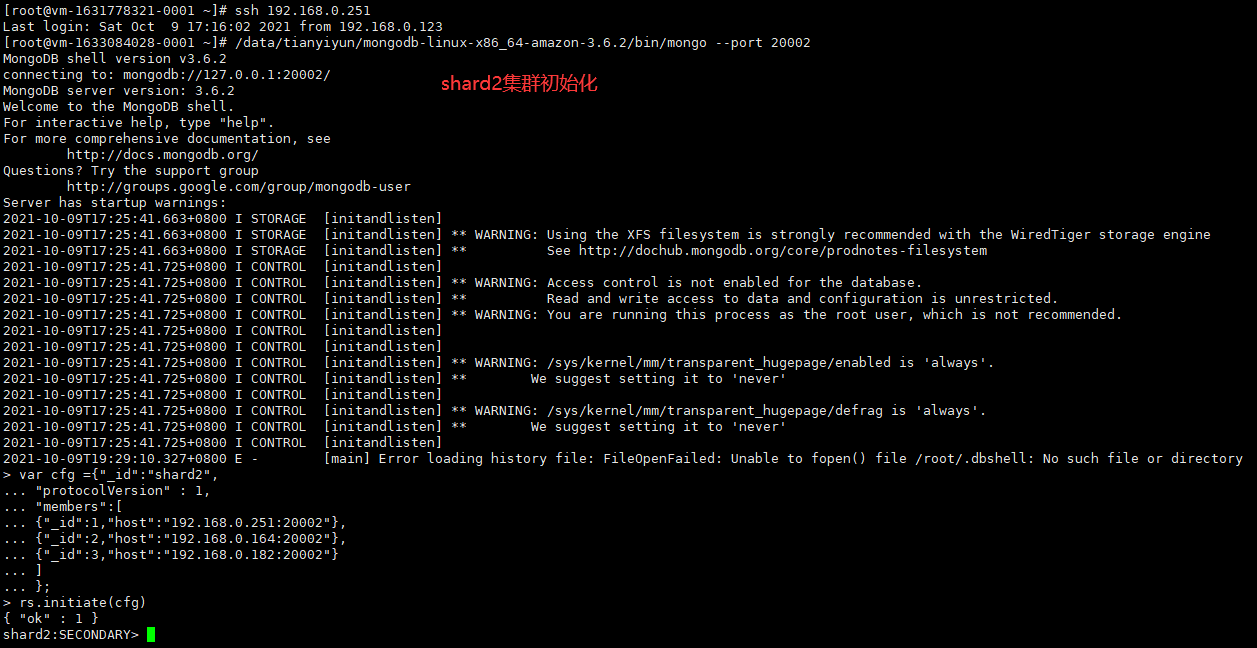
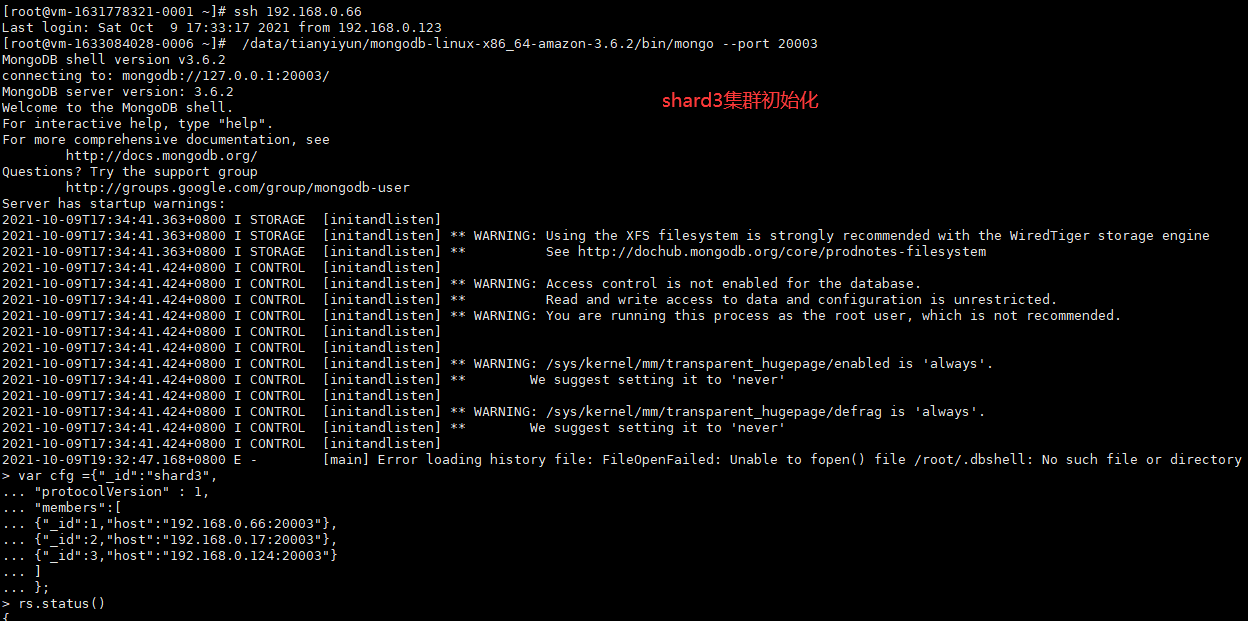
configserver配置
/data/tianyiyun/mongodb-linux-x86_64-amazon-3.6.2/bin/mongo --port 31000
config = {
   _id : "configs",
    members : [
        {_id : 0, host : "192.168.0.171:31000" },
        {_id : 1, host : "192.168.0.113:31000" },
        {_id : 2, host : "192.168.0.171:33000" }
    ]
}
rs.initiate(config)


shard1配置
/data/tianyiyun/mongodb-linux-x86_64-amazon-3.6.2/bin/mongo --port 20001
config = {
   _id : "shard1",
    members : [
        {_id : 0, host : "192.168.0.249:20001" },
        {_id : 1, host : "192.168.0.107:20001" },
        {_id : 2, host : "192.168.0.205:20001" }
    ]
}
rs.initiate(config)

shard2配置
/data/tianyiyun/mongodb-linux-x86_64-amazon-3.6.2/bin/mongo --port 20002
config = {
   _id : "shard2",
    members : [
        {_id : 0, host : "192.168.0.251:20002" },
        {_id : 1, host : "192.168.0.164:20002" },
        {_id : 2, host : "192.168.0.182:20002" }
    ]
}
rs.initiate(config)


shard3配置
/data/tianyiyun/mongodb-linux-x86_64-amazon-3.6.2/bin/mongo --port 20003
config = {
   _id : "shard3",
    members : [
        {_id : 0, host : "192.168.0.66:20003" },
        {_id : 1, host : "192.168.0.17:20003" },
        {_id : 2, host : "192.168.0.124:20003" }
    ]
}
rs.initiate(config)

mongos配置
三台服务器的config服务器和shard服务器均已启动,现在开始配置mongos服务的三副本集
/data/tianyiyun/mongodb-linux-x86_64-amazon-3.6.2/bin/mongo --port 37017
use admin
db.runCommand({addshard:"shard1/192.168.0.249:20001,192.168.0.107:20001,192.168.0.205:20001"})
db.runCommand({addshard:"shard2/192.168.0.251:20002,192.168.0.164:20002,192.168.0.182:20002"})
db.runCommand({addshard:"shard3/192.168.0.66:20003,192.168.0.17:20003,192.168.0.124:20003"})
sh.status()

use dbtest
db.table1.ensureIndex({"id":1})
sh.shardCollection("dbtest.table1",{"id":1})
 for(var i=1;i<=1000000;i++){
  db.table1.save({"id":i,"x":Math.random(),"name":"xubo","time":"20150819","ops":"testinserttimes"});
  }
db.table1.find()
mongodb集群设置用户名认证
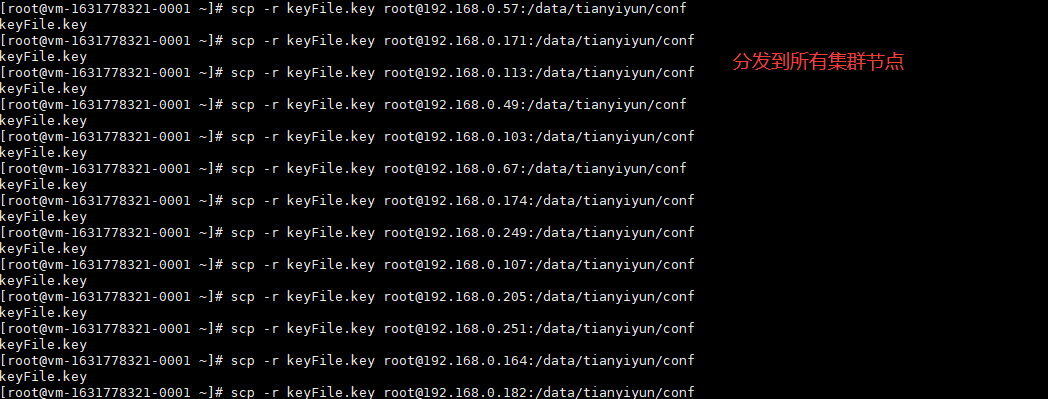
1.在分片集群环境中,副本集内成员之间需要用keyFile认证,mongos与配置服务器,副本集之间也要keyFile认证,集群所有mongod和mongos实例使用内容相同的keyFile文件
openssl rand -base64 756 > ./keyFile.key
chmod 600 ./keyFile.key

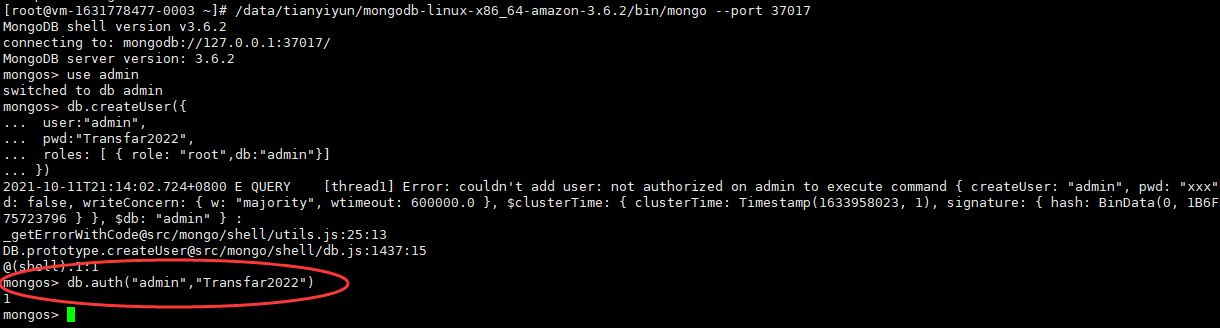
2.创建一个数据库管理的超级用户,相当于root用户权限。


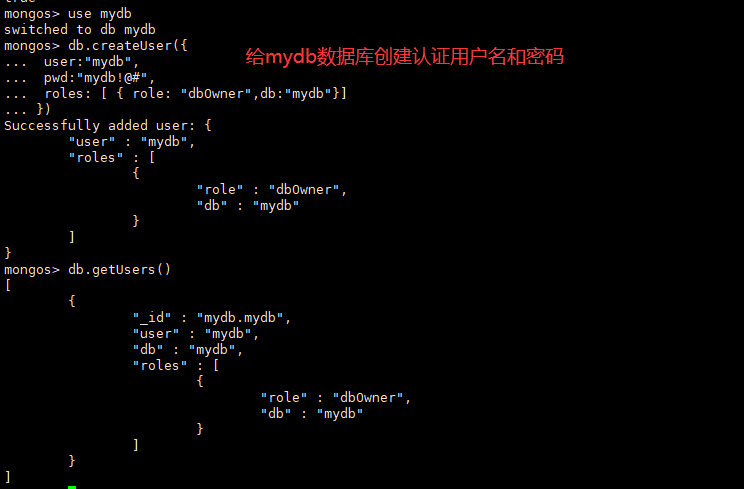

3.对指定数据库创建拥有添加删除用户权限的帐号
use admin 表示只是在admin这个数据库中创建用户,不能拿这个用户去连接其它数据库。
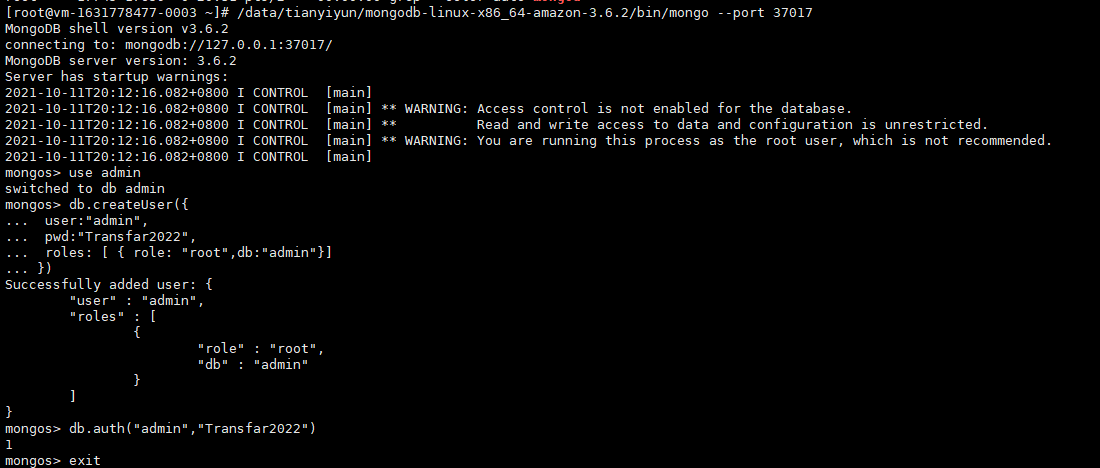
db.createUser({
user:"admin",
pwd:"Transfar2022",
roles: [ { role: "root",db:"admin"}]
})
db.auth("admin","Transfar2022")
3.configserver和shard的配置
## 配置文件内容
pidfilepath = /data/tianyiyun/mongod/config/log/configsrv.pid
dbpath = /data/tianyiyun/mongod/config/data
logpath = /data/tianyiyun/mongod/config/log/congigsrv.log
logappend = true

bind_ip = 0.0.0.0
port = 31000

#true表示后台方式启动进程
#false表示前台方式启动进程
fork = false

#declare this is a config db of a cluster;
configsvr = true

#副本集名称
replSet = configs

#设置最大连接数
maxConns = 20000

auth=true
keyFile=/data/tianyiyun/conf/keyFile.key
# BEGIN ANSIBLE MANAGED BLOCK
#配置文件内容
#???????????????
pidfilepath = /data/tianyiyun/shard3/log/shard3.pid
dbpath = /data/tianyiyun/shard3/data
logpath = /data/tianyiyun/shard3/log/shard3.log
logappend = true

bind_ip = 0.0.0.0
port = 20003
fork = false

#副本集名称
replSet = shard3

#declare this is a shard db of a cluster
shardsvr = true

#设置最大连接数
maxConns = 20000
# END ANSIBLE MANAGED BLOCK

auth=true
keyFile=/data/tianyiyun/conf/keyFile.key
auth=true
keyFile=/data/tianyiyun/conf/keyFile.key
4.mongos的配置
#内容
pidfilepath = /data/tianyiyun/mongod/mongos/log/mongos.pid
logpath = /data/tianyiyun/mongod/mongos/log/mongos.log
logappend = true

bind_ip = 0.0.0.0
port = 37017
fork = false


#监听的配置服务器,只能有1个或者3个configs为配置服务器的副本集名字
keyFile=/data/tianyiyun/conf/keyFile.key


configdb = configs/192.168.0.113:31000,192.168.0.171:31000,192.168.0.57:31000
#设置最大连接数
maxConns = 20000
keyFile=/data/tianyiyun/conf/keyFile.key
5.客户端连接认证登录 admin用户只能登录admin数据库