1. 环境搭建
使用SpringBoot搭建开发环境,只需在pom.xml添加如下依赖即可.
<?xml version="1.0" encoding="UTF-8"?>
<project xmlns="http://maven.apache.org/POM/4.0.0" xmlns:xsi="http://www.w3.org/2001/XMLSchema-instance"
         xsi:schemaLocation="http://maven.apache.org/POM/4.0.0 https://maven.apache.org/xsd/maven-4.0.0.xsd">
    <modelVersion>4.0.0</modelVersion>
    <groupId>qinfeng.zheng</groupId>
    <artifactId>mockmvc-demo</artifactId>
    <version>0.0.1-SNAPSHOT</version>
    <name>mockmvc-demo</name>
    <description>spring security项目</description>

    <properties>
        <java.version>1.8</java.version>
    </properties>
    <dependencies>
        <dependency>
            <groupId>org.projectlombok</groupId>
            <artifactId>lombok</artifactId>
        </dependency>
        <dependency>
            <groupId>org.springframework.boot</groupId>
            <artifactId>spring-boot-starter-web</artifactId>
        </dependency>
        <dependency>
            <groupId>commons-lang</groupId>
            <artifactId>commons-lang</artifactId>
            <version>2.6</version>
        </dependency>
        <dependency>
            <groupId>org.springframework.boot</groupId>
            <artifactId>spring-boot-starter-test</artifactId>
            <scope>test</scope>
        </dependency>
        <dependency>
            <groupId>org.springframework.boot</groupId>
            <artifactId>spring-boot-starter-aop</artifactId>
        </dependency>
        <dependency>
            <groupId>org.springframework.boot</groupId>
            <artifactId>spring-boot-starter-security</artifactId>
        </dependency>
    </dependencies>


    <dependencyManagement>
        <dependencies>
            <!--spring-boot依赖-->
            <dependency>
                <groupId>io.spring.platform</groupId>
                <artifactId>platform-bom</artifactId>
                <version>Cairo-SR8</version>
                <type>pom</type>
                <scope>import</scope>
            </dependency>

            <!--spring-cloud依赖-->
            <dependency>
                <groupId>org.springframework.cloud</groupId>
                <artifactId>spring-cloud-dependencies</artifactId>
                <version>Greenwich.SR3</version>
                <type>pom</type>
                <scope>import</scope>
            </dependency>
        </dependencies>
    </dependencyManagement>

    <build>
        <plugins>
            <plugin>
                <groupId>org.springframework.boot</groupId>
                <artifactId>spring-boot-maven-plugin</artifactId>
            </plugin>
        </plugins>
    </build>
</project>
2. 屏蔽security的权限认证弹框
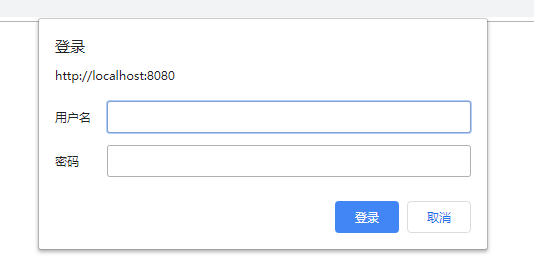
springboot项目在启动的时候会检查classpath下面的java类,发现有security相关类,就会自动启动权限认证,所以我们在通过浏览器访问项目Controller类中方法时,security会将请求url重定向到默认的认证页面,如下所示:
假如我们想要屏敝掉该弹框(即不做权限验证),那么在springboot2.x版本的项目中添加如下配置即可
import org.springframework.context.annotation.Configuration;
import org.springframework.security.config.annotation.web.builders.HttpSecurity;
import org.springframework.security.config.annotation.web.configuration.WebSecurityConfigurerAdapter;

@Configuration
public class SecurityConfig extends WebSecurityConfigurerAdapter {
    @Override
    protected void configure(HttpSecurity http) throws Exception {
        http.authorizeRequests().anyRequest().permitAll();
    }
}
在启动类配置如下也行
@SpringBootApplication(exclude = SecurityAutoConfiguration.class)
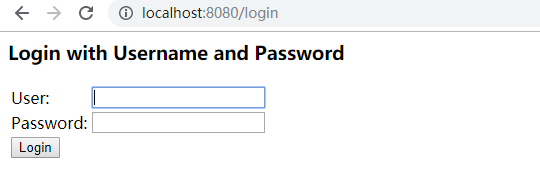
3.简单的 Form表单认证
import org.springframework.context.annotation.Configuration;
import org.springframework.security.config.annotation.web.builders.HttpSecurity;
import org.springframework.security.config.annotation.web.configuration.WebSecurityConfigurerAdapter;

@Configuration
public class SecurityConfig extends WebSecurityConfigurerAdapter {
    @Override
    protected void configure(HttpSecurity http) throws Exception {
        // 使用form表单验证
        http.formLogin()
                .and()
                .authorizeRequests()
                .anyRequest()
                .authenticated();
    }
}
4. 配置简单的http权限认证
import org.springframework.context.annotation.Configuration;
import org.springframework.security.config.annotation.web.builders.HttpSecurity;
import org.springframework.security.config.annotation.web.configuration.WebSecurityConfigurerAdapter;

@Configuration
public class SecurityConfig extends WebSecurityConfigurerAdapter {
    @Override
    protected void configure(HttpSecurity http) throws Exception {
        http.httpBasic()
                .and()
                .authorizeRequests()
                .anyRequest()
                .authenticated();
    }
}
5. 自定义查询用户信息
spring security默认的登录用户信息肯定不能满足生产需要。但是spring security为我们提供了接口类UserDetailsService.java, 我们实现该接口,然后就能有效实现自定义的用户登录权限校验。
@Slf4j
@Component
public class MyUserDetailsService implements UserDetailsService {
    @Override
    public UserDetails loadUserByUsername(String username) throws UsernameNotFoundException {
        log.info("登录用户名:" + username);
        // 使用username查库
        PasswordEncoder encoder = PasswordEncoderFactories.createDelegatingPasswordEncoder();
        String password = encoder.encode("123456");
        log.info("username:{},password:{}", username,password);
        // 用户的权限, 也是从数据库查询
        List<GrantedAuthority> authorities = AuthorityUtils.commaSeparatedStringToAuthorityList("admin");
        return new User(username, password, authorities);
    }
}
此另,spring securty还为我们提供了几种默认的实现,我们只需添加配置即可,比如基于内存的配置示例(抄自官方文档)
  @Bean
    public UserDetailsService userDetailsService() {
        PasswordEncoder encoder = PasswordEncoderFactories.createDelegatingPasswordEncoder();
        UserDetails userDetails = User.withUsername("admin")
                .password(encoder.encode("123456"))
                .roles("USER", "ADMIN").build();
        // 基于内存,非持久化
        InMemoryUserDetailsManager manager = new InMemoryUserDetailsManager();
        manager.createUser(userDetails);
        return manager;
    }
有了以上配置,我们启项目,请求接口,spring security会重定向我们的请求到登录窗口

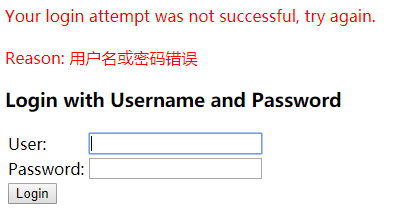
点击Login按钮,会给我们一个默认的提示,如下: