1. web.xml 文件最下方内容 (X:apache-tomcat-7.0.77conf 目录下)
<welcome-file-list>
    <welcome-file>index.html</welcome-file>
    <welcome-file>index.htm</welcome-file>
    <welcome-file>index.jsp</welcome-file>
</welcome-file-list>
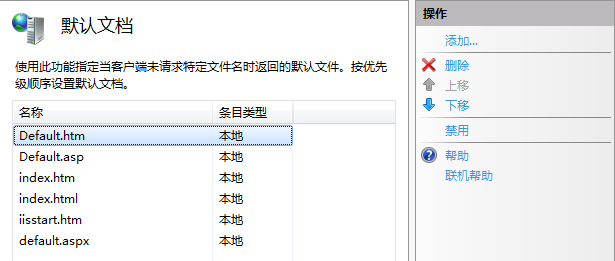
这些和 IIS 中的 默认文档 作用一样。

<Context path="/2" docBase="C:html" />
然后重启 Tomcat 就可以访问路径 http://localhost:8080/2 (这时候可以在 c:html 目录下建一个网页 index.html )
这个方式的缺点是需要重启 Tomcat 服务,不被 Tomcat 所推荐。
还可以使用以下方式来新建虚拟目录:
1. %Catalina_Base%/conf/context.xml 文件中添加,这个会影响所有 web 应用。
2. %Catalina_Base%/conf/[enginename]/[hostname]/context.xml.default 文件中添加,这个会影响所有 hostname 下的web 应用。
3. %Catalina_Base%/conf/[enginename]/[hostname]/ 目录中添加一个 .xml 文件,其中的文件名会作为虚拟目录路径。不需要重启 Tomcat (推荐)
如果需要多级目录,可以在文件名中以 # 隔开为多级。如果需要缺省,文件名为 ROOT.xml 即可。(缺省时需要重启)
4. 把目录放到 webapps 目录下,目录名就是虚拟目录名。(当 Tomcat 在C盘时,不推荐)
package cn.itcast;

import java.io.*;
import javax.servlet.*;

public class FirstServlet extends GenericServlet
{
    public void service(ServletRequest req,
           ServletResponse res)
             throws ServletException,
                    java.io.IOException{
        OutputStream out = res.getOutputStream();
        out.write("hello servlet!!!".getBytes());
    }
}
3. 使用命令
cd X:apache-tomcat-7.0.77webappsday04WEB-INFclasses
set classpath=%classpath%;D:demoJAVAapache-tomcat-7.0.77libservlet-api.jar
javac -d . FirstServlet.java 来引用外部类并编译此 java
编译成功后 day04WEB-INFclasses 目录下会新建一个 cn 目录。
4. 在 web-inf 目录下新建一个 web.xml 文件,配置 servlet 的对外访问路径,内容为:
<?xml version="1.0" encoding="ISO-8859-1"?>
<web-app xmlns="http://java.sun.com/xml/ns/javaee"
  xmlns:xsi="http://www.w3.org/2001/XMLSchema-instance"
  xsi:schemaLocation="http://java.sun.com/xml/ns/javaee
                      http://java.sun.com/xml/ns/javaee/web-app_3_0.xsd"
  version="3.0">
    <servlet>
        <servlet-name>FirstServlet</servlet-name>
        <servlet-class>cn.itcast.FirstServlet</servlet-class>
    </servlet>
    <servlet-mapping>
        <servlet-name>FirstServlet</servlet-name>
        <url-pattern>/FirstServlet</url-pattern>
    </servlet-mapping>
</web-app>
5. 重新启动 Tomcat 服务,使用网站访问。
com.sun.org.apache.xerces.internal.impl.io.MalformedByteSequenceException: 2 字节的 UTF-8 序列的字节 2 无效。