一、elasticsearch安装
1. 安装地址
https://www.elastic.co/products/elasticsearch
2. 使用 xshell 将压缩包上传到linux上,解压elasticsearch-5.6.1.tar.gz到/home目录下。
切记不要放在root目录下
3.配置
1) 解压elasticsearch-5.6.1.tar.gz到 /home/目录下
[hfl@bigdata11 software]$ tar -zxvf elasticsearch-5.6.1.tar.gz -C /home/
2)在/opt/module/elasticsearch-5.6.1路径下创建data和logs文件夹
[hfl@bigdata11 elasticsearch-5.6.1]$ mkdir data
[hfl@bigdata11 elasticsearch-5.6.1]$ mkdir logs
3)创建用户 hfl
useradd hfl
4)给hfl授权es的目录的权限
chown -R hfl:hfl /home/elasticsearch-5.6.1
5) . 配置 /home/elasticsearch-6.5.0/config/elasticsearch.yml
cluster.name: hfl
node.name: node1
path.data: /home/elasticsearch-6.5.0/data
path.logs: /home/elasticsearch-6.5.0/logs
bootstrap.memory_lock: false
bootstrap.system_call_filter: false
network.host: 192.168.157.111
discovery.zen.ping.unicast.hosts: ["bigdata111"]
6) . 编辑limits.conf
[hfl@bigdata11 elasticsearch-5.6.1]$ sudo vi /etc/security/limits.conf
添加如下内容:
*soft nofile 65536
*hard nofile 131072
* soft nproc 2048
* hard nproc 4096
7) . 进入limits.d目录下修改配置文件
[hfl@bigdata11 elasticsearch-5.6.1]$sudo vi /etc/security/limits.d/20-nproc.conf
修改如下内容:
- soft nproc 1024
#修改为
* soft nproc 2048
8) . 修改配置sysctl.conf
[hfl@bigdata11 elasticsearch-5.6.1]$ sudo vi /etc/sysctl.conf
添加下面配置:
vm.max_map_count=655360
并执行命令:
[hfl@bigdata11 elasticsearch-5.6.1]$ sudo sysctl -p
9) . 启动elasticsearch
[hfl@bigdata11 elasticsearch-5.6.1]$ bin/elasticsearch
后台启动方式
[itstar@bigdata11 elasticsearch-5.6.1]$ bin/elasticsearch -d
10) . 测试
二、ik分词器安装
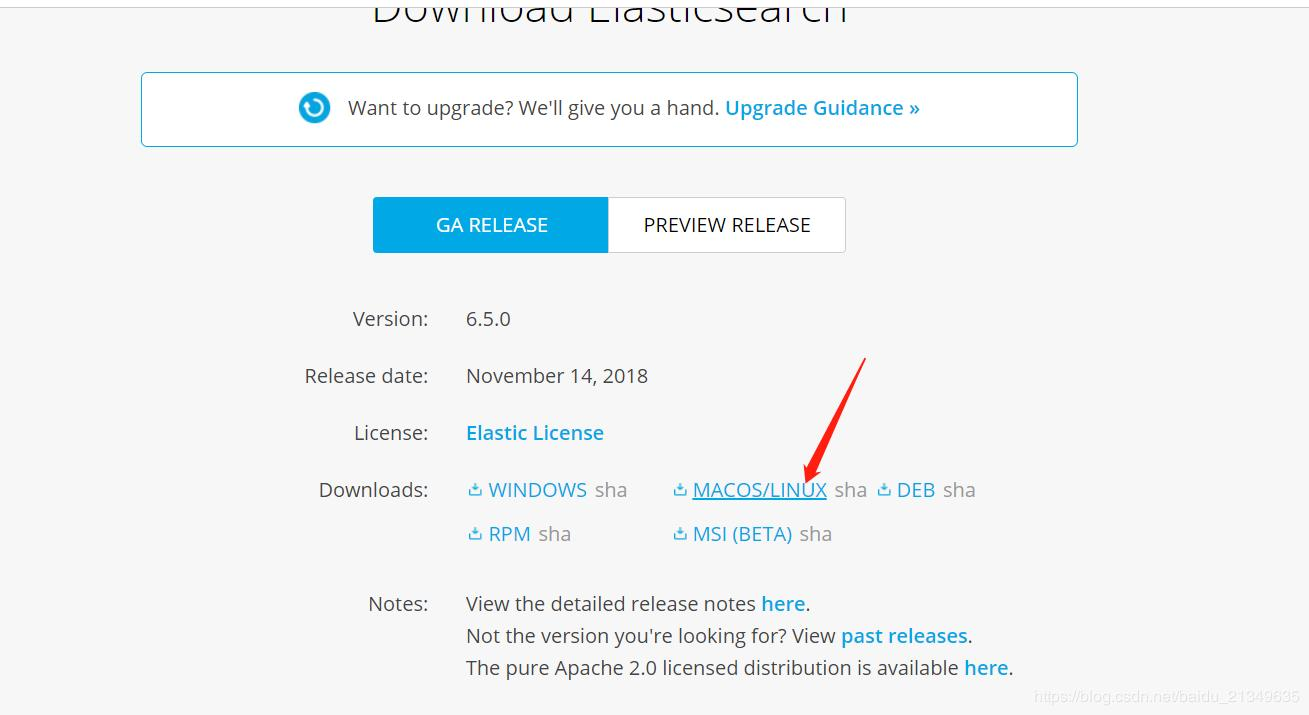
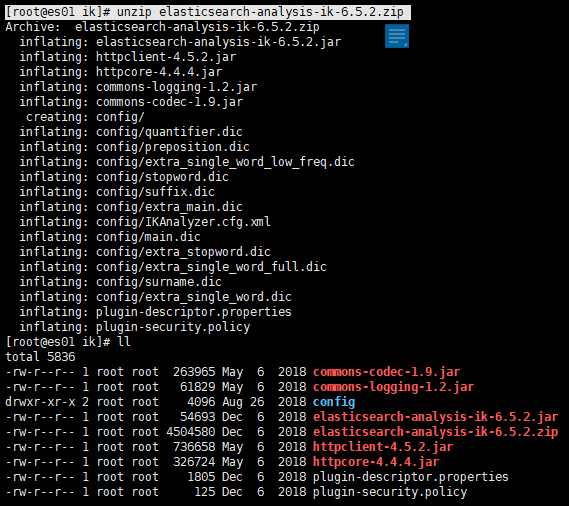
1.下载elasticsearch-analysis-ik-5.0.0的安装包
根据es版本下载 elasticsearch-analysis-ik-6.5.2.zip
下载地址:https://github.com/medcl/elasticsearch-analysis-ik
移动到mv elasticsearch-analysis-ik-master /ES_HOME/plugins/ik
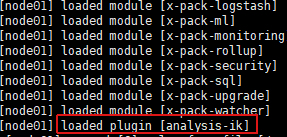
启动的之后,寻找 loaded plugin [analysis-ik]即安装成功
#验证分词器
[itstar@bigdata11 elasticsearch-5.6.1]$ curl -XPOST -H 'Content-Type: application/json' http://localhost:9200/_analyze?pretty -d '{"analyzer":"ik_max_wo rd","text":"我是中国人"}'
{
  "tokens" : [
    {
      "token" : "我",
      "start_offset" : 0,
      "end_offset" : 1,
      "type" : "CN_CHAR",
      "position" : 0
    },
    {
      "token" : "是",
      "start_offset" : 1,
      "end_offset" : 2,
      "type" : "CN_CHAR",
      "position" : 1
    },
    {
      "token" : "中国人",
      "start_offset" : 2,
      "end_offset" : 5,
      "type" : "CN_WORD",
      "position" : 2
    },
    {
      "token" : "中国",
      "start_offset" : 2,
      "end_offset" : 4,
      "type" : "CN_WORD",
      "position" : 3
    },
    {
      "token" : "国人",
      "start_offset" : 3,
      "end_offset" : 5,
      "type" : "CN_WORD",
      "position" : 4
    }
  ]
}
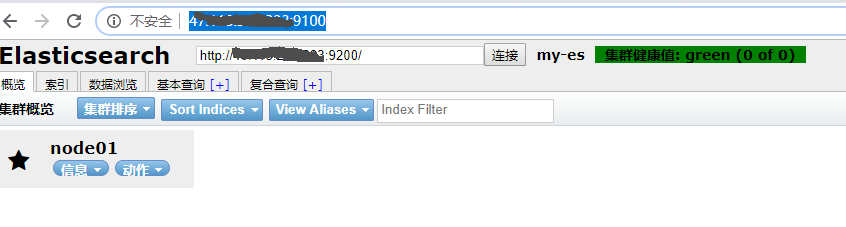
三、Head安装
1、下载node和elasticsearch-head
[root@es01 software]# wget  https://github.com/mobz/elasticsearch-head/archive/master.zip
[root@es01 software]# wget https://npm.taobao.org/mirrors/node/latest-v4.x/node-v4.4.7-linux-x64.tar.gz
#解压
[root@es01 software]# tar -xvf node-v4.4.7-linux-x64.tar.gz
[root@es01 software]# tar -xvf master.zip
#配置环境变量
[root@es01 software]# vi /etc/profile
export NODE_HOME=/opt/software/node
export PATH=$NODE_HOME/bin:$PATH
#配置完环境变量加载环境变量
[root@es01 software]# . /etc/profile
[root@es01 software]# node -v
v4.4.7
#安装grunt ,进入nodejs目录,执行npm 命令,
[root@es01 node]# npm install -g grunt -cli
#head grunt install,进入head目录执行 npm install
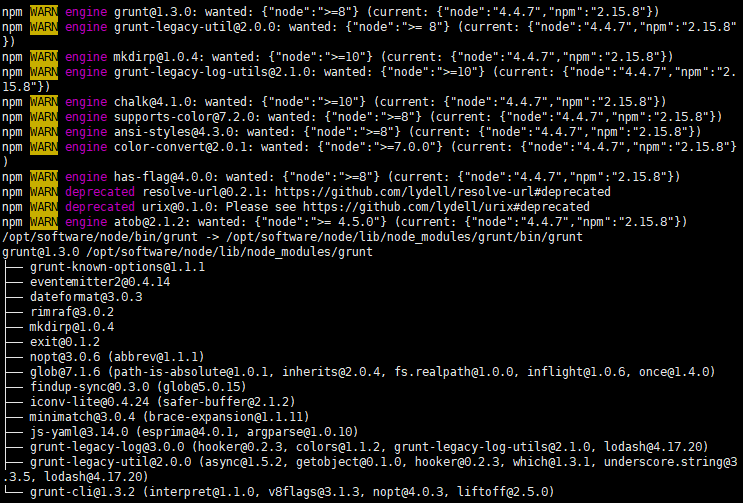
[root@es01 head]# npm install
2、修改head源码
#增加hostname属性,设置为*
[root@es01 head]# vi $HEAD_HOME/Gruntfile.js
   94          connect: {
     95                         server: {
     96                                 options: {
     97                                         port: 9100,
     98                                         hostname: '*',
     99                                         base: '.',
    100                                         keepalive: true
    101                                 }
    102                         }
    103                 }
#修改_sit/app.js 将4388行ip修改为es机器ip
[root@es01 head]# vi $HEAD_HOME/_site/app.js
4388 this.base_uri = this.config.base_uri || this.prefs.get("app-base_uri") || "http://eshostip:9200";
启动验证
[root@es01 head]# grunt server
#后台启动命令
[root@es01 head]# nohup grunt server >> null 2>&1 &