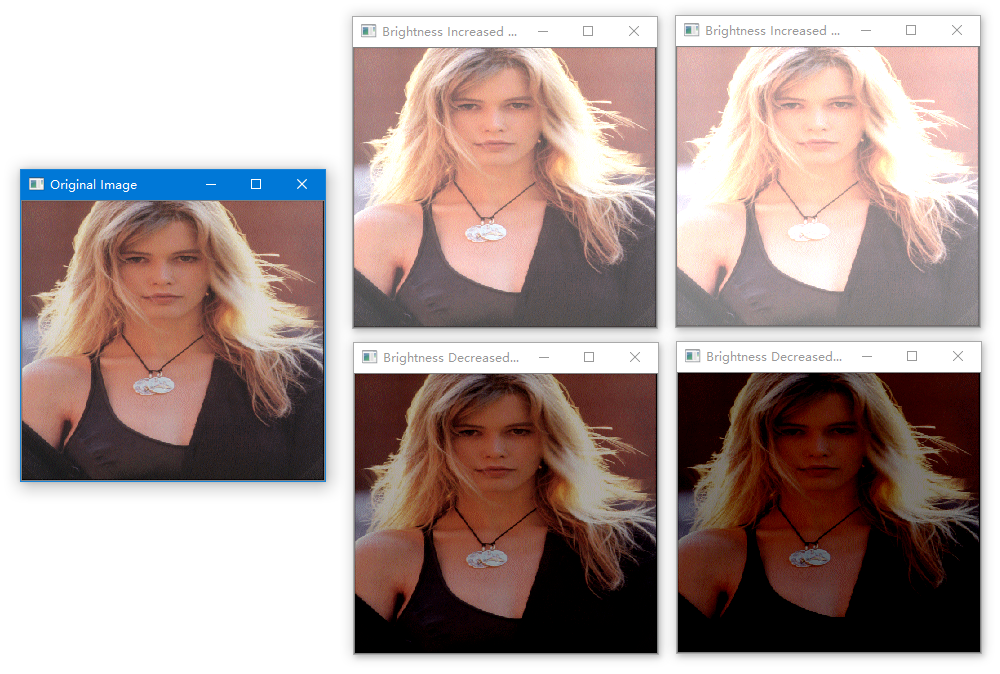
如果你想提升一幅图像的亮度,可以给每个像素的值都加上一个正的常数
[new\_image (i, j) = image(i, j) + c
]
如果你想降低一幅图像的亮度,可以给每个像素的值都减去一个正的常数
[new\_image (i, j) = image(i, j) - c
]
Code
/*
作者:郑大峰
时间:2019年09月20日
环境:OpenCV 4.1.1 + VS2017
内容:Change Brightness
*/

#include "pch.h"
#include <iostream>
#include <opencv2/opencv.hpp>

using namespace std;
using namespace cv;

int main()
{
	Mat image = imread("claudia.png");

	if (image.empty())
	{
		cout << "Could not open or find the image" << endl;
		cin.get();
		return -1;
	}

	Mat imageBrighnessHigh50;
	image.convertTo(imageBrighnessHigh50, -1, 1, 50); //increase the brightness by 50

	Mat imageBrighnessHigh100;
	image.convertTo(imageBrighnessHigh100, -1, 1, 100); //increase the brightness by 100

	Mat imageBrighnessLow50;
	image.convertTo(imageBrighnessLow50, -1, 1, -50); //decrease the brightness by 50

	Mat imageBrighnessLow100;
	image.convertTo(imageBrighnessLow100, -1, 1, -100); //decrease the brightness by 100

	//Defining window names for above images
	String windowNameOriginalImage = "Original Image";
	String windowNameBrightnessHigh50 = "Brightness Increased by 50";
	String windowNameWithBrightnessHigh100 = "Brightness Increased by 100";
	String windowNameBrightnessLow50 = "Brightness Decreased by 50";
	String windowNameBrightnessLow100 = "Brightness Decreased by 100";

	//Create and open windows for above images
	namedWindow(windowNameOriginalImage, WINDOW_NORMAL);
	namedWindow(windowNameBrightnessHigh50, WINDOW_NORMAL);
	namedWindow(windowNameWithBrightnessHigh100, WINDOW_NORMAL);
	namedWindow(windowNameBrightnessLow50, WINDOW_NORMAL);
	namedWindow(windowNameBrightnessLow100, WINDOW_NORMAL);

	//Show above images inside the created windows.
	imshow(windowNameOriginalImage, image);
	imshow(windowNameBrightnessHigh50, imageBrighnessHigh50);
	imshow(windowNameWithBrightnessHigh100, imageBrighnessHigh100);
	imshow(windowNameBrightnessLow50, imageBrighnessLow50);
	imshow(windowNameBrightnessLow100, imageBrighnessLow100);

	waitKey(0); // Wait for any key stroke

	destroyAllWindows(); //destroy all open windows

	return 0;
}
Result
Explanation
void Mat::convertTo( OutputArray m, int rtype, double alpha=1, double beta=0 ) const
This function converts the each pixel value to the target data type and changes the value as per the following formula. pixel_value_of_output_image(x, y) = pixel_value_of_input_image(x, y) * alpha + beta;
- m - Output image. This data structure will be reallocated if required.
- rtype - Type of the output image. If rtype is a negative value, the type of the output image will be same as the input image.
- alpha - Each pixels in the input image will be multiplied by this number before assigning to the output image.
- beta - This value will be added to each pixels in the input image and assigned to the output image.