Activity是Android的四大组件之一,本篇将通过Activity的生命周期,Intent的组成部分以及如何使用Intent进行页面之间的消息传递来介绍它的基本用法。
1.activity的生命周期
下面是有关activity生命周期的方法说明:
· onCreat : 创建页面,把页面上的各个元素加载到内存中
· onStart : 开始页面,把页面显示在屏幕上
· onResume : 恢复页面,让页面在屏幕上活动起来,例如开启动画、开始任务等
· onPause : 暂停页面,让页面在屏幕上的动作停下来
· onStop : 停止页面,把页面从屏幕上搬下来
· onDestory : 销毁页面,把页面从内存中清掉
· onRestart : 重启页面,重新加载内存中的页面数据
下面针对几个常见的业务场景(页面之间的跳转,按HOME与返回APP)探究activity的生命周期
首先是页面的跳转,先看代码:
package com.example.animator.seniortest;

import android.app.Activity;
import android.content.Intent;
import android.net.Uri;
import android.os.Bundle;
import android.support.v7.app.ActionBarActivity;
import android.text.format.DateUtils;
import android.util.Log;
import android.view.Menu;
import android.view.MenuItem;
import android.view.View;
import android.widget.Button;
import android.widget.CompoundButton;
import android.widget.EditText;
import android.widget.RadioButton;
import android.widget.RadioGroup;
import android.widget.TextView;
import android.widget.Toast;

import java.util.Date;

public class MainActivity extends ActionBarActivity implements View.OnClickListener{
    private final static String TAG="MainActivity";
    private TextView textView;
    private String mStr="";
    private void refreshLife(String desc){
        Log.d(TAG, desc);
        findViewById(R.id.btn).setOnClickListener(MainActivity.this);
        Date date=new Date();
        mStr=String.format("%s%s %s %s
",mStr,date.getTime(),TAG,desc);
        textView.setText(mStr);

    }

    @Override
    protected void onCreate(Bundle savedInstanceState) {
        super.onCreate(savedInstanceState);
        setContentView(R.layout.activity_main);

        textView= (TextView) findViewById(R.id.tv);
        refreshLife("onCreat");
    }

    @Override
    protected void onStart() {
        refreshLife("onStart");
        super.onStart();
    }

    @Override
    protected void onStop() {
        refreshLife("onStop");
        super.onStop();
    }

    @Override
    protected void onResume() {
        refreshLife("onResume");
        super.onResume();
    }

    @Override
    protected void onPause() {
        refreshLife("onPause");
        super.onPause();
    }

    @Override
    protected void onRestart() {
        refreshLife("onRestart");
        super.onRestart();
    }

    @Override
    protected void onDestroy() {
        refreshLife("onDestory");
        super.onDestroy();
    }

    @Override
    public void onClick(View view) {
        if(view.getId()==R.id.btn){
//            //准备跳转页面
//            Intent intent=new Intent(this,NewActivity.class);
//            //期望接收到下个页面的返回数据
//            startActivityForResult(intent,0);

            Intent intent=new Intent(MainActivity.this,NewActivity.class);
            Bundle bundle=new Bundle();//创建新的包裹
            bundle.putString("name","小明");
            bundle.putInt("age", 20);
            bundle.putDouble("height", 170.0f);
            intent.putExtras(bundle);//把包裹塞给意图
            startActivityForResult(intent,0);
        }
    }

    @Override
    protected void onActivityResult(int requestCode, int resultCode, Intent data) {
        String nextLife=data.getStringExtra("life");
        refreshLife("
"+nextLife);
        refreshLife("onActivityResult");
        super.onActivityResult(requestCode, resultCode, data);
    }
}
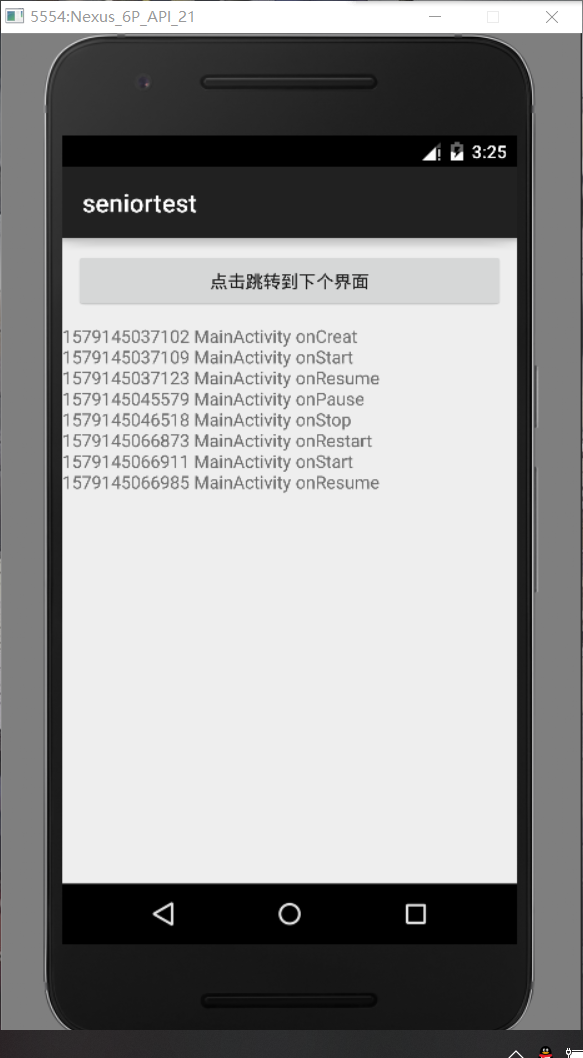
效果如下:

总结如下:打开页面,调用顺序为:本页面onCreat——onStart——onResume;跳转页面:上一个页面onPause——下一个页面onCreat——onStart——onResume——上一个页面onStop;回到页面:下一个页面——onPause——上一个页面onRestart——onStart——onResume——下一个页面onStop——onDestory
按HOME键与返回APP场景测试:
可以看到,此时测试页面的生命周期是典型的从活动状态变为暂停状态(回到桌面时)再变为活动状态(回到APP时)
2.使用Intent传递消息
intent的中文名叫意图,意思是我想让你干什么,简单地说就是传递消息。Intent是各个组件之间信息沟通的桥梁,既能在activity之间沟通,又能在activity和service之间沟通,也能在activity和broadcast之间沟通。总而言之,Intent用于处理Android各组件之间的通信,主要完成以下三个工作:
· Intent需标明本次通信请求从哪里来,到哪里去,要怎么走
· 发起方携带本次通信需要的数据内容,接收方对收到的Intent数据进行解包
· 如果发起方要求判断接收方的处理结果,Intent就要负责让接收方传回应答的数据内容
表达Intent的来往路径有两种方式,一种是显式Intent,一种是隐式Intent
(1)显式Intent,直接指定来源类和目标类名,属于精准匹配
声明方式如下:
· Intent intent = new Intent(this,anotherActivity.class);
` Intent intent = new Intent();
intent.setClass(this,anotherActivity.class);
· Intent intent=new Intent();
ComponentName component=new ComponentName(this,anotherActivity.class);
intent.setComponent(component);
(2)隐式Intent,没有明确指定要跳转的类名,只给出一个动作让系统匹配拥有相同字串定义的目标,属于模糊匹配
因为我们常常不希望暴露源码的类名,只给出一个事先定义好的名称,即隐式Intent起到了过滤作用。这个动作名称通过setAction方法指定,也可以通过构造函数Intent(String action)直接生成Intent对象。由于动作是模糊匹配,所以我们需要加入更详细的路径,Uri和Category就可以实现路径信息,Uri可以通过构造函数Intent(String action,Uri uri)指定,也可以通过setData方法指定;Category可以通过addCategory方法指定,之所以用add是因为一个intent可以设置多个Category
下面是一个调用系统拨号程序的例子
Intent intent=new Intent();//创建新意图
intent.setAction(Intent.ACTION_CALL);//设置意图动作为直接拨号
Uri uri=Uri.parse("tel:"+phone);//声明一个拨号的Uri
intent.setData(uri);//设置意图前往的路径
startActivity(intent);//启动意图通往的活动页面
隐式Intent还用到了过滤器的概念,即把不符合匹配条件的过滤掉,符合的按照优先顺序调用,AndroidManifest.xml里的intent-filter就是xml中的过滤器,比如

这个activity中的intent-filter就是一个过滤器,该节点下设置了action和category的过滤条件
3.向下一个activity传参
前面我们将的setData方法只是指定了到达目标的路径,而不是信息。要想传递参数信息,则要将其存放到Extras中,又由于单纯调用putExtra方法的难管理,Android引入了Bundle(包裹)概念,它内部用来存放数据的实质是Map映射,可添加、删除、判断元素存在,开发者把Bundle全部打包好只需要调用一次putExtras,取出也只需调用一次getExtras,下面是前一个页面向后一个页面发送请求数据的代码:
Intent intent=new Intent(MainActivity.this,NewActivity.class);
Bundle bundle=new Bundle();//创建新的包裹
bundle.putString("name","小明");
bundle.putInt("age",20);
bundle.putDouble("height",170.0f);
intent.putExtras(bundle);//把包裹塞给意图
startActivity(intent);
下面是后一个页面接收前一个页面请求数据的代码:
Intent intent = new Intent();
Bundle bundle=intent.getExtras();
String name=bundle.getString("name", "");
int age=bundle.getInt("age",0);
double height=bundle.getDouble("height",0.0f);
4.向上一个activity返回参数
很多时候我们在接收到上个页面数据的同时需要处理下一个页面的应答数据(通常发生在下一个页面返回到上一个页面时),此时就要分多步骤处理,详细步骤如下:
· 前一个页面打包好请求数据,调用方法startActivityForResult(Intent intent,int requestCode),表示需要处理结果数据,第二个参数表示请求编号,用于标识每次请求的唯一性
· 后一个页面接受请求数据,进行相应处理
· 后一个页面在返回前一个页面时,打包应答数据并调用setResult方法返回信息,setResult的第一个参数表示应答代码(成功还是失败),代码示例如下:
Intent intent=new Intent();
Bundle bundle=new Bundle();
bundle.putString("job","码农");
intent.putExtras(bundle);
setResult(NewActivity.RESULT_OK, intent);//携带意图返回上一个页面
finish();//关闭当前页面
· 前一个页面重写方法onActivityResult,该方法输入参数包含请求编号和应答代码,请求编号用于判断对应哪次请求,应答代码用于判断后一个页面是否处理成功。然后对应答数据解包,代码如下:
protected void onActivityResult(int requestCode, int resultCode, Intent data) {
    Bundle bundle=data.getExtras();
    String job=bundle.getString("job");
    Toast.makeText(this,"您目前的职业是:"+job,Toast.LENGTH_LONG).show();
}