本文参考:http://hyperledger-fabric.readthedocs.io/en/latest/build_network.html
这里我们学习建立第一个Hyperledger Fabric network,包括两个organization(每个包括2个peer节点),以及一个“solo”的ordering service。
前提条件:安装docker、docker compose、go环境、npm、node.js,下载并安装好了Hyberledger Fabric Samples。
安装Hyberledger Fabric Samples简介:
- 建立一个目录
mkdir hyberledger-fabric
cd hyberledger-fabric
- 克隆一个仓库
git clone https://github.com/hyperledger/fabric-samples.git
- 下载特定的二进制文件
curl -sSL https://raw.githubusercontent.com/hyperledger/fabric/master/scripts/bootstrap-1.0.0-rc1.sh | bash
上述命令会下载自动化部署脚本,同时也会下载平台特定使用的二进制文件cryptogen,configtxgen,configtxlator, 以及peer,把他们放到上述仓库的bin目录下
接下来把bin目录加入到PATH环境变量中
vi /etc/profile
打开profile然后把下面语句添加进去即可
export PATH=/home/parallels/hyberledger-fabric/bin:$PATH
1.尝试run first-network
cd fabric-samples/first-network
这里提供了一个脚本,byfn.sh,我们可以查看其的使用方法

如果你没有指定channel的名称,则该脚本则会使用默认的channel名称(mychannel)
CLI的超时参数(-t flag)可以选择,如果不选择,那么CLI容器将在脚本结束后退出。
2.生成network artifacts
执行如下命令:
./byfn.sh -m generate
遇到需要选择的地方选择y,会看到如下日志

这一步生成了network entity所需要的certificates以及keys,genesis block用于获取用于配置channel的ordering service以及transaction配置的集合。
3.启动network
接下来输入以下命令启动network,回复y
./byfn.sh -m up
可以看到如下输出结果
./byfn.sh -m up
Starting with channel 'mychannel' and CLI timeout of '10000'
Continue (y/n)?y
proceeding ...
Creating network "net_byfn" with the default driver
Creating peer0.org1.example.com
Creating peer1.org1.example.com
Creating peer0.org2.example.com
Creating orderer.example.com
Creating peer1.org2.example.com
Creating cli


 ____    _____      _      ____    _____
/ ___|  |_   _|    /     |  _   |_   _|
\___     | |     / _    | |_) |   | |
 ___) |   | |    / ___   |  _ <    | |
|____/    |_|   /_/   \_ |_| \_   |_|

Channel name : mychannel
Creating channel...
日志从这里开始,这将启动所有的容器,形成这个完整的P2P的应用场景。
启动成功后会打印如下日志:
2017-05-16 17:08:01.366 UTC [msp] GetLocalMSP -> DEBU 004 Returning existing local MSP
2017-05-16 17:08:01.366 UTC [msp] GetDefaultSigningIdentity -> DEBU 005 Obtaining default signing identity
2017-05-16 17:08:01.366 UTC [msp/identity] Sign -> DEBU 006 Sign: plaintext: 0AB1070A6708031A0C08F1E3ECC80510...6D7963631A0A0A0571756572790A0161
2017-05-16 17:08:01.367 UTC [msp/identity] Sign -> DEBU 007 Sign: digest: E61DB37F4E8B0D32C9FE10E3936BA9B8CD278FAA1F3320B08712164248285C54
Query Result: 90
2017-05-16 17:08:15.158 UTC [main] main -> INFO 008 Exiting.....
===================== Query on PEER3 on channel 'mychannel' is successful =====================

===================== All GOOD, BYFN execution completed =====================


 _____   _   _   ____
| ____| |  | | |  _
|  _|   |  | | | | | |
| |___  | |  | | |_| |
|_____| |_| \_| |____/
通过上述日志能够看到不同的transaction。
4.关闭network
输入如下命令
./byfn.sh -m down
能够看到输出日志如下:
./byfn.sh -m down
Stopping with channel 'mychannel' and CLI timeout of '10000'
Continue (y/n)?y
proceeding ...
WARNING: The CHANNEL_NAME variable is not set. Defaulting to a blank string.
WARNING: The TIMEOUT variable is not set. Defaulting to a blank string.
Removing network net_byfn
468aaa6201ed
...
Untagged: dev-peer1.org2.example.com-mycc-1.0:latest
Deleted: sha256:ed3230614e64e1c83e510c0c282e982d2b06d148b1c498bbdcc429e2b2531e91
...
如果您想了解有关底层工具和引导机制的更多信息,请继续阅读。 在接下来的章节中,我们将介绍构建功能齐全的Hyperledger Fabric网络的各种步骤和要求。
5.Crypto生成器
我们使用crytogen工具给我们不同的network entity生成加密证书(X509 certs)。这些证书代表了身份,当我们的entity在进行通信以及transact的时候进行签名与验证身份。
Cryptogen有一个配置文件crypto-config.yaml,包括了网络拓扑,同时允许我们给organization以及component(隶属于organization)生成一个证书与私钥的集合。每一个organization被分配一个唯一的根证书(绑定了隶属于Org的具体的component,包括peers与orderers)。通过给每个organization分配一个唯一的CA证书,我们正在模仿一个典型的网络,参与的成员将使用自己的证书颁发机构颁发的证书。Hyperledger Fabric的transaction与通信均被entity的私钥(keystore)进行签名,截止被公钥进行验证(signcerts)。
这个配置文件中有一个计数(count)的变量,我们使用其定义organization中peer的数量,在本例中我们定义每一个Org有两个peer。这里不会深入讨论X.509证书以及公钥框架。
在run这个工具之前,我们回顾一下crypto-config.yaml,请注意在ordererOrgs头下面的“Name”, “Domain” 以及 “Specs”这三个参数。
OrdererOrgs:
#---------------------------------------------------------
# Orderer
# --------------------------------------------------------
- Name: Orderer
  Domain: example.com
  # ------------------------------------------------------
  # "Specs" - See PeerOrgs below for complete description
# -----------------------------------------------------
  Specs:
    - Hostname: orderer
# -------------------------------------------------------
# "PeerOrgs" - Definition of organizations managing peer nodes
# ------------------------------------------------------
PeerOrgs:
# -----------------------------------------------------
# Org1
# ----------------------------------------------------
- Name: Org1
  Domain: org1.example.com
network entity的命名规则约定如下:“{{.Hostname}}.{{.Domain}}”。因此,使用我们的ordering node作为参考,我们能看到一个名称为 - orderer.example.com的ordering node,该node与Orderer的MSP ID关联。 您还可以参考会员 Membership Service Providers (MSP)文档,以便更深入地了解MSP。
我们运行cryptogen工具之后,生成的证书与秘钥将会保存到crypto-config文件夹中。
6.配置transaction生成器
configtxgen tool用于创建如下配置项:
genesis block:是一个配置block用于初始化blockchain网络以及channel的,同样可以作为链上的第一个block
- orderer
genesis block, - channel
channel configuration transaction - 两个anchor peer transactions,其中每一个对应一个peer org
如何使用该工具请查看, Channel Configuration (configtxgen)
orderer block是ordering service的genesis block,channel transaction file在channel创建时广播给orderer。anchor peer transactions在channel定义了一个Org Anchor Peer。
Configtxgen有一个配置文件configtx.yaml,包括了sample network的定义。现有3个成员:一个Orderer Org以及两个Peer Orgs(Org1 Org2,每个包括2个peer节点)。这个文件定义了一个联合consortium,包括两个Peer Org。注意该文件的顶部profile section。你会发现有两个唯一的headers。一个用作orderer Genesis block - TwoOrgsOrdererGenesis -,一个用作channel - TwoOrgsChannel。
后续我们在来看这些headers。
注意:sampleConsortium被定义在system-level profile中,接下来被channel-level profile引用。Channels存在在consortium的范围内,所有的consortium都在network的范围内。
这个配置文件包括了两个附加的定义。一个就是每个Peer Org(peer0.org1.example.com & peer0.org2.example.com)的anchor节点,另外一个就是指向每个成员的MSP目录的位置,基于此,我们可以将每个Org的根证书存放在orderer Genesis block中,这是一个很重要的概念。现在任意network entity与ordering service通信时就能对起数字签名进行验证。
7.运行tool
可以通过configtxgen and cryptogen手动生成证书/密钥以及各项配置文件。同样,可以参考byfn.sh脚本实现。
接下来我们尝试手动生成。
可以参考byfn.sh脚本中的generateCerts函数用来生成证书(这些证书被定义在crypto-config.yaml中的网络配置所使用)所需要的命令。为了方便起见,我们提供一个参考如下。
首先,先跑起来cryptogen工具,我们的二进制文件都在bin目录下,因此我们需要cd到tool所在的目录下.
../bin/cryptogen generate --config=./crypto-config.yaml

接下来,我们会告诉configtxgen工具去哪找到需要调用的configtx.yaml文件。
首先,我们需要设置一个环境变量,用于告知configtxgen根据去哪找configtx.yaml配置文件。接下来,我们调用configtxgen工具创建orderer Genesis block
export FABRIC_CFG_PATH=$PWD
../bin/configtxgen -profile TwoOrgsOrdererGenesis -outputBlock ./channel-artifacts/genesis.block

接着,我们创建channel transaction artifact(channel.tx)。然后,确保替换$CHANNEL_NAME(这里我用zeychannel替换的)或设置环境变量,语句如下:
export CHANNEL_NAME=mychannel

# this file contains the definitions for our sample channel
../bin/configtxgen -profile TwoOrgsChannel -outputCreateChannelTx ./channel-artifacts/channel.tx -channelID $CHANNEL_NAME
接着,我们在我们正在创建的channel上定义Org1的anchor节点。然后,确保替换$CHANNEL_NAME(这里我用zeychannel替换的)或设置环境变量,语句如下:
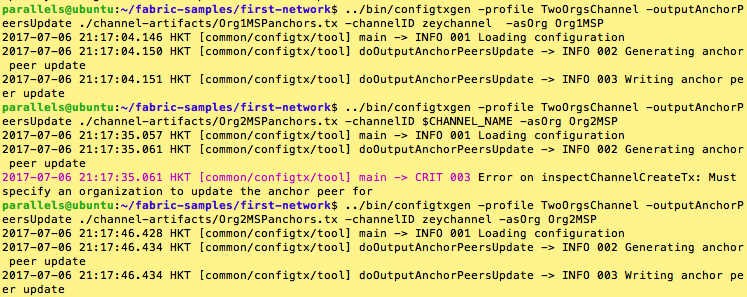
../bin/configtxgen -profile TwoOrgsChannel -outputAnchorPeersUpdate ./channel-artifacts/Org1MSPanchors.tx -channelID $CHANNEL_NAME -asOrg Org1MSP
然后,我们在相同的channel上定义Org2的anchor节点。
../bin/configtxgen -profile TwoOrgsChannel -outputAnchorPeersUpdate ./channel-artifacts/Org2MSPanchors.tx -channelID $CHANNEL_NAME -asOrg Org2MSP
8.启动network
我们利用docker-compose脚本来启动我们的network。docker-compose文件引用了我们之前下载的镜像,并使用前面生成的genesis block来引导orderer。
working_dir: /opt/gopath/src/github.com/hyperledger/fabric/peer
# command: /bin/bash -c './scripts/script.sh ${CHANNEL_NAME}; sleep $TIMEOUT'
volumes
如果没有注释掉上面的命令的话,在network启动的时候,其将执行所有的CLI命令,具体请见 What’s happening behind the scenes?节。我们需要分析每一步的功能及句法,因此我们一步步执行命令。
timeout的变量适合使用较高的数值,默认是60s。
启动network,注意$CHANNEL_NAME,<pick_a_value>自己设定
CHANNEL_NAME=$CHANNEL_NAME TIMEOUT=<pick_a_value> docker-compose -f docker-compose-cli.yaml up -d
如果想看到实时日志,则不要加-d标示。如果需要日志流,则需要打开第二个终端进行操作。
9.环境变量
对于以下针对peer0.org1.example.com的CLI命令,我们需要使用以下给出的四个环境变量来介绍我们的命令。这些peer0.org1.example.com变量都被包含在CLI容器里,因此我们可以不用传递的操作它们。然而!,如果你想发送calls到其他peers或者orderer,你需要根据情况提供这些变量。打开docker-compose-base.yaml并查看具体的路径信息,
# Environment variables for PEER0

CORE_PEER_MSPCONFIGPATH=/opt/gopath/src/github.com/hyperledger/fabric/peer/crypto/peerOrganizations/org1.example.com/users/Admin@org1.example.com/msp
CORE_PEER_ADDRESS=peer0.org1.example.com:7051
CORE_PEER_LOCALMSPID="Org1MSP"
CORE_PEER_TLS_ROOTCERT_FILE=/opt/gopath/src/github.com/hyperledger/fabric/peer/crypto/peerOrganizations/org1.example.com/peers/peer0.org1.example.com/tls/ca.crt
10.创建并进入Channel
接下来进入到刚创建的CLI容器里面,
docker exec -it cli bash
如果成功则能看到如下信息

请回忆下我们使用configtxgen工具生成channel配置artifact-channel.tx。我们将把artifact作为创建channel的请求的一部分发送给orderer。
注意到在接下来的命令中我们发送了-- cafile作为命令的一部分。这个是orderer证书的本地路径,使得我们可以验证TLS握手。
我们使用-c flag 标注出我们的channel名称,用-f flag标注出我们的channel 配置transaction。在本例中是channel.tx,然而你可以使用不同的名称用于挂载配置transaction。使用下面创建channel的语句的时候注意channel-name。
export CHANNEL_NAME=mychannel

# the channel.tx file is mounted in the channel-artifacts directory within your CLI container
# as a result, we pass the full path for the file
# we also pass the path for the orderer ca-cert in order to verify the TLS handshake
# be sure to replace the $CHANNEL_NAME variable appropriately

peer channel create -o orderer.example.com:7050 -c $CHANNEL_NAME -f ./channel-artifacts/channel.tx --tls $CORE_PEER_TLS_ENABLED --cafile /opt/gopath/src/github.com/hyperledger/fabric/peer/crypto/ordererOrganizations/example.com/orderers/orderer.example.com/msp/tlscacerts/tlsca.example.com-cert.pem
上述命令返回了一个genesis block- <channel-ID.block> -我们可以通过这个id进入到channel。它包含channel.tx中指定的配置信息,创建成功后有如下输出:

接下来的操作都需要在CLI容器中进行,在操作peer0.org1.example.com之外的peer时,需要记得相关环境变量的命令。
接下来我们把peer0.org1.example.com加入到channel中去,channel-ID.block是之前生成的,这里我的是zeychannel.block。
# By default, this joins ``peer0.org1.example.com`` only
# the <channel-ID>.block was returned by the previous command

 peer channel join -b <channel-ID.block>
以下是成功的显示

你可把其他的peer加入到该channel上,但是需要设置上述的四个环境变量。
11.安装并实例化chaincode
我们这里只是使用已经存在的chaincode。
application通过chaincode与blockchain ledger进行交互。我们把chaincode安装到execute与endorse我们transaction的peer上,接下来在channel上初始化chaincode。
首先,安装sample go代码到4个peer之一的peer上。以下命令把chaincode的源代码放到了peer节点的文件系统上。
peer chaincode install -n zeychaincode -v 1.0 -p github.com/hyperledger/fabric/examples/chaincode/go/chaincode_example02
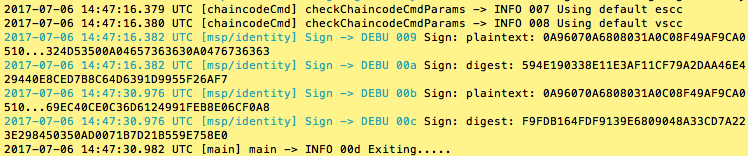
安装成功打印如下日志

接下来,在channel上实例化chaincode。这将在channel上初始化chaincode,同时设置chaincode的endorsement的策略,然后在目标peer上启动chaincode容器。请注意-P参数,我们通过设置这个参数,来指定transaction的endorsement的需求level,用于验证chaincode。
在下面的命令,我们定义了endorsement策略为-P "OR ('Org0MSP.member','Org1MSP.member')"。这表示我们需要隶属于Org1或者Org2的peer进行“endorsement”(也就是说,只有一个endorsement)。如果把or改为and则说明我们需要两个endorsement。
# be sure to replace the $CHANNEL_NAME environment variable
# if you did not install your chaincode with a name of mycc, then modify that argument as well

peer chaincode instantiate -o orderer.example.com:7050 --tls $CORE_PEER_TLS_ENABLED --cafile /opt/gopath/src/github.com/hyperledger/fabric/peer/crypto/ordererOrganizations/example.com/orderers/orderer.example.com/msp/tlscacerts/tlsca.example.com-cert.pem -C zeychannel -n zeychaincode -v 1.0 -c '{"Args":["init","a", "100", "b","200"]}' -P "OR ('Org1MSP.member','Org2MSP.member')"
请在 endorsement policies中查看更详细的策略说明。
12.查询
首先查询a的值,确保chaincode已经正常的实例化,同时确保state DB已经被填充
# be sure to set the -C and -n flags appropriately

peer chaincode query -C zeychannel -n zeychaincode -c '{"Args":["query","a"]}'

13.调用
让我们从a账户转移10个到b账户,这个命令将会创建新的block同时更新state DB。
# be sure to set the -C and -n flags appropriately

peer chaincode invoke -o orderer.example.com:7050  --tls $CORE_PEER_TLS_ENABLED --cafile /opt/gopath/src/github.com/hyperledger/fabric/peer/crypto/ordererOrganizations/example.com/orderers/orderer.example.com/msp/tlscacerts/tlsca.example.com-cert.pem  -C zeychannel -n zeychaincode -c '{"Args":["invoke","a","b","10"]}'
然后查询
# be sure to set the -C and -n flags appropriately

peer chaincode query -C zeychannel -n zeychaincode -c '{"Args":["query","a"]}'

14.上述调用过程解析
- script.sh脚本在CLI容器内部执行,该脚本执行了createChannel命令,提供了channel名称,同时使用channel.tx进行channel配置
- createChannel的输出是一个genesis block,使用channel名称命名的block,例如zeychannel.block,该block在peers的文件系统上存储(个人理解就在chain上作为一个block存储的),该block包括channel.tx指定的channel配置信息。
- 加入channel的命令对所有4个peer进行执行,把之前生成的genesis block作为输入。这个join命令使得peers加入到了zeychannel(我自己创建的)里面,同时创建了一个以zeychannel.block作为开始的chain。
- 接着,我们拥有了由4个peer,两个organization组成的channel。这都在我们
TwoOrgsChannelprofile.里面。 peer0.org1.example.com与peer1.org1.example.com隶属于 Org1;peer0.org2.example.com 以及peer1.org2.example.com隶属于 Org2。这些关系在crypto-config.yaml中定义,同时在我们的docker compose中指定了MSP的路径。- Org1MSP (
peer0.org1.example.com) 以及 Org2MSP (peer0.org2.example.com)的anchor节点接下来被更新了。我们基于建立的channel把Org1MSPanchors.tx与Org2MSPanchors.tx的artifacts,发送给orderering service,以实现上述的更新。 - chaincode_example02被安装在了
peer0.org1.example.com与peer0.org2.example.com - 接着chaincode在peer0.org2.example.com被实例化。实例化把chaincode加到channel上,并启动目标peer的容器,接着初始化chaincode有关的键-值对( [“a”,”100” “b”,”200”])。实例化的过程导致了dev-peer0.org2.example.com-zeychaincode-1.0的启动。
- 实例化需要有endorsement策略的参数,这里设置为-P "OR ('Org1MSP.member','Org2MSP.member')",表示任意transaction必须被Org1 或者 Org2的一个peer进行endorsed。
- 接下来把对“a”的查询发送给peer0.org1.example.com,即在peer0.org1.example.com查询a的值。chaincode之前已经安装在了peer0.org1.example.com上,因此这个查询将会针对Org1 peer0 启动一个容器(dev-peer0.org1.example.com-zeychaincode-1.0),然后查询结果得到返回,没有任何写的操作发生,因此返回值是100
- 接着调用请求发送给peer0.org1.example.com,把10个从a转移到b。
- 然后chaincode在peer1.org2.example.com进行安装。
- 然后一个查询a的余额的请求发送到peer1.org2.example.com。这个启动了第三个chaincode容器(dev-peer1.org2.example.com-mycc-1.0),90被返回。正确的反应了上述transaction,a的值被改为了10。