及官方文档: https://docs.hortonworks.com/HDPDocuments/Ambari-2.4.2.0/bk_ambari-installation/content/download_the_ambari_repo.html
版本兼容性可参考:https://docs.hortonworks.com/ (官网)
一:基础环境配置
1、所有节点关闭防火墙及selinux
systemctl stop firewalld
systemctl disable friewalld
setenforce 0
sed -i ‘s/SELINUX=enforcing/SELINUX=disabled/g’ /etc/selinux/config
2、修改主机名配置hosts文件 及 主节点到各个节点免密登陆
/etc/hosts /etc/hostname
hostname hadoop-dn02
bash
for i in {1..35};do scp /etc/hosts hadoop-dn$i:/etc;done
for i in {45..80};do ssh root@10.205.225.$i “hostnamectl set-hostname hostname ;“done
”
hostnamectl set-hostname hostname
3、打开文件和进程限制,内核参数配置
/etc/security/limits.conf /etc/security/limits.d/20-nproc.conf /etc/sysctl.conf
4、创建你想要安装的应用的数据目录(可选)
(一般来说在安装的时候ambari会自动创建)
mkdir /data/hadoop
mkdir /data/hbase
mkdir /data/zookeeper
5、自建 JDK(所有节点)
(1)卸载自带JDK
rpm -qa |grep java |xargs -i rpm -e --nodeps {}
(2)安装1.8 版本JDK
6、时间同步配置
RHEL7开始默认已安装chrony,而没有安装ntpd.
chrony兼容ntpdate,客户端可以使用ntpdate手动同步时间
systemctl restart chronyd.service
systemctl enable chronyd.service
服务端:
#vim /etc/chrony.conf --修改配置文件
#server 0.rhel.pool.ntp.org iburst --注释这4行,由于是内网环境,所以无法跟外部时间服务器进行时间同步。
#server 1.rhel.pool.ntp.org iburst
#server 2.rhel.pool.ntp.org iburst
#server 3.rhel.pool.ntp.org iburst
server 127.127.1.0 iburst --添加这一行,表示与本机同步时间
# Allow NTP client access from local network.
allow 192.168.100.0/24 --允许哪些服务器到这台服务器来同步时间
# Serve time even if not synchronized to any NTP server.
local stratum 10 # 默认不开启,意思是,即使服务端没有同步到精确的网络时间,也允许向客户端同步不精确的时间。
客户端:
vim /etc/chrony.conf
#server 0.rhel.pool.ntp.org iburst --注释这4行,由于是内网环境,所以无法跟外部时间服务器进行时间同步。
#server 1.rhel.pool.ntp.org iburst
#server 2.rhel.pool.ntp.org iburst
#server 3.rhel.pool.ntp.org iburst
server 192.168.1.3 iburst --添加这一行,与客户端同步
7、配置本地yum源,安装http (主服务器)
上传 相应版本镜像 ,挂载
配置本地源 /etc/yum.repos.d/local.repo
yum clean all ;yum repolist
yum -y install httpd ;systemctl enable httpd
8、下载ambari HDP HDP-UTILS 包 并解压至 /var/www/html/下
9、制作本地源
(1)安装本地源制作相关工具(主服务器)
yum install yum-utils createrepo yum-plugin-priorities -y
(2)制作ambari hdp hdp-utils源包(各个节点)
主服务器上配置 ambari 和hdp的网络源
进入/var/www/html/ 中,进入 ambari各个包中执行 (或者创建hdp文件夹在hdp文件夹下执行)
createrepo ./
cd /etc/yum.repos.d
vim ambari.repo
[ambari-2.7.3.0] name=ambari Version - ambari-2.7.3.0 baseurl=http://192.168.200.10/hdp/ambari/centos7/2.7.3.0 gpgcheck=0 enabled=1 [HDP-3.1.0.0] name=HDP Version - HDP-3.1.0.0 baseurl=http://192.168.200.10/hdp/HDP/centos7/3.1.0.0 gpgcheck=0 enabled=1 [HDP-UTILS-1.1.0.22] name=HDP-UTILS Version - HDP-UTILS-1.1.0.22 baseurl=http://192.168.200.10/hdp/HDP-UTILS/centos7/1.1.0.22 gpgcheck=0 enabled=1
vim hdp-gpl.repo
[HDP-GPL-3.1.0.0] name=HDP-GPL Version - HDP-GPL-3.1.0.0 baseurl=http://192.168.200.10/hdp/HDP-GPL/centos7/3.1.0.0 gpgcheck=0 enabled=1
yum celan all;yum makecache;yum repolist
配置完成后分发至各个节点

二:安装ambari-server
1、首先 yum -y install ambari-server 下载ambari-server
然后安装mysql5.7
2 安装好MySQL之后的配置:创建ambari-server需要用到的库表
create database ambari character set utf8 ;
CREATE USER 'ambari'@'%'IDENTIFIED BY 'ambari';
GRANT ALL PRIVILEGES ON *.* TO 'ambari'@'%';
FLUSH PRIVILEGES;
导入ambari需要的表
use ambari
source /var/lib/ambari-server/resources/Ambari-DDL-MySQL-CREATE.sql
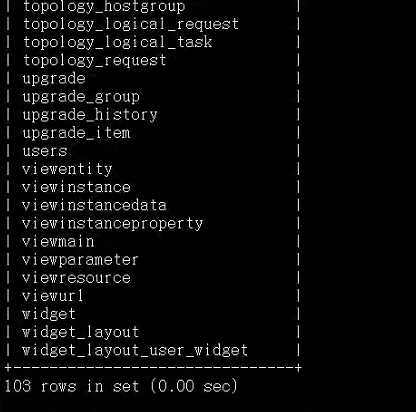
show tables;
如果还要搭其他服务 比如hive
create database hive character set utf8 ;
CREATE USER 'hive'@'%'IDENTIFIED BY 'hive';
GRANT ALL PRIVILEGES ON *.* TO 'hive'@'%';
FLUSH PRIVILEGES;
建立mysql与ambari-server的连接
网上下载mysql-connector-java-8.0.18.jar放到root文件下,注意目录必须按照下面规定得否则无法启动
yum -y install mysql-connector-java
mkdir /usr/share/java mv mysql-connector-java-8.0.18.jar mysql-connector-java.jar cp mysql-connector-java.jar /usr/share/java/mysql-connector-java.jar cp /usr/share/java/mysql-connector-java.jar /var/lib/ambari-server/resources/mysql-jdbc-driver.jar
vim /etc/ambari-server/conf/ambari.properties
添加
server.jdbc.driver.path=/usr/share/java/mysql-connector-java.jar
安装hive的话一定要执行(不安装也可以执行)
ambari-server setup --jdbc-db=mysql --jdbc-driver=/usr/share/java/mysql-connector-java.jar
3、开始配置ambari
[root@master ~]# ambari-server setup
下面是配置执行流程,按照提示操作
(1) 提示是否自定义设置。输入:y
Customize user account for ambari-server daemon [y/n] (n)? y
(2)ambari-server 账号。
Enter user account for ambari-server daemon (root):
如果直接回车就是默认选择root用户
如果输入已经创建的用户就会显示:
Enter user account for ambari-server daemon (root):ambari
Adjusting ambari-server permissions and ownership...
(3)检查防火墙是否关闭
Adjusting ambari-server permissions and ownership...
Checking firewall...
WARNING: iptables is running. Confirm the necessary Ambari ports are accessible. Refer to the Ambari documentation for more details on ports.
OK to continue [y/n] (y)?
直接回车
(4)设置JDK。输入:3
Checking JDK...
Do you want to change Oracle JDK [y/n] (n)? y
[1] Oracle JDK 1.8 + Java Cryptography Extension (JCE) Policy Files 8
[2] Custom JDK
==============================================================================
Enter choice (1): 3
如果上面选择3自定义JDK,则需要设置JAVA_HOME。输入:/usr/local/java/jdk1.8.0_121
WARNING: JDK must be installed on all hosts and JAVA_HOME must be valid on all hosts.
WARNING: JCE Policy files are required for configuring Kerberos security. If you plan to use Kerberos,please make sure JCE Unlimited Strength Jurisdiction Policy Files are valid on all hosts.
Path to JAVA_HOME: /home/tools/jdk1.8.0_121
Validating JDK on Ambari Server...done.
Completing setup...
Checking GPL software agreement...
GPL License for LZO: https://www.gnu.org/licenses/old-licenses/gpl-2.0.en.html
Enable Ambari Server to download and install GPL Licensed LZO packages [y/n] (n)? y
Completing setup...
Configuring database...
(5)数据库配置。选择:y
Configuring database...
Enter advanced database configuration [y/n] (n)? y
(6)选择数据库类型。输入:3
Configuring database...
==============================================================================
Choose one of the following options:
[1] - PostgreSQL (Embedded)
[2] - Oracle
[3] - MySQL
[4] - PostgreSQL
[5] - Microsoft SQL Server (Tech Preview)
[6] - SQL Anywhere
==============================================================================
Enter choice (3): 3
(7)设置数据库的具体配置信息,根据实际情况输入,如果和括号内相同,则可以直接回车。如果想重命名,就输入。
Hostname (localhost):
Port (3306):
Database name (ambari):
Username (ambari):
Enter Database Password (bigdata):ambari
Re-Enter password: ambari
Should ambari use existing default jdbc /usr/share/java/mysql-connector-java.jar [y/n] (y)? y
Configuring remote database connection properties...
(8)将Ambari数据库脚本导入到数据库
WARNING: Before starting Ambari Server, you must run the following DDL against the database to create the schema: /var/lib/ambari-server/resources/Ambari-DDL-MySQL-CREATE.sql
Proceed with configuring remote database connection properties [y/n] (y)?
ambari-setup有一个略过GPL认证的选项!!!!(安装LZO需要)
启动
ambari-server start
chkconfig --add ambari-server
启动日志查看
tail -f /var/log/ambari-server/ambari-server.log
所有节点安装ambari-agent
[root@master ~]# yum -y install ambari-agent
启动命令 ambari-agent start /status/ stop
[root@master ~]# chkconfig --add ambari-agent
chkconfig --add ambari-server
然后再进入ambari-server管理界面
账号密码默认都为admin
日志位置位于 /var/log/ambari-*
这两个包是在安装集群的时候需要的(在部署集群之前批量分发到每个节点rpm安装)
https://files.cnblogs.com/files/zgngg/libtripc.zip
rpm -ivh libtirpc-0.2.4-0.16.el7.x86_64.rpm libtirpc-devel-0.2.4-0.16.el7.x86_64.rpm
三、安装配置部署HDP集群
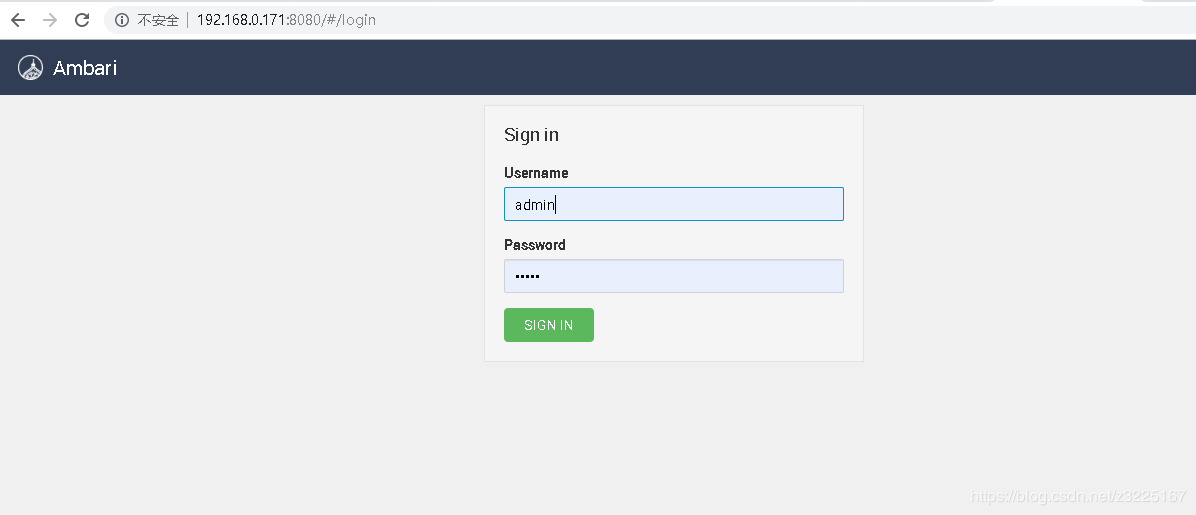
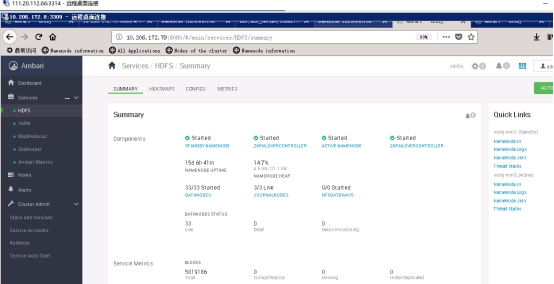
1、访问Ambari web页面
默认端口8080,Username:admin;Password:admin;http://192.168.0.171:8080
2、开始集群安装

3、配置集群名称

4、版本选择、添加本地源链接
Enable Ambari Server to download and install GPL Licensed LZO packages [y/n] (n)? y
GPL认证 选择是在前面 ambari-setup 中选择的 ,就会出现GPL的源配置
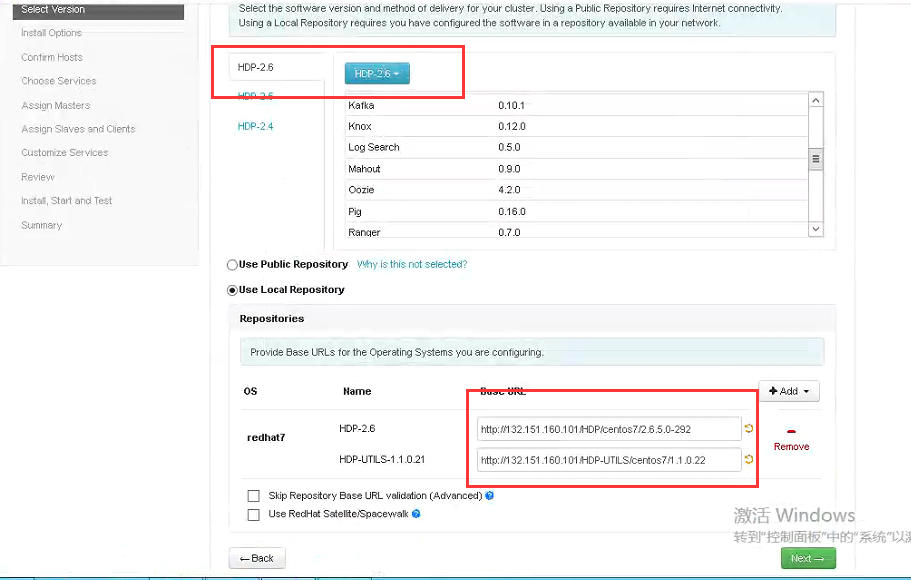
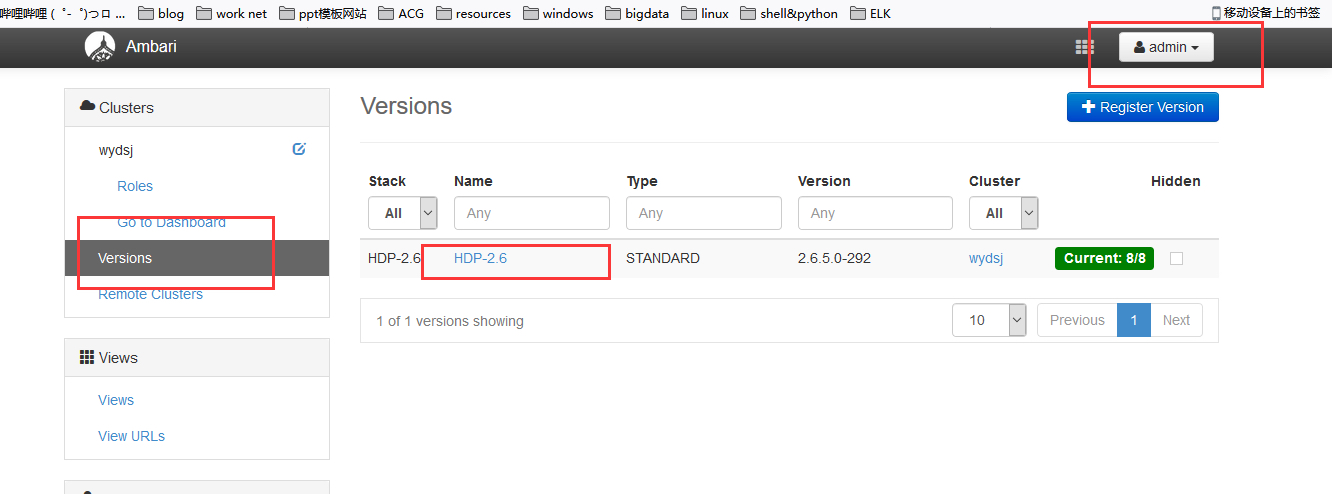
tips:搭建完成后如有源包位置变动、需要修改配置,在
admin → Manage Ambari → Clusters 下的 Versions → 点击右侧出来界面的版本号,进入即可看到
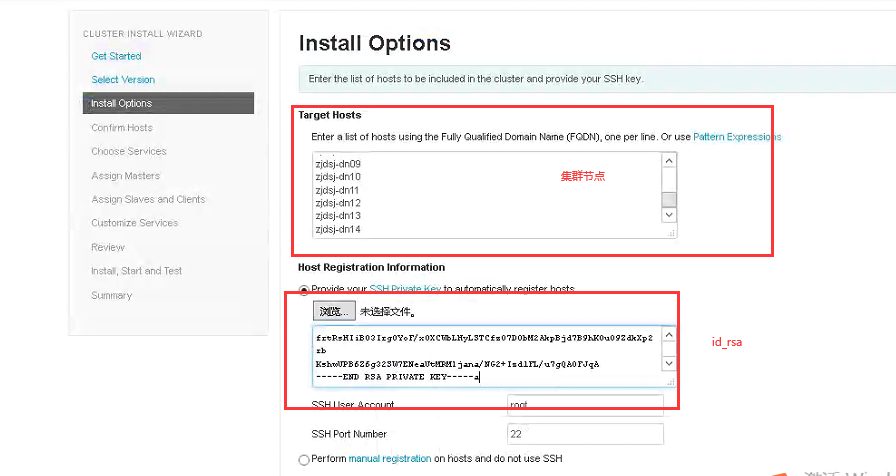
5、集群目前拥有的节点和密钥配置 id_rsa
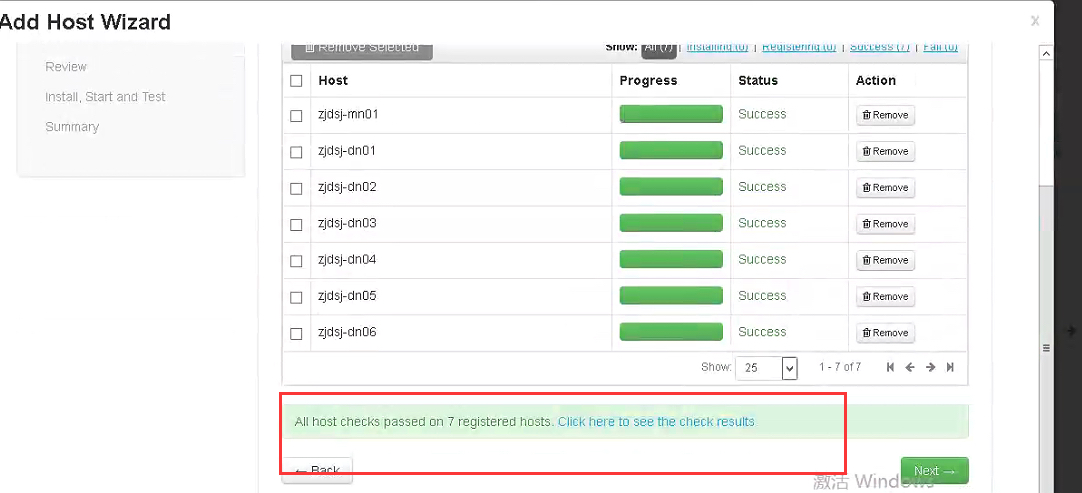
6、主机确认
注意此处的检查信息,一定要为绿色通过,不然后续可能会有问题
如果是黄色或者红色,点进去看具体节点问题,排查解决后,重新检查
7、选择需要安装的组件

8、资源节点分配

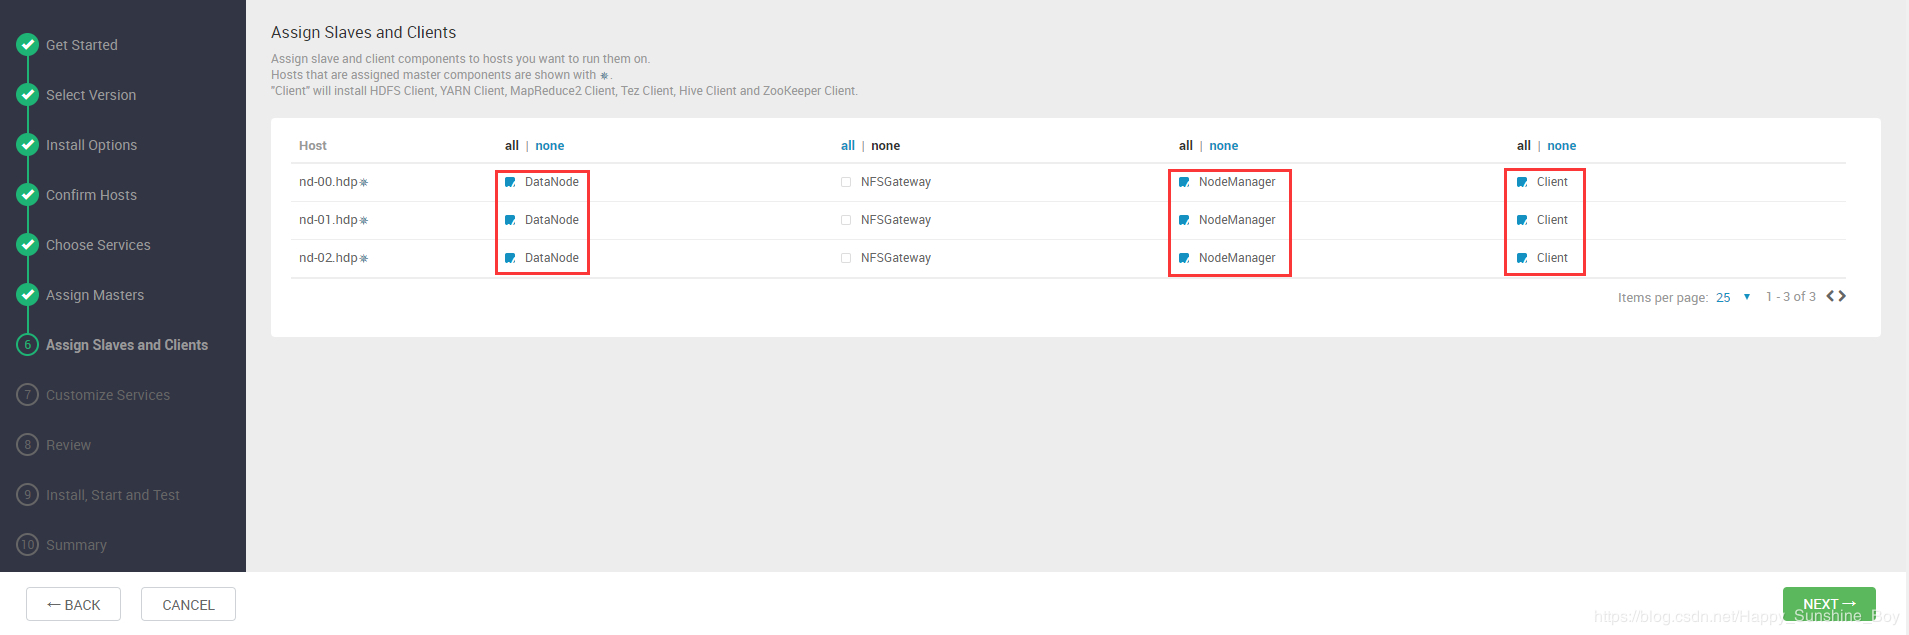
9、分配从属和客户端
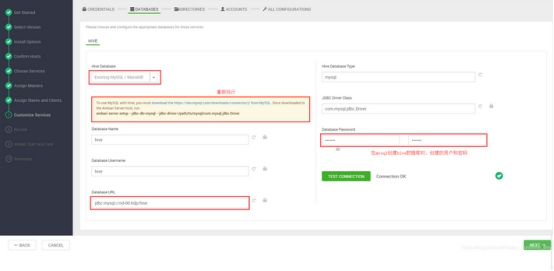
10、定制服务
配置 路径 、资源等(资源分配根据集群资源)

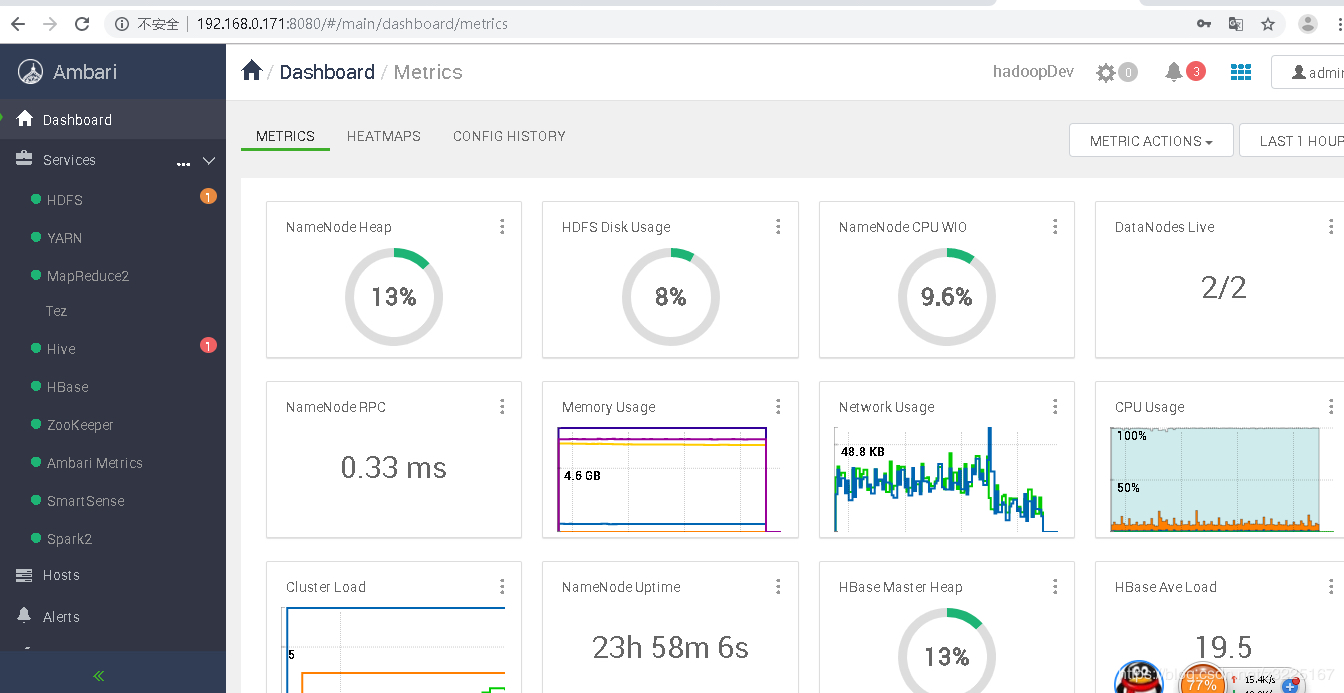
11、安装完成后下一步则进入监控界面
五:HA搭建
进入 ambari界面上 ,选择hdfs服务 ,最左侧actions 点开,会有一个 HA namenode的选项,点进去之后,类似前面创建步骤 创建namenode HA即可

两个NameNode为了数据同步,会通过一组称作JournalNodes的独立进程进行相互通信。当active状态的NameNode的命名空间有任何修改时,会告知大部分的JournalNodes进程。standby状态的NameNode有能力读取JNs中的变更信息,并且一直监控edit log的变化,把变化应用于自己的命名空间。standby可以确保在集群出错时,命名空间状态已经完全同步了。
