1、注解
注解就是一个类,使用@加上注解名称,开发中可以使用注解取代配置文件
2、@Component 取代<bean class="">,@Component 取代<bean id="" class="">
(1)创建一个类(该类与dao层无联系,是一个单独的类)
@Component("studentService")
public class StudentServiceImpl implements StudentService {
    public void addStudent(){
        System.out.println("StudentService的实现类的Add方法!!");
    }
}
(2)创建配置文件:
<?xml version="1.0" encoding="UTF-8"?>
<beans xmlns:xsi="http://www.w3.org/2001/XMLSchema-instance"
       xmlns:context="http://www.springframework.org/schema/context"
       xmlns="http://www.springframework.org/schema/beans"
       xsi:schemaLocation="http://www.springframework.org/schema/beans
       http://www.springframework.org/schema/beans/spring-beans-4.2.xsd
       http://www.springframework.org/schema/context
       http://www.springframework.org/schema/context/spring-context.xsd">
    <context:component-scan base-package="pers.zhb.service"></context:component-scan>
</beans>
(3)测试类:
public class TestCycle {
    public static void main(String[] args) {
        ApplicationContext applicationContext=new
                ClassPathXmlApplicationContext("applicationContext.xml");//创建容器对象
        StudentService studentService= (StudentService) applicationContext.getBean("studentService");
        studentService.addStudent();
    }
}
(4)web开发中,提供了3个@Component注解的衍生注解(功能一样),它们是spring框架为我们提供的三层使用的注解,使得我们的三层对象更加清晰
@Repository:dao层(持久层)
@Service:service层(业务层)
@Controller:web层(表现层)
(5)@Component注解
作用:用于把当前类的对象存入到spring容器中
属性:
value:指定bean的id,不写的时候默认是当前的类名,且首字母小写。当指定属性的值的时候就要用该值
3、依赖注入
(1)创建一个Action:
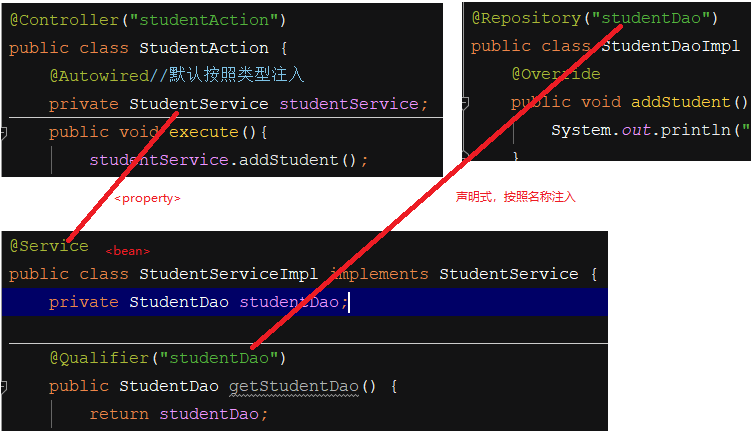
@Controller("studentAction")
public class StudentAction {
    @Autowired//默认按照类型注入
    private StudentService studentService;
    public void execute(){
        studentService.addStudent();
    }
}
使用@Autowired注解(依赖注入)的时候可以写在属性或set方法处,写在属性处可以节省代码量,优先按照bean的类型去找。
(2)service层:
public interface StudentService {
    public void addStudent();
}
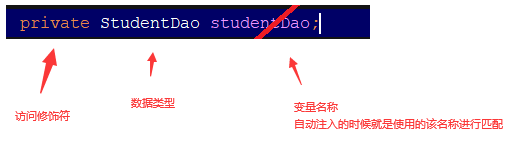
@Service
public class StudentServiceImpl implements StudentService {
    private StudentDao studentDao;

    @Qualifier("studentDao")
    public StudentDao getStudentDao() {
        return studentDao;
    }
    @Autowired
    public void setStudentDao(StudentDao studentDao) {
        this.studentDao = studentDao;
    }

    public void addStudent(){
        studentDao.addStudent();
    }
}
(3)dao层:
public interface StudentDao {
    public void addStudent();
}
@Repository("studentDao")
public class StudentDaoImpl implements StudentDao {
    @Override
    public void addStudent() {
        System.out.println("StudentDao的实现类的Add方法!!");
    }
}
(4)配置文件:
<?xml version="1.0" encoding="UTF-8"?>
<beans xmlns:xsi="http://www.w3.org/2001/XMLSchema-instance"
       xmlns:context="http://www.springframework.org/schema/context"
       xmlns="http://www.springframework.org/schema/beans"
       xsi:schemaLocation="http://www.springframework.org/schema/beans
       http://www.springframework.org/schema/beans/spring-beans-4.2.xsd
       http://www.springframework.org/schema/context
       http://www.springframework.org/schema/context/spring-context.xsd">
    <!--扫描-->
    <context:component-scan base-package="pers.zhb"></context:component-scan>
</beans>
(5)测试:
public class ActionTest {
    public static void main(String[] args) {
        ApplicationContext applicationContext=new
                ClassPathXmlApplicationContext("applicationContext.xml");//创建容器对象
        StudentAction studentAction= (StudentAction) applicationContext.getBean("studentAction");
        studentAction.execute();
    }
}
StudentDao的实现类的Add方法!!
@Autowired
- 可以省略类内的get和set方法以及配置文件中bean的依赖注入的内容,但是在spring容器中还是需要配置bean的,可以结合生成bean的注解使用
- 自动按照类型注入,只要容器中有唯一一个bean对象类型和要注入的变量类型匹配,就可以注入成功
- 出现的位置可以是变量上也可以是方法上
- 按照类型注入的时候,如果有多个可以注入,不能注入成功的时候,可以按照名称注入(需要手动修改注入的变量名称),例如,一个接口有多个实现类,那么这些实现类就是相同类型的,注入的时候会出现问题,因为注入的时候匹配到了多个bean
@Qualifier
属性value用于指定注入的bean的id
在给类成员注入的时候不能独立使用,也就是说要和Autowired注解配合使用
@Resource
直接按照bean的id注入,可以独立使用
属性可以指定bean的id
以上三种注解都是能用于注入bean类型的数据,而基本类型和String类型无法使用上述注解
@Value:用于注入基本类型和String类型,属性用于指定值
4、生命周期
初始化:@PostConstruct
销毁:@PreDestory
分别添加到初始化和销毁方法之前。
5、作用域
多例:@Scope("prototype")