1、管理索引库
(1)添加
初始查询结果:
{
  "responseHeader": {
    "status": 0,
    "QTime": 1,
    "params": {
      "q": "*:*",
      "indent": "true",
      "wt": "json",
      "_": "1608643748789"
    }
  },
  "response": {
    "numFound": 2,
    "start": 0,
    "docs": [
      {
        "id": "1",
        "title": [
          "zhai"
        ],
        "_version_": 1686785156649582600
      },
      {
        "id": "change.me",
        "title": [
          "change.me"
        ],
        "_version_": 1686785221848989700
      }
    ]
  }
}
提交数据:
{"id":"2","title":"test"}
再次查询:
{
  "responseHeader": {
    "status": 0,
    "QTime": 1,
    "params": {
      "q": "*:*",
      "indent": "true",
      "wt": "json",
      "_": "1608643854340"
    }
  },
  "response": {
    "numFound": 3,
    "start": 0,
    "docs": [
      {
        "id": "1",
        "title": [
          "zhai"
        ],
        "_version_": 1686785156649582600
      },
      {
        "id": "change.me",
        "title": [
          "change.me"
        ],
        "_version_": 1686785221848989700
      },
      {
        "id": "2",
        "title": [
          "test"
        ],
        "_version_": 1686785333280112600
      }
    ]
  }
}
(2)更新
当ID相同的时候进行的是更新操作:
提交一个已经存在的ID
{"id":"2","title":"hello"}
查询:
{
  "responseHeader": {
    "status": 0,
    "QTime": 1,
    "params": {
      "q": "*:*",
      "indent": "true",
      "wt": "json",
      "_": "1608643946423"
    }
  },
  "response": {
    "numFound": 3,
    "start": 0,
    "docs": [
      {
        "id": "1",
        "title": [
          "zhai"
        ],
        "_version_": 1686785156649582600
      },
      {
        "id": "change.me",
        "title": [
          "change.me"
        ],
        "_version_": 1686785221848989700
      },
      {
        "id": "2",
        "title": [
          "hello"
        ],
        "_version_": 1686785397815771100
      }
    ]
  }
}
执行过程是先删除再添加
(3)删除
删除ID为1的索引:
<delete>
<id>1</id>
</delete>
<commit/>
查询结果中ID为1的索引全部消失了
按照条件删除ID为2的索引:
<delete>
<query>id:2</query>
</delete>
<commit/>
删除所有:
<delete>
<query>*:*</query>
</delete>
<commit/>
2、配置数据导入
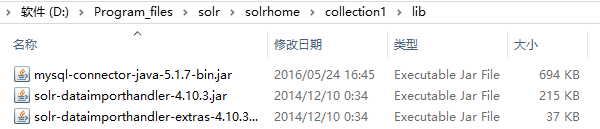
(1)jar包

将以上两个jar包复制到核的lib目录下,然后将mysql的驱动包也拷贝到此目录下:
(2)配置solrconfig.xml文件,添加一个requestHandler
 <requestHandler name="/dataimport"
class="org.apache.solr.handler.dataimport.DataImportHandler">
    <lst name="defaults">
      <str name="config">data-config.xml</str>
     </lst>
  </requestHandler>
(3)创建一个data-config.xml,保存到collection1conf目录下(与solrconfig.xml在同一级目录下)
<?xml version="1.0" encoding="UTF-8" ?>
<dataConfig>
<dataSource type="JdbcDataSource"
          driver="com.mysql.jdbc.Driver"
          url="jdbc:mysql://localhost:3306/lucene"
          user="root"
          password="root"/>
<document>
    <entity name="product" query="SELECT pid,name,catalog_name,price,description,picture FROM products ">
         <field column="pid" name="id"/>
         <field column="name" name="product_name"/>
         <field column="catalog_name" name="product_catalog_name"/>
         <field column="price" name="product_price"/>
         <field column="description" name="product_description"/>
         <field column="picture" name="product_picture"/>
    </entity>
</document>

</dataConfig>
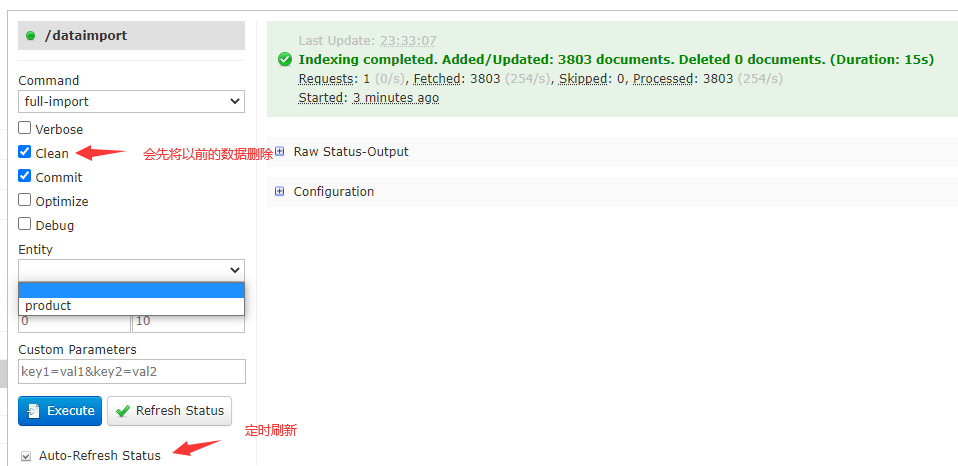
(4)向数据库导入数据
(5)设置业务系统域(schema.xml)
 <field name="product_name" type="text_ik" indexed="true" stored="true"/>
   <field name="product_price"  type="float" indexed="true" stored="true"/>
   <field name="product_description" type="text_ik" indexed="true" stored="false" />
   <field name="product_picture" type="string" indexed="false" stored="true" />
   <field name="product_catalog_name" type="string" indexed="true" stored="true" />
在第三步中,只有ID能够域系统中已经存在的ID进行映射,因此,需要向系统中添加域来满足业务需求
  <field name="product_keywords" type="text_ik" indexed="true" stored="false" multiValued="true"/>
   <copyField source="product_name" dest="product_keywords"/>
   <copyField source="product_description" dest="product_keywords"/>
上面是配置根据关键字搜索的拷贝域,就是将商品的名称和描述拷贝到一个域中,搜索的时候既不是根据名称或描述搜索,而是将其拷贝到一个域中将两个字段组合后进行搜索
(6)重启Tomcat
(7) 注意点
如果是Mysql8需要更新jar包到8版本,同时,获取数据库的连接的方法也要注意更改
<?xml version="1.0" encoding="UTF-8" ?>
<dataConfig>
<dataSource type="JdbcDataSource"
          driver="com.mysql.cj.jdbc.Driver"
          url="jdbc:mysql://localhost:3306/lucene?serverTimezone=CST"
          user="root"
          password="root"/>
<document>
    <entity name="product" query="SELECT pid,name,catalog_name,price,description,picture FROM products ">
         <field column="pid" name="id"/>
         <field column="name" name="product_name"/>
         <field column="catalog_name" name="product_catalog_name"/>
         <field column="price" name="product_price"/>
         <field column="description" name="product_description"/>
         <field column="picture" name="product_picture"/>
    </entity>
</document>
</dataConfig>
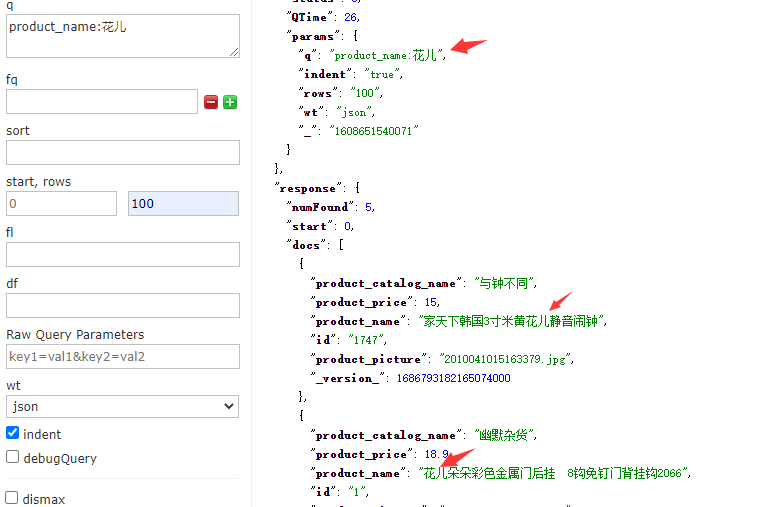
(8)测试
查询:

3、查询
(1)关键字查询
(2)多条件查询
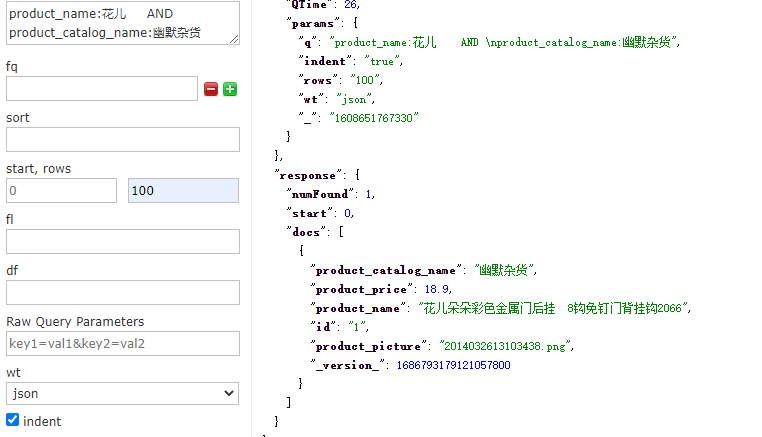
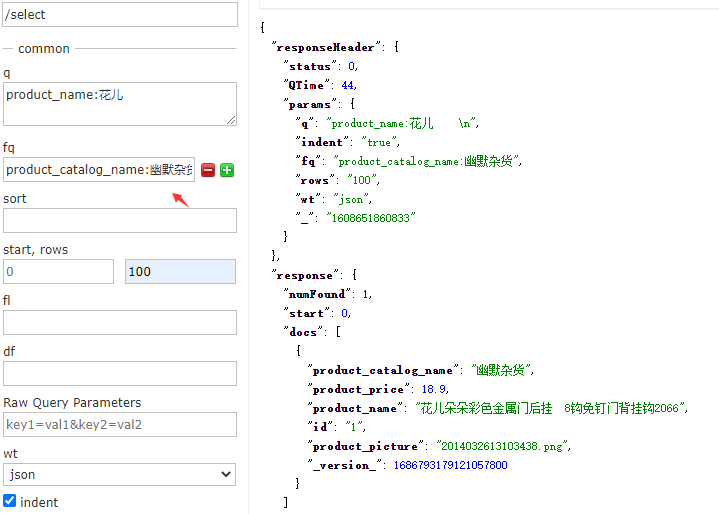
(3)过滤
(4)排序

(5)只要某一个字段

用逗号分隔就可以查询多个字段
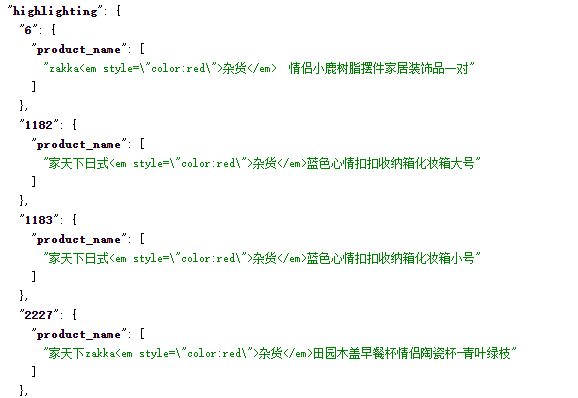
(6)设置查询的关键字高亮

运行结果: