表单创建一个有效、引人注目的数据输入体验。Angular表单协调一组数据绑定控件,跟踪变更。验证输入的有效性,并且显示错误信息。
接下来,主要内容有:
1、使用组件和模板构建Angular表单;
2、用ngModel创建数据绑定,以读取和写入输入控件的值。
构建Angular表单
我们想构建包含姓名,电话,特长三个字段的表单
1、我们可以参照快速启动那篇,创建一个名为forms的新项目,也可以使用之前的项目进行修改;
2、创建Person类;
3、创建控制此表单的组件;
4、创建具有初始表单布局的模板;
5、使用ngModel双向数据绑定语法把数据属性绑定到每个表单控件中。
创建Person类
在app文件夹下创建hero.ts文件,内容为
export class Person{
    constructor(
        public id:number,
        public name:string,
        public ownpower:string,
        public power?:string  //可填可不填,可选的  ?不能省略
    ){}
}
//创建一个类,定义它的属性
TypeScript编译器为每个public构造函数参数生成一个公共字段,在创建一个新的Person实例时,自动把参数赋给这些公共字段。
创建表单组件
在app文件夹下创建hero-form-component.ts文件:
import { Component } from '@angular/core';
import {Person} from './hero'; //引入hero.ts中的Person类
@Component({
    moduleId:module.id,//属性设置了基地址,用于从相对路径加载form.html模板文件
    selector: 'hero-form',//在模板中创建添加<hero-form>标签
    templateUrl:'../form.html'//模板上增加form.html里面的内容
})
export class HeroFormComponent {
    powers=['唱歌','跳舞','弹琴','画画'];
    model=new Person(1,'小明','跳舞',this.powers[2]);//实例化
    submitted=false;
    onsubmit(){this.submitted=true;}
    get diagnostic(){return JSON.stringify(this.model);} //这个先暂时不管
}
1、这段代码导入了Angular核心库以及我们刚刚创建的Person模型;
2、@Component装饰器的选择器将<hero-form>标签把这个表单放进父模板;
3、moduleId:module.id属性设置了基地址,用于从相对模块路径加载templateUrl;
4、templateUrl属性指向一个独立的HTML模板文件,使用外联模板;
5、位model和powers提供了演示用的假数据;
6、在最后增加diagnostic属性,她返回这个模型的JSON形式。在开发过程中用于调试。
修改app.module.ts启动文件
import { NgModule } from '@angular/core';
import { BrowserModule } from '@angular/platform-browser';
import {FormsModule} from '@angular/forms';//导入表单
import { AppComponent1 } from './app.component';
import{HeroFormComponent} from './hero-form.component';//导入新增加的组件类
//导入hero-form.component.ts中的HeroFormComponent
@NgModule({
imports: [
    BrowserModule,
    FormsModule  //表单模板
],
declarations: [
    AppComponent1 ,
    HeroFormComponent //类名
],
bootstrap: [AppComponent1]
})
export class AppModule { }
1、导入FormsModule和新组件HeroFormComponent;
2、把FormModule添加到ngModel装饰器的imports列表中,这样应用就能访问模板驱动表单的所有特性,包括ngModel;
3、把HeroFormComponent添加到ngModule装饰器的declarations列表中,使HeroFormComponent组件在整个模块中可见。
修改app.component.ts文件
import { Component } from '@angular/core';
@Component({
    selector: 'my-app',//在index.html中创建添加<my-app>标签
    //包裹<hero-form></hero-form>
    template:`<hero-form></hero-form>`
    //模板里面添加此标签(hero-form里面的内容)
})
export class AppComponent1{}
关于表单的组建模板构建完了。
创建初始HTML表单模板,上文提到的form.html文件
<!DOCTYPE html>
<html lang="en">
<head>
    <meta charset="UTF-8">
    <title>form表单</title>
</head>
<body>
<div class="container">
    <h1>个人信息</h1>
    <form>
        <div class="form-group">
            <label for="name">姓名</label>
            <input type="text" id="name" required class="form-control">
        </div>
        <div class="form-group">
            <label for="ownpower">特长</label>
            <input type="text" class="form-control" id="ownpower">
        </div>
        <div class="form-group">
            <label for="power">能力选择</label>
            <select class="form-control" id="power" required>
                <!--循环-->
                <option *ngFor="let pow of powers" [value]="pow">{{pow}}</option>
            </select>
        </div>
        <button type="submit" class="btn btn-success">提交</button>
    </form>
</div>
</body>
</html>
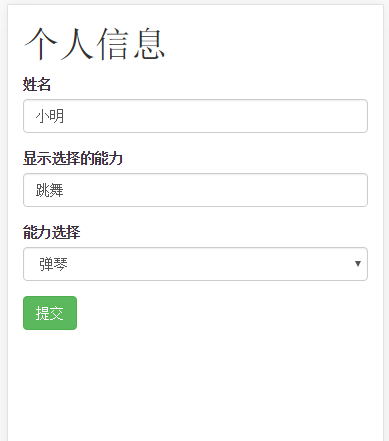
我们可以使用css来美化表单,在index.html里面引入样式表文件
<!--样式表-->
    <link rel="stylesheet" href="css/bootstrap.min.css">
显示的效果为
使用ngModel进行双向数据绑定[(ngModel)]语法
修改form.html文件,拿姓名做个实例
<div class="form-group">
            <label for="name">姓名,显示为{{model.name}}</label>
            <input type="text" id="name" required class="form-control" [(ngModel)]="model.name" name="name" #name1="ngModel">
            <!--双向绑定:{{model.name}}-->
            <!--使用ngModwl进行双向绑定,其绑定了model.name,所以所有有model。name的都可以同时变化-->
        </div>
效果为

好了,一个简单的表单就做好了,下一篇讲控制表单,校验错误等内容。