1.首先确定是否可以使用brew:
如果不行:建议先安装;
/bin/bash -c "$(curl -fsSL https://raw.githubusercontent.com/Homebrew/install/HEAD/install.sh)"
1.1、遇到报错
curl: (7) Failed to connect to raw.githubusercontent.com port 443: Connectio
1.2、处理方法:
sudo vim /etc/hosts
输入密码:
添加:199.232.28.133 raw.githubusercontent.com
:wq
source /etc/hosts
1.3 在操作1步骤的代码
2、终端下使用brew 安装allure
brew install allure
3.结合自己的pytest框架case运行用例
from py_37.Py_Pytest.day17.login import login_check

class TestLogin:

    def test_login_success(self):
        actual = login_check('python37','lemonban')
        assert actual == {"code": 0, "msg": "登录成功"}

    def test_login_wrong_passwd(self):
        actual = login_check('python37', 'lemonban666')
        assert actual == {"code": 1, "msg": "账号或密码不正确"}

    def test_login_wrong_user(self):
        actual = login_check('python370', 'lemonban')
        assert actual == {"code": 1, "msg": "账号或密码不正确"}

    def test_login_no_user(self):
        actual = login_check(password="lemonban")
        assert actual == {"code": 1, "msg": "所有的参数不能为空"}

    def test_login_no_passwd(self):
        actual = login_check("python37")
        assert actual == {"code": 1, "msg": "所有的参数不能为空"}
4、在pycharm下-控制台找到-Terminal
pytest -v
#切换目录到
cd /py_37/Py_Pytest/day17
#执行命令
allure server allure_file
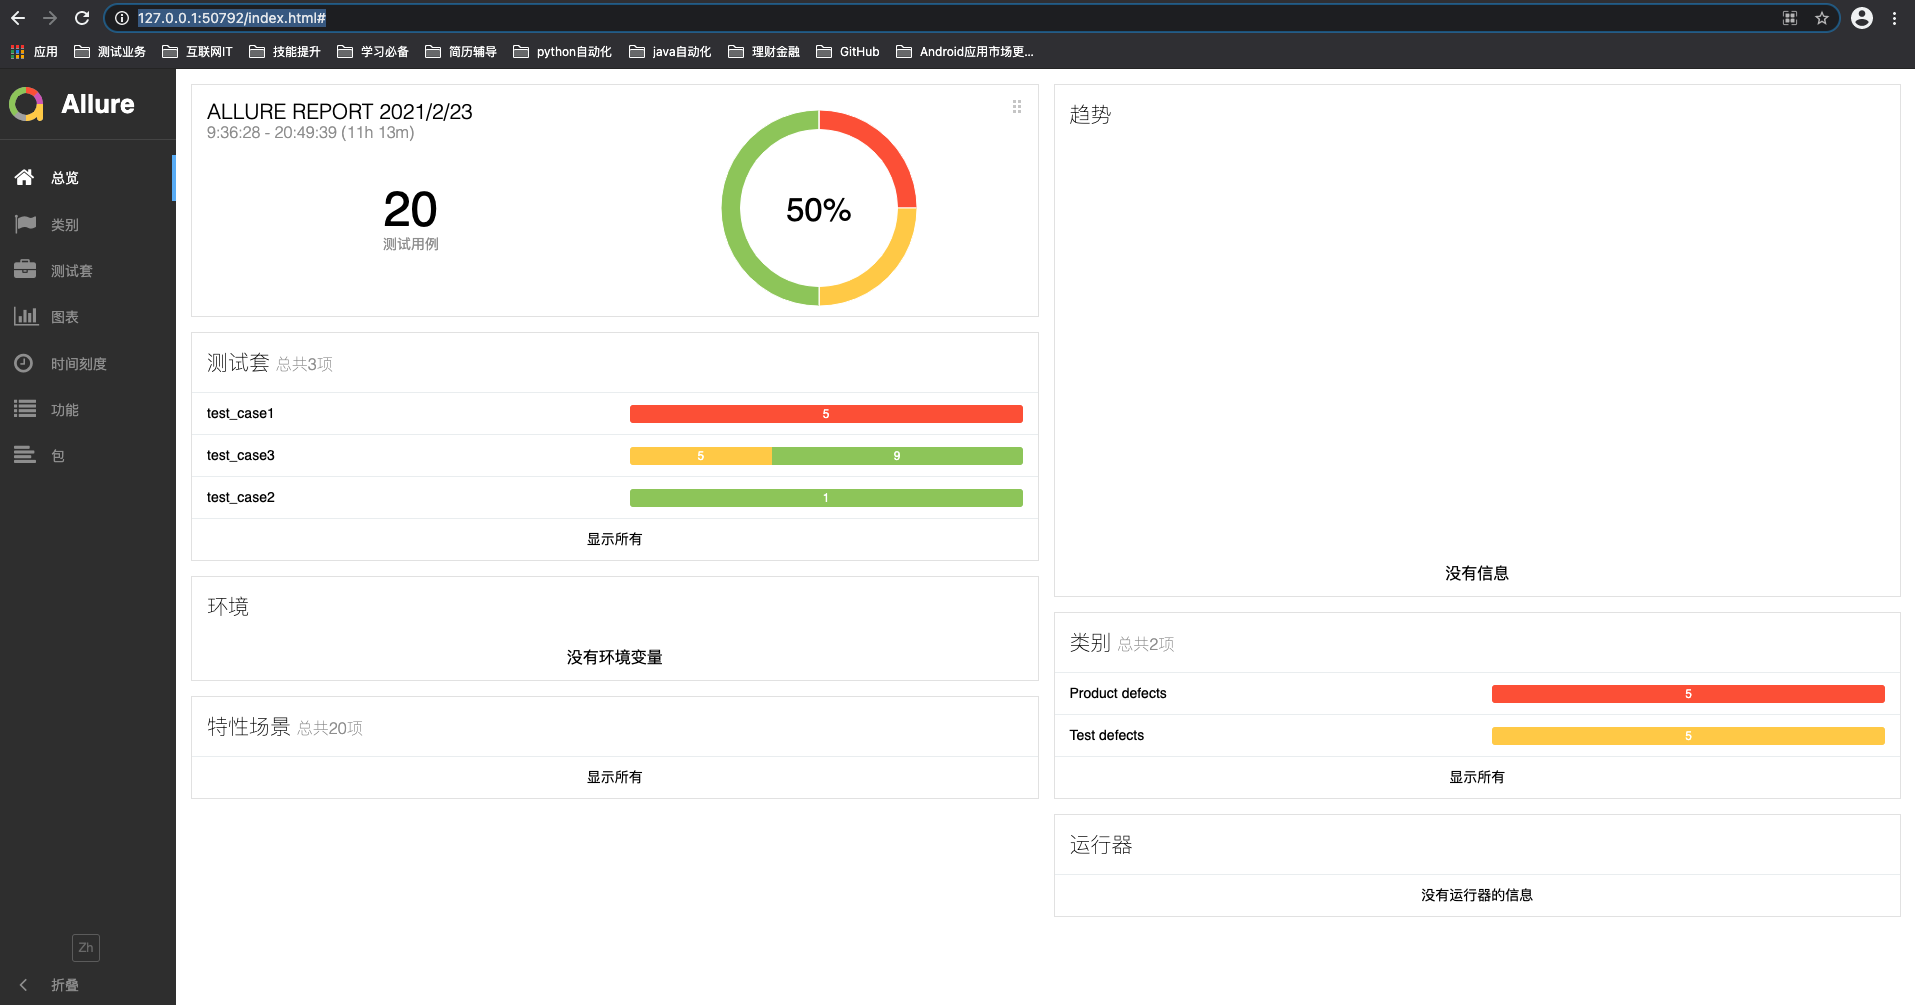
5.输出allure报告如下