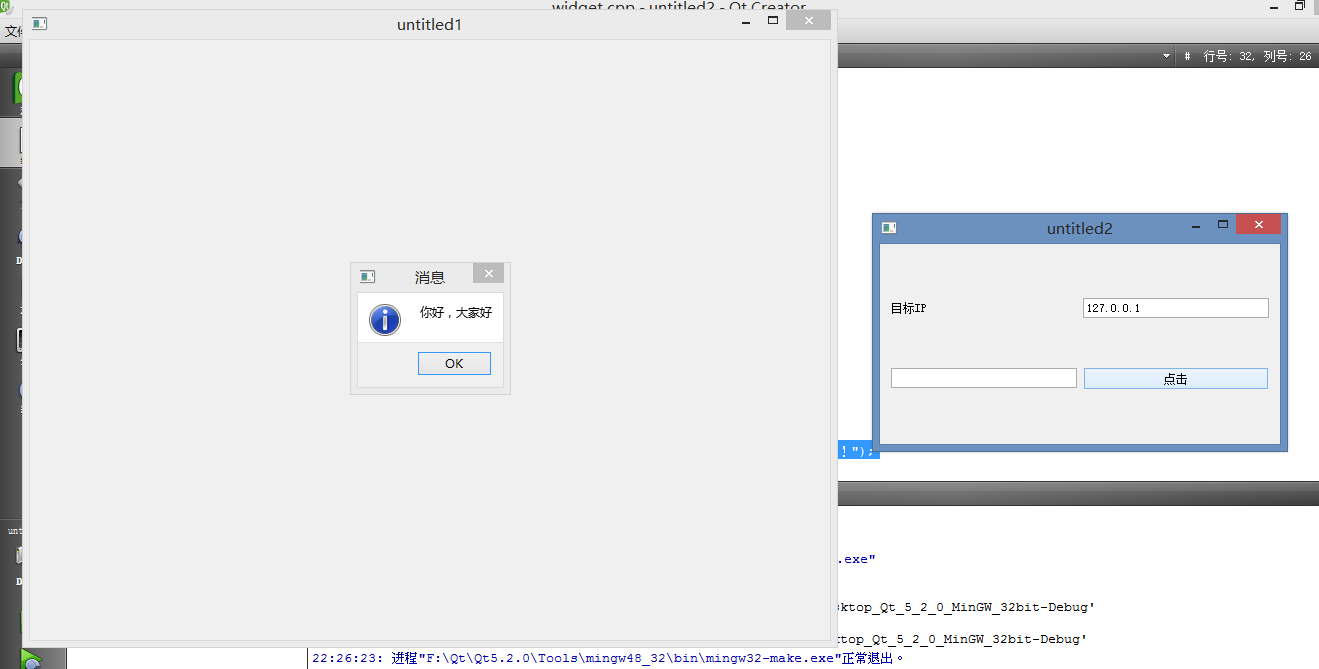
QT的UdpSocket接收消息使用原则
第一步:new一个UdpSocket
第二步:调用UdpSocket的bind方法,同时指定端口号
第三步:使用connect将接收消息函数和UdpSocket对象做关联
第四步:在接受消息槽函数当中调用readDatagram接收消息
#ifndef WIDGET_H
#define WIDGET_H

#include <QWidget>
#include <QUdpSocket>

class Widget : public QWidget
{
    Q_OBJECT

public:
    Widget(QWidget *parent = 0);
    ~Widget();
    void mydatasend();
private:
    QUdpSocket *udpsocket;
private slots:
    void mydatarecv();
};

#endif // WIDGET_H
#include "widget.h"
#include <QHostAddress>
#include <QMessageBox>

Widget::Widget(QWidget *parent)
    : QWidget(parent)
{
    udpsocket=new QUdpSocket(this);
    /*指定绑定端口号,接收消息必须绑定端口号,发送消息则不需要绑定*/
    udpsocket->bind(8080);
  /*取消绑定端口号使用:udpsocket->close()方法*/
    /*readyRead()表示有消息到来这个信号*/
    connect(udpsocket,SIGNAL(readyRead()),this,SLOT(mydatarecv()));
}

void Widget::mydatarecv()
{
    char buf[1024]={0};
    /*判断是否有消息*/
    while(udpsocket->hasPendingDatagrams())
    {
        udpsocket->readDatagram(buf,sizeof(buf));
        QMessageBox::information(this,"消息",buf);
        memset(buf,0,sizeof(buf));
    }
}

void Widget::mydatasend()
{
    //
}

Widget::~Widget()
{

}
#ifndef WIDGET_H
#define WIDGET_H

#include <QWidget>
#include <QUdpSocket>
#include <QPushButton>
#include <QLineEdit>
#include <QLabel>

class Widget : public QWidget
{
    Q_OBJECT

public:
    Widget(QWidget *parent = 0);
    ~Widget();
private:
    QUdpSocket *udpsocket;
    QPushButton *btn1;
    QLineEdit *edit1;
    QLineEdit *edit2;
    QLabel *label1;
    void mysenddata();
private slots:
    void btn_click();
};

#endif // WIDGET_H
#include "widget.h"
#include <QHostAddress>
#include <QGridLayout>
#include <QMessageBox>

Widget::Widget(QWidget *parent)
    : QWidget(parent)
{
    udpsocket=new QUdpSocket(this);
    btn1=new QPushButton(tr("点击"));
    edit1=new QLineEdit();
    edit2=new QLineEdit();
    label1=new QLabel(tr("目标IP"));
    QGridLayout *lay1=new QGridLayout(this);
    lay1->addWidget(btn1,1,1);
    lay1->addWidget(edit1,1,0);
    lay1->addWidget(edit2,0,1);
    lay1->addWidget(label1,0,0);
    connect(btn1,SIGNAL(clicked()),this,SLOT(btn_click()));
}

Widget::~Widget()
{

}

void Widget::btn_click()
{
    mysenddata();
}

void Widget::mysenddata()
{
    QString stext=edit1->text();
    QHostAddress *serverip=new QHostAddress();
    //获取目标IP地址
    QString ipstr=edit2->text();
    if(ipstr.isEmpty())
    {
        QMessageBox::critical(this,"错误信息","ip地址不可以为空!");
        return;
    }
    serverip->setAddress(ipstr);
    char buf[1024]={0};
    strncpy(buf,stext.toStdString().data(),sizeof(buf));
    udpsocket->writeDatagram(buf,strlen(buf),*serverip,8080);
    delete serverip;
    edit1->clear();
}

