一.完成Docker-compose的安装
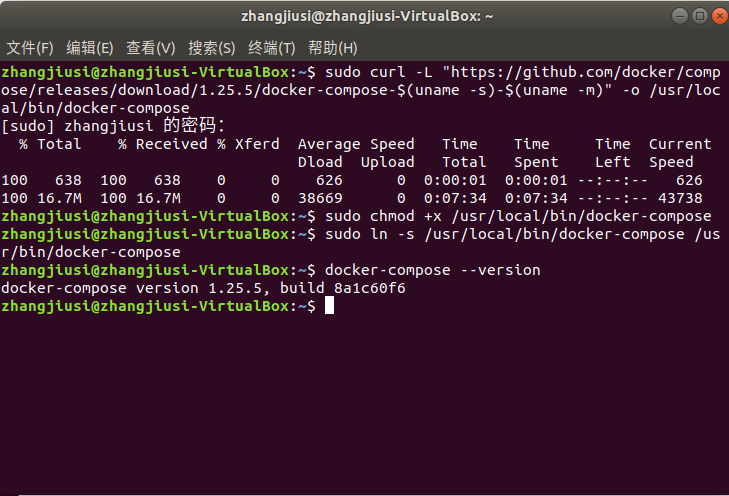
下载docker-compose
sudo curl -L "https://github.com/docker/compose/releases/download/1.25.5/docker-compose-$(uname -s)-$(uname -m)" -o /usr/local/bin/docker-compose
将可执行权限应用于二进制文件
sudo chmod +x /usr/local/bin/docker-compose
创建软链
sudo ln -s /usr/local/bin/docker-compose /usr/bin/docker-compose
测试安装
docker-compose --version
二.Dockerfile编写
创建如下目录结构
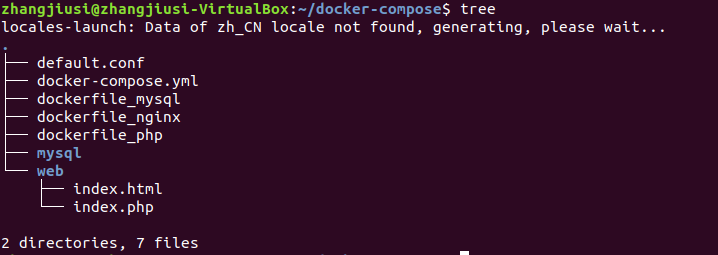
(1)default.conf

(2)docker-compose.yml

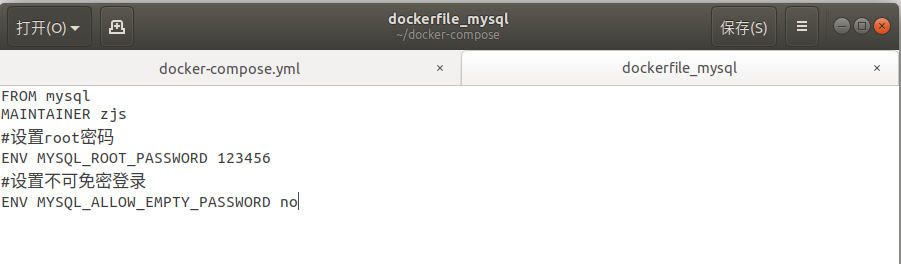
(3)dockerfile_mysql
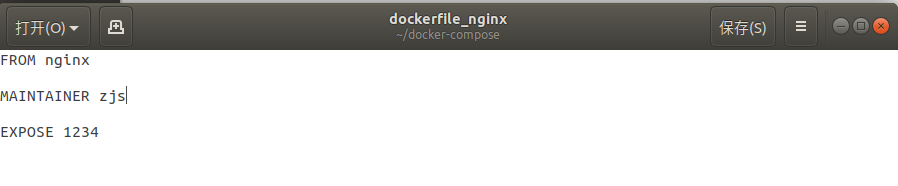
(4)dockerfile_nginx
(5)dockerfile_php

(6)index.html

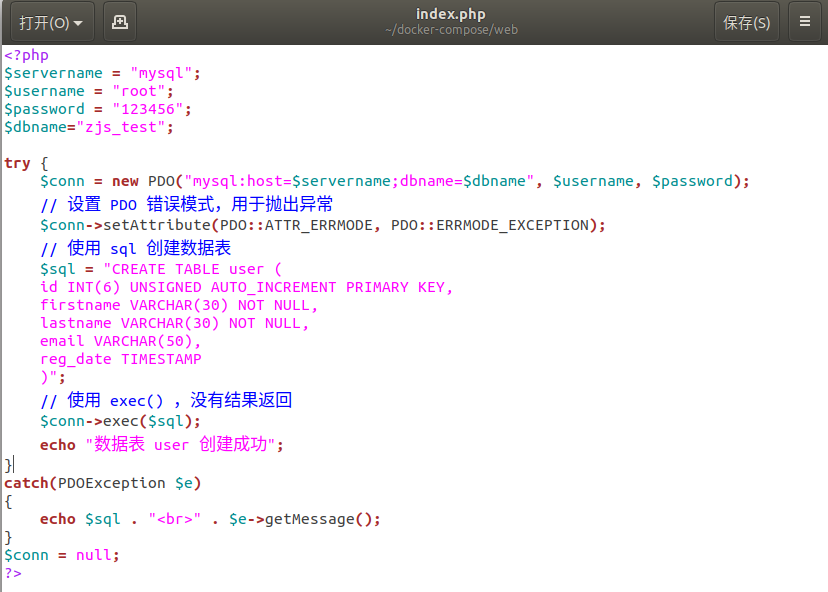
(7)index.php

三.使用Compose实现多容器运行机制
(1)运行docker-compose
sudo docker-compose up -d --build

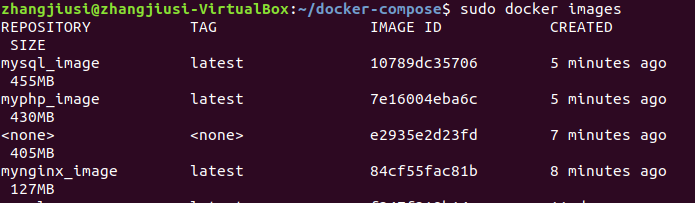
(2)查看容器和镜像
sudo docker images
(3)查看容器

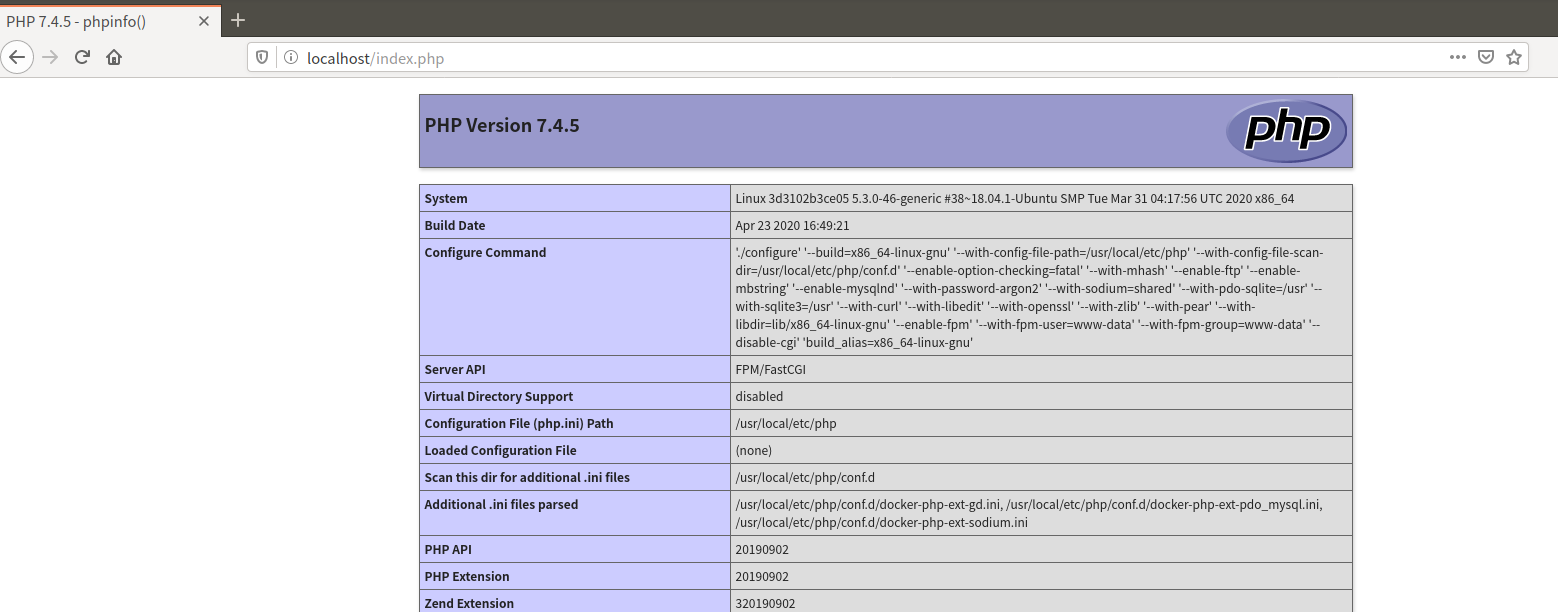
(4)访问测试

四.服务测试
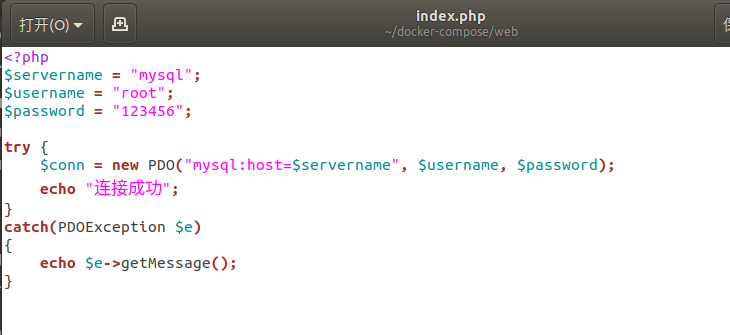
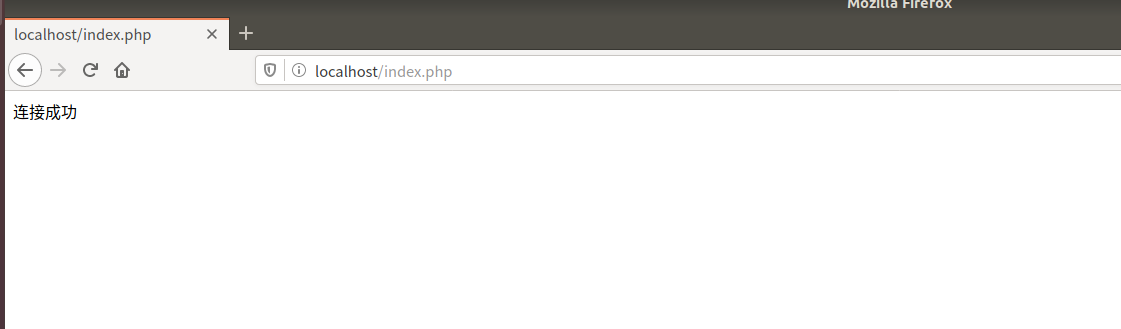
(1)测试数据库连接
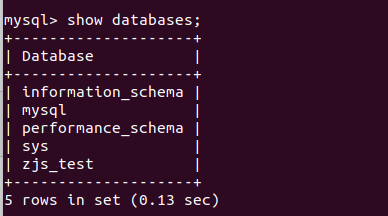
(2)创建zjs_test数据库


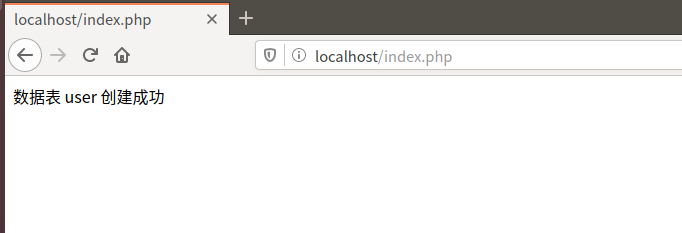
(3)创建一个名为user的数据表

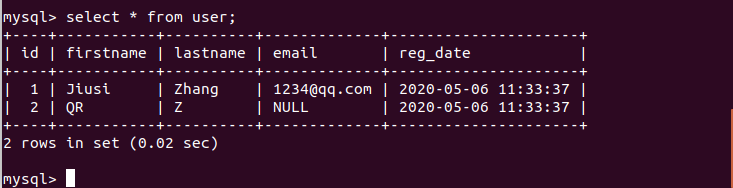
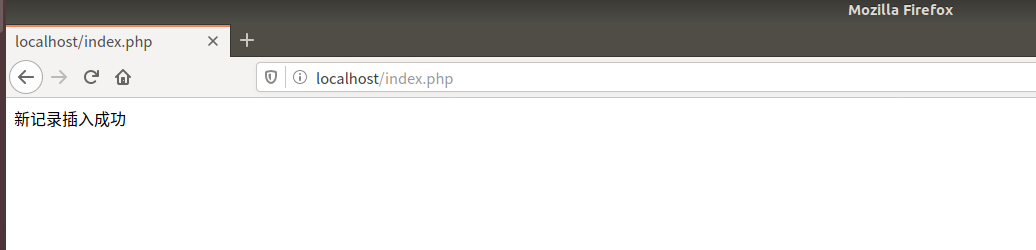
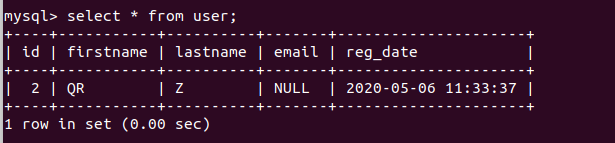
(4)插入数据


(5)删除数据

五.选做
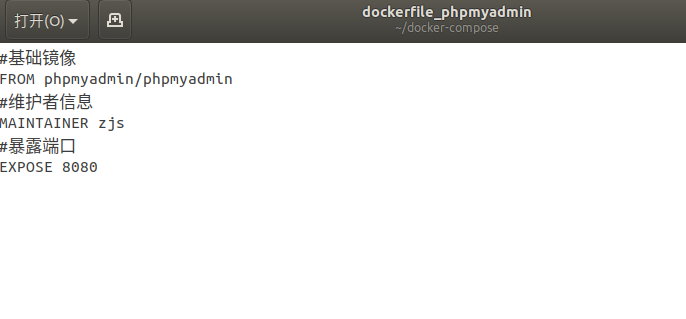
(1)新建dockerfile_phpmyadmin
(2)在docker-compose.yml里面添加

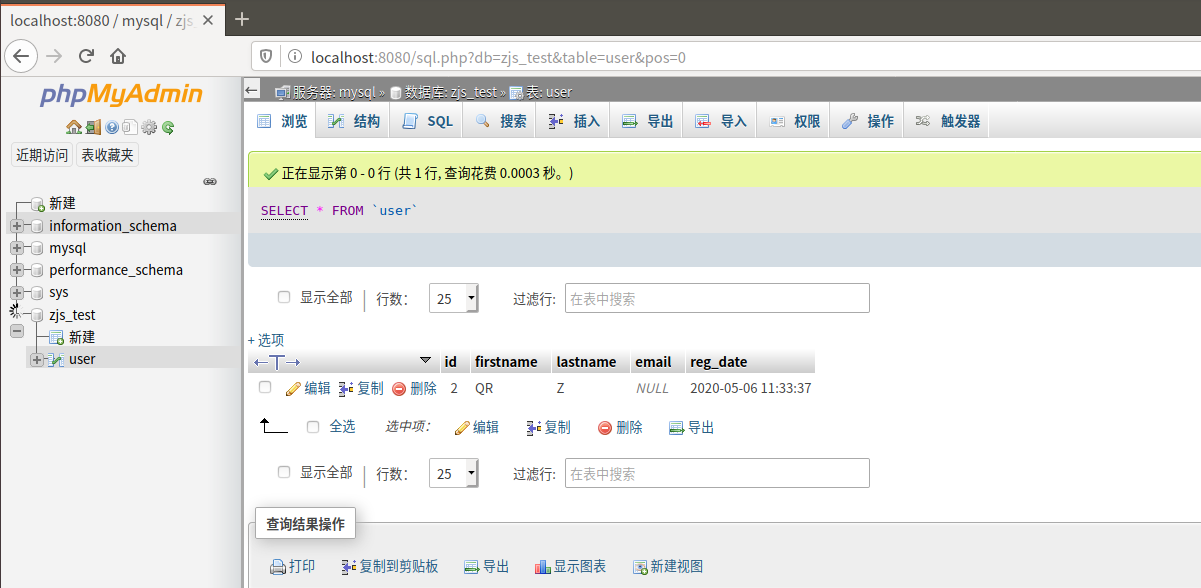
(3)重启之后就可以通过8080端口进入

(4)查看表然后也可以增删查改了
六.总结
本次实验还是遇到一些困难,比如自己不清楚文件的编写结构导致直接复制来的文件出错debug大概两个多小时,所幸在同学大佬的帮助下还是解决了,总共大概花了将近7个小时的时间,但是都是值得的,加深了我非常多的理解,希望后面的作业能够仔细一点。