GitLab是一个利用 Ruby on Rails 开发的开源应用程序,实现一个自托管的Git项目仓库,可通过Web界面进行访问公开的或者私人项目。
GitLab拥有与Github类似的功能,能够浏览源代码,管理缺陷和注释。可以管理团队对仓库的访问,它非常易于浏览提交过的版本并提供一个文件历史库。它还提供一个代码片段收集功能可以轻松实现代码复用,便于日后有需要的时候进行查找。
1. GitLab安装与配置
1.1. 基础环境准备
1 [root@mini04 ~]# yum install -y curl policycoreutils openssh-server openssh-clients postfix
2 ………………
3 [root@mini04 ~]# systemctl start postfix
1.2. 配置yum源
注:由于网络问题,国内用户,建议使用清华大学的镜像源进行安装:
1 [root@mini04 ~]# vim /etc/yum.repos.d/gitlab-ce.repo
2 [gitlab-ce]
3 name=gitlab-ce
4 baseurl=https://mirrors.tuna.tsinghua.edu.cn/gitlab-ce/yum/el7/
5 repo_gpgcheck=0
6 gpgcheck=0
7 enabled=1
8 gpgkey=https://packages.gitlab.com/gpg.key
1.3. 更新本地yum缓存
1 [root@mini04 ~]# yum makecache
2 ………………
1.4. 安装GitLab
1 [root@mini04 ~]# yum install -y gitlab-ce
2 ………………
1.5. 配置修改
1 [root@mini04 ~]# vim /etc/gitlab/gitlab.rb
2 ………………
3 ## GitLab URL
4 ##! URL on which GitLab will be reachable.
5 ##! For more details on configuring external_url see:
6 ##! https://docs.gitlab.com/omnibus/settings/configuration.html#configuring-the-external-url-for-gitlab
7 # external_url 'http://gitlab.example.com'
8 # 能够解析
9 external_url 'http://mini04'
1.6. 配置并启动gitlab-ce
1 [root@mini04 ~]# gitlab-ctl reconfigure
2 ………………
1.7. 查看gitlab状态
 1 [root@mini04 ~]# gitlab-ctl status
 2 run: alertmanager: (pid 4075) 27s; run: log: (pid 4180) 25s
 3 run: gitaly: (pid 4004) 28s; run: log: (pid 4016) 28s
 4 run: gitlab-monitor: (pid 4025) 28s; run: log: (pid 4045) 27s
 5 run: gitlab-workhorse: (pid 3983) 28s; run: log: (pid 4049) 27s
 6 run: logrotate: (pid 3529) 90s; run: log: (pid 4051) 27s
 7 run: nginx: (pid 3506) 96s; run: log: (pid 4050) 27s
 8 run: node-exporter: (pid 3710) 78s; run: log: (pid 4017) 28s
 9 run: postgres-exporter: (pid 4096) 26s; run: log: (pid 4196) 25s
10 run: postgresql: (pid 3229) 140s; run: log: (pid 3972) 29s
11 run: prometheus: (pid 4052) 27s; run: log: (pid 4070) 27s
12 run: redis: (pid 3154) 146s; run: log: (pid 4021) 28s
13 run: redis-exporter: (pid 3783) 66s; run: log: (pid 4041) 27s
14 run: sidekiq: (pid 3475) 103s; run: log: (pid 3974) 29s
15 run: unicorn: (pid 3432) 110s; run: log: (pid 3973) 30s
1.8. GitLab常用命令
1 gitlab-ctl start    # 启动所有 gitlab 组件;
2 gitlab-ctl stop        # 停止所有 gitlab 组件;
3 gitlab-ctl restart        # 重启所有 gitlab 组件;
4 gitlab-ctl status        # 查看服务状态;
5 gitlab-ctl reconfigure        # 启动服务;
6 vim /etc/gitlab/gitlab.rb        # 修改默认的配置文件;
7 gitlab-ctl tail        # 查看日志;
8 gitlab-rake gitlab:check SANITIZE=true --trace    # 检查gitlab;
2. GitLab使用
2.1. 首次登陆
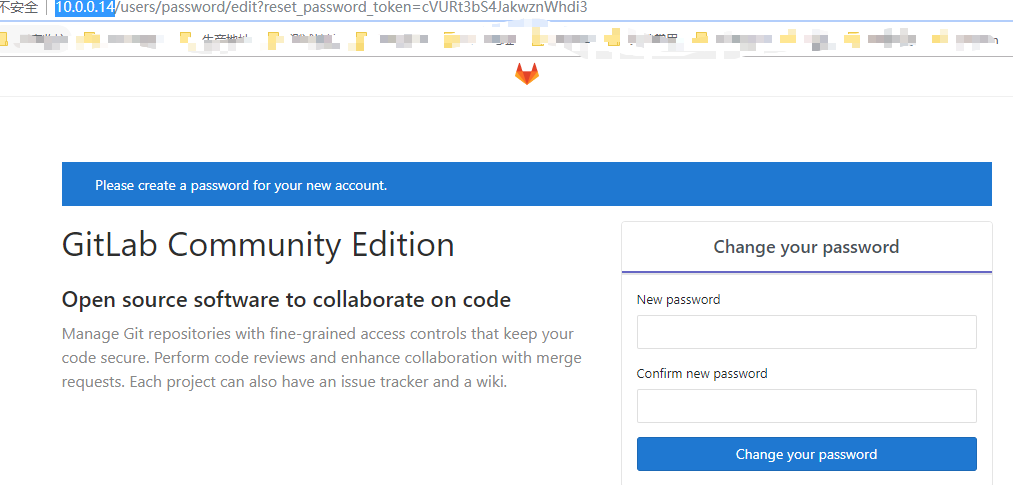
1 http://10.0.0.14

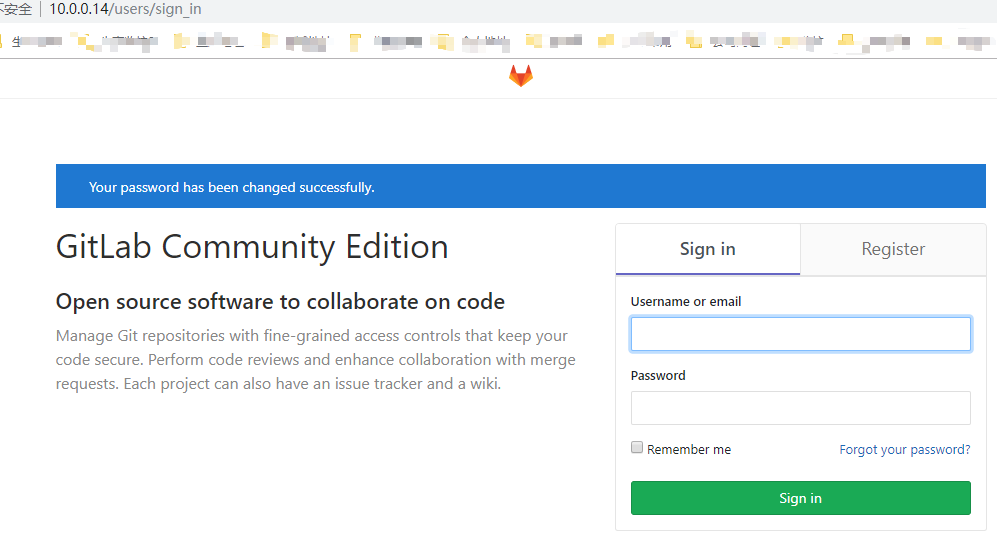
首次登陆会要求修改root用户的密码。

之后对到登陆页面,使用root用户登录即可。
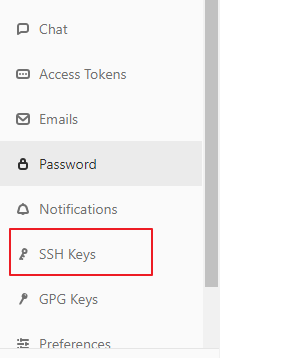
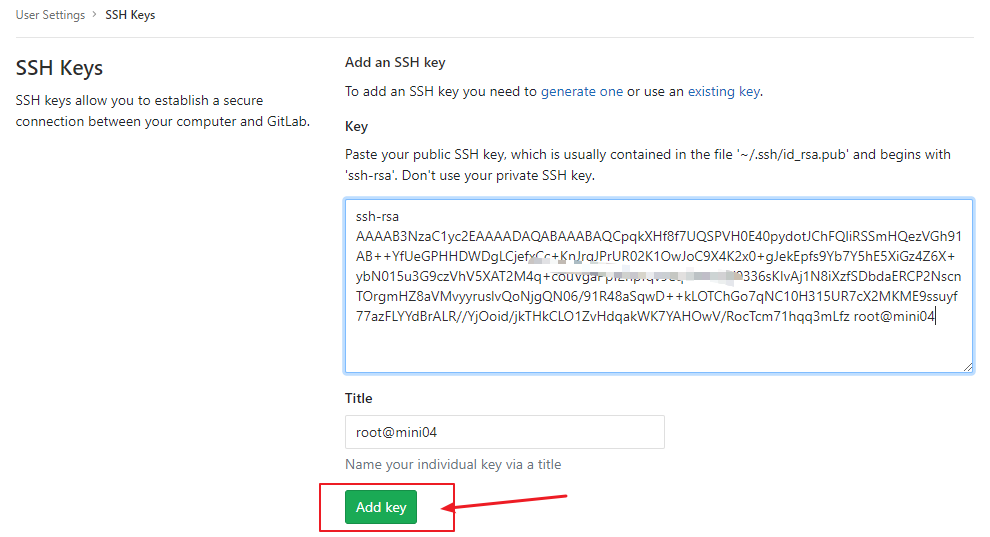
2.2. 添加SSH Key信息
 1 [root@mini04 ~]# ssh-keygen -t rsa
 2 Generating public/private rsa key pair.
 3 Enter file in which to save the key (/root/.ssh/id_rsa):
 4 Created directory '/root/.ssh'.
 5 Enter passphrase (empty for no passphrase):
 6 Enter same passphrase again:
 7 Your identification has been saved in /root/.ssh/id_rsa.
 8 Your public key has been saved in /root/.ssh/id_rsa.pub.
 9 The key fingerprint is:
10 SHA256:ACvHut11cMKDaL1QzsrL3x23OyUl9cd7+kLfFW30cLM root@mini04
11 The key's randomart image is:
12 +---[RSA 2048]----+
13 |    . .          |
14 |   . O o      o.o|
15 |  . B * = .  . *=|
16 |   * o o =  . .EB|
17 |  . o . S .  o .+|
18 |   + o . .  . o.o|
19 |  . + .   . .+ o+|
20 |     . . . o..o o|
21 |      . . . oo o.|
22 +----[SHA256]-----+
23 [root@mini04 ~]# ll -d .ssh/
24 drwx------ 2 root root 38 Sep 17 22:26 .ssh/
25 [root@mini04 ~]# cd .ssh/
26 [root@mini04 .ssh]# ll
27 total 8
28 -rw------- 1 root root 1679 Sep 17 22:26 id_rsa
29 -rw-r--r-- 1 root root  393 Sep 17 22:26 id_rsa.pub
30 [root@mini04 .ssh]# cat id_rsa.pub
31 ssh-rsa AAAAB3NzaC1yc2EAAAADAQABAAABAQCpqkXHf8f7UQSPVH0E40pydotJChFQliRSSmHQezVGh91AB++YfUeGPHHDWDgLCjefxCc+KnJrqJPrUR02K1OwJoC9X4K2x0+gJekEpfs9Yb7Y5hE5XiGz4Z6X+ybN015u3G9czVhV5XAT2M4q+couVgaPpf2npfqv9eqhTuh1W0336sKIvAj1N8iXzfSDbdaERCP2NscnTOrgmHZ8aVMvyyruslvQoNjgQN06/91R48aSqwD++kLOTChGo7qNC10H315UR7cX2MKME9ssuyf77azFLYYdBrALR//YjOoid/jkTHkCLO1ZvHdqakWK7YAHOwV/RocTcm71hqq3mLfz root@mini04


GitLab的页面使用,请自行百度参考。git的命令行使用,可参考前面的几篇博文。