4.2 使用模板
1. 路径与渲染
使用模板,需要仿照静态文件路径设置一样,向web.Application类的构造函数传递一个名为template_path的参数来告诉Tornado从文件系统的一个特定位置提供模板文件,如:
app = tornado.web.Application(
    [(r'/', IndexHandler)],
    static_path=os.path.join(os.path.dirname(__file__), "statics"),
    template_path=os.path.join(os.path.dirname(__file__), "templates"),
)
在这里,我们设置了一个当前应用目录下名为templates的子目录作为template_path的参数。在handler中使用的模板将在此目录中寻找。
现在我们将静态文件目录statics/html中的index.html复制一份到templates目录中,此时文件目录结构为:
. ├── statics │ ├── css │ │ ├── index.css │ │ ├── main.css │ │ └── reset.css │ ├── html │ │ └── index.html │ ├── images │ │ ├── home01.jpg │ │ ├── home02.jpg │ │ ├── home03.jpg │ │ └── landlord01.jpg │ ├── js │ │ ├── index.js │ │ └── jquery.min.js │ └── plugins │ ├── bootstrap │ │ └─... │ └── font-awesome │ └─... ├── templates │├--templateStudyIndex.html
| |--templateControlStudyIndex.html
|
└── static_server.py
在handler中使用render()方法来渲染模板并返回给客户端。
class TemplateStudyIndexHandler(web.RequestHandler):
    '''
    定义请求处理类
    '''
    def get(self, *args, **kwargs):
        '''测试模板用方法
        '''
        '''给模板传递变量'''
        house_info = {
            "price": 398,
            "title": "宽窄巷子+160平大空间+文化保护区双地铁",
            "score": 5,
            "comments": 6,
            "position": "北京市丰台区六里桥地铁"
        }
        self.render('templateStudyIndex.html',**house_info)  #渲染类render('模板名',变量字典)

if __name__ == '__main__':
    options.parse_command_line()
    options.define('port', type=int, default=80, help='服务器端口')
    BASE_DIR = os.path.dirname(__file__)
    static_path = os.path.join(BASE_DIR,'statics')
    print(static_path)
    urls = [
        (r'/',IndexHandler,),
        (r'/templateTest',TemplateStudyIndexHandler,),
    ]
    app = web.Application(urls,
                          static_path=static_path,#给html中css js文件指定的获取路径=html中/static/ 这个url
                          template_path=os.path.join(BASE_DIR,'templates'), #模板的目录配置
                          login_url='/login',
                          debug=True)
    server = httpserver.HTTPServer(app)
    server.listen(options.port)
    ioloop.IOLoop.current().start()
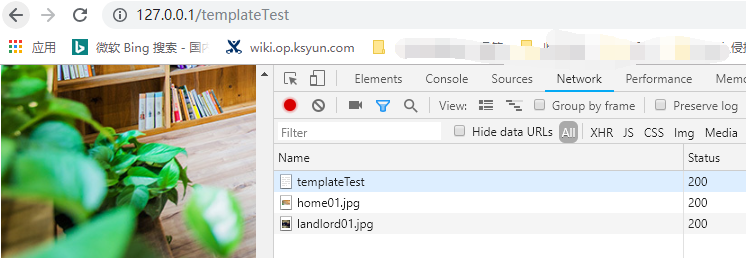
2. 模板语法
2-1 变量与表达式
在tornado的模板中使用{{}}作为变量或表达式的占位符,使用render渲染后占位符{{XXX}}会被替换为相应的结果值。
我们将templateStudyIndex.html中的一条房源信息记录
<li class="house-item">
    <a href=""><img src="/static/images/home01.jpg"></a>
    <div class="house-desc">
        <div class="landlord-pic"><img src="/static/images/landlord01.jpg"></div>
        <div class="house-price">¥<span>398</span>/晚</div>
        <div class="house-intro">
            <span class="house-title">宽窄巷子+160平大空间+文化保护区双地铁</span>
            <em>整套出租 - 5分/6点评 - 北京市丰台区六里桥地铁</em>
        </div>
    </div>
</li>
改为模板:
<li class="house-item">
    <a href=""><img src="/static/images/home01.jpg"></a>
    <div class="house-desc">
        <div class="landlord-pic"><img src="/static/images/landlord01.jpg"></div>
        <div class="house-price">¥<span>{{price}}</span>/晚</div>
        <div class="house-intro">
            <span class="house-title">{{title}}</span>
            <em>整套出租 - {{score}}分/{{comments}}点评 - {{position}}</em>
        </div>
    </div>
</li>
渲染方式如下:
    def get(self, *args, **kwargs):
        '''测试模板用方法
        '''
        '''给模板传递变量'''
        house_info = {
            "price": 398,
            "title": "宽窄巷子+160平大空间+文化保护区双地铁",
            "score": 5,
            "comments": 6,
            "position": "北京市丰台区六里桥地铁"
        }
        self.render('templateStudyIndex.html',**house_info)  #渲染类render('模板名',变量字典)
{{}}不仅可以包含变量,还可以是表达式,如html语法中: {{p1 + p2}} 这种写法
<div class="house-price">¥<span>{{p1 + p2}}</span>/晚</div>
class IndexHandler(RequestHandler):
    def get(self):
        house_info = {
            "p1": 198,
            "p2": 200,
            "titles": ["宽窄巷子", "160平大空间", "文化保护区双地铁"],
            "score": 5,
            "comments": 6,
            "position": "北京市丰台区六里桥地铁"
        }
        self.render("index.html", **house_info)
--------------------------------展示模板渲染访问效果-------------------------------------------------------------
-------------------------------------------------The End-----------------------------------------------------------------------------------
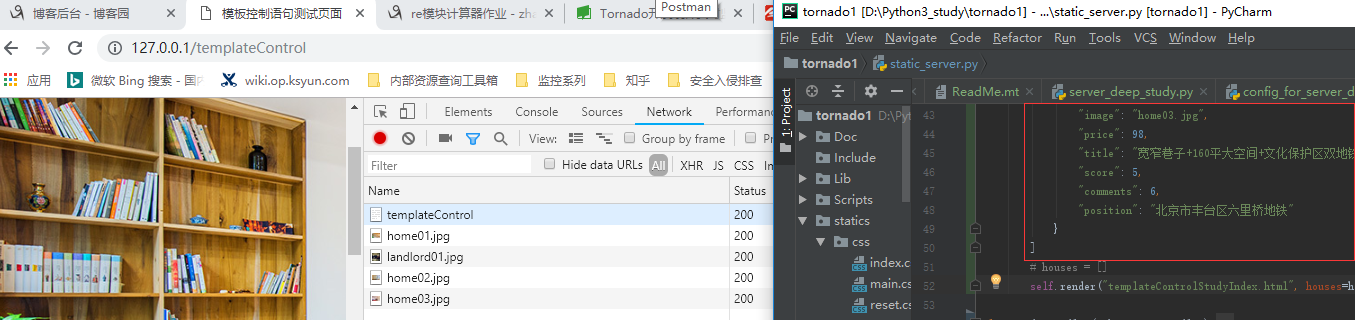
2-2 控制语句
可以在Tornado模板中使用Python条件和循环语句。控制语句以{\%和\%}包围,并以类似下面的形式被使用:
{% if page is None %}
或
{% if len(entries) == 3 %}
控制语句的大部分就像对应的Python语句一样工作,支持if、for、while,注意end:
{% if ... %} ... {% elif ... %} ... {% else ... %} ... {% end %}
{% for ... in ... %} ... {% end %}
{% while ... %} ... {% end %}
示例html
<!DOCTYPE html>
<html lang="en">
<head>
    <meta charset="UTF-8">
    <title>模板控制语句测试页面</title>
</head>
<body>
    <ur class="house-list">
        {% if len(houses) > 0 %}

            {% for house in houses %}
                <li class="house-item">
                    <a href=""><img src="/static/images/{{ house['image'] }}"></a>
                    <div class="house-desc">
                        <div class="landlord-pic"><img src="/static/images/landlord01.jpg"></div>
                        <div class="house-price">¥<span>{{ house["price"] }}</span>/晚</div>
                        <div class="house-intro">
                            <span class="house-title">{{ house["title"] }}</span>
                            <em>整套出租 - {{ house["score"] }}分/{{ house["comments"] }}点评 - {{ house["position"] }}</em>
                        </div>
                    </div>
                </li>

            {% end %}

        {% else %}
            对不起,暂时没有房源!!!
        {% end %}
    </ur>

</body>
</html>
python中渲染语句为:
class TemplateControlStudyIndexHandler(RequestHandler):
    def get(self):
        houses = [
            {
                "image": "home01.jpg",
                "price": 298,
                "title": "宽窄巷子+160平大空间+文化保护区双地铁",
                "score": 5,
                "comments": 6,
                "position": "北京市丰台区六里桥地铁"
            },
            {
                "image": "home02.jpg",
                "price": 198,
                "title": "宽窄巷子+160平大空间+文化保护区双地铁",
                "score": 5,
                "comments": 6,
                "position": "北京市丰台区六里桥地铁"
            },
            {
                "image": "home03.jpg",
                "price": 98,
                "title": "宽窄巷子+160平大空间+文化保护区双地铁",
                "score": 5,
                "comments": 6,
                "position": "北京市丰台区六里桥地铁"
            }
        ]
        houses = [] #此时无房源,注释后有房源
        self.render("templateControlStudyIndex.html", houses=houses)
----------------------------------------------------------------------------------展示访问效果------------------------------------------------------------------------------------------------------------
---------------------------------------------------无房源展示-------------------------------------------------------------------
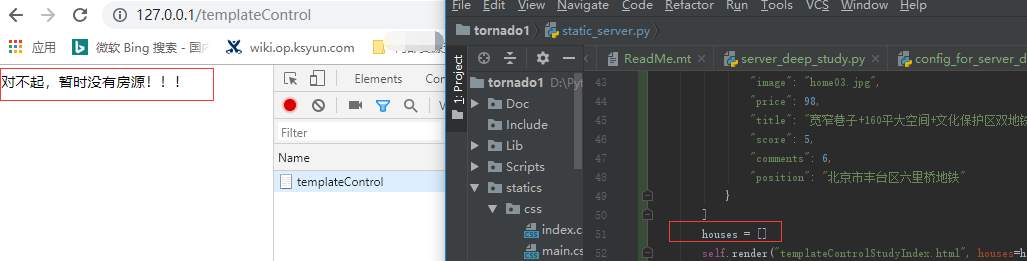
-----------------------------------------------------------------展示end-------------------------------------------------------------------------------------
2-3 函数
static_url()
Tornado模板模块提供了一个叫作static_url的函数来生成静态文件目录下文件的URL。如下面的示例代码:
<link rel="stylesheet" href="{{ static_url("style.css") }}">
这个对static_url的调用生成了URL的值,并渲染输出类似下面的代码:
<link rel="stylesheet" href="/static/style.css?v=fe8ccdaf962ce00b725138ef260cbf0c">

优点:
-
- static_url函数创建了一个基于文件内容的hash值,并将其添加到URL末尾(查询字符串的参数v)。这个hash值确保浏览器总是加载一个文件的最新版而不是之前的缓存版本。无论是在你应用的开发阶段,还是在部署到生产环境使用时,都非常有用,因为你的用户不必再为了看到你的静态内容而清除浏览器缓存了。
- 另一个好处是你可以改变你应用URL的结构,而不需要改变模板中的代码。例如,可以通过设置static_url_prefix来更改Tornado的默认静态路径前缀/static。如果使用static_url而不是硬编码的话,代码不需要改变。
转义--------------------------------------------------------------------------------------------------------------
我们新建一个表单页面transferred.html
<!DOCTYPE html>
<html lang="en">
<head>
    <meta charset="UTF-8">
    <title>Title</title>
</head>
<body>
    <form method="post" href="/transferred">
        <textarea name="text"></textarea>
        <input type="submit" value="提交数据">
    </form>
    {{ text }}
</body>
</html>
对应的handler为:
class TransferredHandler(RequestHandler):
    def get(self, *args, **kwargs):
        '''测试tornado对网页文字的自动转义功能'''
        self.render('transferred.html',text='')

    def post(self, *args, **kwargs):
        '''测试tornado对网页文字的自动转义功能'''
        text = self.get_argument('text','')
        print('获取到参数text:',text)
        self.render('transferred.html',text=text)
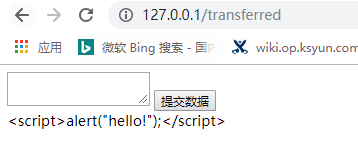
当我们在表单中填入如下内容时:
<script>alert("hello!");</script> :写入的js程序并没有运行,而是显示出来了,如下截图展示
--------------------------截图展示自动转义------------------------------------访问效果-------------------------------------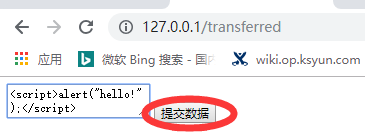

---------------------------------------------------------------------------------------------------------------------------------------------------------------------
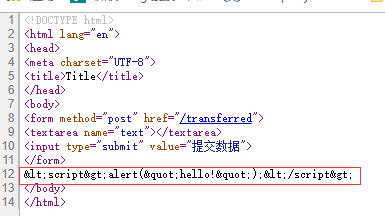
我们查看页面源代码,发现<、>、"等被转换为对应的html字符:<script>alert("hello!");</script>

------------------------------------------------------------------------------------------------------------------------------------------------------------------------------------------------
这是因为tornado中默认开启了模板自动转义功能,防止网站受到恶意攻击。
我们可以通过raw语句来输出不被转义的原始格式,如:
<!DOCTYPE html>

<html lang="en">
<head>
    <meta charset="UTF-8">
    <title>Title</title>
</head>
<body>
    <form method="post" action="/transferred">
        <textarea name="text"></textarea>
        <input type="submit" value="提交数据">
    </form>
    {{ text }}
    {% raw text %}    <!-- 这里设置浏览器执行网页输入的脚本-->

</body>
</html>
注意:在Firefox浏览器中会直接弹出alert窗口,而在Chrome浏览器中,需要set_header("X-XSS-Protection", 0)
    def post(self, *args, **kwargs):
        '''测试tornado对网页文字的自动转义功能'''
        self.set_header("X-XSS-Protection", 0)
        text = self.get_argument('text','')
        print('获取到参数text:',text)
        self.render('transferred.html',text=text)

-------------------------------------------------------------------------------------------------------------------------------------------------------------------------------------------------------------------
关闭自动转义:,
方法一: 在Application构造函数中配置参数: autoescape=None,
app = web.Application(urls,
                          static_path=static_path,#给html中css js文件指定的获取路径=html中/static/ 这个url
                          template_path=os.path.join(BASE_DIR,'templates'),
                          autoescape=None,
                          login_url='/login',
                          debug=True)
方法二:每页模板中修改自动转义行为,添加如下语句: {% autoescape None %} : 被注释的情况下仍然生效


<!DOCTYPE html> <html lang="en"> <head> <meta charset="UTF-8"> <title>测试自动转义</title> </head> <body> <form method="post" action="/transferred"> <textarea name="text"></textarea> <input type="submit" value="提交数据"> </form> {{ text }} {% autoescape None %} <!--{% raw text %} <!– 这里设置浏览器执行网页输入的脚本–>--> </body> </html>
escape():
关闭自动转义后,可以使用escape()函数来对特定变量进行转义,如:{{ escape(text) }}
注意:模板中{{ escape(text) }} 并不会覆盖{% autoescape None %} 两者同时存在时先按照不转义处理,转义后的仍会被显示自定义函数-----------------------------------------------------------------------------------------------------------------------
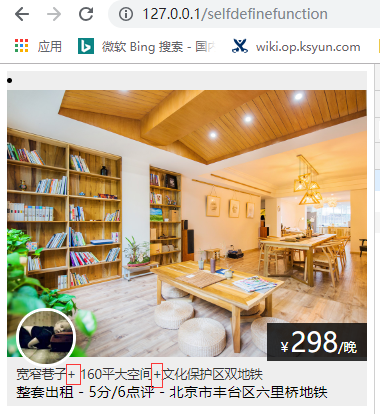
在模板中还可以使用一个自己编写的函数,只需要将函数名作为模板的参数传递即可,就像其他变量一样。
我们修改后端如下:
class SelfDefiningfunction(RequestHandler):
    def get(self):
        houses = [
            {
                "image": "home01.jpg",
                "price": 298,
                "title": ["宽窄巷子"," 160平大空间","文化保护区双地铁"],
                "score": 5,
                "comments": 6,
                "position": "北京市丰台区六里桥地铁"
            }
        ]
        self.render("templateControlStudyIndex.html", houses=houses,title_join=house_title_join)
前端Html文件修改如下
<body>
    <ur class="house-list">
        {% if len(houses) > 0 %}

            {% for house in houses %}
                <li class="house-item">
                    <!--<a href=""><img src="/static/images/{{ house['image'] }}"></a>-->
                    <a href=""><img src="/static/images/{{house['image']}}"></a>
                    <div class="house-desc">
                        <div class="landlord-pic"><img src="{{static_url('images/landlord01.jpg')}}"></div>
                        <div class="house-price">¥<span>{{ house["price"] }}</span>/晚</div>
                        <div class="house-intro">
                            <span class="house-title">{{ title_join(house["title"]) }}</span>
                            <em>整套出租 - {{ house["score"] }}分/{{ house["comments"] }}点评 - {{ house["position"] }}</em>
                        </div>
                    </div>
                </li>

            {% end %}

        {% else %}
            对不起,暂时没有房源!!!
        {% end %}
    </ur>

</body>
=================================================================================================
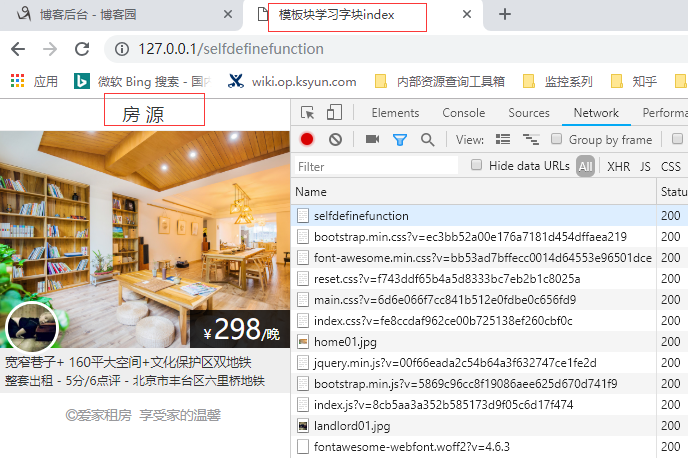
2-4 块
我们可以使用块来复用模板,块语法如下:
{% block block_name %} {% end %}
现在,我们对模板index.html进行抽象,抽离出父模板base.html如下:
<!DOCTYPE html>
<html>
<head>
    <meta charset="utf-8">
    <meta http-equiv="X-UA-Compatible" content="IE=edge">
    <meta name="viewport" content="width=device-width, initial-scale=1, maximum-scale=1, user-scalable=no">
    {% block page_title %}{% end %}
    <link href="{{static_url('plugins/bootstrap/css/bootstrap.min.css')}}" rel="stylesheet">
    <link href="{{static_url('plugins/font-awesome/css/font-awesome.min.css')}}" rel="stylesheet">
    <link href="{{static_url('css/reset.css')}}" rel="stylesheet">
    <link href="{{static_url('css/main.css')}}" rel="stylesheet">
    {% block css_files %}{% end %}
</head>
<body>
    <div class="container">
        <div class="top-bar">
            {% block header %}{% end %}
        </div>
        {% block body %}{% end %}
        <div class="footer">
            {% block footer %}{% end %}
        </div>
    </div>

    <script src="{{static_url('js/jquery.min.js')}}"></script>
    <script src="{{static_url('plugins/bootstrap/js/bootstrap.min.js')}}"></script>
    {% block js_files %}{% end %}
</body>
</html>
而子模板subblock_index.html使用extends来使用父模板base.html,如下:
{% extends "base.html" %} {% block page_title %} <title>爱家-房源</title> {% end %} {% block css_files %} <link href="{{static_url('css/index.css')}}" rel="stylesheet"> {% end %} {% block js_files %} <script src="{{static_url('js/index.js')}}"></script> {% end %} {% block header %} <div class="nav-bar"> <h3 class="page-title">房 源</h3> </div> {% end %} {% block body %} <ul class="house-list"> {% if len(houses) > 0 %} {% for house in houses %} <li class="house-item"> <a href=""><img src="/static/images/home01.jpg"></a> <div class="house-desc"> <div class="landlord-pic"><img src="/static/images/landlord01.jpg"></div> <div class="house-price">¥<span>{{house["price"]}}</span>/晚</div> <div class="house-intro"> <span class="house-title">{{title_join(house["title"])}}</span> <em>整套出租 - {{house["score"]}}分/{{house["comments"]}}点评 - {{house["position"]}}</em> </div> </div> </li> {% end %} {% else %} 对不起,暂时没有房源。 {% end %} </ul> {% end %} {% block footer %} <p><span><i class="fa fa-copyright"></i></span>爱家租房 享受家的温馨</p> {% end %}
#渲染直接使用子页面
self.render("subblock_index.html", houses=houses,title_join=house_title_join)