debug PostgreSQL 9.6.18 using Eclipse IDE on CentOS7
1.概览
这个文档指导如何在Centos7下,使用Eclipse IDE 调试PostgreSQL
- Linux: CentOS7
- Postgres: postgresql-9.6.18.tar.gz
- Eclipse:eclipse-cpp-helios-SR2-linux-gtk-x86_64.tar.gz
2.建立用户
创建用户组和用户
groupadd postgre
## 提供密码和home路径
useradd -g postgre -d /home/postgre -m postgre -p 你的密码
在/home/postgre目录中,放置postgresql-9.6.18.tar.gz和eclipse-cpp-helios-SR2-linux-gtk-x86_64.tar.gz。同时,赋予权限。
chown -R postgre:postgre eclipse-cpp-helios-SR2-linux-gtk-x86_64.tar.gz postgresql-9.6.18.tar.gz
3.编译postgre
3.1 解压postgresql
su - postgre
tar zxvf postgresql-9.6.18.tar.gz
3.2 编译
cd postgresql-9.6.18/
./configure --prefix=$HOME/workspace/pg9 --enable-debug CFLAGS='-O0'
通过make命令,如果你得到了如下信息All of PostgreSQL successfully made. Ready to install.
$ make -j4
其中-j4,代表中启动4个进程任务,并发make,减少时间。
4.启动Eclipse
创建workspace目录
mkdir -p $HOME/workspace/pg9
解压eclipse-cpp-helios-SR2-linux-gtk-x86_64.tar.gz目录。开启eclipse
# ./eclipse
OpenJDK 64-Bit Server VM warning: ignoring option MaxPermSize=256m; support was removed in 8.0
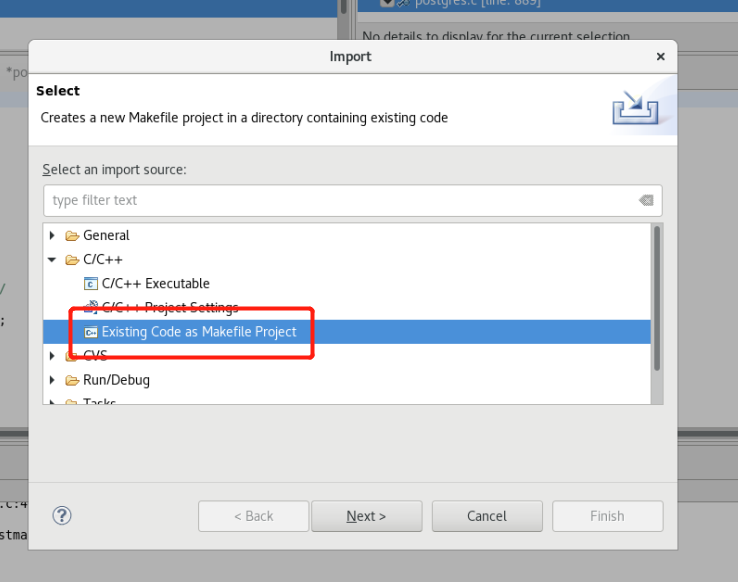
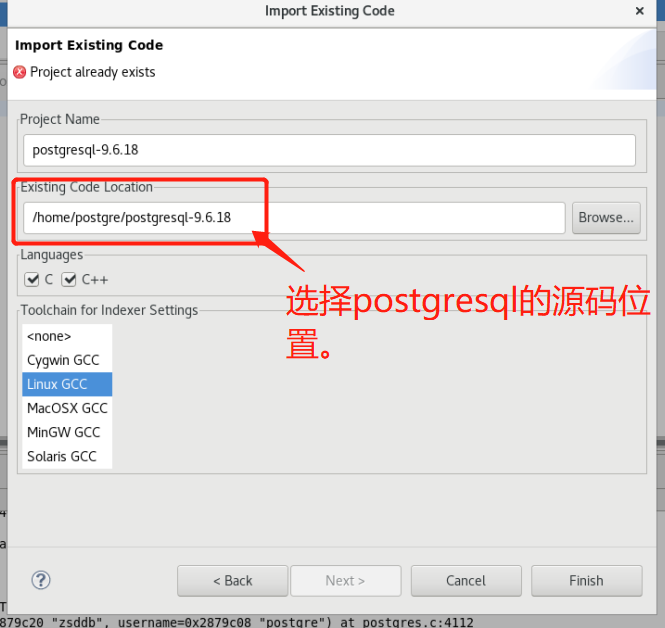
导入工程。选择[Existing Code as Makfile Porject]
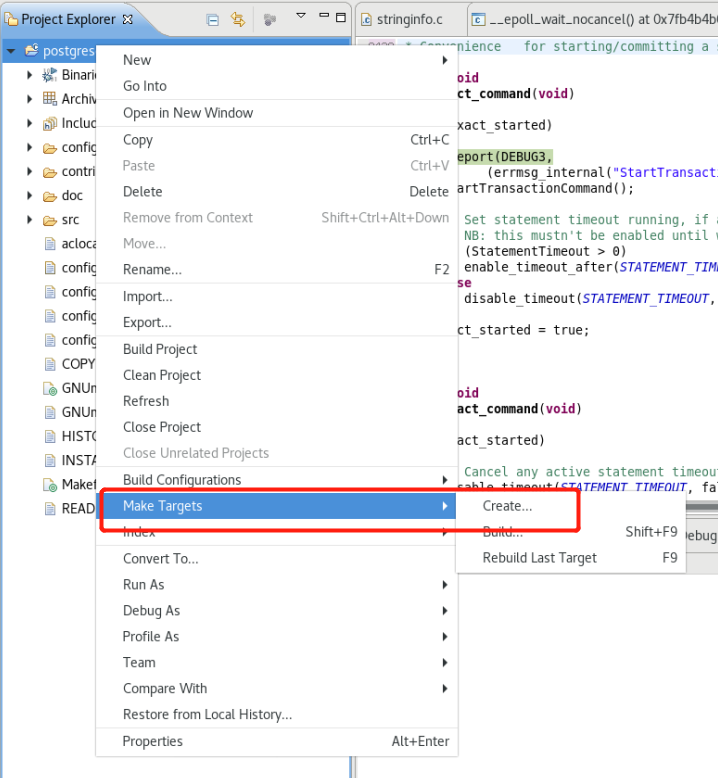
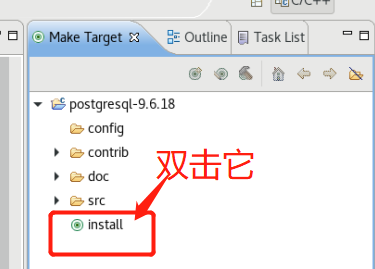
使用eclipse进行make install安装。
看到,有下面的选项卡,双击[install]。
最后在cd /home/postgre/workspace/pg9/目录中,有安装之后的各种文件。
[postgre@localhost ~]$ cd /home/postgre/workspace/pg9/
[postgre@localhost pg9]$ ls -l
总用量 16
drwxr-xr-x 2 root root 4096 6月  21 15:32 bin
drwxr-xr-x 4 root root 4096 6月  21 15:32 include
drwxr-xr-x 4 root root 4096 6月  21 15:32 lib
drwxr-xr-x 3 root root 4096 6月  21 15:32 share
5.设置环境变量&&初始化
设置环境变量:
$ export PATH=$HOME/workspace/pg9/bin:$PATH
$ mkdir -p $HOME/pg9data/data/
$ export PGDATA=$HOME/pg9data/data/
初始化数据库:
$ initdb -D $HOME/pg9data/data/ -U postgre -W
启动服务:
$ pg_ctl -D $HOME/pg9data/data/ -l logfile start
查看服务
[postgre@localhost ~]$ ps -ef |grep postgres
postgre   7140     1  0 15:39 pts/0    00:00:00 /home/postgre/workspace/pg9/bin/postgres -D /home/postgre/pg9data/data
postgre   7142  7140  0 15:39 ?        00:00:00 postgres: checkpointer process
postgre   7143  7140  0 15:39 ?        00:00:00 postgres: writer process
postgre   7144  7140  0 15:39 ?        00:00:00 postgres: wal writer process
postgre   7145  7140  0 15:39 ?        00:00:00 postgres: autovacuum launcher process
postgre   7146  7140  0 15:39 ?        00:00:00 postgres: stats collector process
postgre   7152 15393  0 15:39 pts/0    00:00:00 grep --color=auto postgres
6.连接pg和获取进程
创建zsddb数据库
[postgre@localhost ~]$ createdb zsddb
[postgre@localhost ~]$ psql zsddb
psql (9.6.18)
Type "help" for help.

zsddb=#
查看client客户端进程
[postgre@localhost ~]$ ps -ef |grep postgres
postgre  10617  7140  0 16:58 ?        00:00:00 postgres: postgre zsddb [local] idle
从上面可以看到,psql一个客户端的进程连接了上来,pid为10617。我们可以通过这个进程j进行debug
7.eclipse调试pg
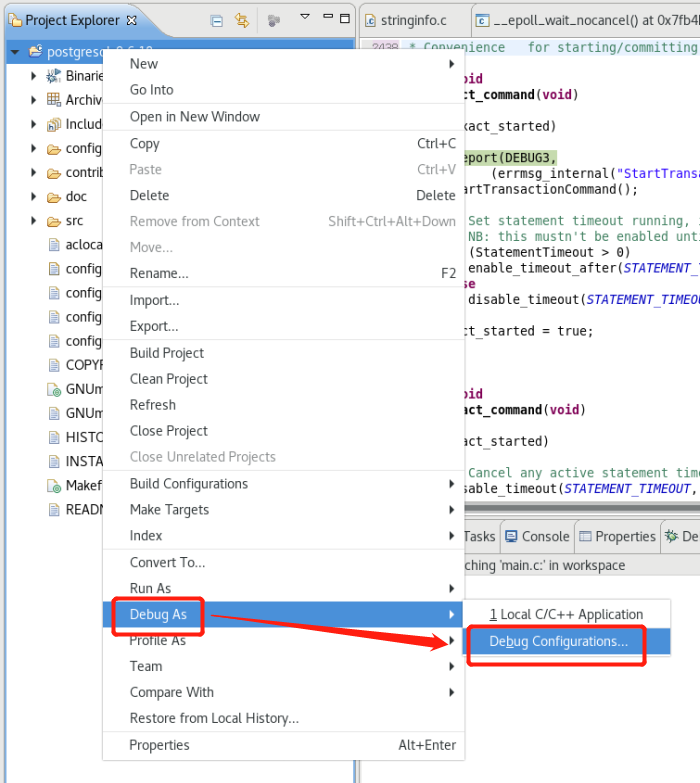
右键postgresql-9.6.18,选择Debug As,然后选择Debug Configuration
然后在选择C/C++ Attach Application,在选择我们编译安装好的/home/postgre/workspace/pg9/bin/postgres。
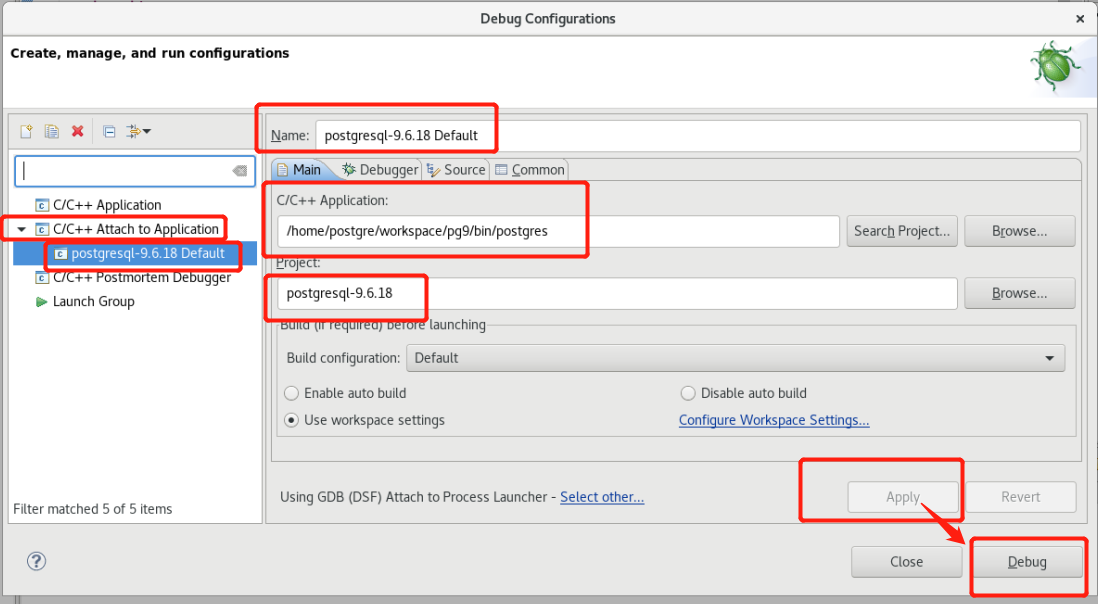
然后选择Apply,再选择Debug。
后面会弹出一个选择进程的对话框.通过输入postgres,选择10617就可以开始debug了。

8.debug数据库pg的一个简单的select语句
postgres=# CREATE TABLE test (id serial PRIMARY KEY, name VARCHAR(20));
CREATE TABLE
postgres=# INSERT INTO test VALUES(1, 'test1');
INSERT 0 1
postgres=# INSERT INTO test VALUES(2, 'test2');
INSERT 0 1
postgres=# SELECT id, name FROM test;
 id | name
----+-------
  1 | test1
  2 | test2
(2 rows)
我们先插入一些语句。
在上述的情况下,我们的如果没有打Breakpoint的话,我们可以直接顺利执行如上的语句。
现在呢?我们开始做一个断点,如下图:
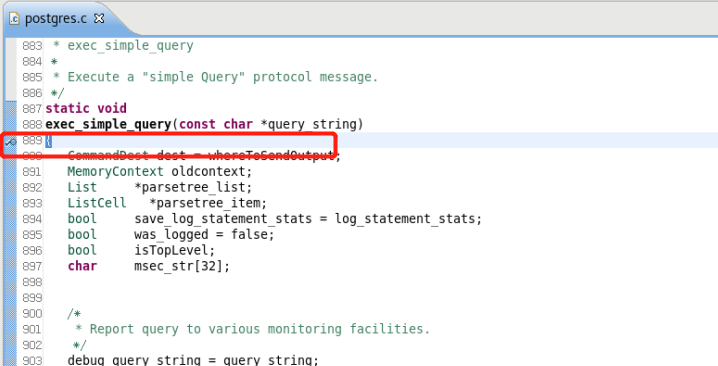
然后,我们再次进行输入如下语句:
zsddb=# SELECT id, name FROM test;
....现在是hang住的情况,为什么呢,因为我们的代码设置了断点。现在可以通过eclipse进行分析
我们通过使用bt命令,可以看到后台传输了什么数据,如下我们可以看到query_string指向的是 SELECT id, name FROM test;语句。
dbname=0x2879c20 "zsddb", username=0x2879c08 "postgre"可以看到dbname是zsddb,用户是postgre.
可以也知道内存位置是在0x2879c20.

可以使用F5进行一步一步看怎么执行的,也可以通过Ctrl+鼠标左键进入函数里面。看里面干什么。
到此,我们可以看到这种方法,也同样适用于debug MySQL数据库和Redis数据库等。
文献参考:how-to-build-and-debug-postgresql-12-using-latest-eclipse-ide-on-ubuntu-18-04