Ocelot
Ocelot是用 .NET Core 实现的一个开源API网关。包含身份验证、路由、请求聚合等功能。能够轻松的集成IdentityServer
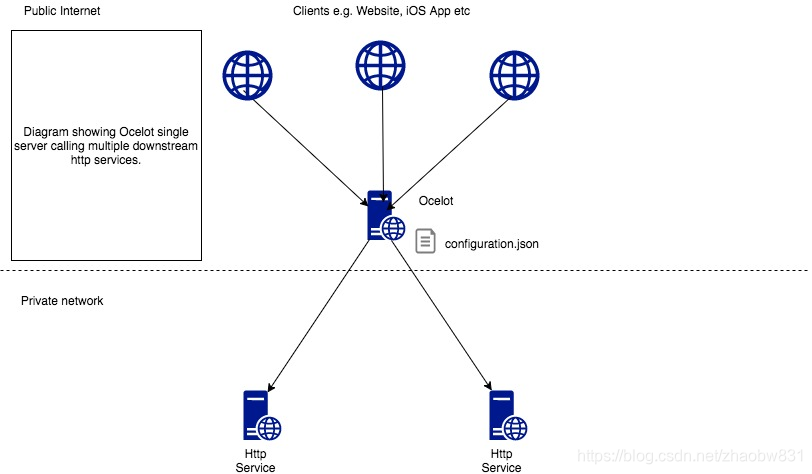
Ocelot的五种部署方式
-
基本使用
-
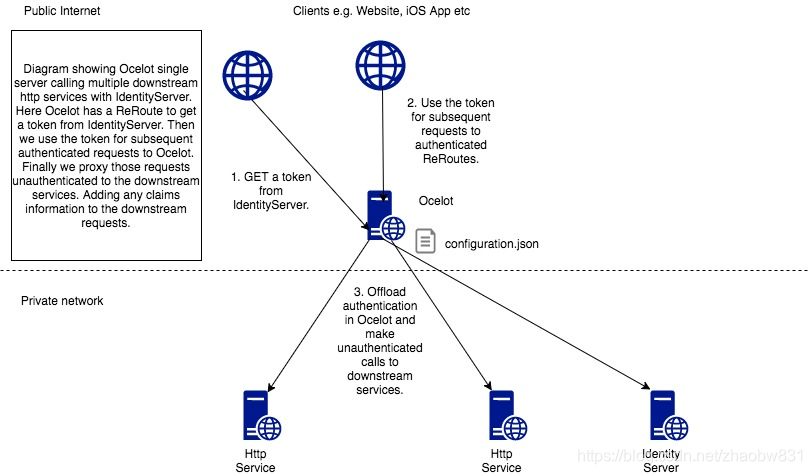
集成IdentityServer
-
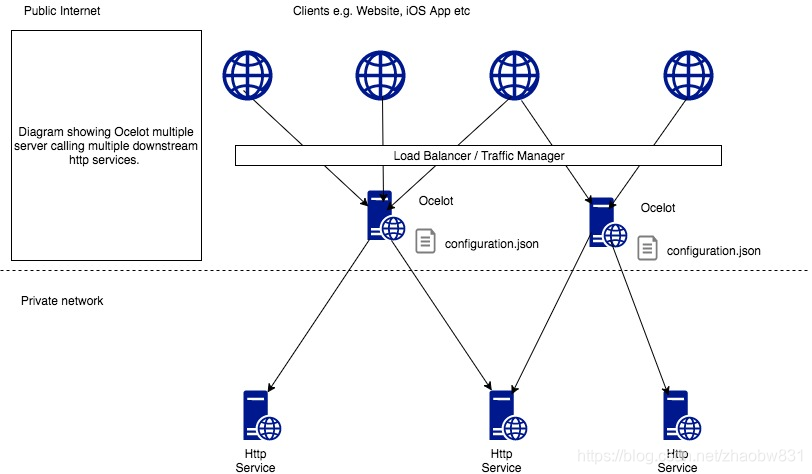
多实例
-
集成Consul

-
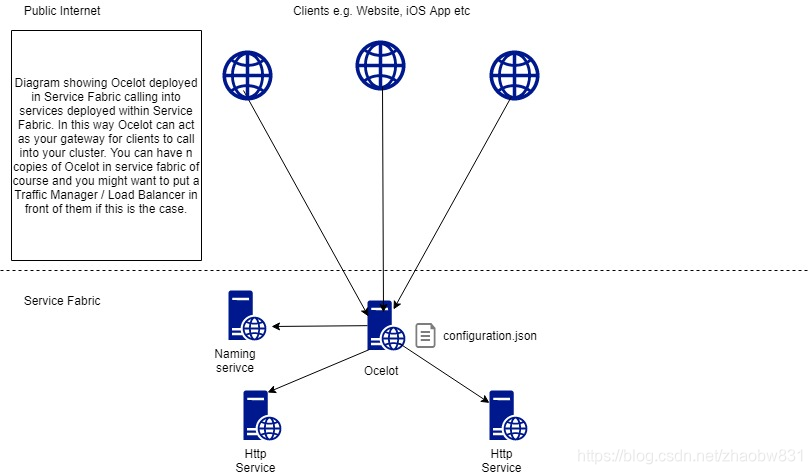
集成 Service Fabric
开始使用
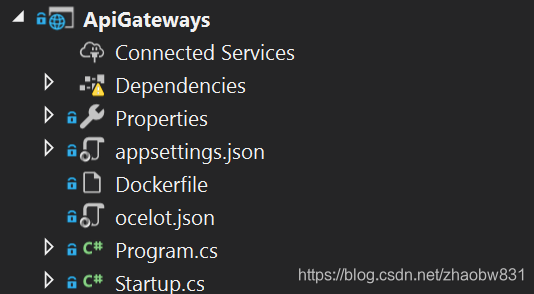
新建网关项目
新建一个Web项目ApiGateways,添加nuget包引用
Install-Package Ocelot
添加ocelot配置文件
- ocelot.json
{
    "ReRoutes": [
        {
        "DownstreamPathTemplate": "/todos/{id}",
        "DownstreamScheme": "https",
        "DownstreamHostAndPorts": [
            {
                "Host": "jsonplaceholder.typicode.com",
                "Port": 443
            }
        ],
        "UpstreamPathTemplate": "/todos/{id}",
        "UpstreamHttpMethod": [ "Get" ]
        }
    ],
    "GlobalConfiguration": {
        "BaseUrl": "https://localhost:5000"
    }
}
此配置中,ReRoutes节点下的Downstream相关节点表示网关下游服务相关配置,以上,我们指定了任意请求都以https请求转发,其中DownstreamHostAndPorts表示下游服务地址和端口。Upstream表示上游请求配置
- 配置服务引入oeclot.json
public static IHostBuilder CreateHostBuilder(string[] args) =>
    Host.CreateDefaultBuilder(args)
        .ConfigureAppConfiguration((hostingContext, config) =>
        {
            config.SetBasePath(hostingContext.HostingEnvironment.ContentRootPath)
            .AddJsonFile("ocelot.json")
            .AddEnvironmentVariables();
        })
        .ConfigureWebHostDefaults(webBuilder =>
        {
            webBuilder.UseStartup<Startup>();
        });
此配置中,我们的网关服务运行在http://localhost,其中AuthenticationOptions是认证服务相关配置,另外有一个下游服务运行在http://localhost:5201。
将Ocelot服务添加到容器服务
public void ConfigureServices(IServiceCollection services)
{
    services.AddOcelot();
}
将Ocelot添加请求管道
public void Configure(IApplicationBuilder app, IWebHostEnvironment env)
{
	app.UseOcelot();
}
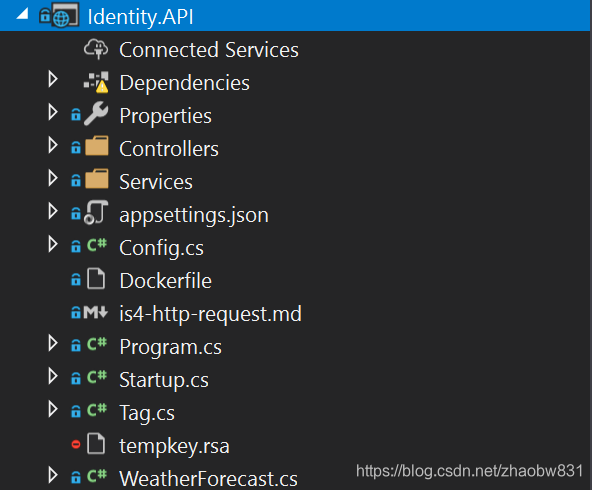
创建身份认证服务
新建一个Identity.API项目
添加nuget
Install-Package IdentityServer4 -Version 3.1.2
添加IdentityServer4 配置
- IdentityServer4 配置
为便于展示,不做持久化,写在内存中
public static class Config
{
    // Defining an API Resource
    public static IEnumerable<ApiResource> Apis => new List<ApiResource>
    {
        new ApiResource("gateway_api","ApiGateways")
    };

    // Defining Client
    public static IEnumerable<Client> Clients => new List<Client>
    {
        new Client
        {
            ClientId="app_test",

            // no interactive user, use the clientid/secret for authentication
            AllowedGrantTypes=GrantTypes.ClientCredentials,

            // secret for authentication
            ClientSecrets={
                new Secret("123456".Sha256())
            },

            // scopes that client has access to
            AllowedScopes=new List<string>{
                "gateway_api",
            }
        }
    };

    // Defineing Identity Resource
    public static IEnumerable<IdentityResource> IdentityResources => new List<IdentityResource>
    {
        new IdentityResources.OpenId(),
        new IdentityResources.Profile(),
    };
}
- 添加IdentityServer4到容器
public void ConfigureDevelopmentServices(IServiceCollection services)
{
    var builder = services.AddIdentityServer()
        .AddInMemoryApiResources(Config.Apis)
        .AddInMemoryClients(Config.Clients)
        .AddInMemoryIdentityResources(Config.IdentityResources);
    builder.AddDeveloperSigningCredential();
    services.AddControllers();
}
- 添加IdentityServer4到请求管道
public void Configure(IApplicationBuilder app, IWebHostEnvironment env)
{
    app.UseHttpsRedirection();
    app.UseRouting();
    app.UseIdentityServer();
    app.UseAuthorization();
    app.UseEndpoints(endpoints =>
    {
        endpoints.MapControllers();
    });
}
创建一个ServiceA
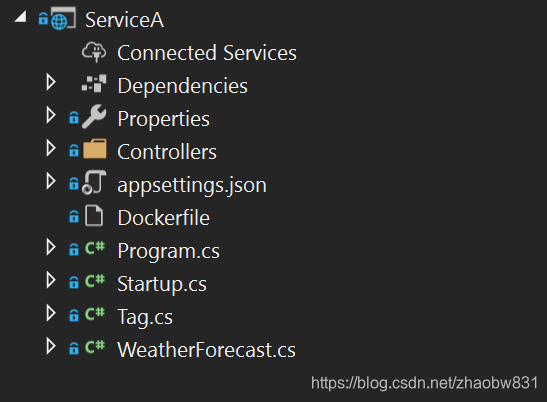
我们将在ServiceA中提供一个简单服务:为一个用户打一个标签
    [Route("[controller]")]
    [ApiController]
    public class UserController : ControllerBase
    {
        [HttpPost]
        [Route("tag/create")]
        public IActionResult CreateTag([FromForm]int userId, [FromForm]string value)
        {
            // 假设数据库记录添加成功,直接返回对象
            Tag tagEntity = new Tag();
            tagEntity.Id = 1;
            tagEntity.UserId = userId;
            tagEntity.Value = value;
            return Ok(tagEntity);
        }
    }
    public class Tag
    {
        public int Id { get; set; }
        public int UserId { get; set; }
        public string Value { get; set; }
    }
终章
支持我们三个项目已经建立完成,但要通过网关经身份认证服务请求到创建标签的服务,我们还需要对网关服务做一些修改。
首先,在ocelot.json新增AuthenticationOptions配置IdentityServer4身份认证服务中对应的资源
{
  "ReRoutes": [
    {
      "DownstreamPathTemplate": "/{url}",
      "DownstreamScheme": "http",
      "DownstreamHostAndPorts": [
        {
          "Host": "localhost",
          "Port": 5201
        }
      ],
      "UpstreamPathTemplate": "/service-a/{url}",
      "UpstreamHttpMethod": [ "Get", "Post" ],
      "AuthenticationOptions": {
        "AuthenticationProviderKey": "SampleKey",
        "AllowedScopes": [ "gateway_api" ]
      }
    }
  ],
  "GlobalConfiguration": {
    "BaseUrl": "http://localhost"
  }
}
其中http://localhost:5201是我们ServiceA运行的地址
然后我们需要注入认证服务到容器
Install-Package IdentityServer4.AccessTokenValidation -Version 3.0.1
public void ConfigureServices(IServiceCollection services)
{
    var authenticationProviderKey = "SampleKey";
    Action<IdentityServerAuthenticationOptions> options = o =>
    {
        o.Authority = "http://localhost:5200";
        o.ApiName = "gateway_api";
        o.SupportedTokens = SupportedTokens.Both;
        o.ApiSecret = "123456";
        o.RequireHttpsMetadata = false;
    };

    services.AddAuthentication()
        .AddIdentityServerAuthentication(authenticationProviderKey, options);
    services.AddOcelot();
}
其中http://localhost:5200是我们认证服务运行的地址
-
通过网关直接调用
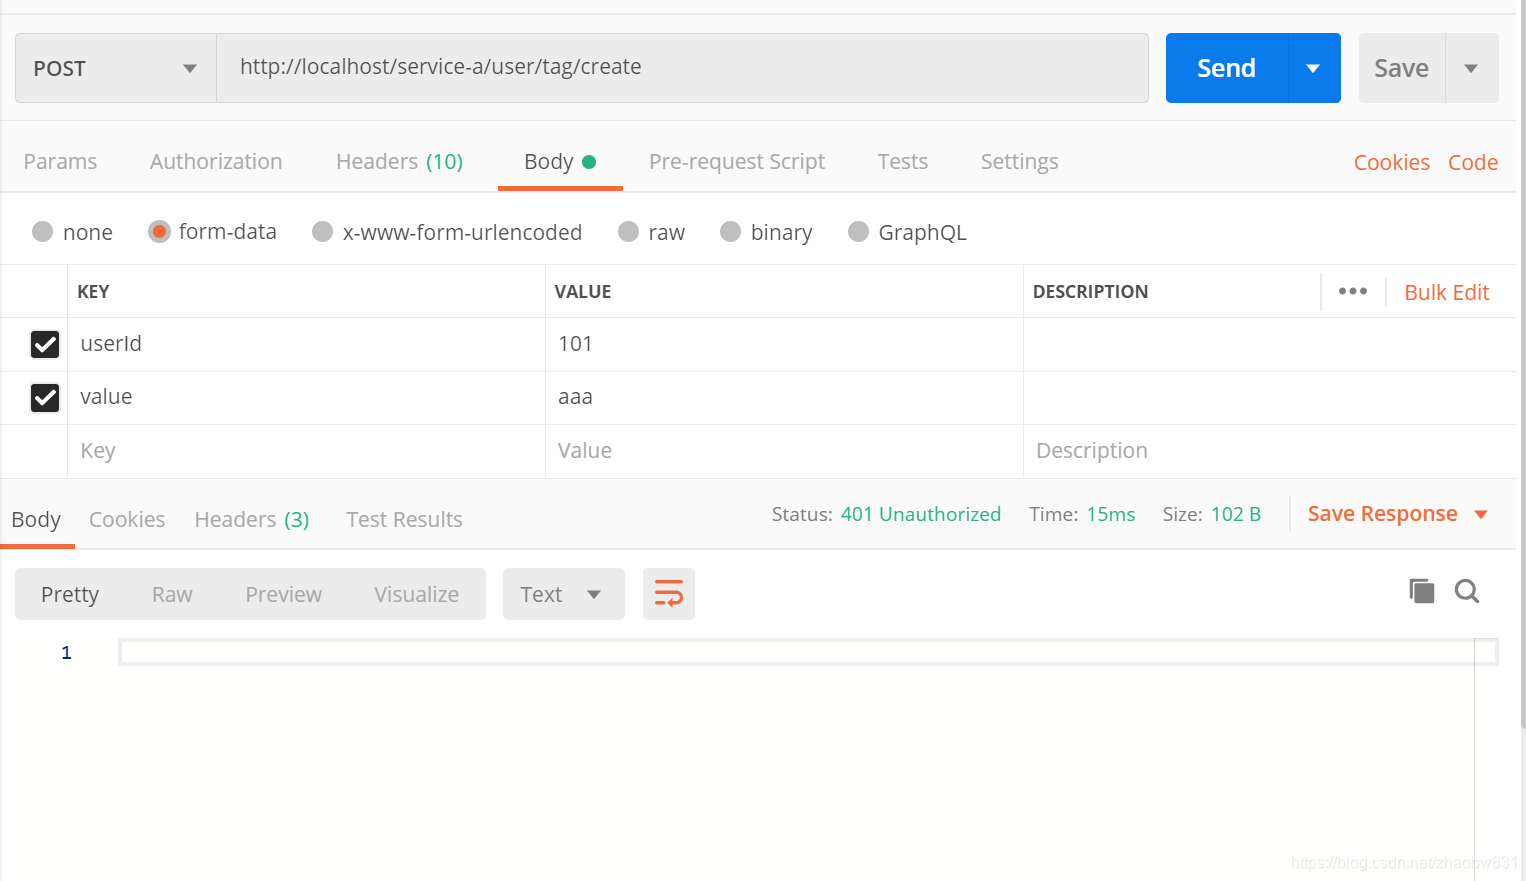
我们发现返回401未授权,这是正常的,因为我们为网关服务添加了认证服务。 -
通过token访问
我们首先要去拿token,我们现在暂时先通过postman直接获取token

通过token访问
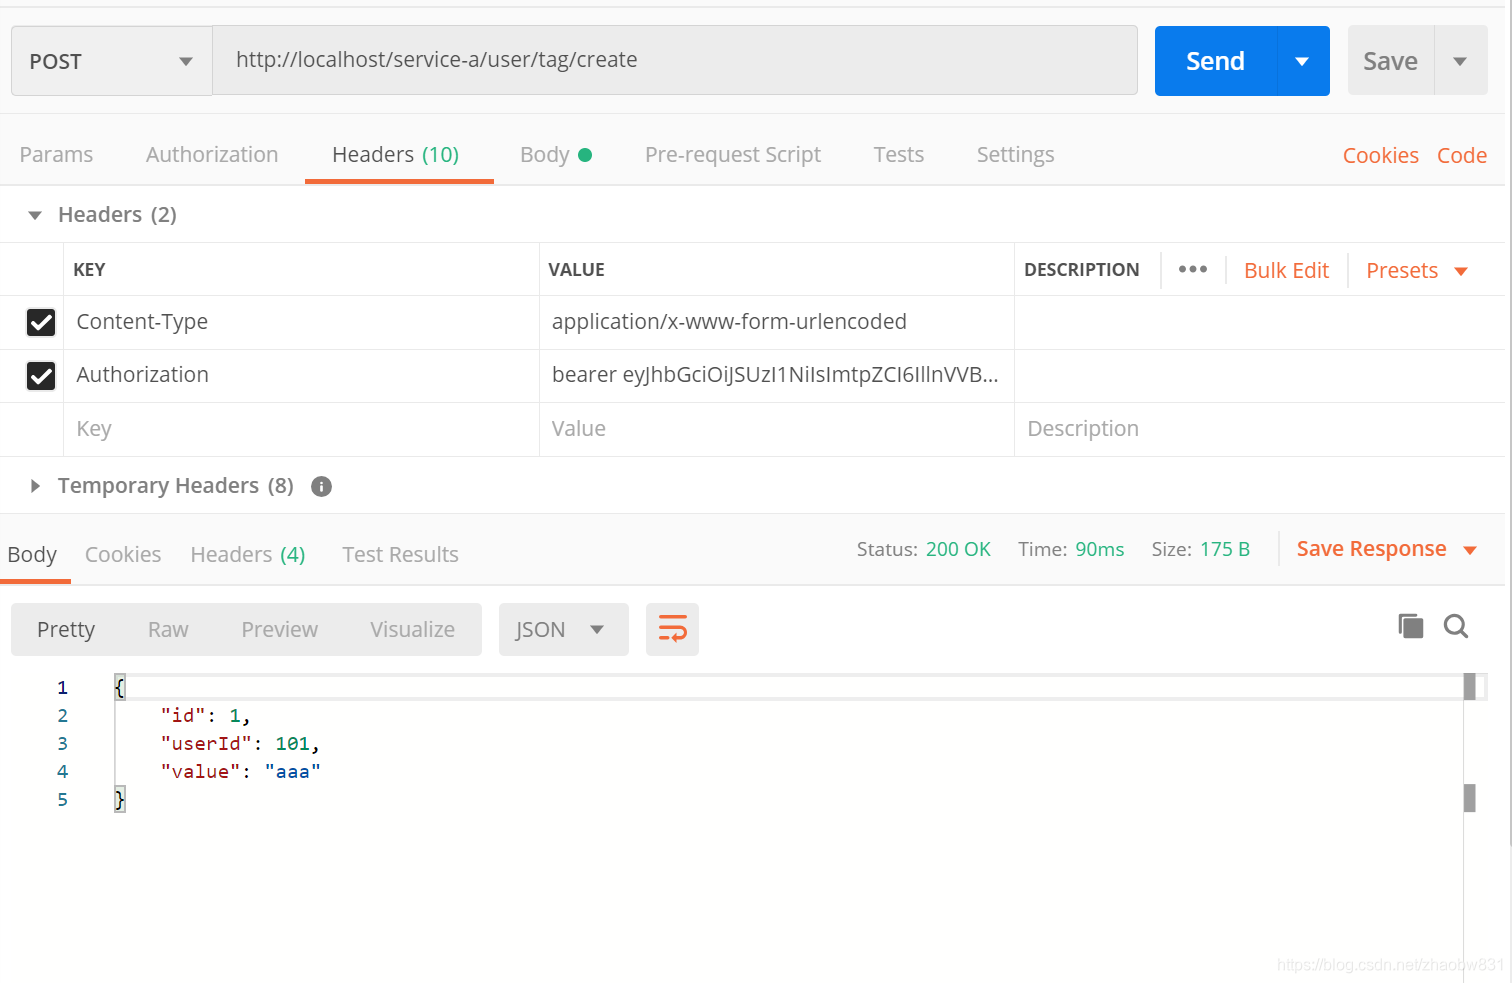
我们可以看到已经成功请求到了创建用户标签接口