本文主要介绍如何在阿里云容器服务Kubernetes上快速安装部署Jenkins X Platform并结合demo实践演示GitOps的操作流程。
注意:
本文中使用的jx工具、cloud-environments等做过改造用以适配阿里云Kubernetes容器服务,并未在自建Kubernetes集群中做过验证。
先决条件:
首先,需要在 阿里云容器服务控制台 创建一个Kubernetes集群,本次实践使用的环境信息如下:
master1 192.168.0.119
master2 192.168.0.120
master3 192.168.0.121
worker1 192.168.0.122
jx-node 192.168.0.123
一、 部署Jenkins X Platform并创建Staging Production Env
1. kubectl 、helm、git和jx的安装以及初始化
$ scp 192.168.0.119:/usr/bin/kubectl /usr/bin/kubectl
$ scp 192.168.0.119:/usr/local/bin/helm /usr/local/bin/helm
$ mkdir -p $HOME/.kube
将容器服务控制台上显示的kubeconfig文件内容复制到计算机 $HOME/.kube/config
初始化Helm Client:
$ helm init --client-only --stable-repo-url https://aliacs-app-catalog.oss-cn-hangzhou.aliyuncs.com/charts-incubator/
$ helm repo update
安装git
$ yum install git -y安装jx
$ wget http://acs-jenkins-x.oss-cn-beijing.aliyuncs.com/v1.3.699/jx && mv jx /usr/local/bin/ && chmod +x /usr/local/bin/jx验证jx:(注意不要选择升级,jx做了定制化修改,目前版本1.3.699)
$ jx version
Error loading team settings. the server could not find the requested resource (get environments.jenkins.io)
Error loading team settings. the server could not find the requested resource (get environments.jenkins.io)
Failed to get git version: failed to run 'git version' command in directory '', output: '': exec: "git": executable file not found in $PATH
NAME               VERSION
jx                 1.3.699
Kubernetes cluster v1.11.5
kubectl            v1.11.5
helm client        v2.11.0+g2e55dbe
helm server        v2.11.0+g2e55dbe
Operating System   "CentOS Linux release 7.4.1708 (Core) "

A new jx version is available: 1.3.736
? Would you like to upgrade to the new jx version? No
2. 安装jenkins-x-platform
$ mkdir -p ~/.jx
$ cd ~/.jx
$ jx install --provider=kubernetes
             --domain aliyunk8s-bj.com
             --ingress-deployment=nginx-ingress-controller
             --ingress-service=nginx-ingress-lb
             --cloud-environment-repo=https://github.com/AliyunContainerService/cloud-environments.git
             --no-tiller=true
             --no-default-environments=true
交互及日志输出如下:
Namespace jx created
 Using helmBinary helm with feature flag: none
Context "kubernetes-admin-ccf3ebc497d9e4083aab8c89bb1b217bc" modified.
Storing the kubernetes provider kubernetes in the TeamSettings
Enabling helm template mode in the TeamSettings
? Please enter the name you wish to use with git:  jenkins-x-bot
? Please enter the email address you wish to use with git:  haoshuwei24@gmail.com
Git configured for user: jenkins-x-bot and email haoshuwei24@gmail.com
Trying to create ClusterRoleBinding kubernetes-admin-cluster-admin-binding for role: cluster-admin for user kubernetes-admin
 clusterrolebindings.rbac.authorization.k8s.io "kubernetes-admin-cluster-admin-binding" not found
Created ClusterRoleBinding kubernetes-admin-cluster-admin-binding
Using helm2
Skipping tiller
helm installed and configured
existing ingress controller found, no need to install a new one
Waiting for external loadbalancer to be created and update the nginx-ingress-controller service in kube-system namespace
External loadbalancer created
Waiting to find the external host name of the ingress controller Service in namespace kube-system with name nginx-ingress-lb
If you are installing Jenkins X on premise you may want to use the '--on-premise' flag or specify the '--external-ip' flags. See: https://jenkins-x.io/getting-started/install-on-cluster/#installing-jenkins-x-on-premise
You can now configure your wildcard DNS aliyunk8s-bj.com to point to 39.97.21.40
nginx ingress controller installed and configured
Lets set up a Git user name and API token to be able to perform CI/CD

Creating a local Git user for GitHub server
? GitHub user name: jenkins-x-bot
To be able to create a repository on GitHub we need an API Token
Please click this URL https://github.com/settings/tokens/new?scopes=repo,read:user,read:org,user:email,write:repo_hook,delete_repo

Then COPY the token and enter in into the form below:

? API Token: ****************************************
Select the CI/CD pipelines Git server and user
? Do you wish to use GitHub as the pipelines Git server: Yes
? Do you wish to use jenkins-x-bot as the pipelines Git user for GitHub server: Yes
Setting the pipelines Git server https://github.com and user name jenkins-x-bot.
Saving the Git authentication configurationCurrent configuration dir: /root/.jx
options.Flags.CloudEnvRepository: https://github.com/AliyunContainerService/cloud-environments.git
options.Flags.LocalCloudEnvironment: false
Cloning the Jenkins X cloud environments repo to /root/.jx/cloud-environments
Enumerating objects: 1317, done.
Counting objects: 100% (1317/1317), done.
Compressing objects: 100% (618/618), done.
Total 1317 (delta 673), reused 1317 (delta 673), pack-reused 0
No default password set, generating a random one
Generated helm values /root/.jx/extraValues.yaml
Creating Secret jx-install-config in namespace jx
Installing Jenkins X platform helm chart from: /root/.jx/cloud-environments/env-kubernetes
? Select Jenkins installation type: Static Master Jenkins
? Pick workload build pack:  Kubernetes Workloads: Automated CI+CD with GitOps Promotion
Setting the team build pack to kubernetes-workloads repo: https://github.com/AliyunContainerService/jenkins-x-kubernetes.git ref: master
Installing jx into namespace jx
Adding values file /root/.jx/cloud-environments/env-kubernetes/myvalues.yaml
Adding values file /root/.jx/adminSecrets.yaml
Adding values file /root/.jx/extraValues.yaml
Adding values file /root/.jx/cloud-environments/env-kubernetes/secrets.yaml
Fetched chart jenkins-x/jenkins-x-platform to dir /tmp/helm-template-workdir-860490114/jenkins-x/chartFiles/jenkins-x-platform
Generating Chart Template 'template --name jenkins-x --namespace jx /tmp/helm-template-workdir-860490114/jenkins-x/chartFiles/jenkins-x-platform --output-dir /tmp/helm-template-workdir-860490114/jenkins-x/output --debug --values /root/.jx/cloud-environments/env-kubernetes/myvalues.yaml --values /root/.jx/adminSecrets.yaml --values /root/.jx/extraValues.yaml --values /root/.jx/cloud-environments/env-kubernetes/secrets.yaml'
Applying generated chart jenkins-x/jenkins-x-platform YAML via kubectl in dir: /tmp/helm-template-workdir-860490114/jenkins-x/output
deployment.extensions/jenkins-x-chartmuseum created
persistentvolumeclaim/jenkins-x-chartmuseum created
secret/jenkins-x-chartmuseum created
service/jenkins-x-chartmuseum created
role.rbac.authorization.k8s.io/cleanup created
rolebinding.rbac.authorization.k8s.io/cleanup created
serviceaccount/cleanup created
clusterrole.rbac.authorization.k8s.io/controllercommitstatus-jx created
clusterrolebinding.rbac.authorization.k8s.io/controllercommitstatus-jx created
deployment.apps/jenkins-x-controllercommitstatus created
role.rbac.authorization.k8s.io/controllercommitstatus created
rolebinding.rbac.authorization.k8s.io/controllercommitstatus created
serviceaccount/jenkins-x-controllercommitstatus created
clusterrole.rbac.authorization.k8s.io/controllerrole-jx created
clusterrolebinding.rbac.authorization.k8s.io/controllerrole-jx created
deployment.apps/jenkins-x-controllerrole created
role.rbac.authorization.k8s.io/controllerrole created
rolebinding.rbac.authorization.k8s.io/controllerrole created
serviceaccount/jenkins-x-controllerrole created
clusterrole.rbac.authorization.k8s.io/controllerteam-jx created
clusterrolebinding.rbac.authorization.k8s.io/controllerteam-jx created
deployment.apps/jenkins-x-controllerteam created
role.rbac.authorization.k8s.io/controllerteam created
rolebinding.rbac.authorization.k8s.io/controllerteam created
serviceaccount/jenkins-x-controllerteam created
clusterrole.rbac.authorization.k8s.io/controllerworkflow-jx created
clusterrolebinding.rbac.authorization.k8s.io/controllerworkflow-jx created
deployment.apps/jenkins-x-controllerworkflow created
role.rbac.authorization.k8s.io/controllerworkflow created
rolebinding.rbac.authorization.k8s.io/controllerworkflow created
serviceaccount/jenkins-x-controllerworkflow created
configmap/exposecontroller created
role.rbac.authorization.k8s.io/expose created
rolebinding.rbac.authorization.k8s.io/expose created
serviceaccount/expose created
clusterrole.rbac.authorization.k8s.io/gcactivities-jx created
clusterrolebinding.rbac.authorization.k8s.io/gcactivities-jx created
cronjob.batch/jenkins-x-gcactivities created
role.rbac.authorization.k8s.io/gcactivities created
rolebinding.rbac.authorization.k8s.io/gcactivities created
serviceaccount/jenkins-x-gcactivities created
cronjob.batch/jenkins-x-gcpods created
role.rbac.authorization.k8s.io/gcpods created
rolebinding.rbac.authorization.k8s.io/gcpods created
serviceaccount/jenkins-x-gcpods created
clusterrole.rbac.authorization.k8s.io/gcpreviews-jx created
clusterrolebinding.rbac.authorization.k8s.io/gcpreviews-jx created
cronjob.batch/jenkins-x-gcpreviews created
role.rbac.authorization.k8s.io/gcpreviews created
rolebinding.rbac.authorization.k8s.io/gcpreviews created
serviceaccount/jenkins-x-gcpreviews created
deployment.extensions/jenkins-x-heapster created
service/heapster created
configmap/jenkins created
persistentvolumeclaim/jenkins created
service/jenkins-agent created
deployment.extensions/jenkins created
service/jenkins created
configmap/jenkins-x-git-kinds created
clusterrolebinding.rbac.authorization.k8s.io/jenkins-jx-role-binding created
secret/jenkins created
serviceaccount/jenkins created
configmap/jenkins-tests created
configmap/nexus created
deployment.extensions/jenkins-x-nexus created
persistentvolumeclaim/jenkins-x-nexus created
secret/nexus created
service/nexus created
role.rbac.authorization.k8s.io/committer created
clusterrolebinding.rbac.authorization.k8s.io/jenkins-x-team-controller created
configmap/jenkins-x-team-controller created
secret/jenkins-docker-cfg created
configmap/jenkins-x-devpod-config created
configmap/jenkins-x-docker-registry created
configmap/jenkins-x-extensions created
configmap/jenkins-x-pod-templates created
secret/jx-basic-auth created
role.rbac.authorization.k8s.io/jx-view created
secret/jenkins-maven-settings created
secret/jenkins-npm-token created
role.rbac.authorization.k8s.io/owner created
secret/jenkins-release-gpg created
secret/jenkins-ssh-config created
role.rbac.authorization.k8s.io/viewer created
Applying Helm hook post-upgrade YAML via kubectl in file: /tmp/helm-template-workdir-860490114/jenkins-x/helmHooks/jenkins-x-platform/charts/expose/templates/job.yaml
job.batch/expose created
Waiting for helm post-upgrade hook Job expose to complete before removing it
如果是首次部署jenkins x platfrom的话,此处需等待几分钟进行镜像的拉取和容器的启动:
$ kubectl -n jx get po
NAME                                                READY     STATUS              RESTARTS   AGE
expose-2bhmv                                        0/1       ContainerCreating   0          1m
jenkins-568884c766-sxc7d                            0/1       Init:0/1            0          1m
jenkins-x-chartmuseum-6cf566bfb-jm7cv               0/1       ContainerCreating   0          1m
jenkins-x-controllercommitstatus-6f57d857d8-kzllt   1/1       Running             0          1m
jenkins-x-controllerrole-57d864c96f-4lrrk           1/1       Running             0          1m
jenkins-x-controllerteam-c48fc44f-tsrkh             0/1       ContainerCreating   0          1m
jenkins-x-controllerworkflow-c758649d6-2kpfj        0/1       ContainerCreating   0          1m
jenkins-x-heapster-7fbdb867d9-wt6sl                 0/2       ContainerCreating   0          1m
jenkins-x-nexus-5d5455cfd7-4xsck                    0/1       ContainerCreating   0          1m
接下来的日志交互及输出如下:
^@^@^@Deleting helm hook sources from file: /tmp/helm-template-workdir-860490114/jenkins-x/helmHooks/jenkins-x-platform/charts/expose/templates/job.yaml
job.batch "expose" deleted
Removing Kubernetes resources from older releases using selector: jenkins.io/chart-release=jenkins-x,jenkins.io/version!=0.0.3193
waiting for install to be ready, if this is the first time then it will take a while to download images
^@Jenkins X deployments ready in namespace jx


    ********************************************************

         NOTE: Your admin password is: qub6n#mKkh0oN!S59nPp

    ********************************************************


Getting Jenkins API Token
Using url http://jenkins.jx.aliyunk8s-bj.com/me/configure
Unable to automatically find API token with chromedp using URL http://jenkins.jx.aliyunk8s-bj.com/me/configure
Error: creating the chrome client: fork/exec /usr/bin/google-chrome: no such file or directory
Please go to http://jenkins.jx.aliyunk8s-bj.com/me/configure and click Show API Token to get your API Token
Then COPY the token and enter in into the form below:

? API Token:
此处如果没有DNS service解析域名jenkins.jx.aliyunk8s-bj.com的话, 需要先在jx-node上手动绑定hosts:
$ kubectl -n jx get ing
NAME          HOSTS                             ADDRESS       PORTS     AGE
chartmuseum   chartmuseum.jx.aliyunk8s-bj.com   xx.xx.xx.xx   80        5m
jenkins       jenkins.jx.aliyunk8s-bj.com       xx.xx.xx.xx   80        5m
nexus         nexus.jx.aliyunk8s-bj.com         xx.xx.xx.xx   80        5m
$ echo "xx.xx.xx.xx jenkins.jx.aliyunk8s-bj.com" >> /etc/hosts
根据日志提示生成jenkins api token: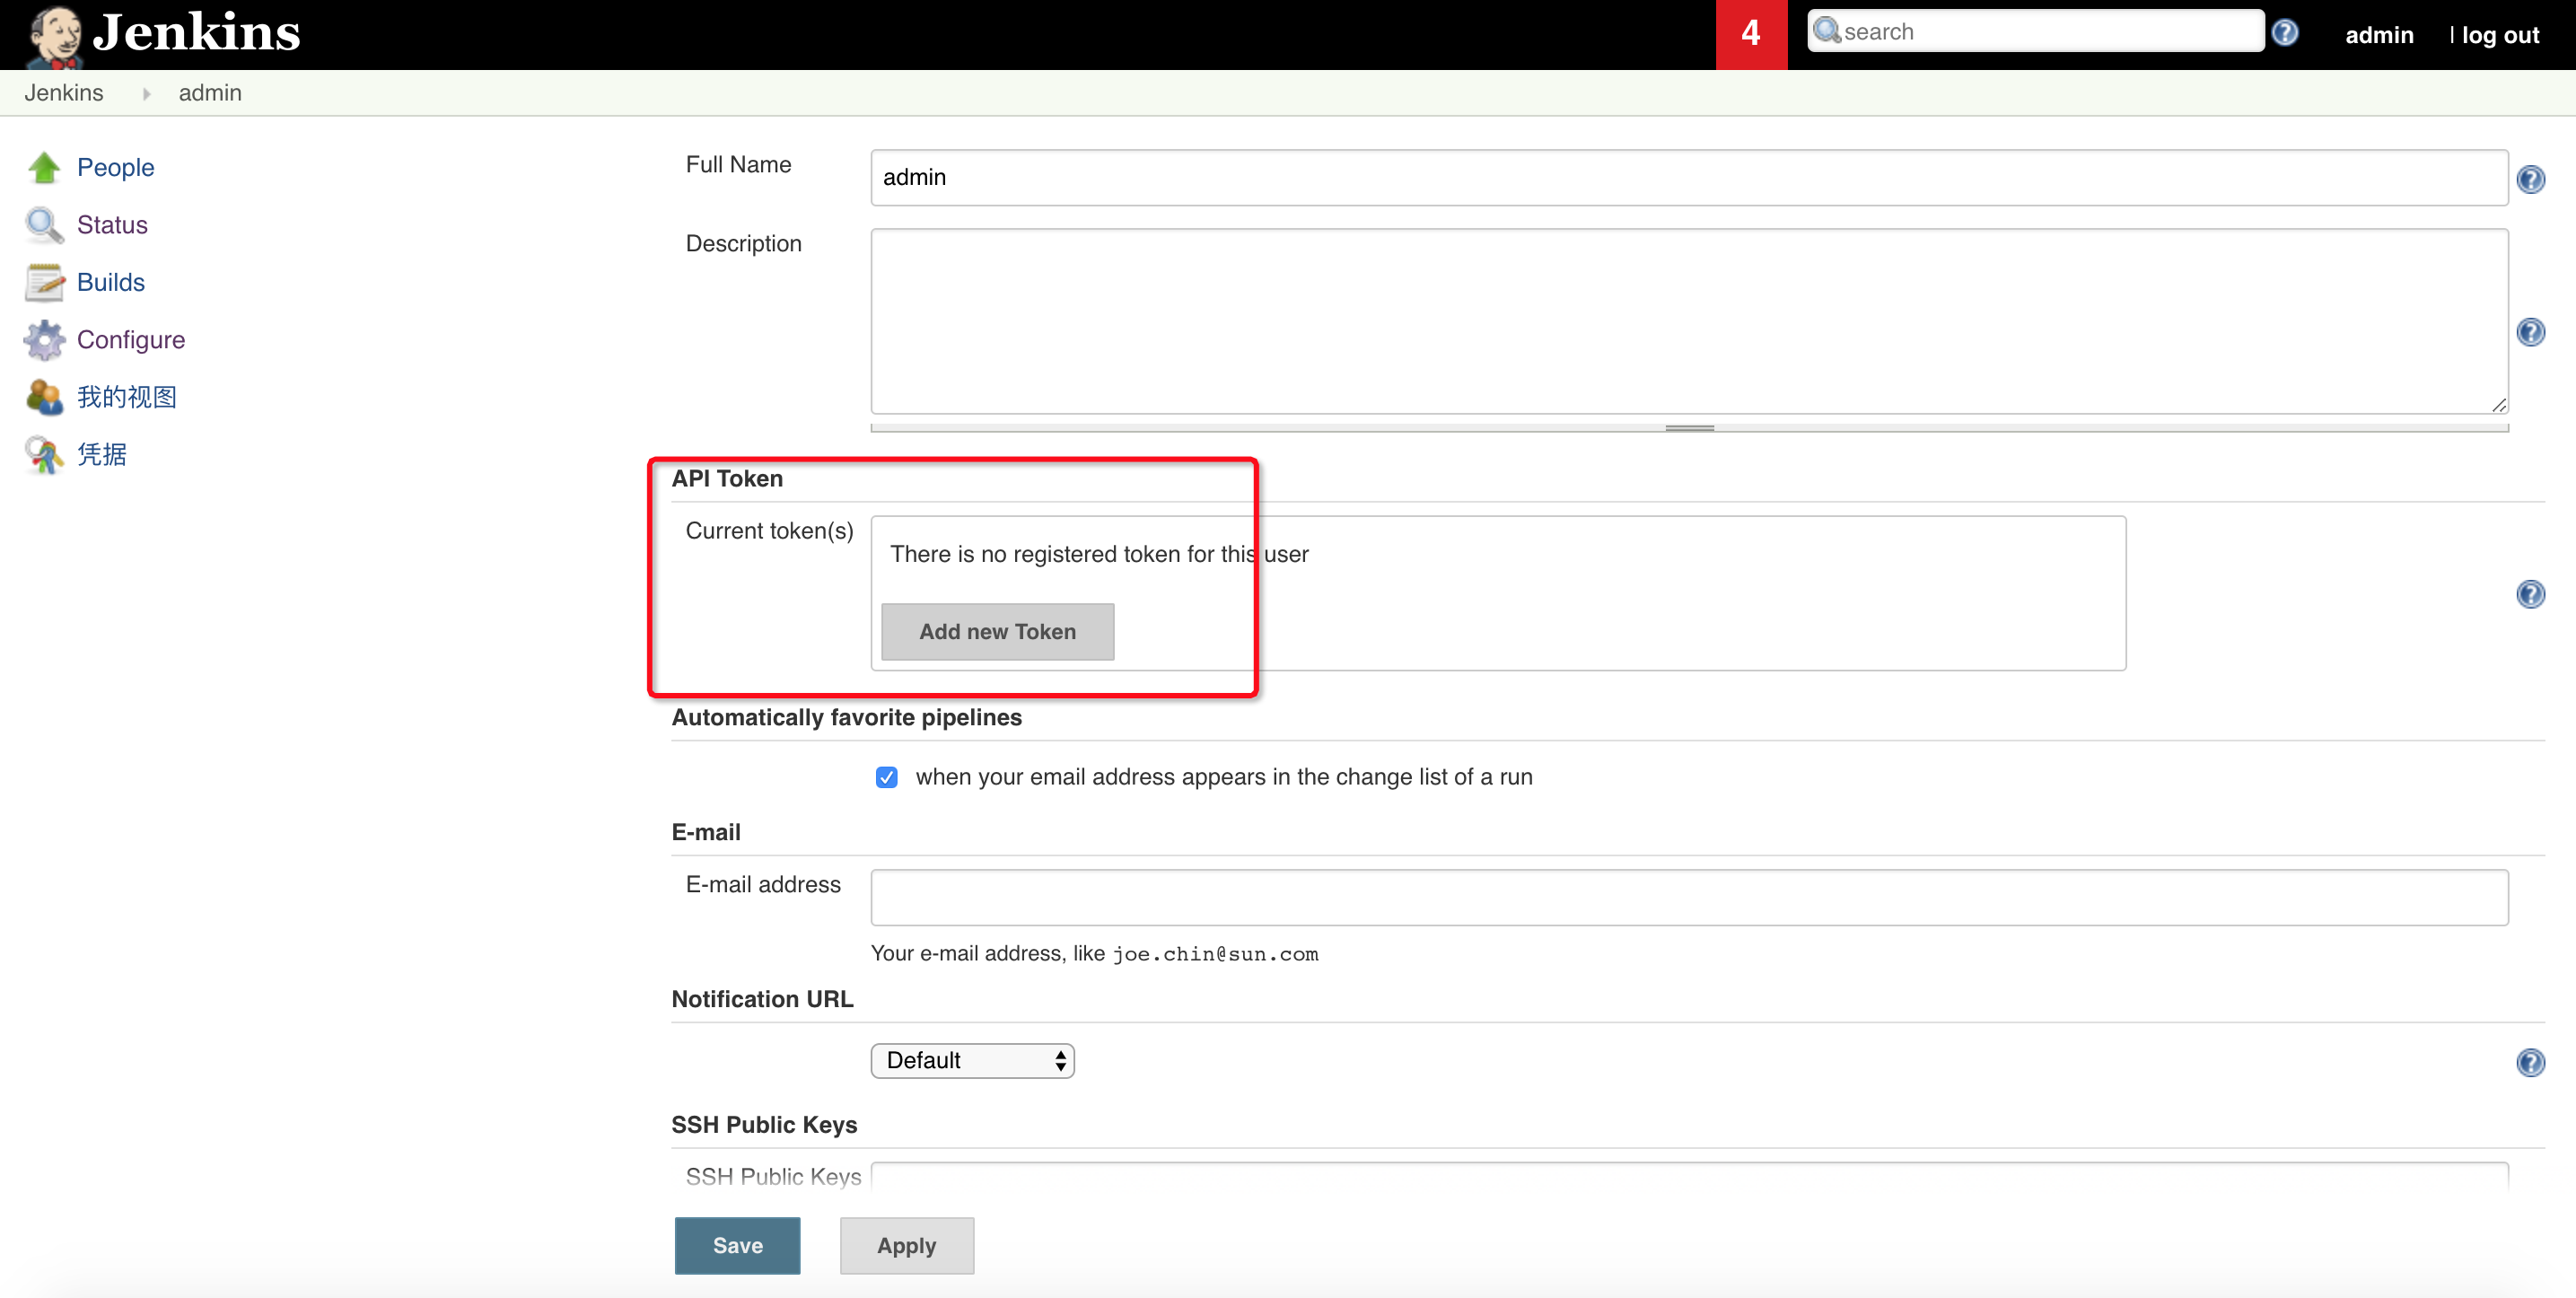
完成安装:
Created user admin API Token for Jenkins server jenkins.jx.aliyunk8s-bj.com at http://jenkins.jx.aliyunk8s-bj.com
Updating Jenkins with new external URL details http://jenkins.jx.aliyunk8s-bj.com

Jenkins X installation completed successfully


    ********************************************************

         NOTE: Your admin password is: qub6n#mKkh0oN!S59nPp

    ********************************************************


Your Kubernetes context is now set to the namespace: jx
To switch back to your original namespace use: jx namespace default
For help on switching contexts see: https://jenkins-x.io/developing/kube-context/

To import existing projects into Jenkins:       jx import
To create a new Spring Boot microservice:       jx create spring -d web -d actuator
To create a new microservice from a quickstart: jx create quickstart
3. 创建staging env
$ jx create env -n staging -l Staging --namespace staging --fork-git-repo='https://github.com/haoshuwei/default-environment-charts.git' --domain=aliyunk8s-bj.com --promotion=Auto --prefix='bj'

....
Creating GitHub webhook for haoshuwei/environment-bj-staging for url http://jenkins.jx.aliyunk8s-bj.com/github-webhook/
由于我们默认使用Ingress暴露服务, 所以需要修改environment-bj-staging的webhook:
$ kubectl -n jx get svc |grep LoadBalancer
kubectl -n jx get svc |grep LoadBalancer
jenkins                 LoadBalancer   172.19.11.179   xx.xx.xx.xx   8080:30456/TCP   13h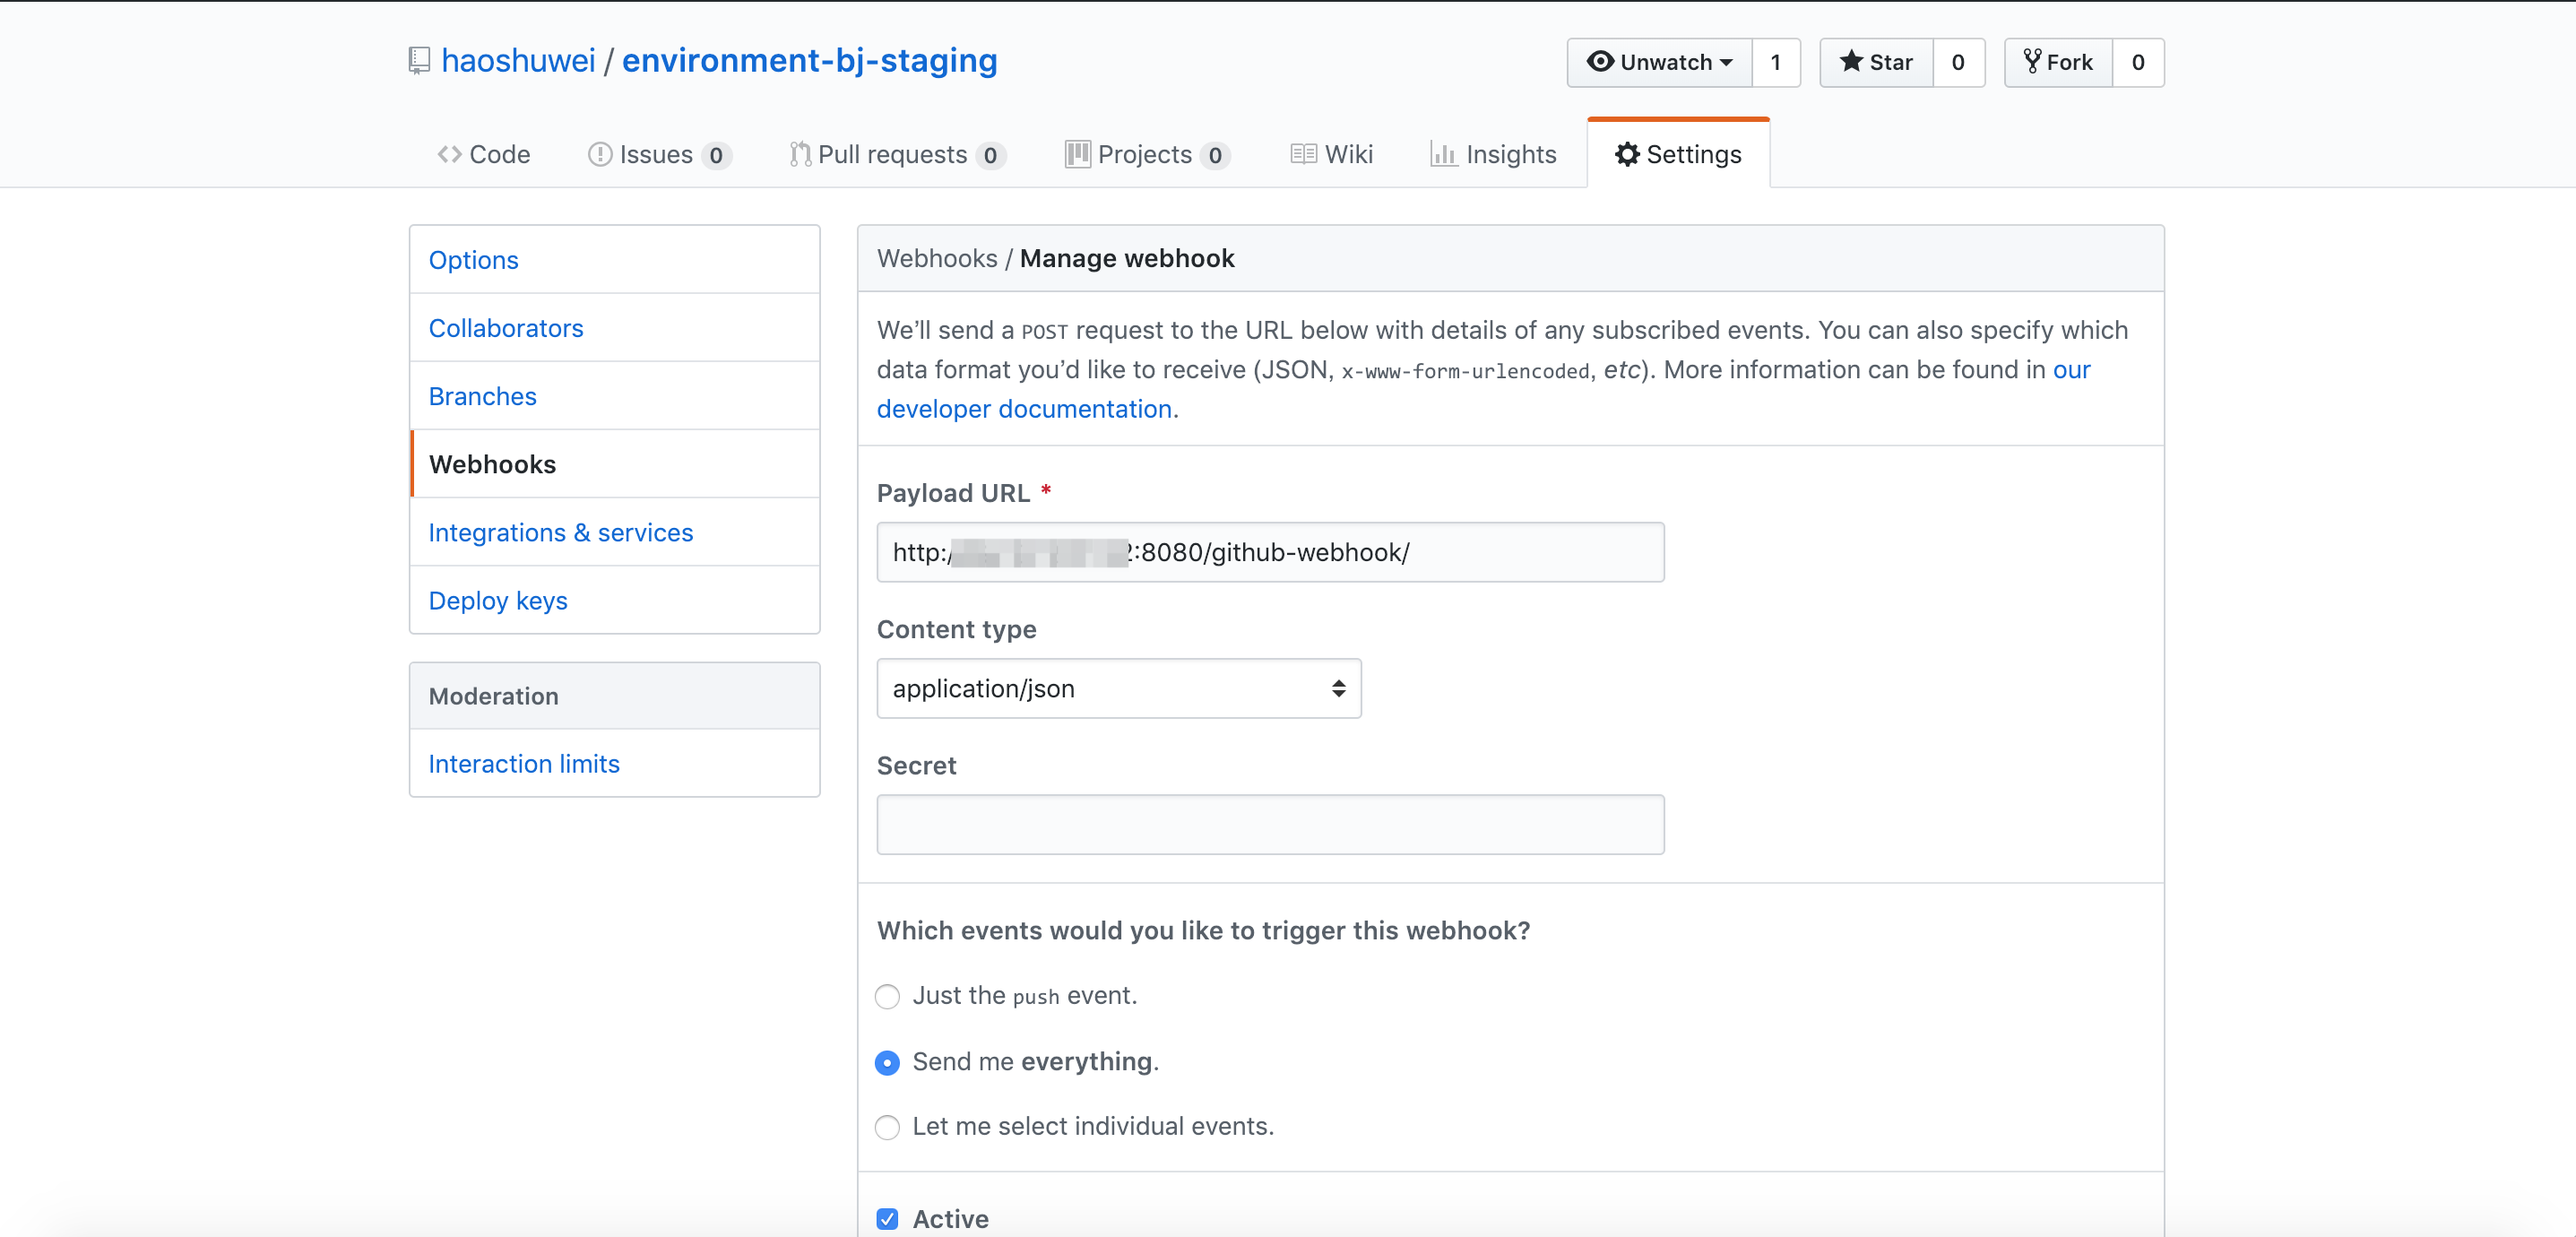
jenkins会自动创建environment-bj-staging job并进行扫描和构建: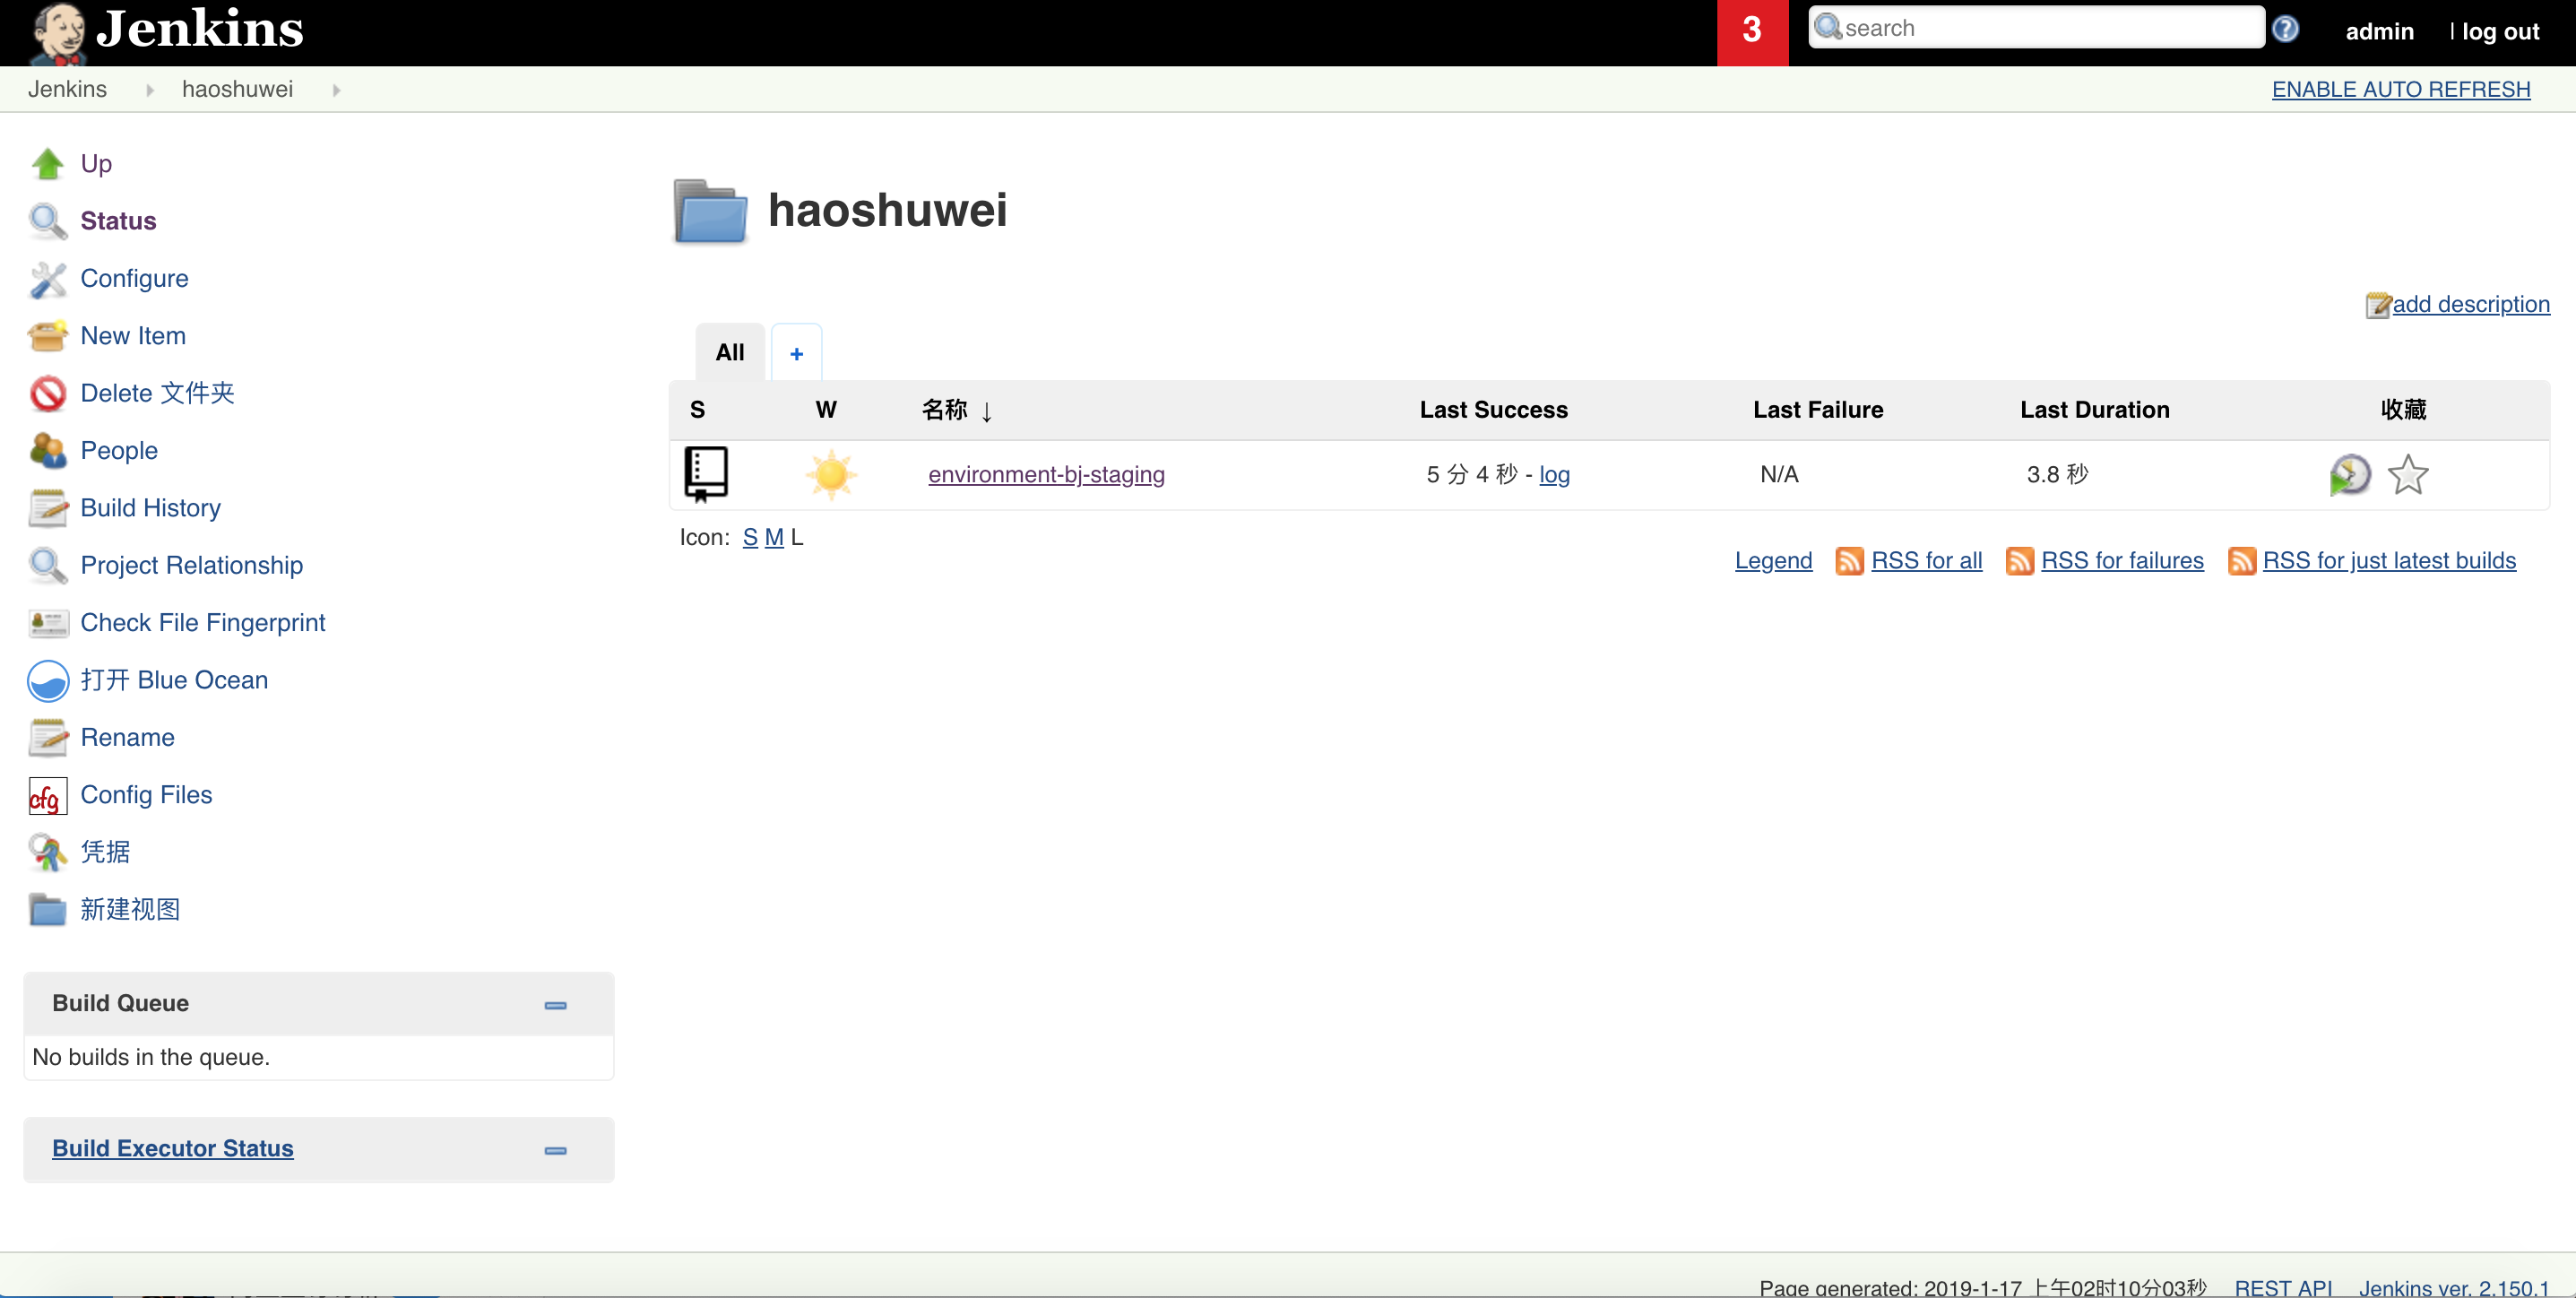
4. 创建production env:
$ jx create env -n production -l Production --namespace production --fork-git-repo='https://github.com/haoshuwei/default-environment-charts.git' --domain=aliyunk8s-bj.com --promotion=Manual --prefix='bj'

...
Creating GitHub webhook for haoshuwei/environment-bj-production for url http://jenkins.jx.aliyunk8s-bj.com/github-webhook/
修改environment-hz-production的webhook。
jenkins会自动创建environment-bj-production job并进行扫描和构建: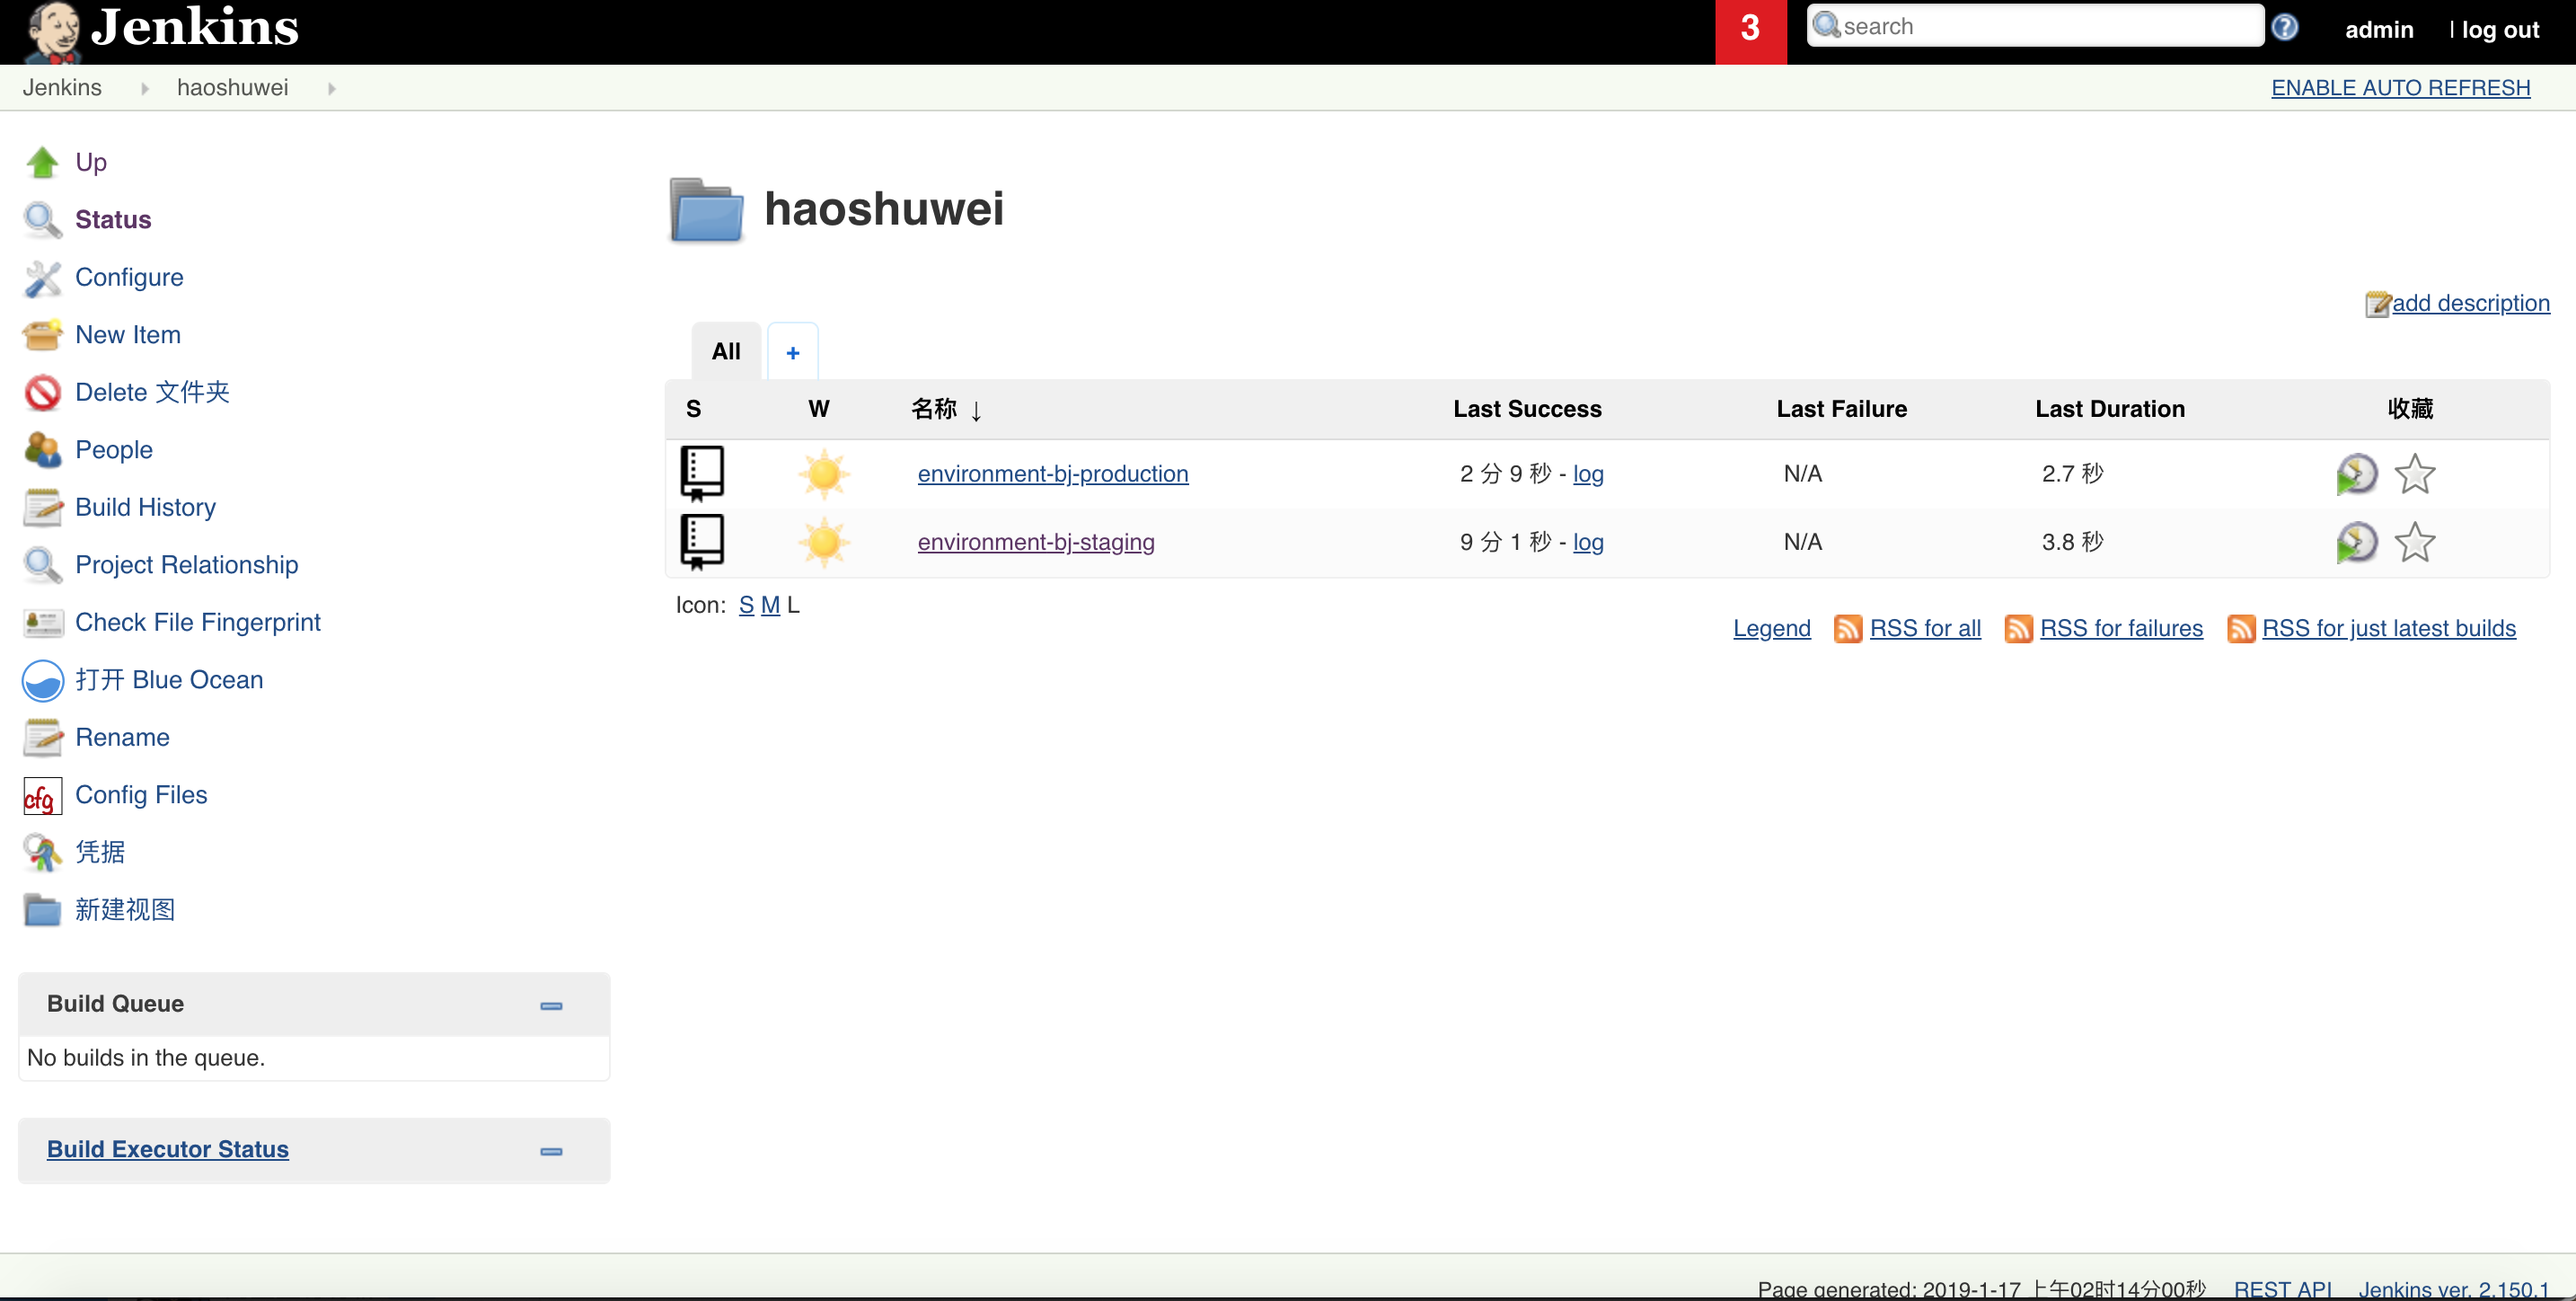
5. 配置访问阿里云容器镜像服务的docker registry secret:
$ kubectl -n jx delete secrets jenkins-docker-cfg
secret "jenkins-docker-cfg" deleted
$ docker login -u xxx -p xxx registry.cn-beijing.aliyuncs.com
$ kubectl create secret generic jenkins-docker-cfg -n jx --from-file=/root/.docker/config.json
secret/jenkins-docker-cfg created
二、 运用GitOps管理应用发布
1. 安装openjdk
$ yum install -y java-1.8.0-openjdk2. 创建一个Spring示例应用
$ jx create spring -d web -d actuator
? Language: java
? Group: com.example
? Artifact: jenkins-x-demo
Created Spring Boot project at /root/.jx/jenkins-x-demo
No username defined for the current Git server!
? Do you wish to use jenkins-x-bot as the Git user name: Yes
The directory /root/.jx/jenkins-x-demo is not yet using git
? Would you like to initialise git now? Yes
? Commit message:  Initial import

Git repository created
selected pack: /root/.jx/draft/packs/github.com/AliyunContainerService/jenkins-x-kubernetes/packs/maven
? Which organisation do you want to use? jenkins-x-bot
replacing placeholders in directory /root/.jx/jenkins-x-demo
app name: jenkins-x-demo, git server: github.com, org: jenkins-x-bot, Docker registry org: jenkins-x-bot
skipping directory "/root/.jx/jenkins-x-demo/.git"
Using Git provider GitHub at https://github.com


About to create repository jenkins-x-demo on server https://github.com with user jenkins-x-bot
? Enter the new repository name:  jenkins-x-demo


Creating repository jenkins-x-bot/jenkins-x-demo
Pushed Git repository to https://github.com/haoshuwei/jenkins-x-demo

Created Jenkins Project: http://jenkins.jx.aliyunk8s-bj.com/job/haoshuwei/job/jenkins-x-demo/

Watch pipeline activity via:    jx get activity -f jenkins-x-demo -w
Browse the pipeline log via:    jx get build logs haoshuwei/jenkins-x-demo/master
Open the Jenkins console via    jx console
You can list the pipelines via: jx get pipelines
When the pipeline is complete:  jx get applications

For more help on available commands see: https://jenkins-x.io/developing/browsing/

Note that your first pipeline may take a few minutes to start while the necessary images get downloaded!

Creating GitHub webhook for haoshuwei/jenkins-x-demo for url http://jenkins.jx.aliyunk8s-bj.com/github-webhook/
修改 jenkins-x-demo的webhook。
jenkins-x-demo项目成功创建后,jenkins job jenkins-x-demo会自动扫描并构建jenkins-x-demo-0.0.1.tgz发布到chartmuseum并自动promote到staging环境: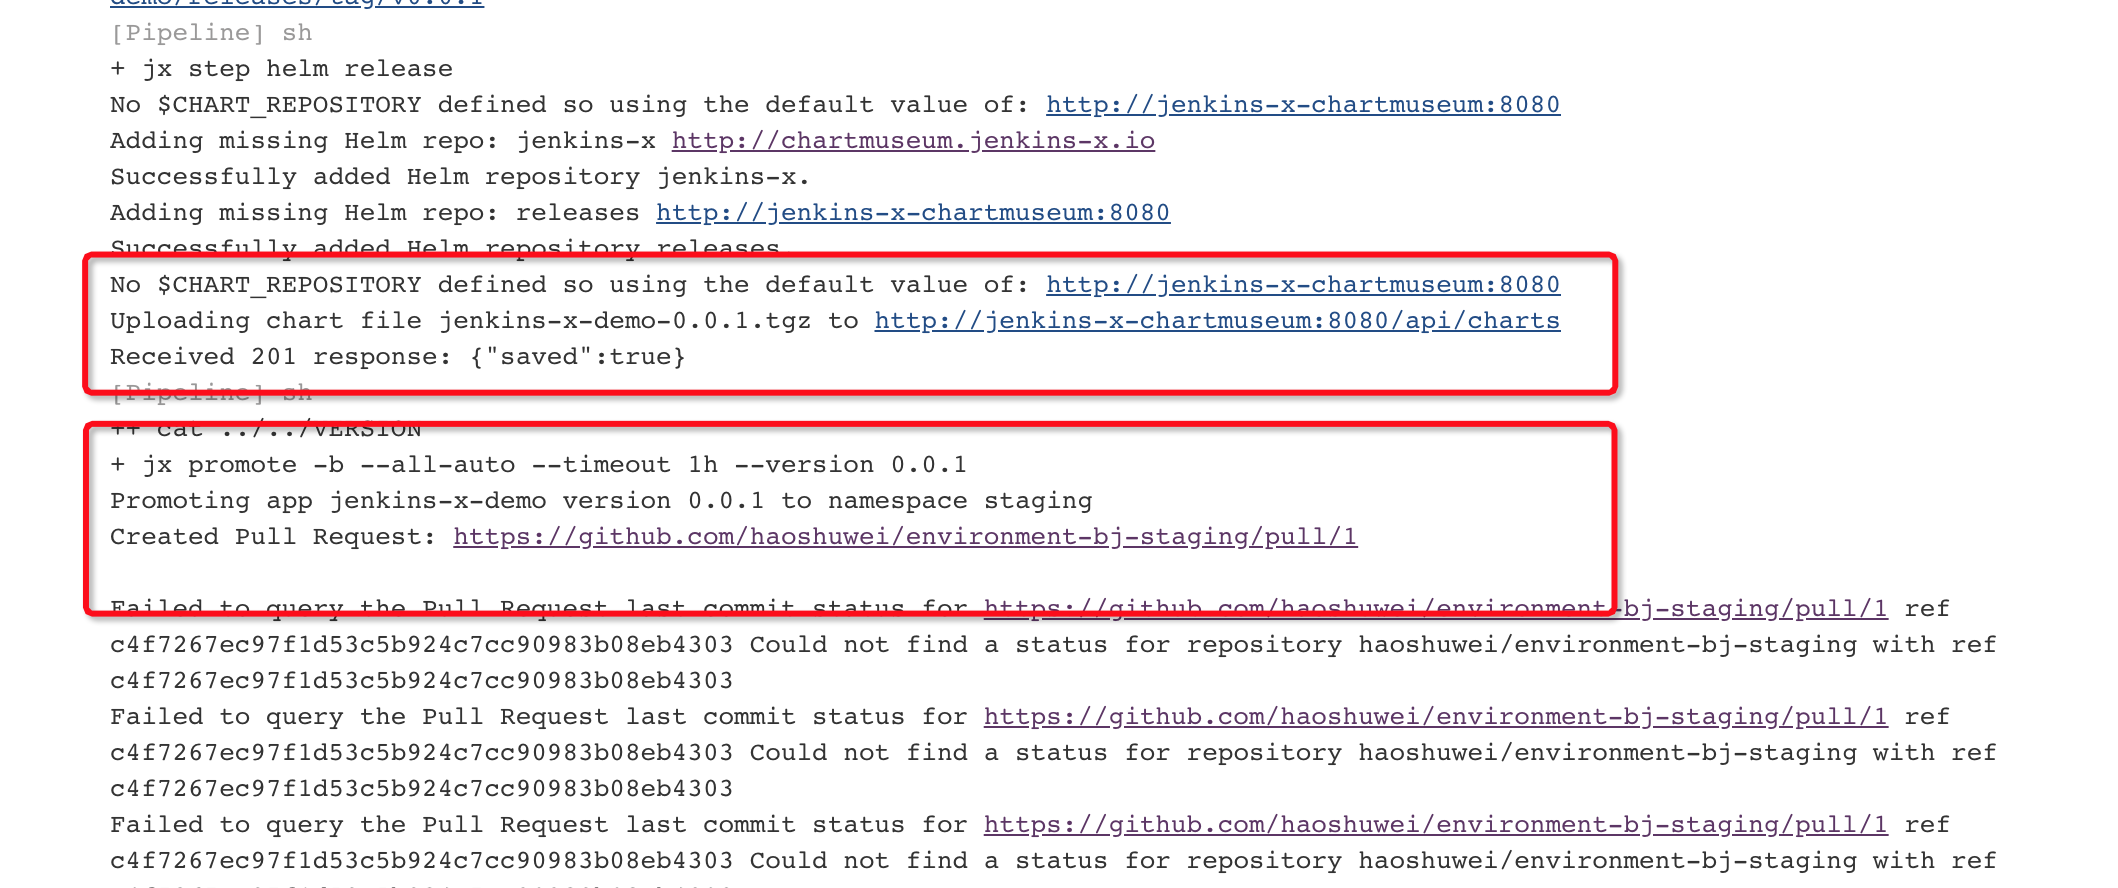
查看environment-bj-staging项目的PR: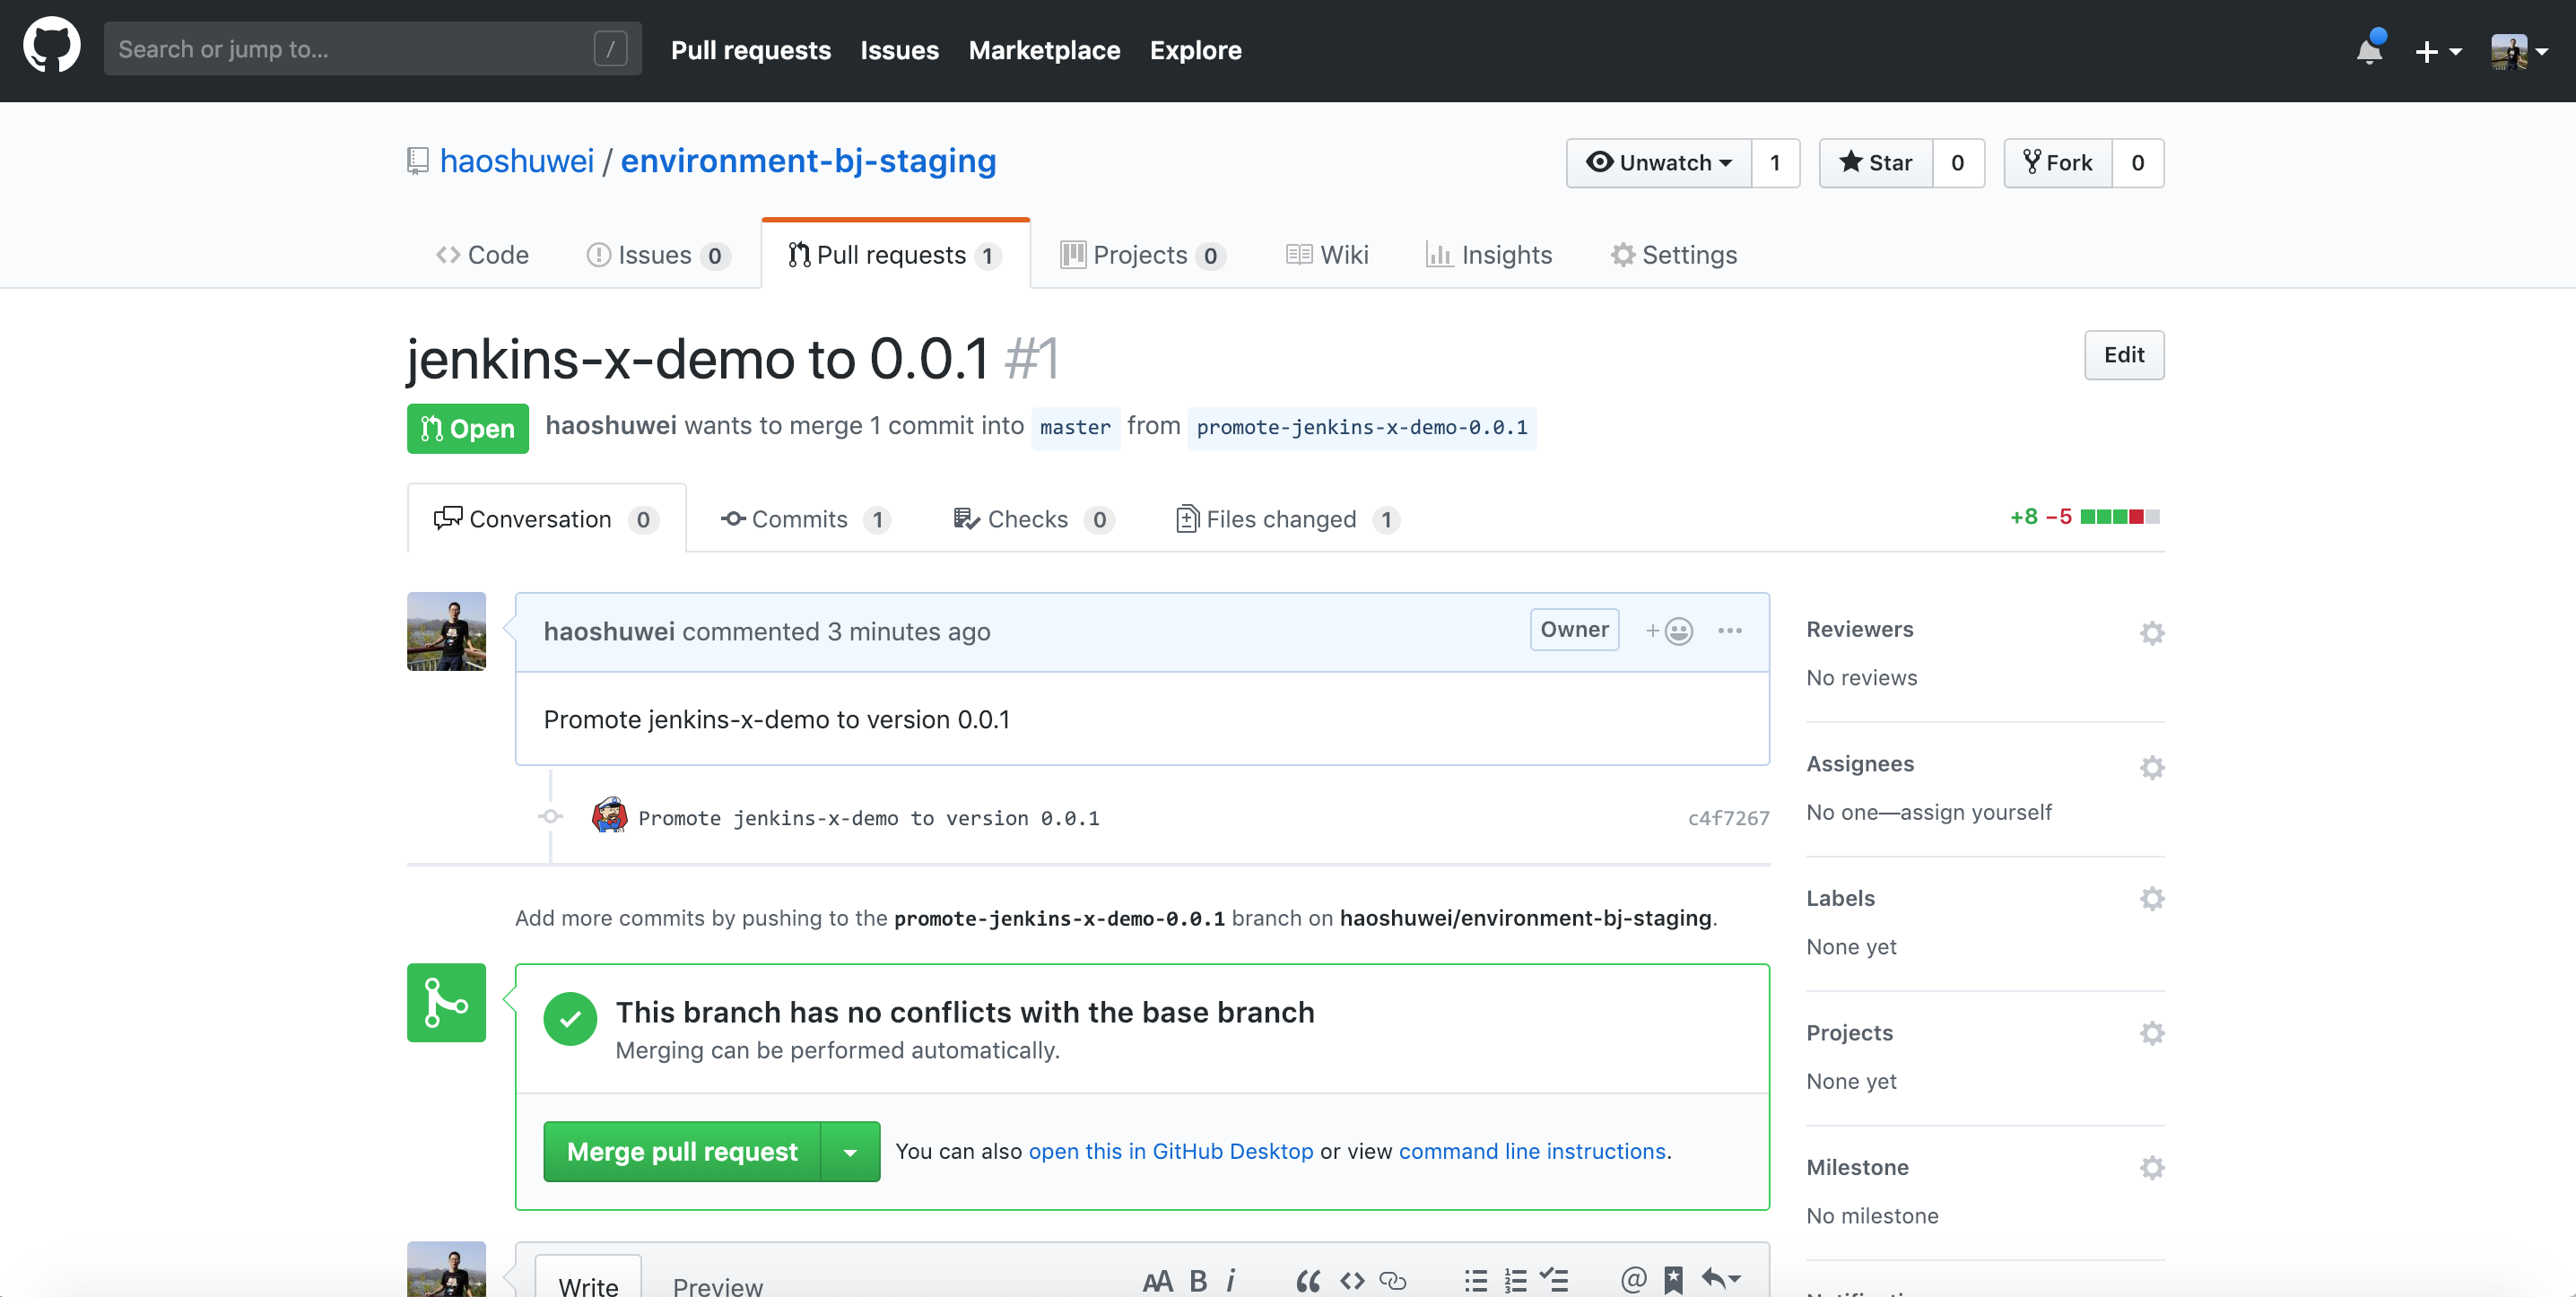
PR的Check通过后会自动merge: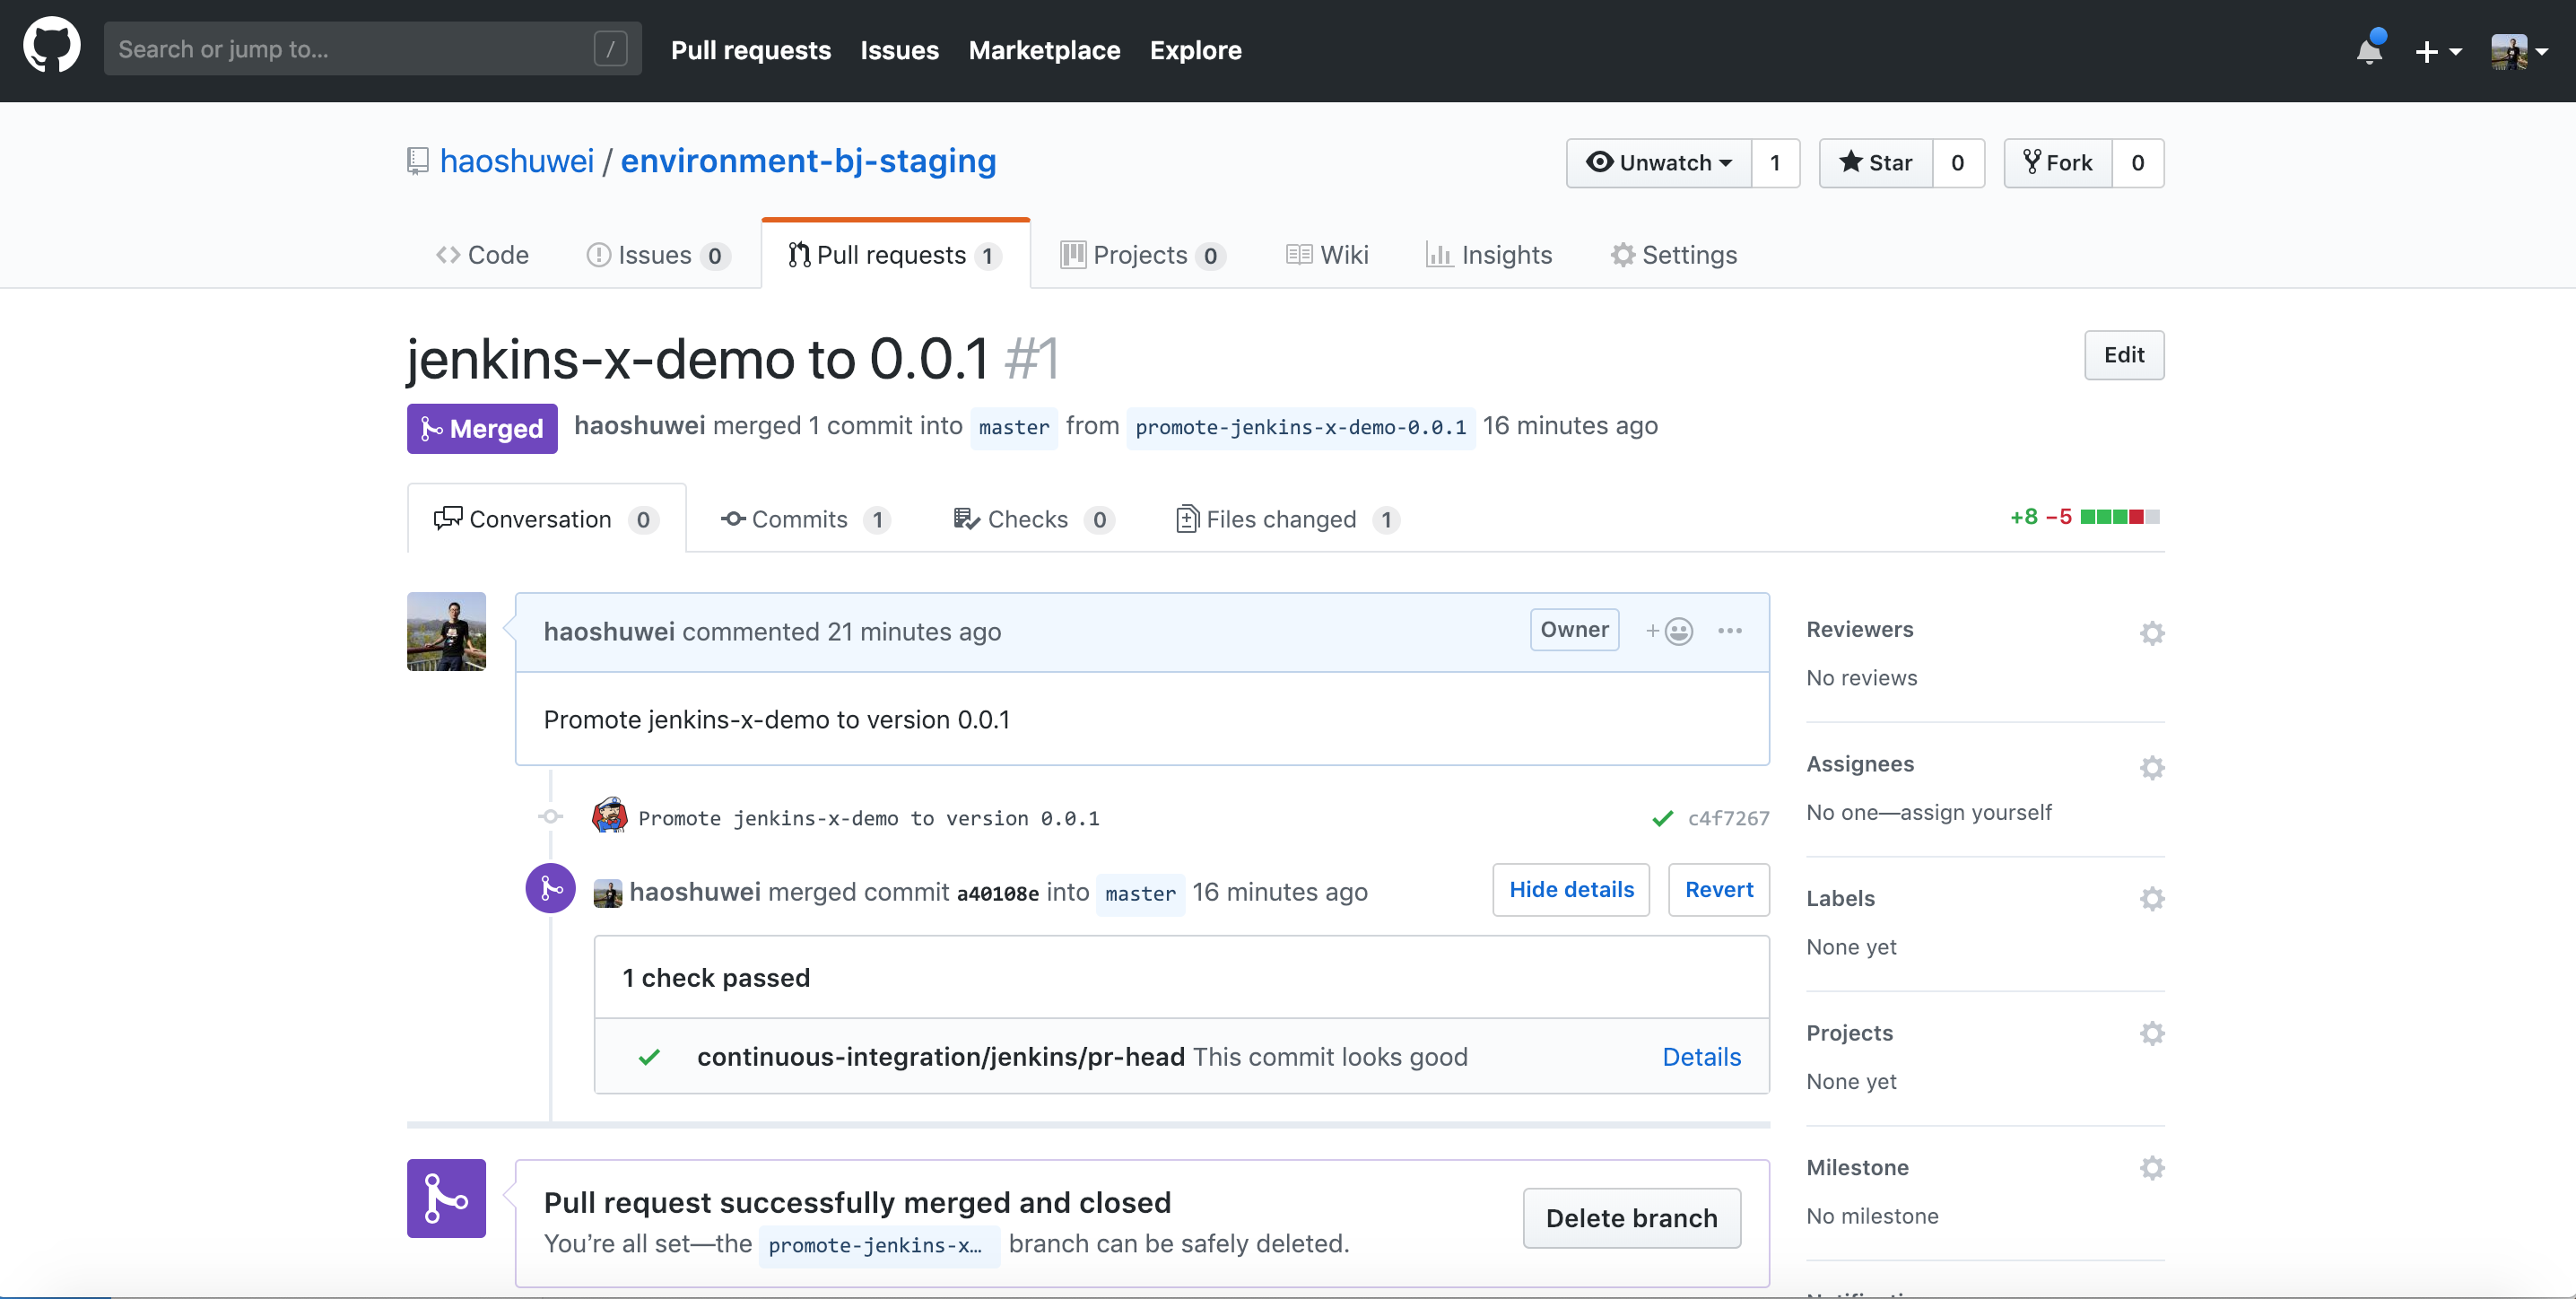
主要修改内容为: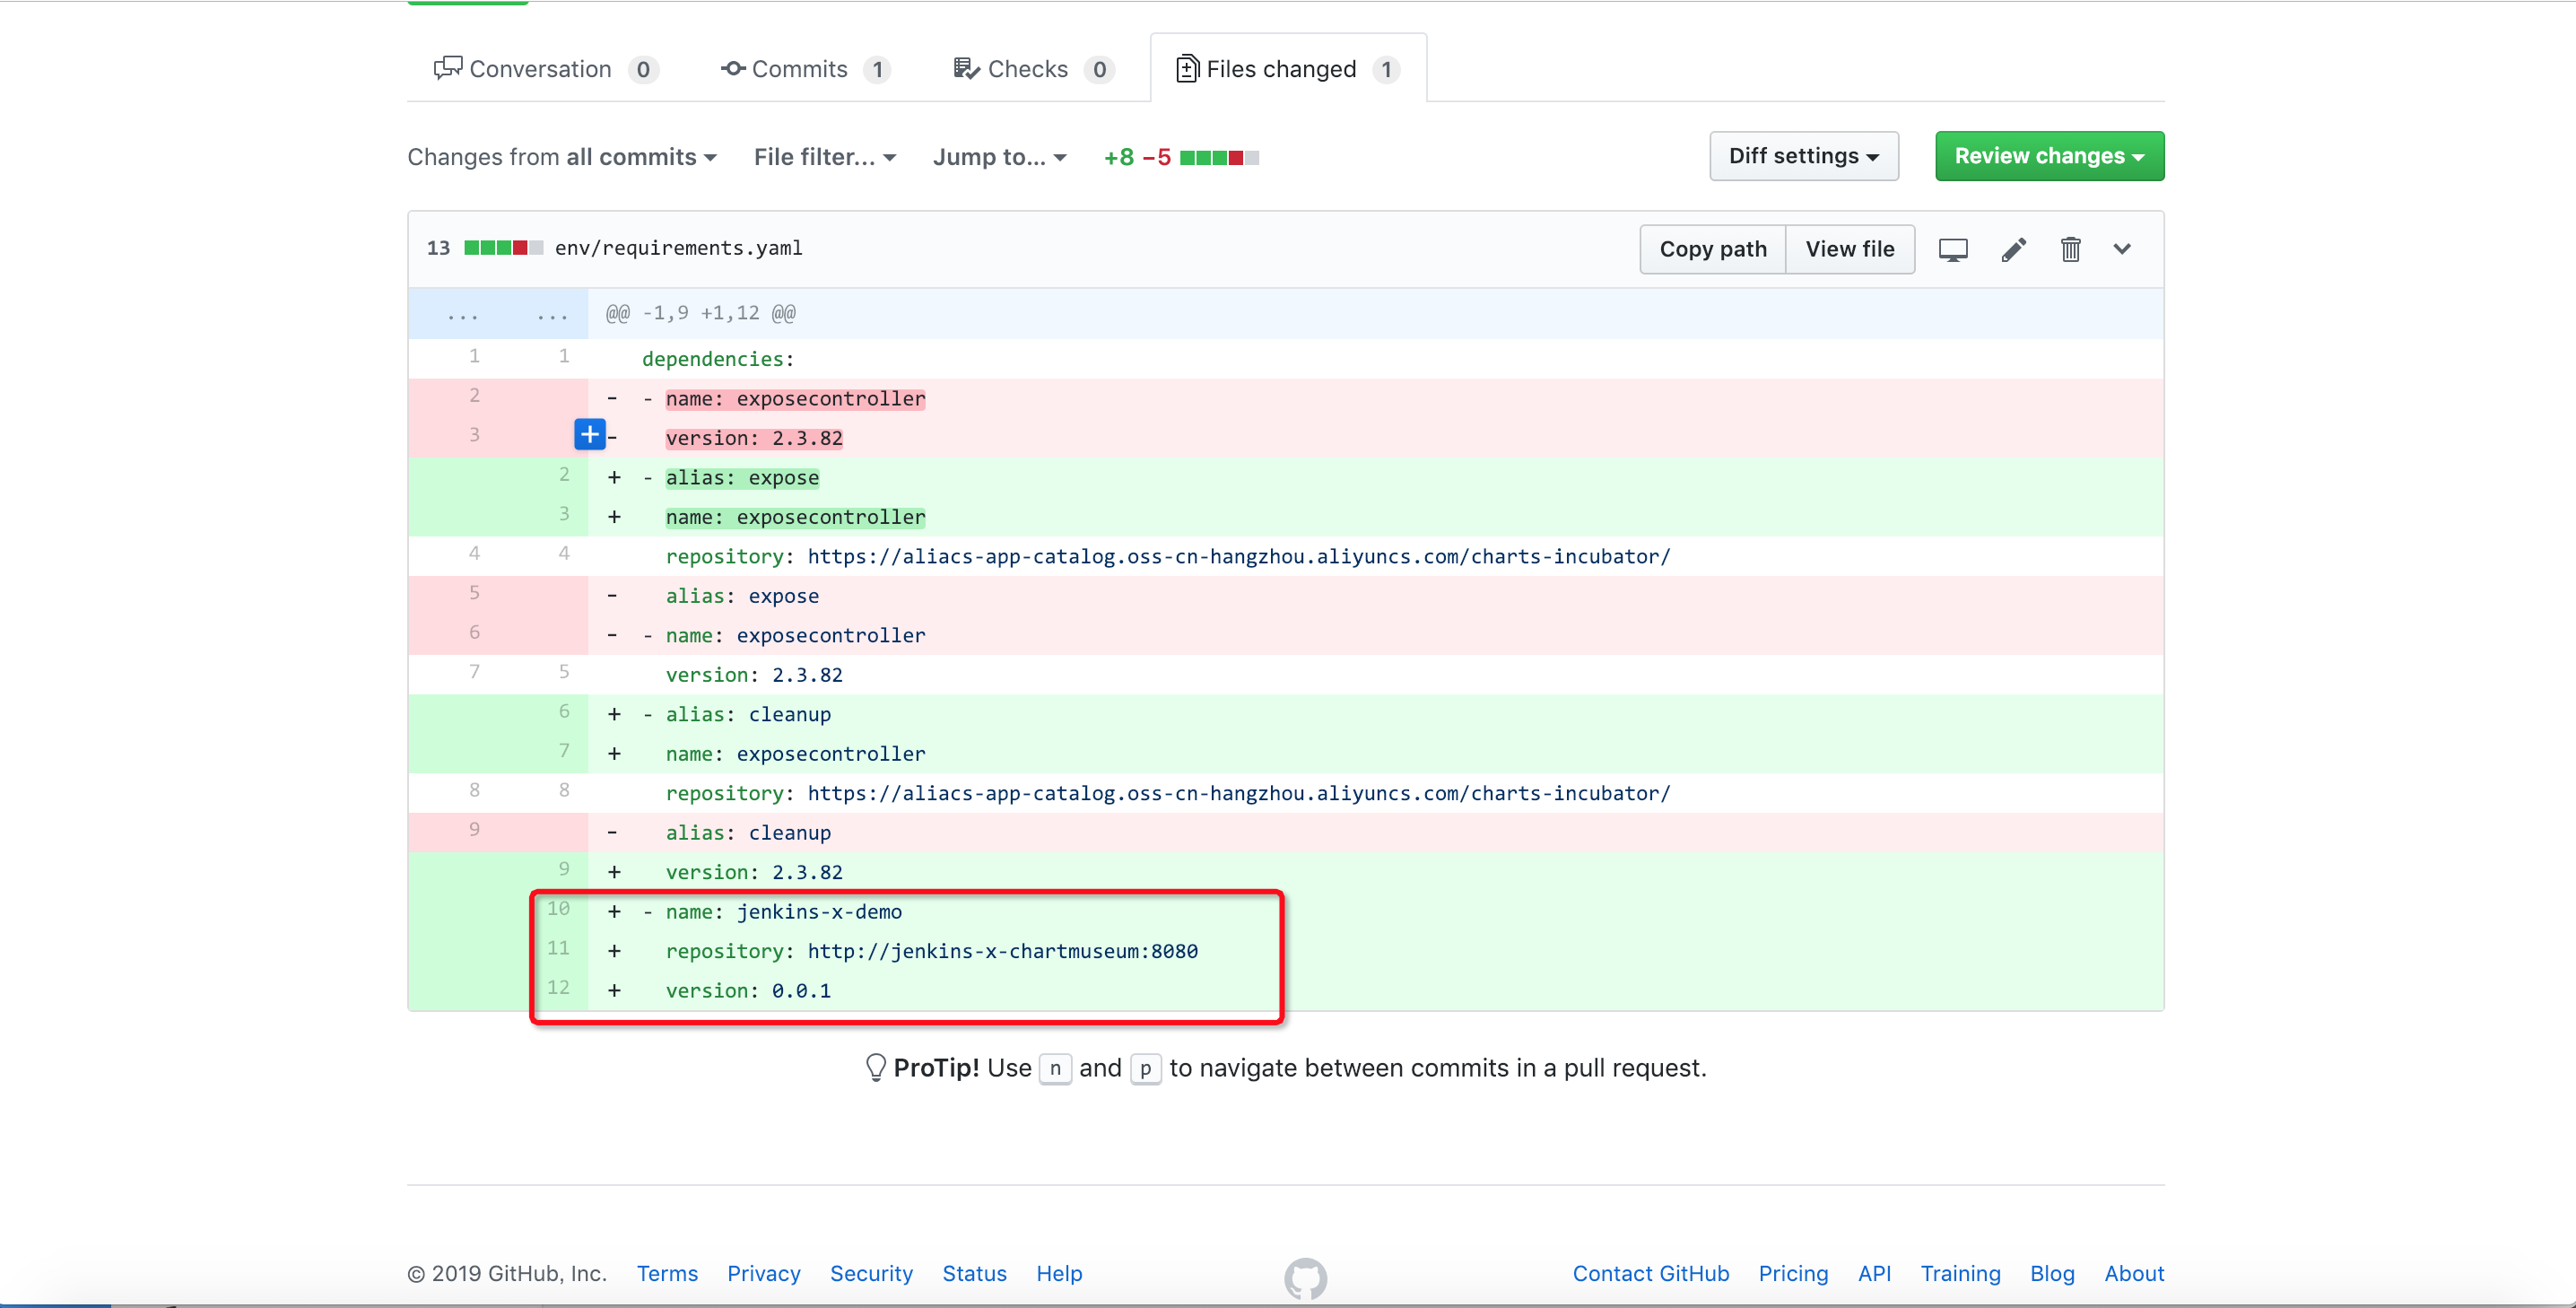
然后environment-bj-staging项目自动构建并部署jenkins-x-demo应用到Staging Env。
3. 访问Staging环境中的jenkins-x-demo应用服务
$ jx get apps
APPLICATION       PRODUCTION PODS URL                                            STAGING PODS URL
jx-jenkins-x-demo 0.0.1 1/1 http://jenkins-x-demo.staging.aliyunk8s-bj.com访问http://jenkins-x-demo.staging.aliyunk8s-bj.com:
4. 开发jenkins-x-demo应用并发布新版本到Staging环境
步骤3中, 我们访问了一个并没有准备好进入生产环境的jenkins-x-demo应用, 下面我们添加一个新的feature:
$ cd jenkins-x-demo
$ git checkout -b feature/add-index
新建src/main/resources/static/index.html并写入如下内容:
<html>
  <head>
    <title> Jenkins X Spring Demo </title>
  </head>
  <body bgcolor=white>

    <table border="0" cellpadding="10">
      <tr>
        <td>
          <img height="300" width="300" src="https://github.com/jenkins-x/jenkins-x-website/raw/e5aae999166a67d6220aa469eed1f23e0996c1f7/images/logo.png">
        </td>
        <td>
          <h1>Jenkins X Spring Demo</h1>
        </td>
      </tr>
    </table>
  </body>

</html>
提交和推送后我们在GitHub上创建一个feature/add-index到master分支的PR: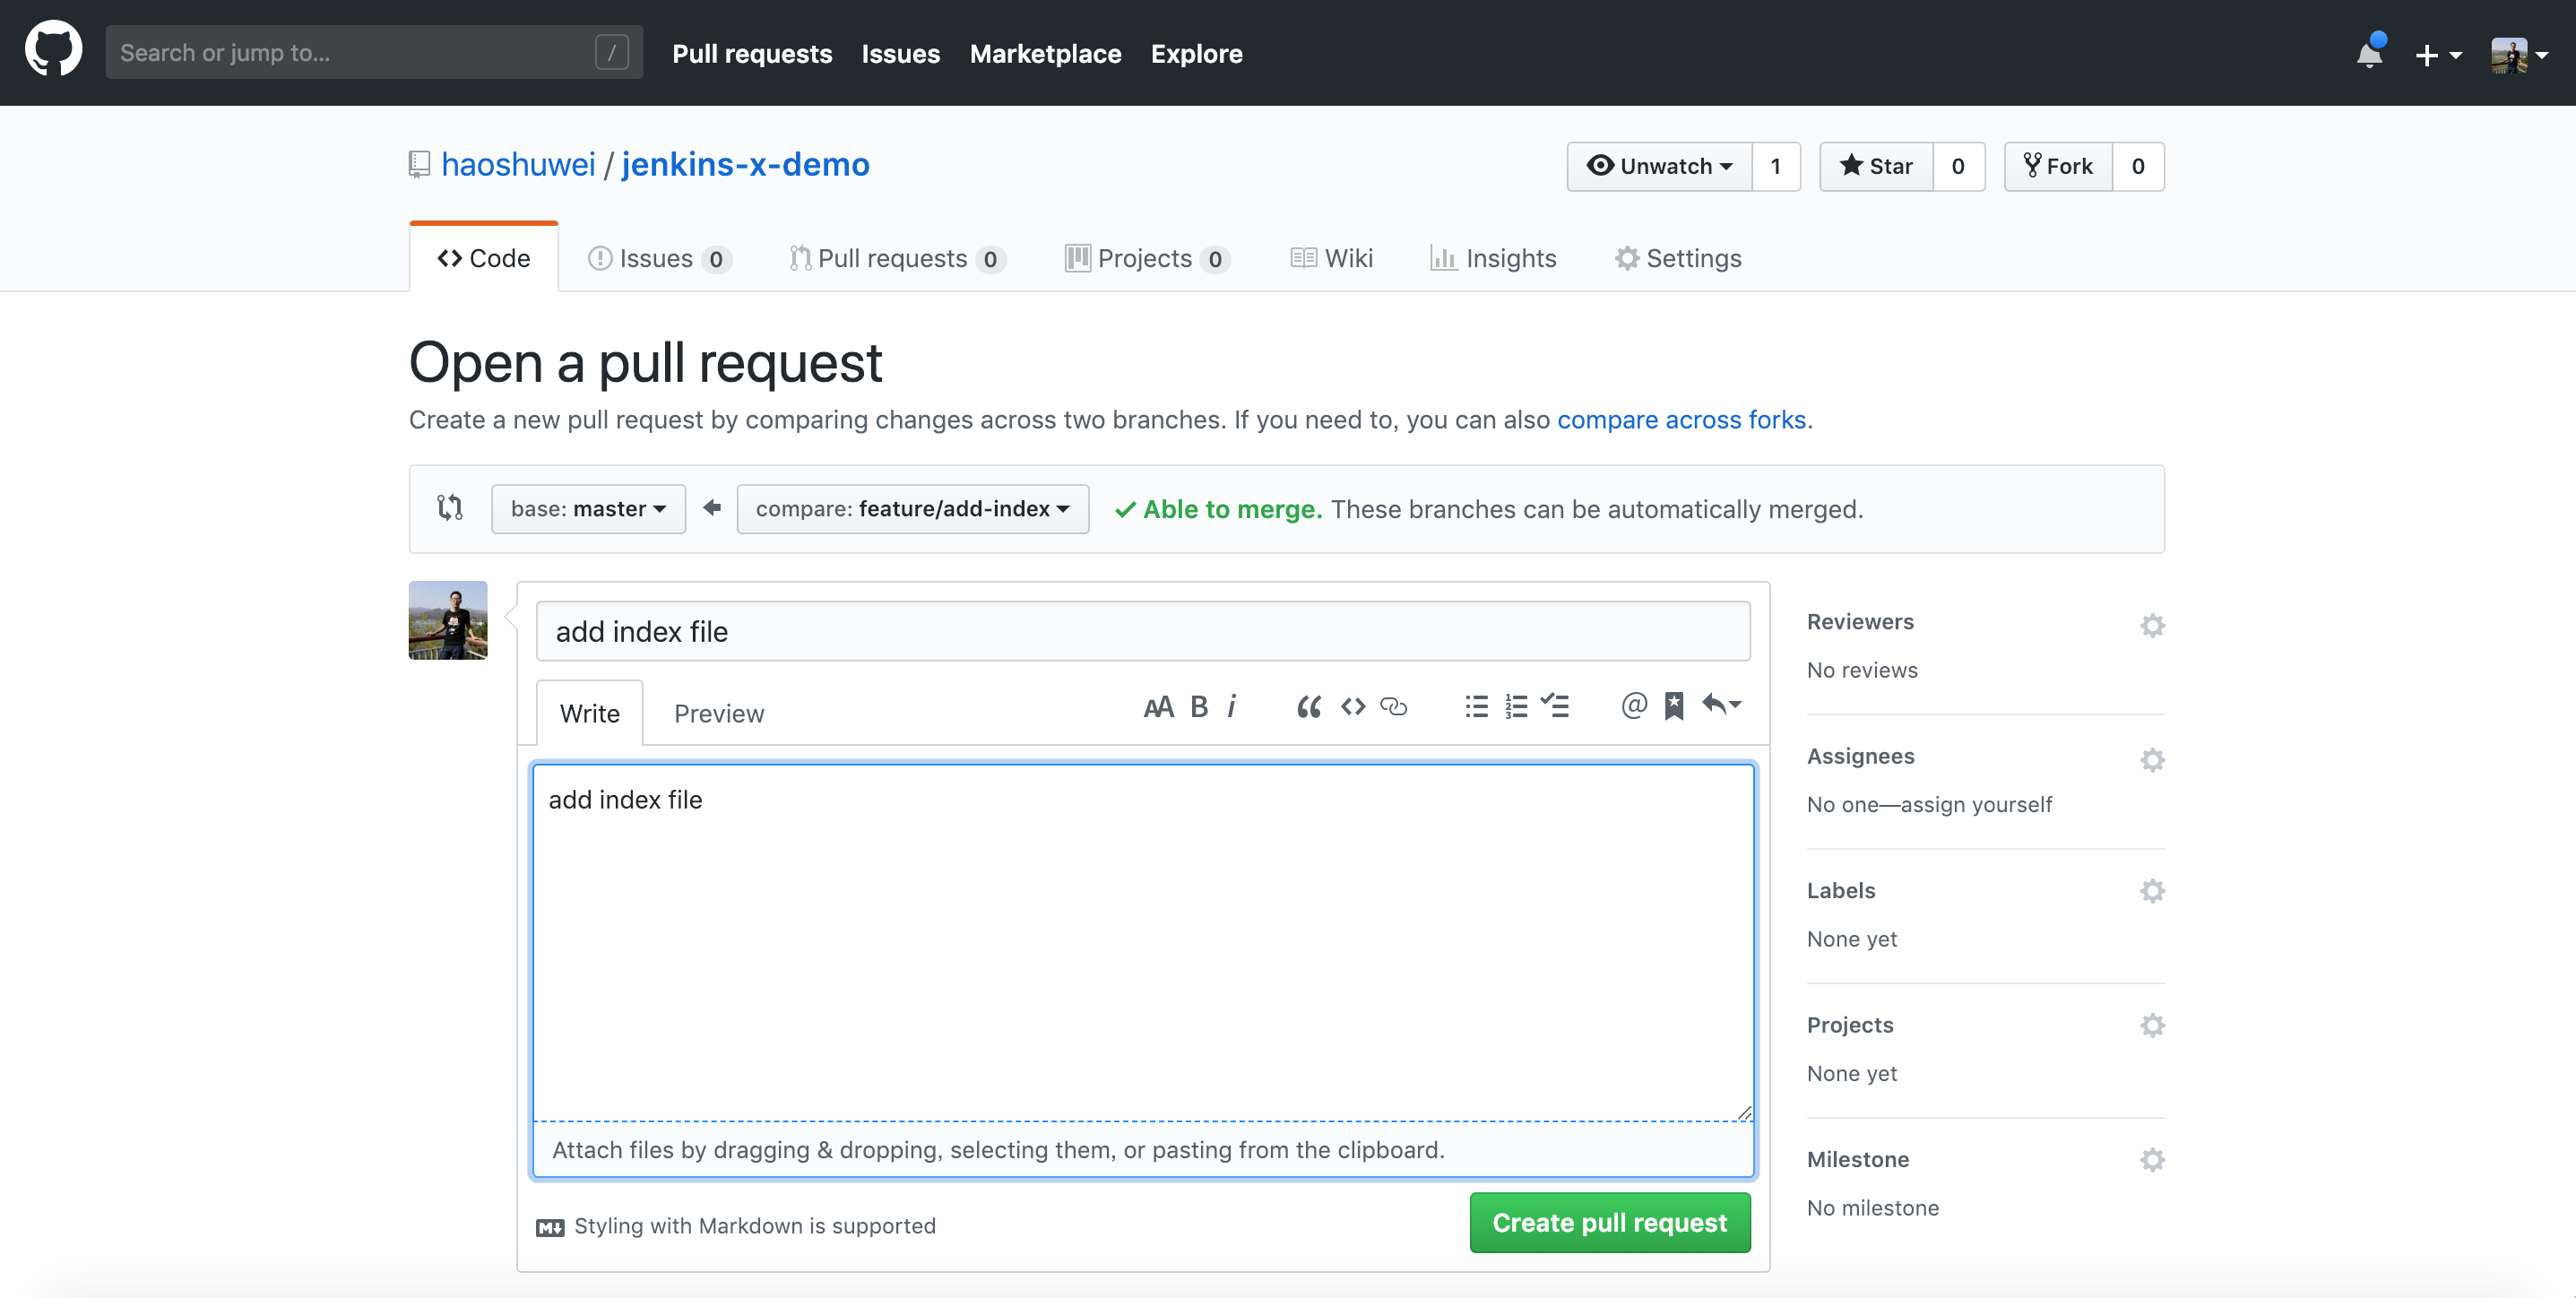
jenkins会自动对PR进行构建和部署,这个过程中jenkins-x-demo的部署并不是部署到Staging环境,而是会部署为Preview环境提供预览: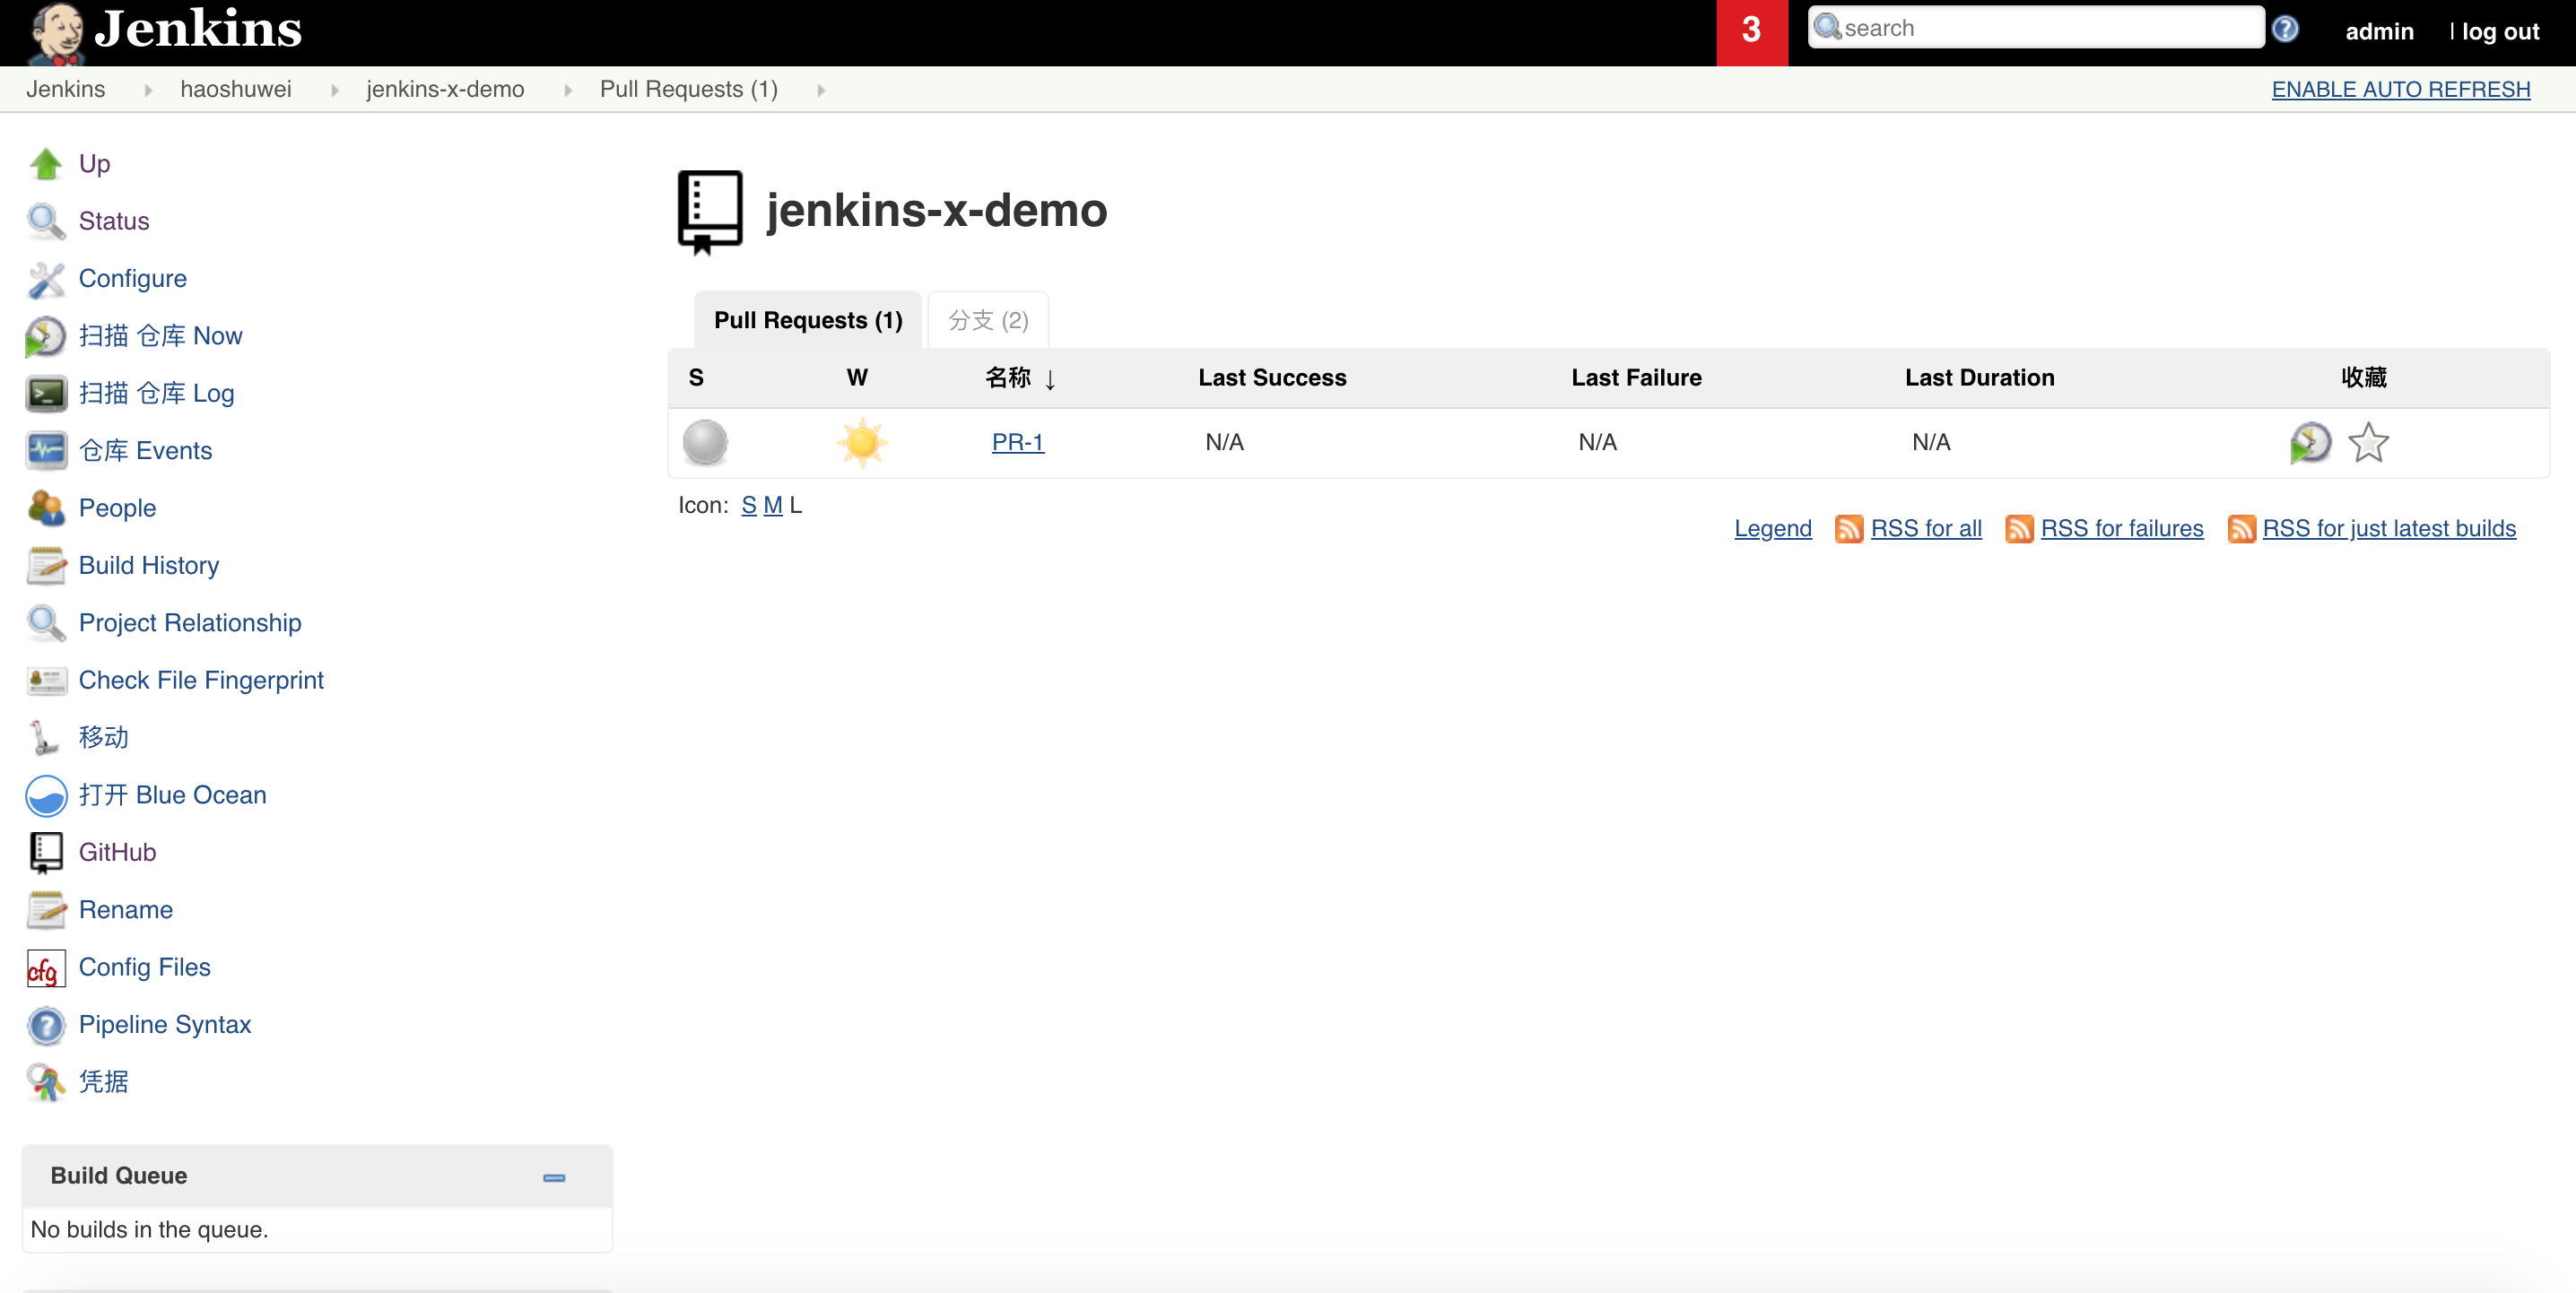
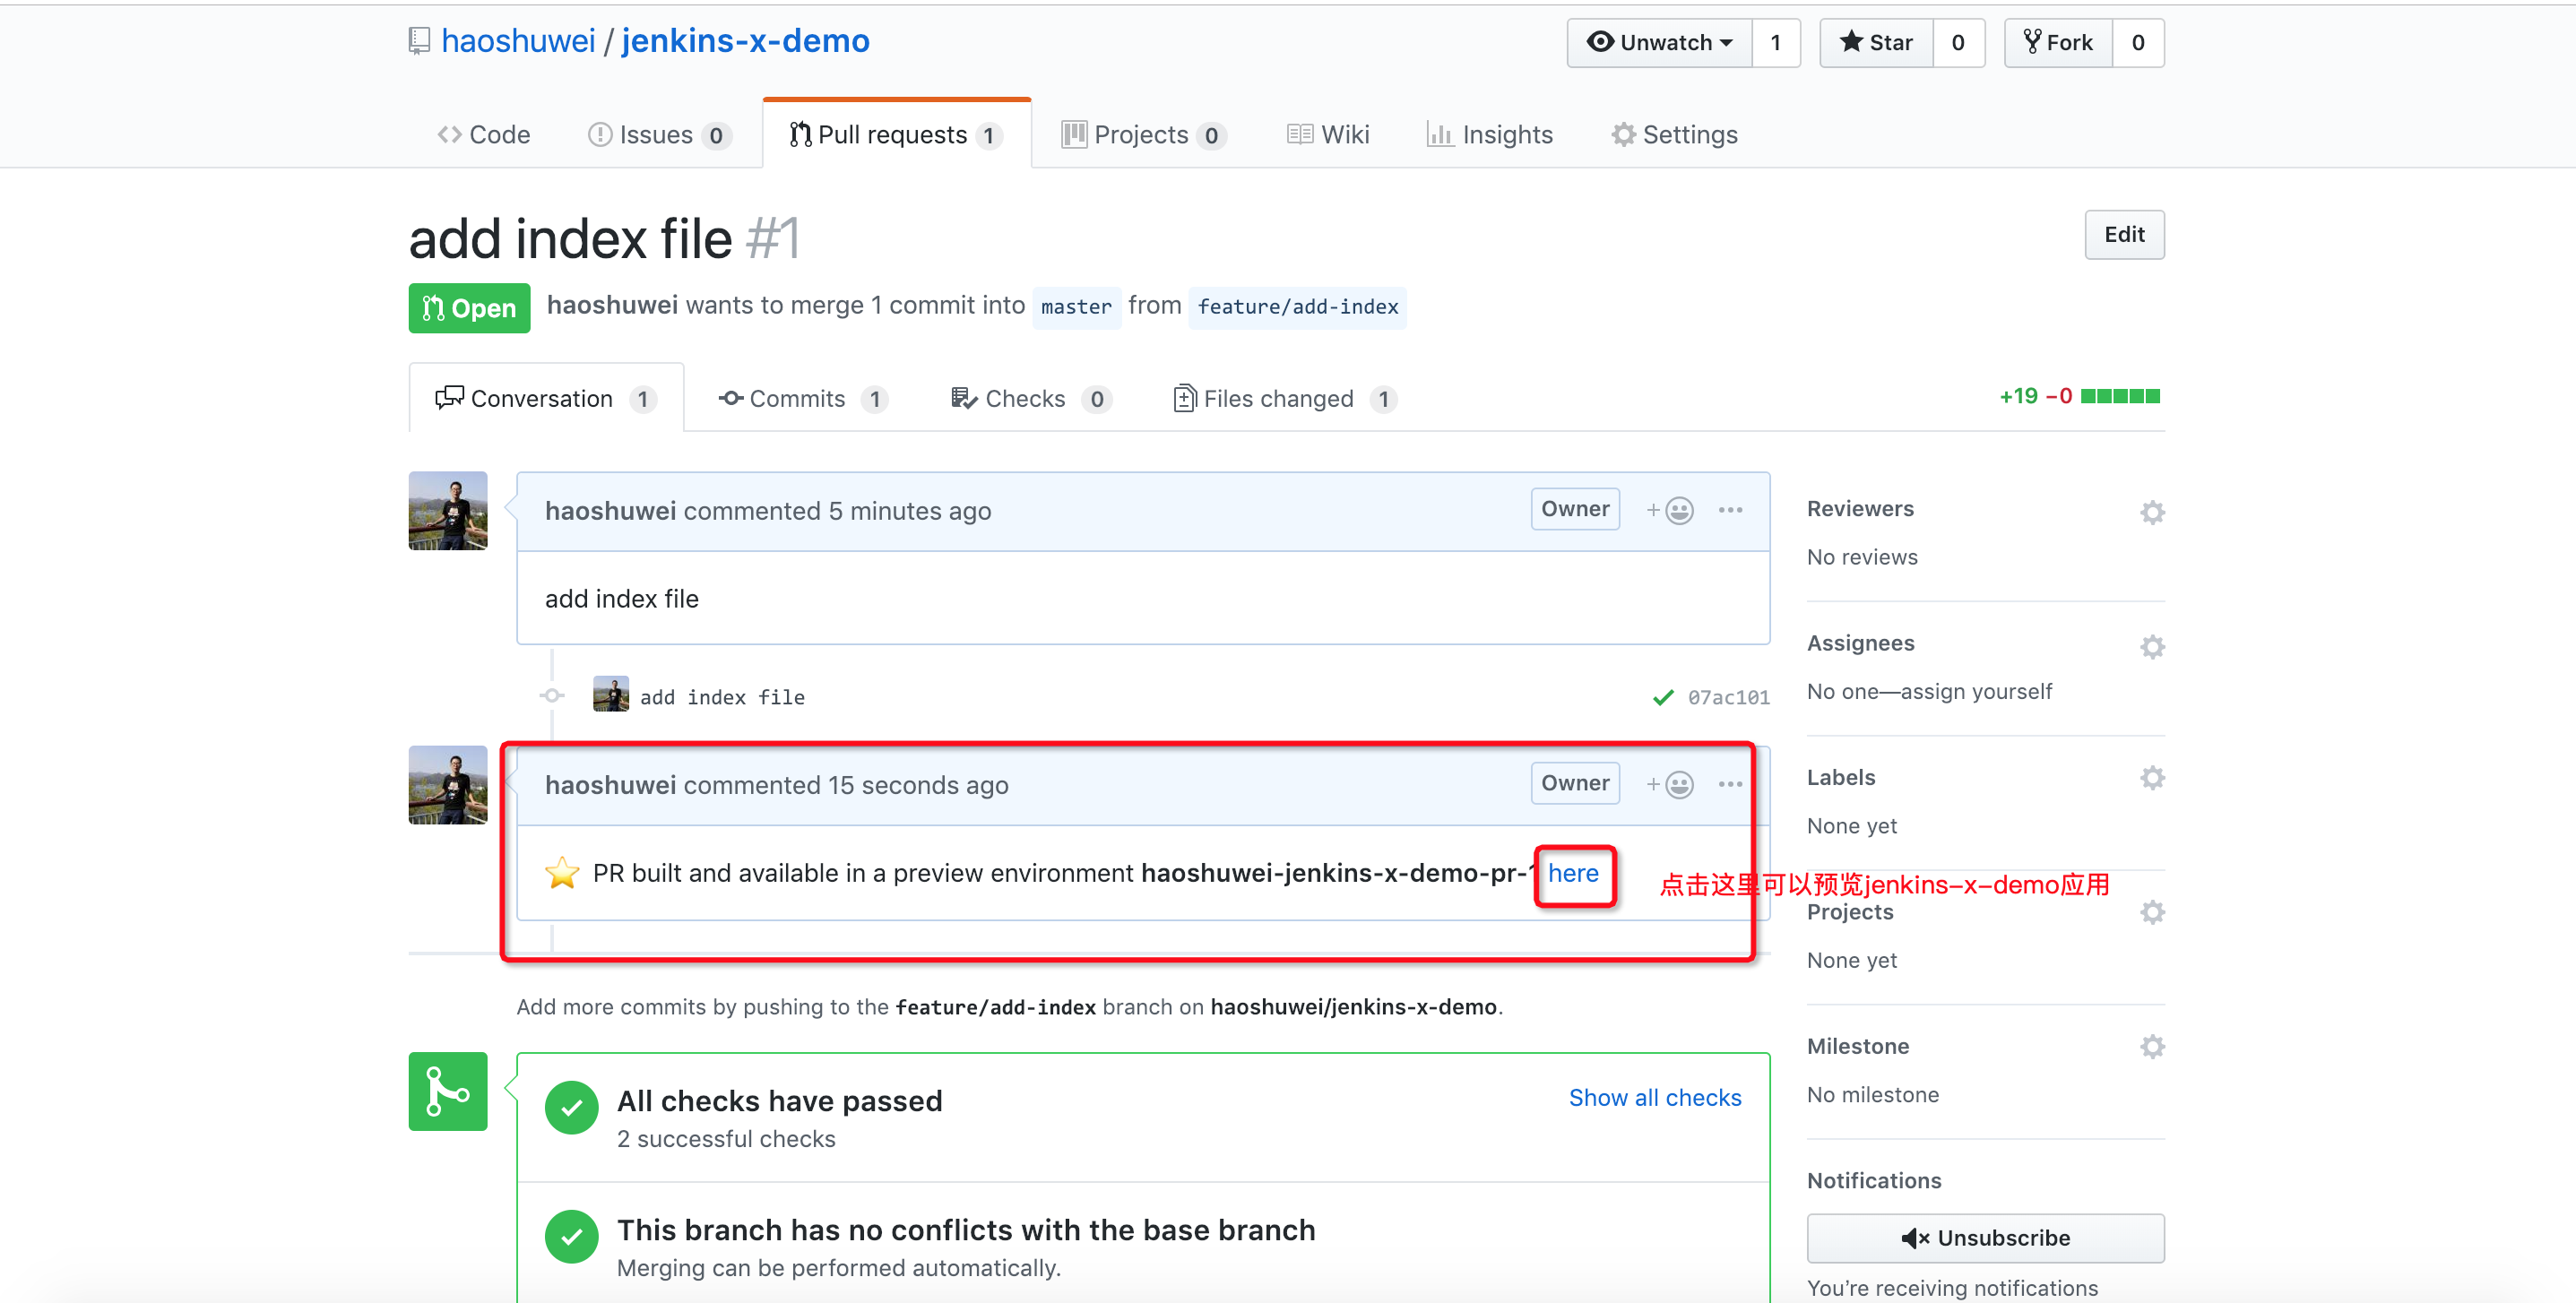
预览jenkins-x-demo应用http://jenkins-x-demo.jx-haoshuwei-jenkins-x-demo-pr-1.aliyunk8s-bj.com/:
5. 发布新版本jenkins-x-demo应用到Staging环境
确认提交的PR没问题后,即可merge到master分支: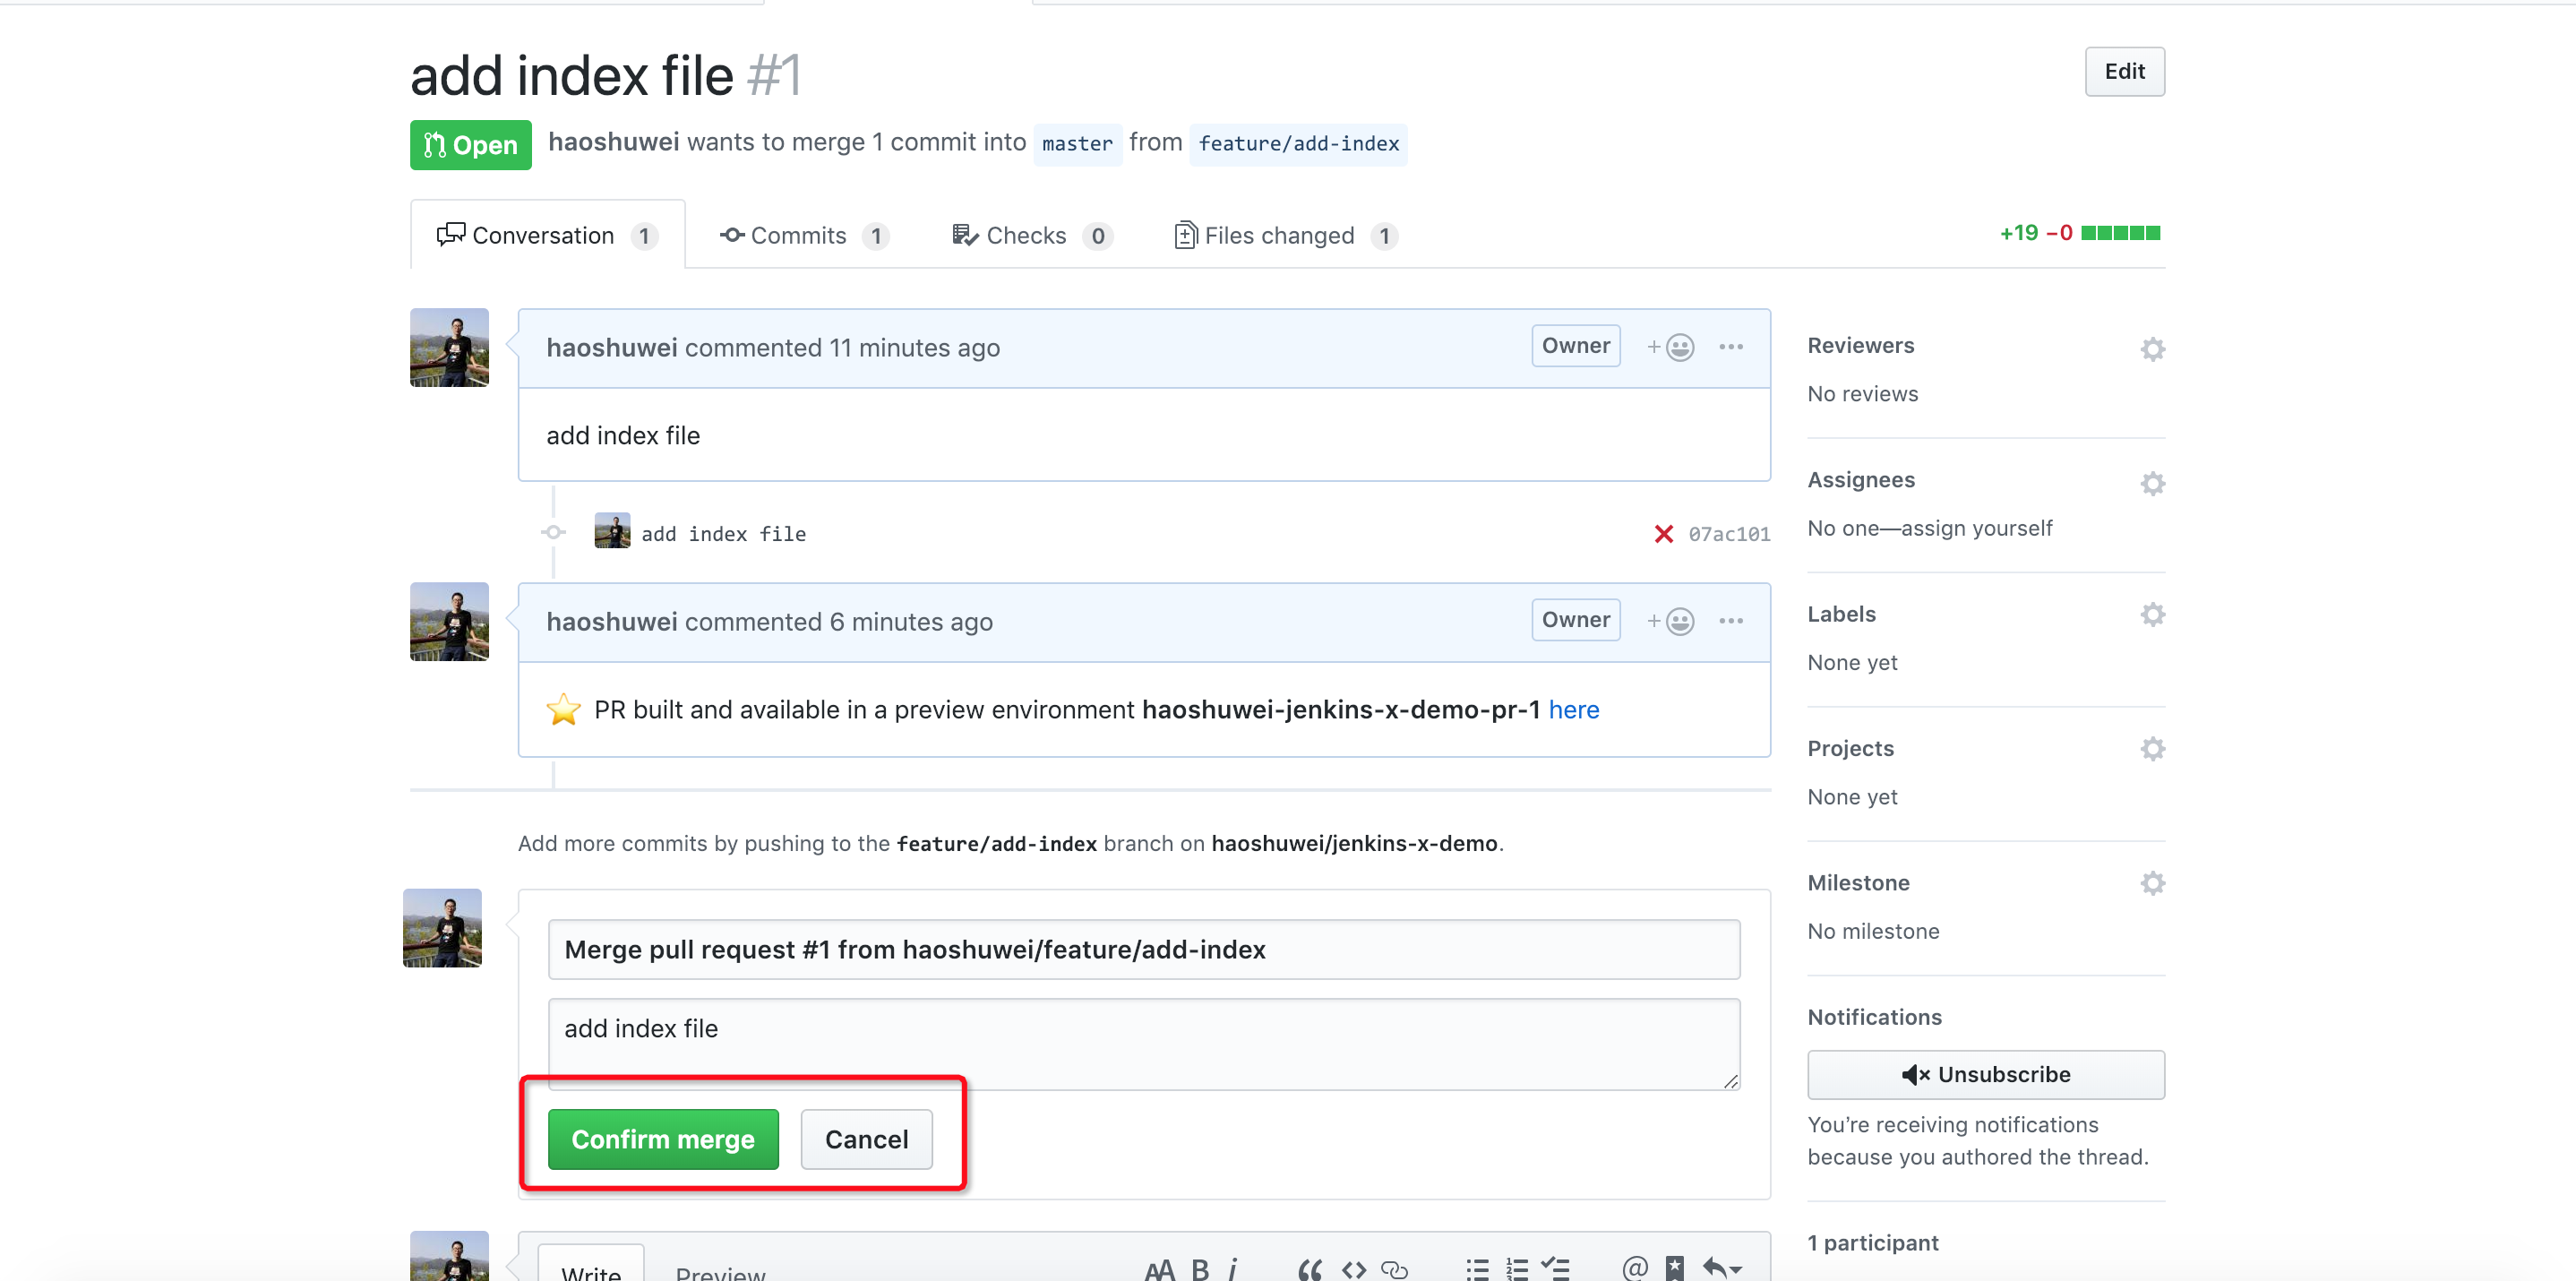
jenkins会重新构建jenkins-x-demo v0.0.2并发布到Staging环境:
$ jx get apps
APPLICATION       PRODUCTION PODS URL                                            STAGING PODS URL
jx-jenkins-x-demo 0.0.2      1/1  http://jenkins-x-demo.staging.aliyunk8s-bj.com
6. jenkins-x-demo应用推送到Production环境
一旦应用通过测试验证并准备好进入生产后, 我们就可以手动发布应用到Production环境:
$ jx get apps
APPLICATION       PRODUCTION PODS URL                                               STAGING PODS URL
jx-jenkins-x-demo 0.0.2      1/1  http://jenkins-x-demo.production.aliyunk8s-bj.com 0.0.2   1/1  http://jenkins-x-demo.staging.aliyunk8s-bj.com
访问Production环境中的jenkins-x-demo:
三、 Production环境中应用的回滚
回滚到版本v0.x.x
$ jx promote --version 0.x.x --env production --timeout 20m四、 删除或重装Jenkins X Platform
$ kubectl config current-context
$ jx uninstall
$ cd ~/.jx
$ rm -rf *
五、 结束语
目前Jenkins X Platform还在不断完善和改进中, 比如支持多集群等问题https://github.com/jenkins-x/jx/issues/479, 我们也会持续优化Jenkins X 在阿里云Kubernetes容器服务上的最佳实践并更新博客。
原文链接
更多技术干货 请关注阿里云云栖社区微信号 :yunqiinsight