Elasticsearch 的搭建方法上篇已经介绍过了,这里不做赘述
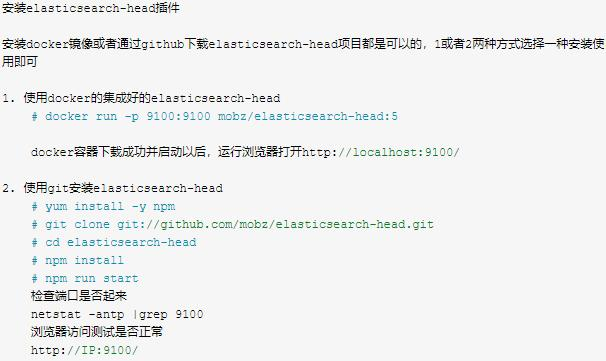
1.安装elashticsearch-head 插件 我这里选用的是第二种方法 安装node.js比较麻烦 可参考
https://www.runoob.com/nodejs/nodejs-install-setup.html
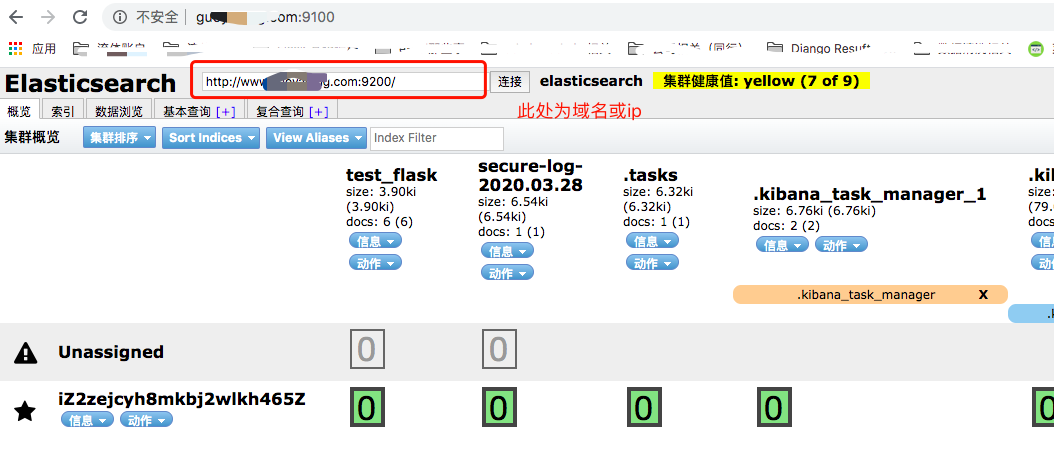
2.访问 http://IP:9100/ 注意图中连接要用域名
3.安装 LogStash的使用
下载地址
https://www.elastic.co/cn/downloads/past-releases#logstash
选择 logstash-7.6.1版本 必须要和Elasticsearch Kibana 一样
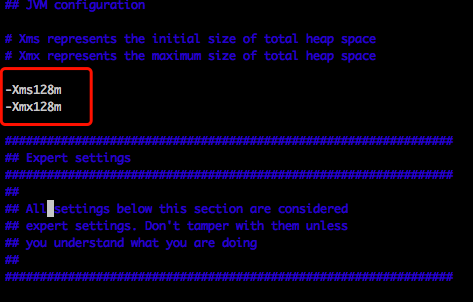
注意如果内存不足,请修改内存配置 vim config/jvm.options
由于服务器是1核2G改为128m
新建配置文件&&也是启动文件 文件的基本格式为输入和输出
vim config/logstash-sample.conf
input {
    file {
        path => "/tmp/messages" # log 文件目录
        type => "systemlog"
        start_position => "beginning" # 从头开始读,文件内容有更新自动同步
        stat_interval => "3" #延迟时间
    }
    file {
        path => "/tmp/secure"
        type => "securelog"
        start_position => "beginning"
        stat_interval => "3"
    }
}

output {
    if [type] == "systemlog" {
        elasticsearch {
            hosts => ["www.guoyafeng.com:9200"]
            index => "system-log-%{+YYYY.MM.dd}"
        }
    }
    if [type] == "securelog" {
        elasticsearch {
            hosts => ["www.guoyafeng.com:9200"]
            index => "secure-log-%{+YYYY.MM.dd}"
        }
    }
}
启动方式 加&为后台启动
./bin/logstash -f config/logstash-sample.conf & # 后台启动