介绍一款基于react-native的弹窗提示插件 react-native-ms ,
github地址:https://github.com/jiangzhenfei/react-native-ms
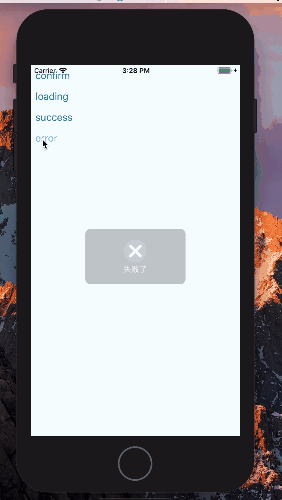
样式图
该组件还支持自己定义的icon组件


主要的使用法法如下
npm下载组件
npm install react-native-ms --save
在页面中使用
import { TipModal } from 'react-native-ms';
import React, {Component} from 'react';
import {Platform, StyleSheet, Text, View,Button} from 'react-native';

export default class App extends Component {
  /* 打开loading弹出框 */
  loading(){
    this.refs.tipModal._loading()
  }
  /* 打开成功提示框,参数一是提示内容,参数二是多少时间自动关闭*/
  _success(){
    this.refs.tipModal._success('成功了',500)
  }
  /* 打开失败提示框,参数一是提示内容,参数二是多少时间自动关闭*/
  _error(){
    this.refs.tipModal._error('失败了',500)
  }
  render() {
    return (
      <View style={styles.container}>
        <TipModal ref="tipModal"/>
        <Button title="loading" onPress={this.loading.bind(this)}/>
        <Button title="_success" onPress={this._success.bind(this)}/>
        <Button title="_error" onPress={this._error.bind(this)}/>
      </View>
        );
    }
}
修改自定义icon属性,成功提示框自定义icon
<TipModal ref="tipModal"
  successIconComponent={
    <Icon
      color = '#FFFFFF'
      type = 'evilicon'
      name = 'check'
      size = { 30 }
    />
  }
/>
失败提示框自定义icon组件
<TipModal ref="tipModal"
  errorIconComponent={
    <Icon
      color = '#FFFFFF'
      type = 'evilicon'
      name = 'close-o'
      size = { 30 }
    />
  }
/>
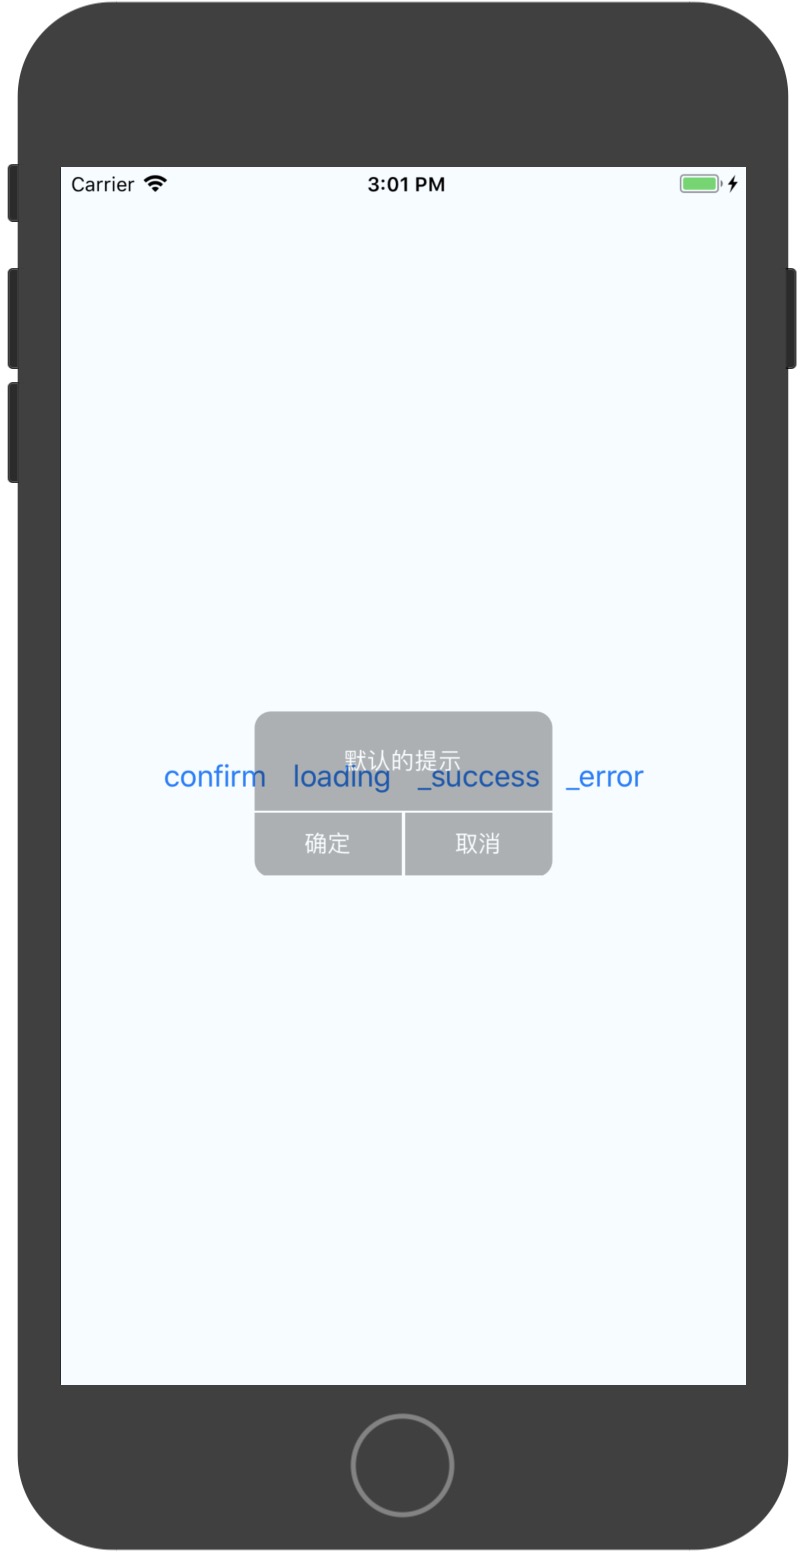
接下来是确认弹窗提示的组件效果
import {Platform, StyleSheet, Text, View,Button} from 'react-native';
import { ConfirmModal } from 'react-native-ms'


export default class App extends Component {
  confirm(){
    this.refs.tipModal2._open('默认的提示')
  }
  render() {
    return (
      <View style={styles.container}>
        <ConfirmModal ref="tipModal2"
          confirmFunc={()=>{alert(1)}}
        />
        <Button title="confirm" onPress={this.confirm.bind(this)}/>
      </View>
    );
  }
}